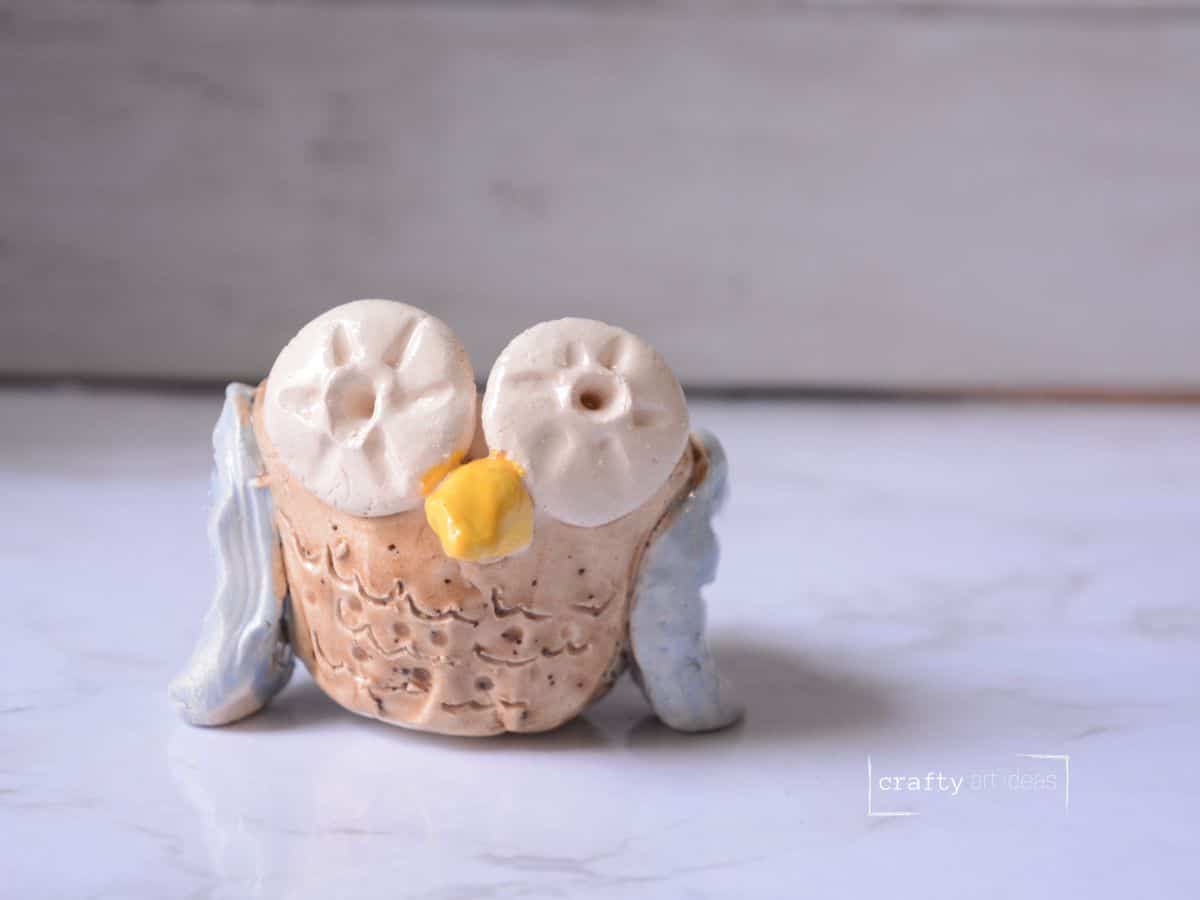
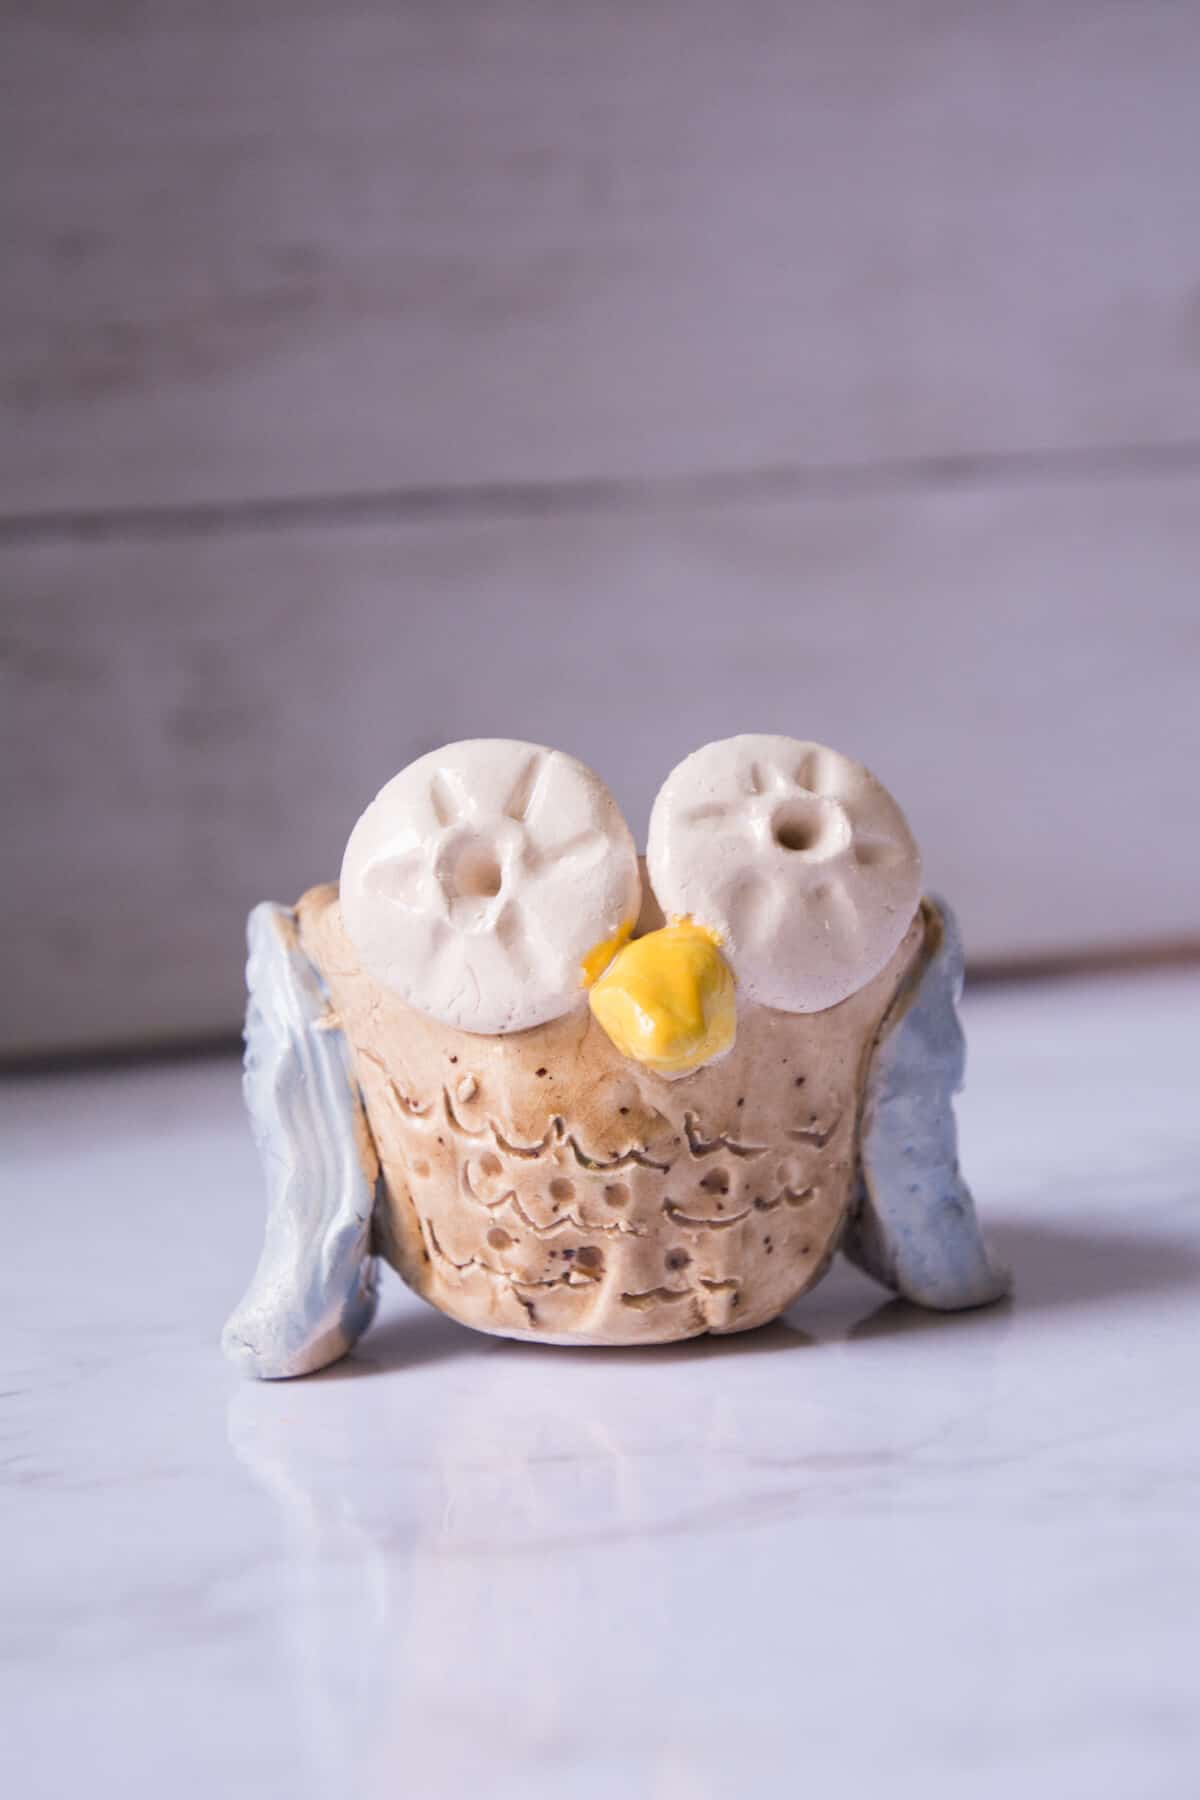
How to Build The Cutest Clay Owl Pinch Pot

This clay project perfectly introduces how to attach clay by scoring. If children have knowledge or experience with making pinch pots, they should be able to make this clay owl art project.
This clay lesson was initially published in April 2022 after years of making this project with students. In February 2025, Erin updated it in a clearer format with new tips and takeaways.
Why You Will Love This Clay Project
Great Way To Teach Elements Of Art & Clay Skills
- Clay is a fantastic medium to teach children about texture and help them understand it fully.
- You can show them how to draw in textures, stamped textures with various materials, or build up reliefs on their owl.
- Other Art Vocabulary used: pinch pots, scoring, kiln, ceramics, pottery, glaze, form, line and shape
NO CLAY? No problem, check out this cute Model Magic owl project.
Modification Ideas
You can modify this ceramic art project so kids can work with what you have. If you only have model magic or air dry clay, you can still make a textured owl sculpture! Once kids are comfortable making a clay owl, they can explore making other clay animals, such as a cute pinch pot turtle and more beginner-friendly clay craft ideas.
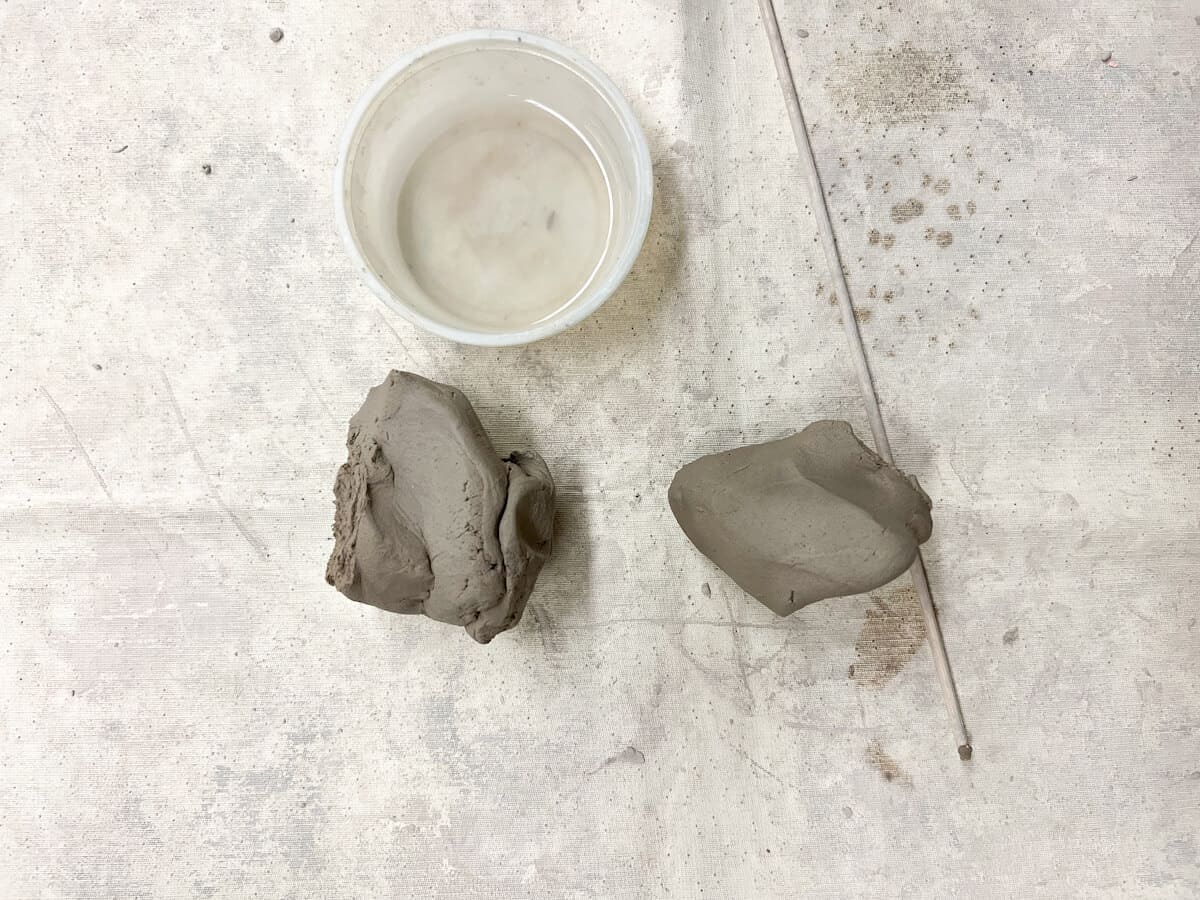
Supplies you’ll need
Disclosure: We only recommend products we would use ourselves and all opinions expressed are our own. This post may contain affiliate links when clicked, we may earn a small commission at no additional cost to you. Read our full privacy policy.
How To Build A Clay Owl

Step 1: Pass Out The Clay
Cut the clay so that it fits into your hand or the hands of the children completing the project.
Step 2: Split The Clay
Split the clay into a large hunk and a smaller one.
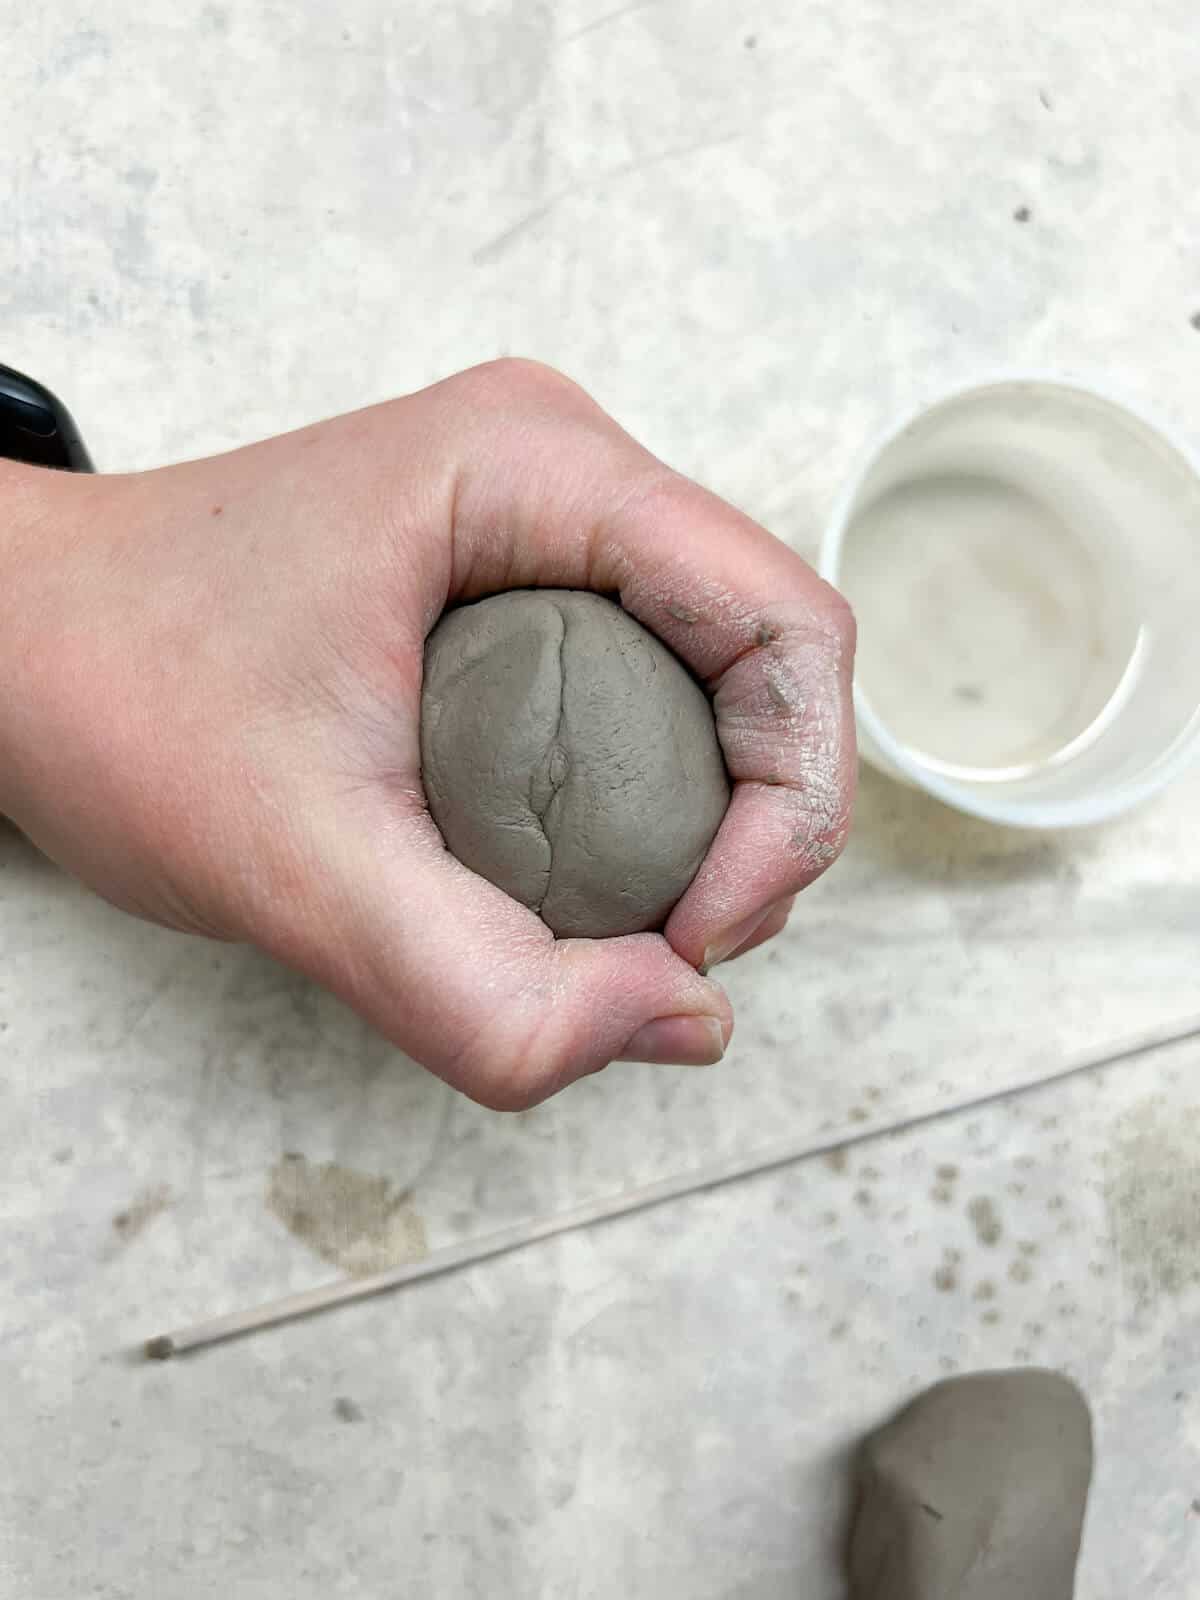
Step 3: Roll An Egg Shape
Roll the larger chunk into a ball of clay and squeeze the clay a little to make it more egg-shaped.
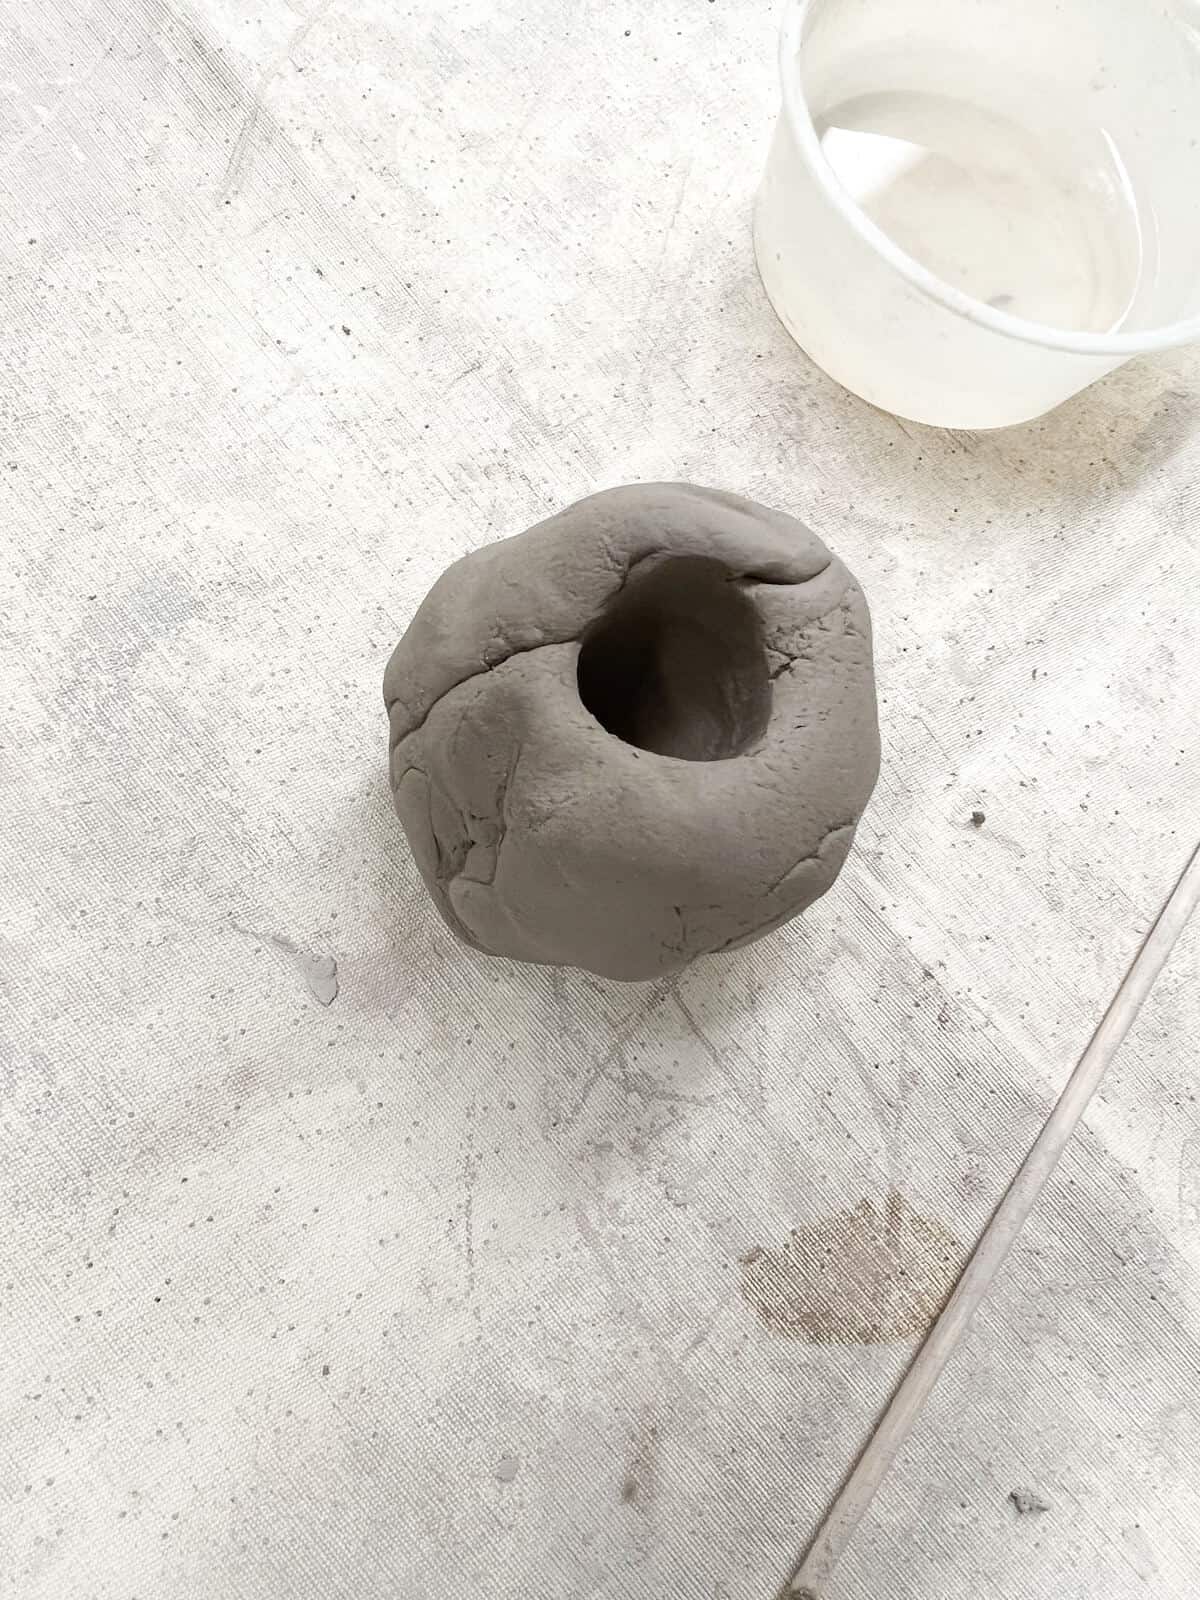
Step 4: Push Your Thumb Into Clay
Push your thumb as far as it will go without pushing through. With young children, you may have to check or help them push farther down.
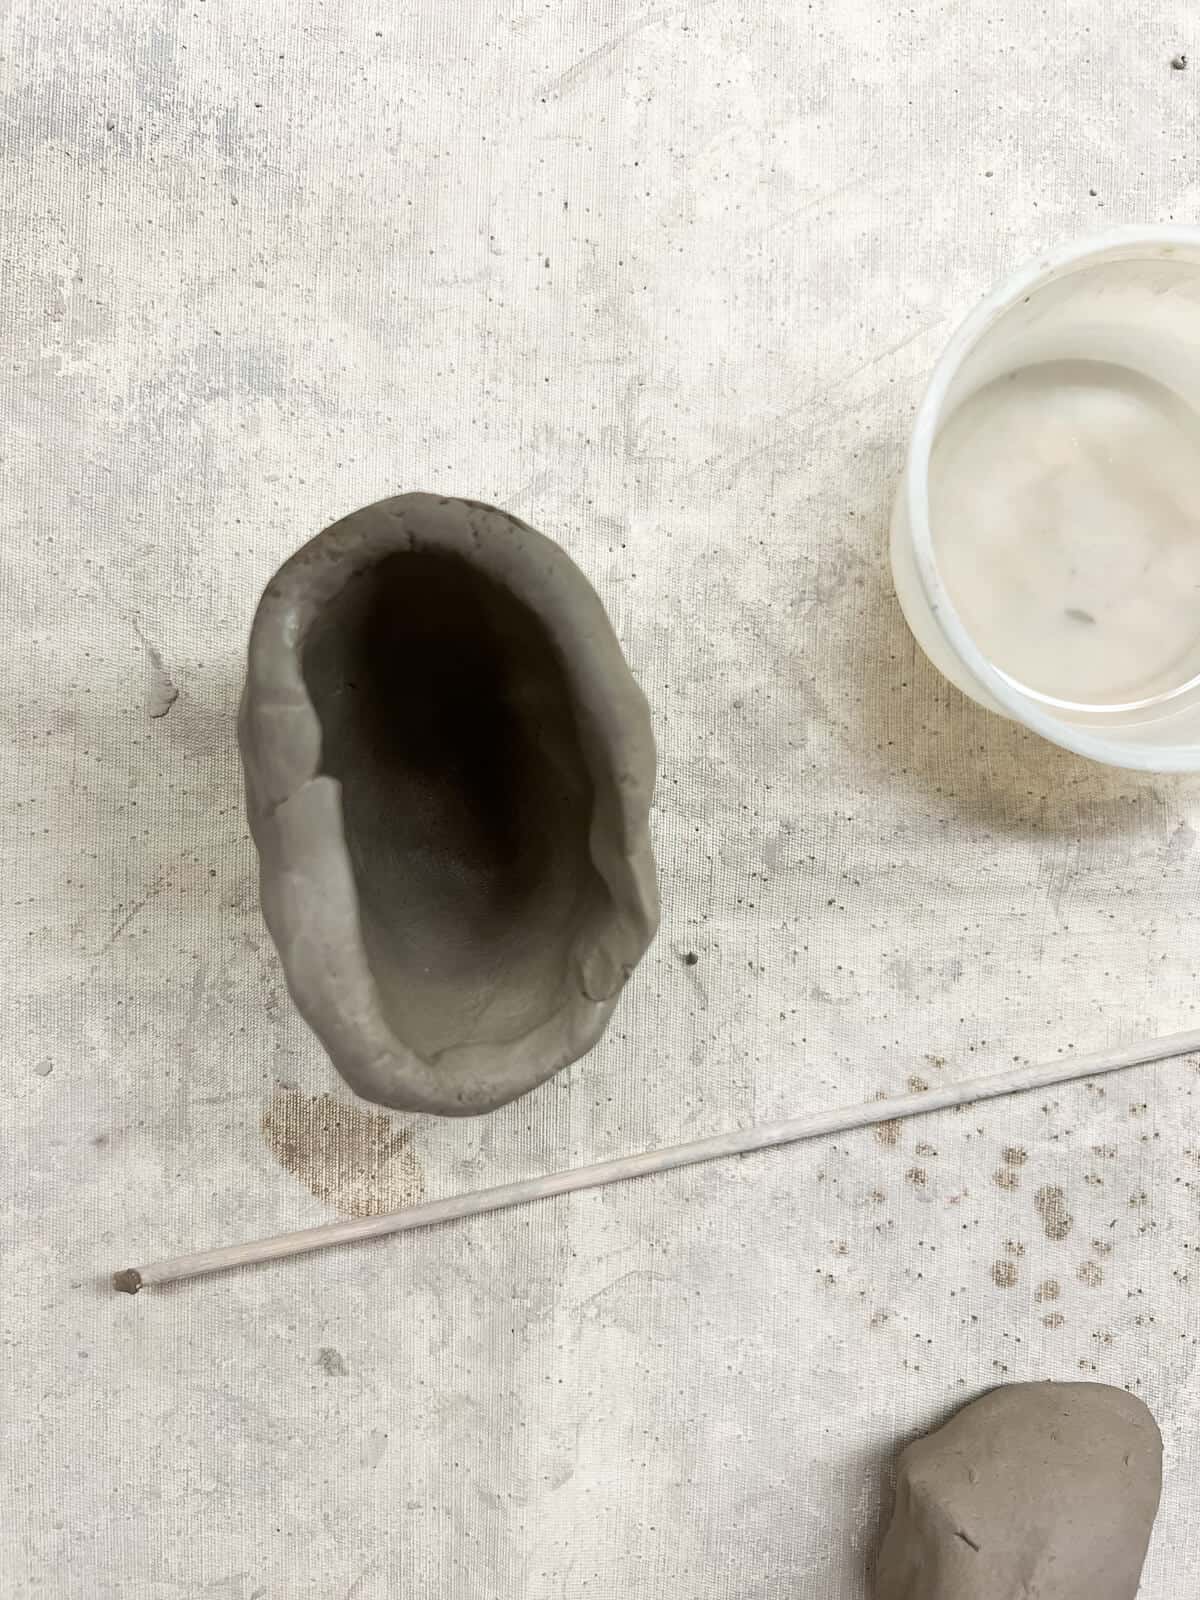
Step 5: Make A Pinch Pot
Create a pinch pot cup as the base of your owl. Make sure that the walls of the pinch pot are not too thin. Lightly squeeze the sides of your pinch pot to compress the top of the circular opening.
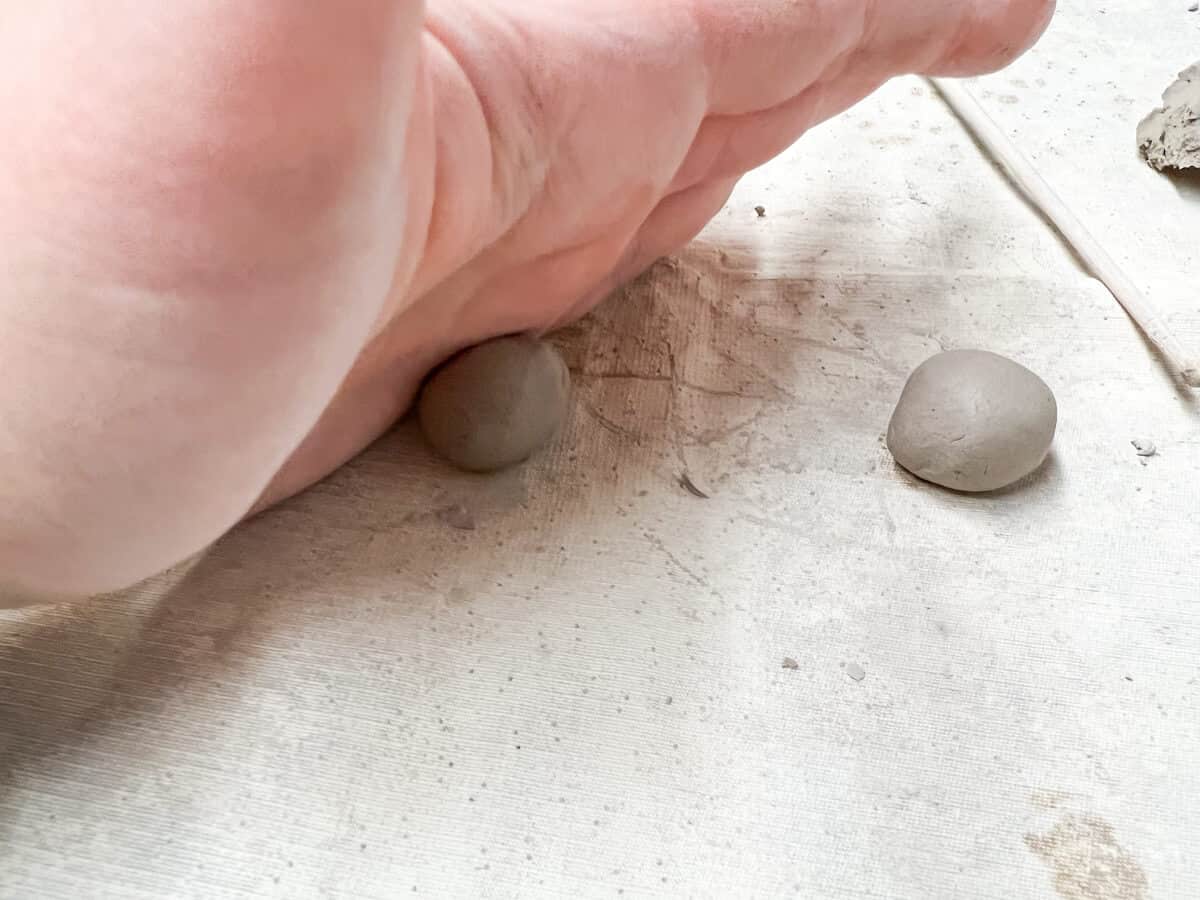
Step 6: Make Owl Eyes
Create owl eyes by rolling small balls of clay and smooshing and using the end of the pointer to add eye details and possibly designs.
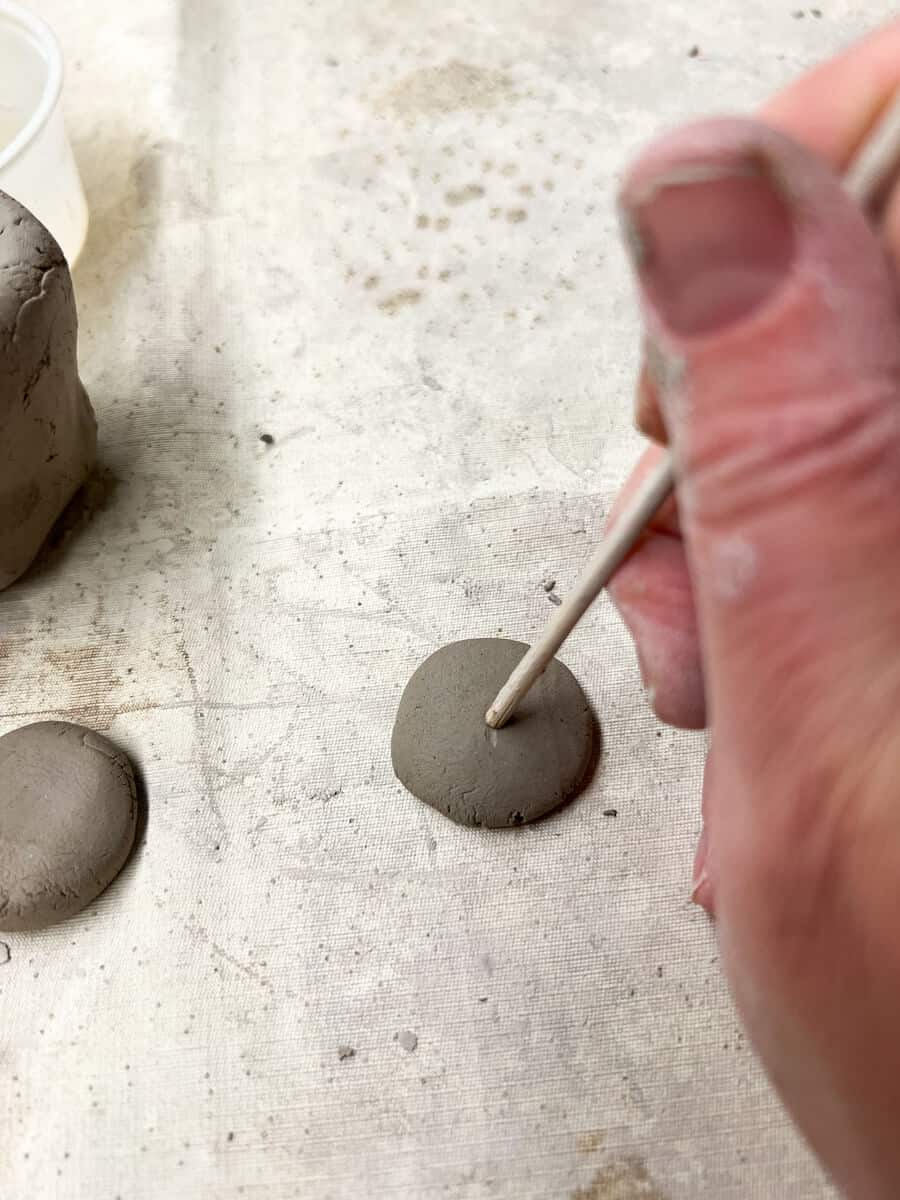
Step 7: Add Texture and Details
Use a skewer to create details like eyeholes and extra textures.
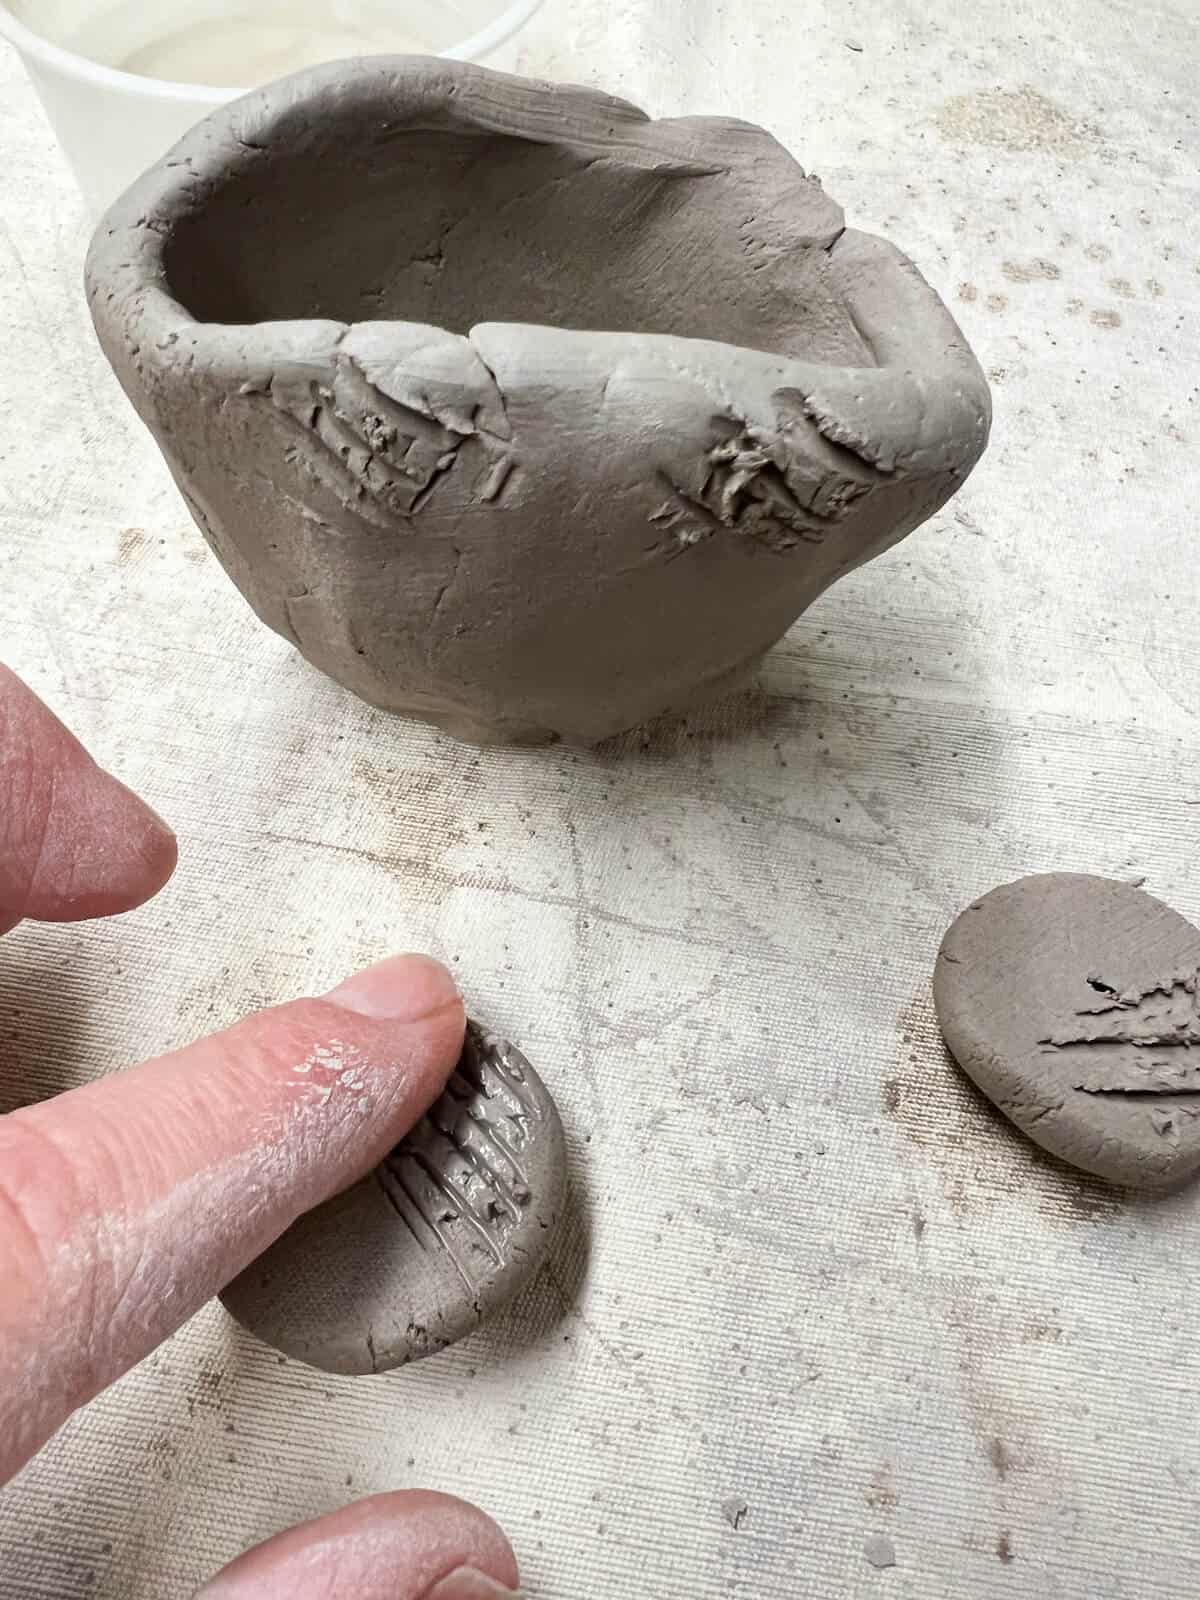
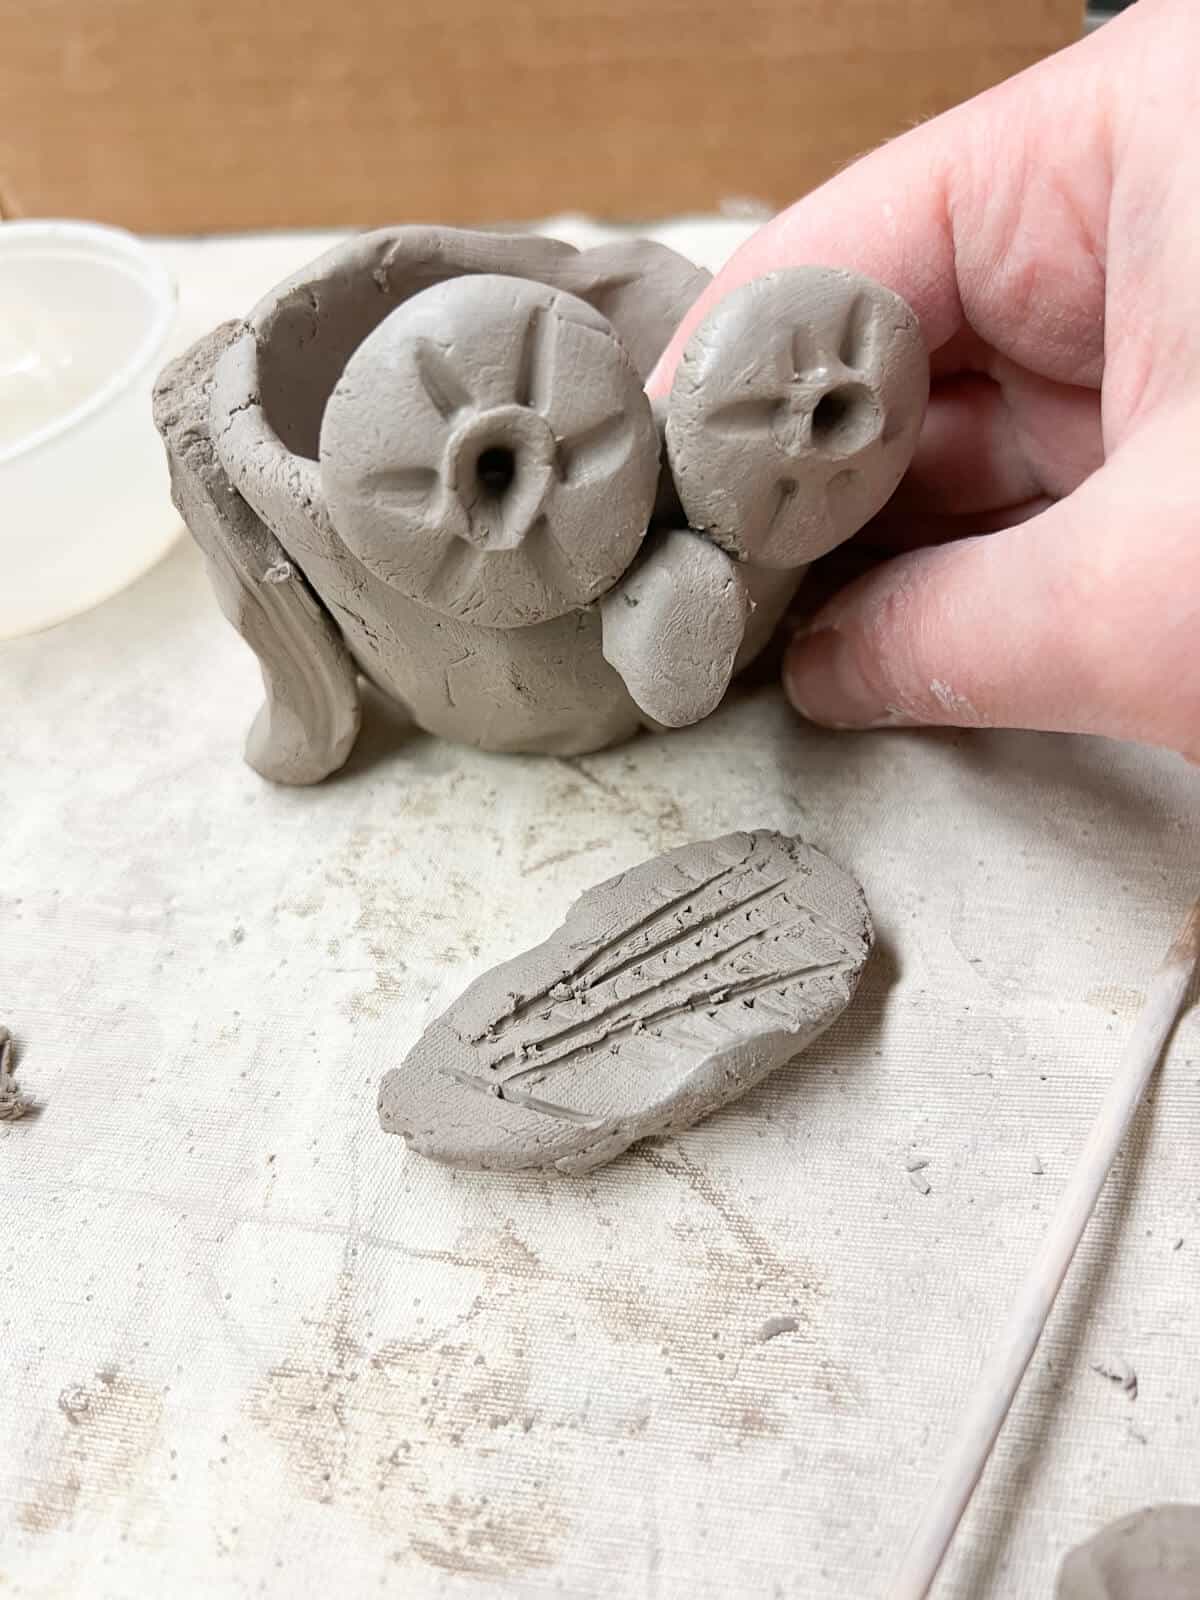
Step 8: Attach The Eyes
Score the back of the eyeball and where you are attaching the clay eye. Use a little water on your finger to put water on both spots you have scored.

Step 9: Build and Attach The Beak
Create a beak for your ceramic owl, score and attach it to the pinch pot body.
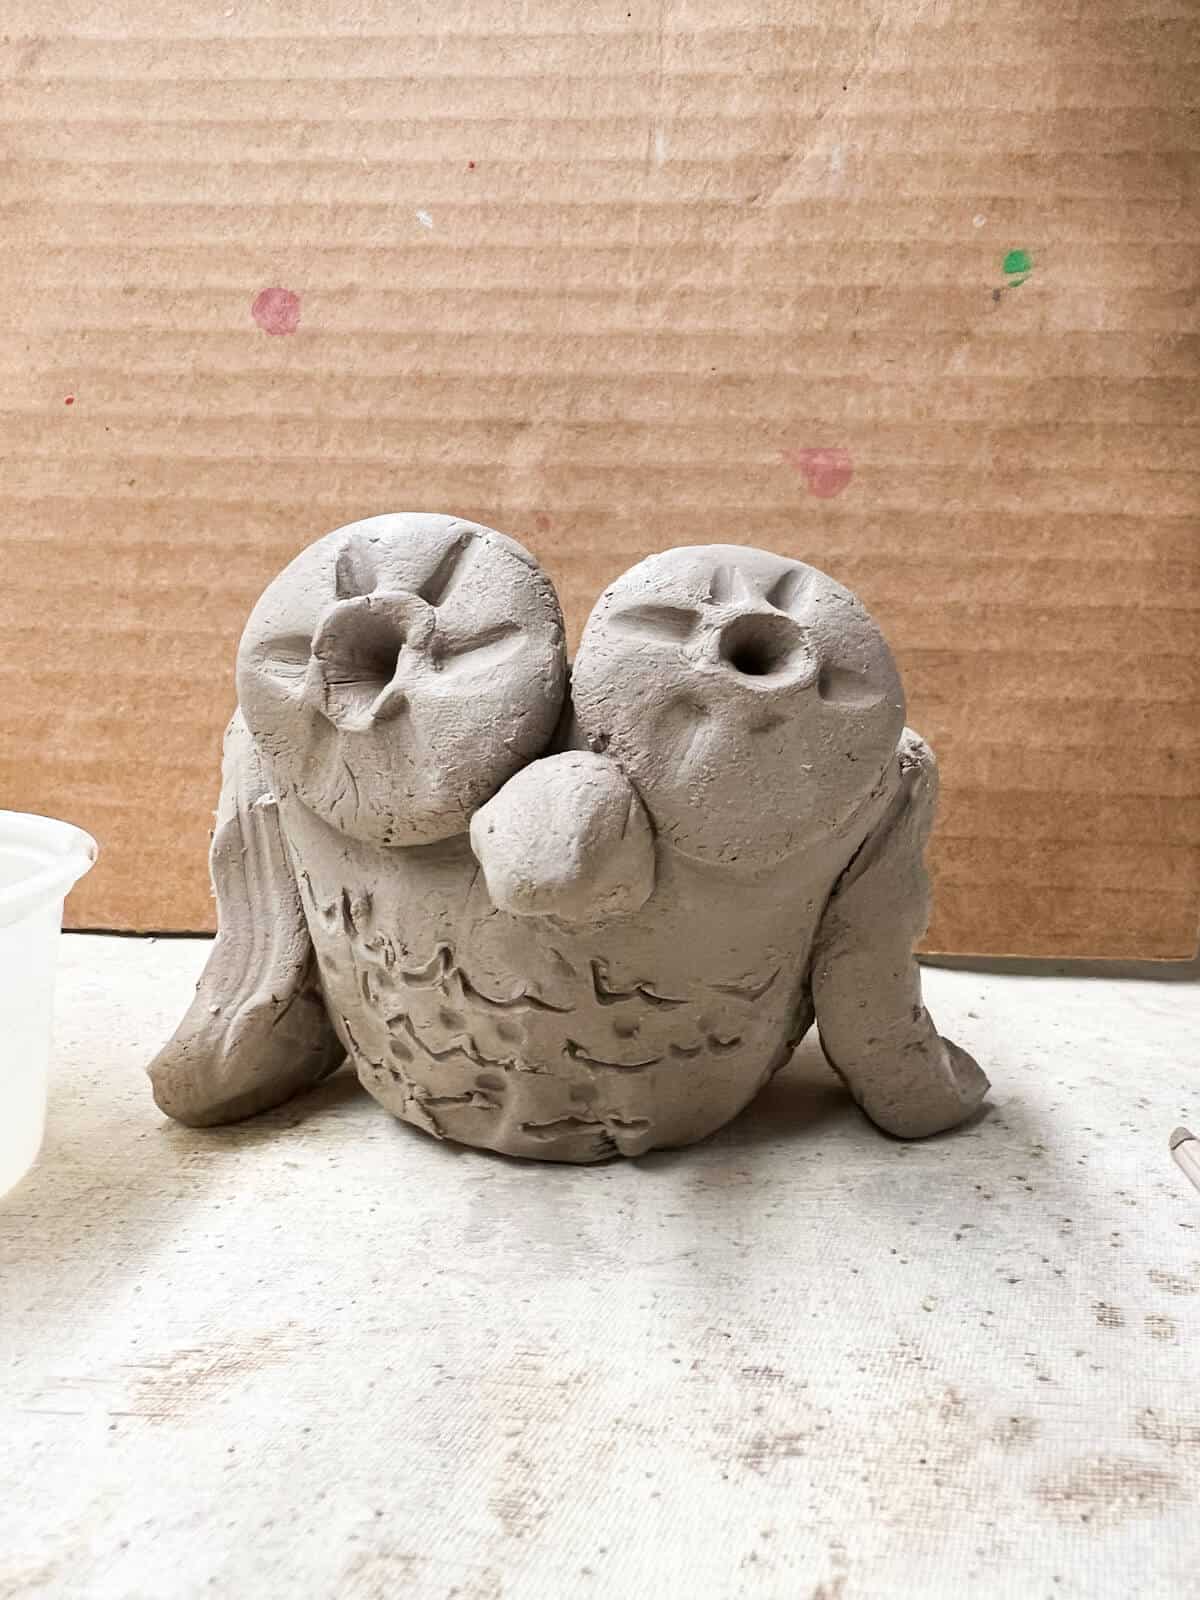
Step 10: Create Wings and Attach
Make a small slab and use a skewer to cut out the wings. Add feather details by stamping or drawing. Use the pointed end of the skewer to score (draw little lines) on both the pieces that need to be attached and where they are going on the pinch pot.
Step 11: Add Finishing Touches
Add extra textures or draw breast feathers onto the finished adorable clay owl.

Step 12: Let Dry and Fire
Let the owls fully dry. We like to let them dry for a whole week before firing in the kiln.

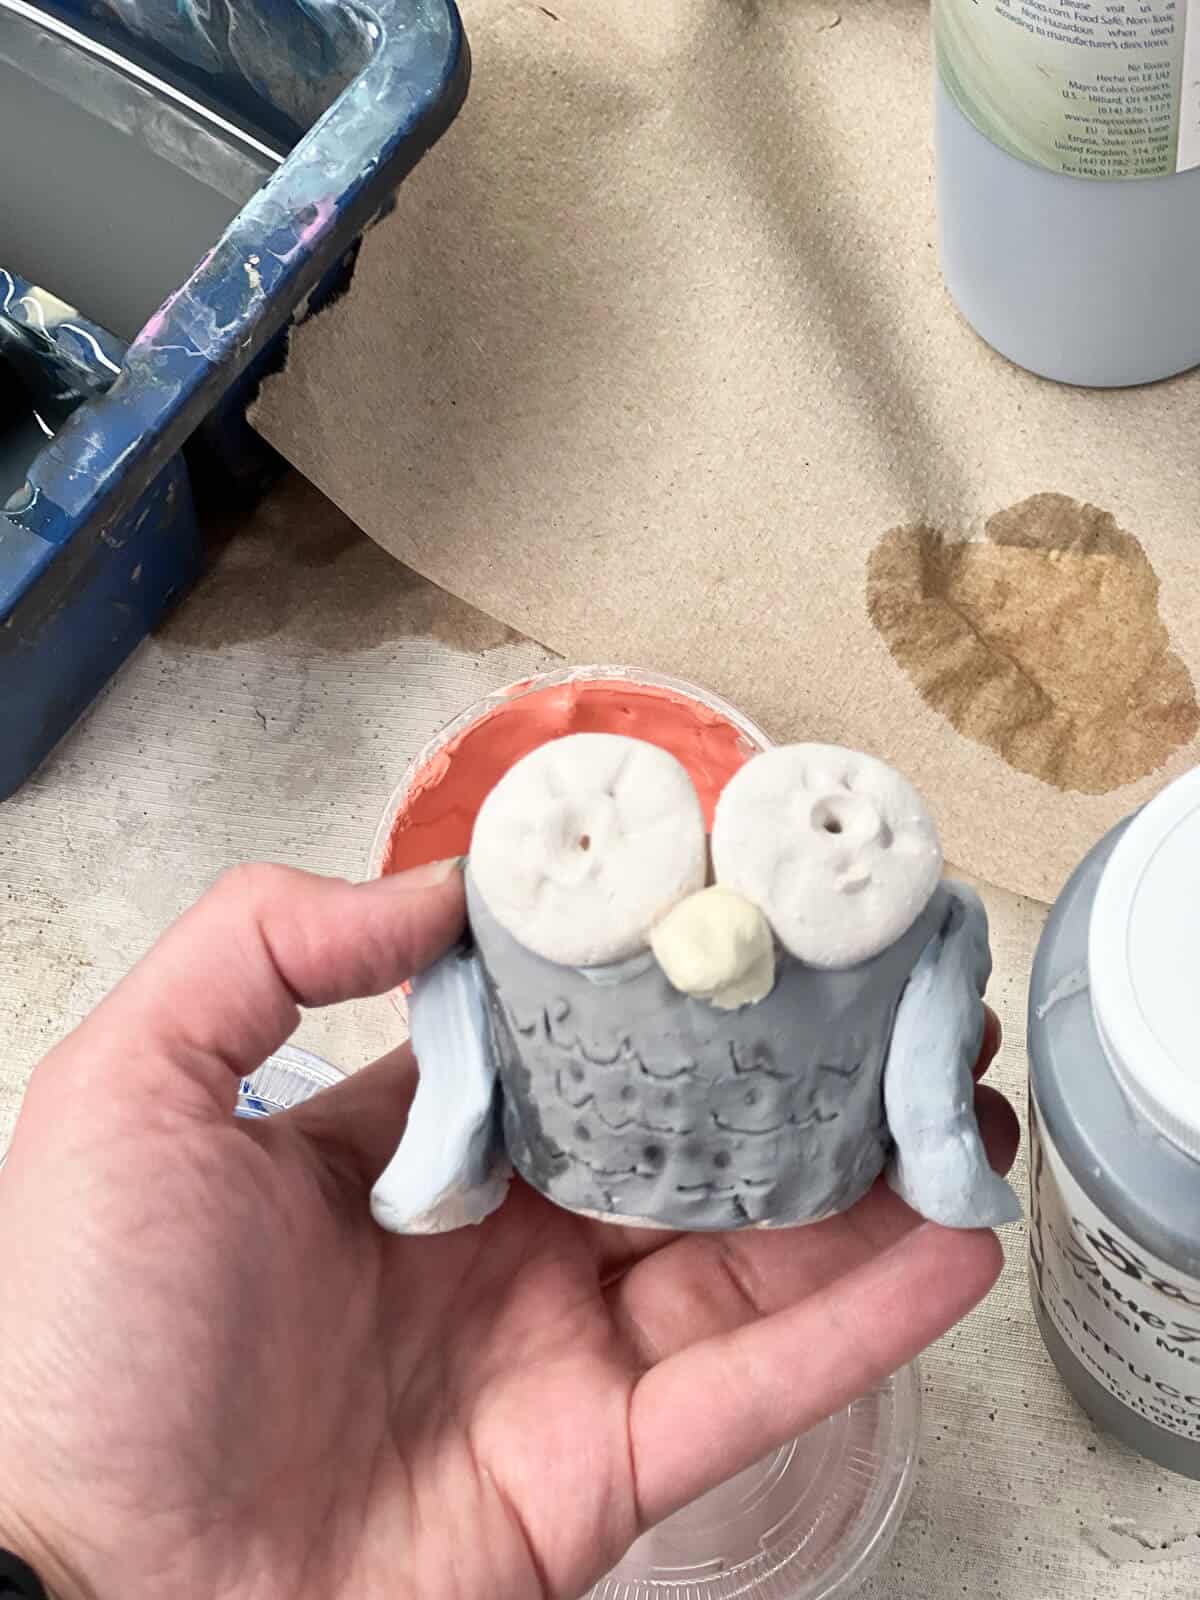
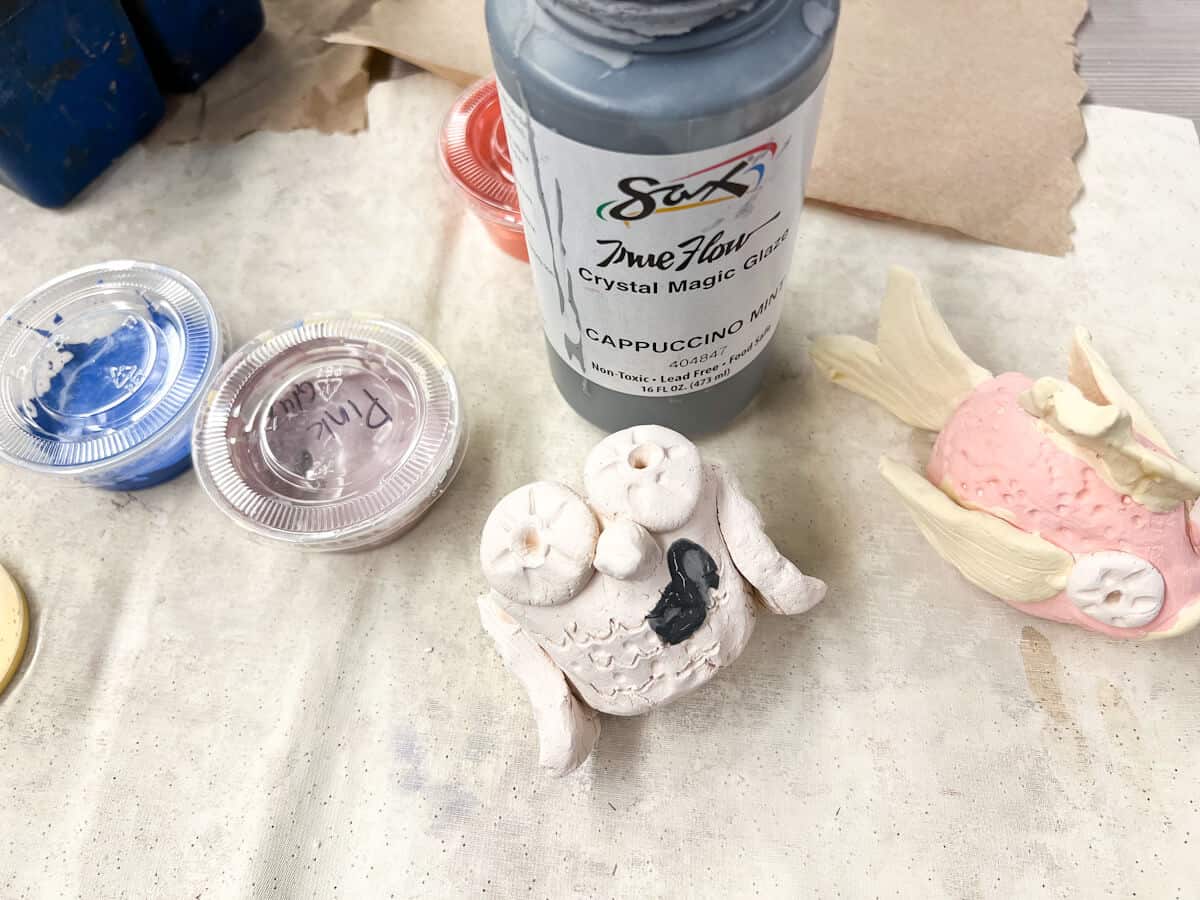
Step 13: Add Color
You can use watercolor paint, acrylic paint or clay glaze to add color to your project.
Step 14: Fire In The Kiln
Follow your firing instructions for your kiln and clay type.
Tips For Glazing Owls
- Give students a few choices of colored glazes or paints. Read our tips for using clay glazes with a group of children.
- Kids should pick one color for the body, one for the beak and wings, and one for the eyes.
- Make sure children use three layers of glaze and fully cover the project.
- Don’t want to glaze your clay owls? Check out this non-glazing clay technique for kids. You can also use acrylic paint or clear sealer on your clay.
More Project Tips
- Pull up stock photos of lifelike owls to help inspire all the little details and textures during the building.
- Adults should use a needle tool to write the child’s name on the bottom of the clay owl.
- Run a bisque fire in the kiln according to the directions of the clay you ordered.
Follow us on Pinterest, YouTube & Facebook for more free art and craft ideas!
Find Your Next Clay Project
- Double Pinch Pot Clay Fish Art Project
- Easy Snowman Clay Pendant Ornament
- Fun Clay Slab Art Lesson
- DIY Polymer Clay Charms You Can Build At Home
Do you like this art project? Please give us a 5-STAR review below ⭐️⭐️⭐️⭐️⭐️ and have fun being creative with your family.
How To Build A Clay Owl

Equipment
- Wooden Skewer
- Small Water Container
- Needle Tool (for adult)
- Paint Brushes
- Kiln
Supplies
Instructions
- Cut clay so that it fits into your hand or the hands of the children completing the project.
- Split the clay into a large hunk and a smaller one.
- Roll the larger chunk into a ball of clay and squeeze the clay a little to make it more egg-shaped.
- Push your thumb as far as it will go without pushing through. With young children, you may have to check or help them push farther down.
- Create a pinch pot cup as the base of your owl. Make sure that the walls of the pinch pot are not too thin.
- Create owl eyes by rolling small balls of clay and smooshing and using the end of the pointer to add eye details and possibly designs.
- Use a skewer to create details like eye holes and extra textures.
- Score the back of the eyeball and where you are attaching the clay eye. Use a little water on your finger to put water on both spots you have scored.
- Create a beak for your ceramic owl, score and attach it to the pinch pot body.
- Make a small slab and use a skewer to cut out wings. Add feather details by stamping or drawing. Use the pointed end of the skewer to score (draw little lines) on both the pieces needed to be attached and where they are going on the pinch pot.
- Add extra textures or draw feather details onto the finished adorable clay owl.
- Let owls fully dry. We like to let them dry for a whole week.
- Run a bisque fire in the kiln according to the directions of the clay you ordered.
- Use paint or glaze to complete clay projects and run a glaze fire.