Easy Watercolor Painting For Preschoolers (3-Year-Old Approved!)
Get creative with your family with this fun art activity! Our 3-year-old little artist thought this was a great idea! Even younger children can have a blast experimenting with different watercolor paint ideas.
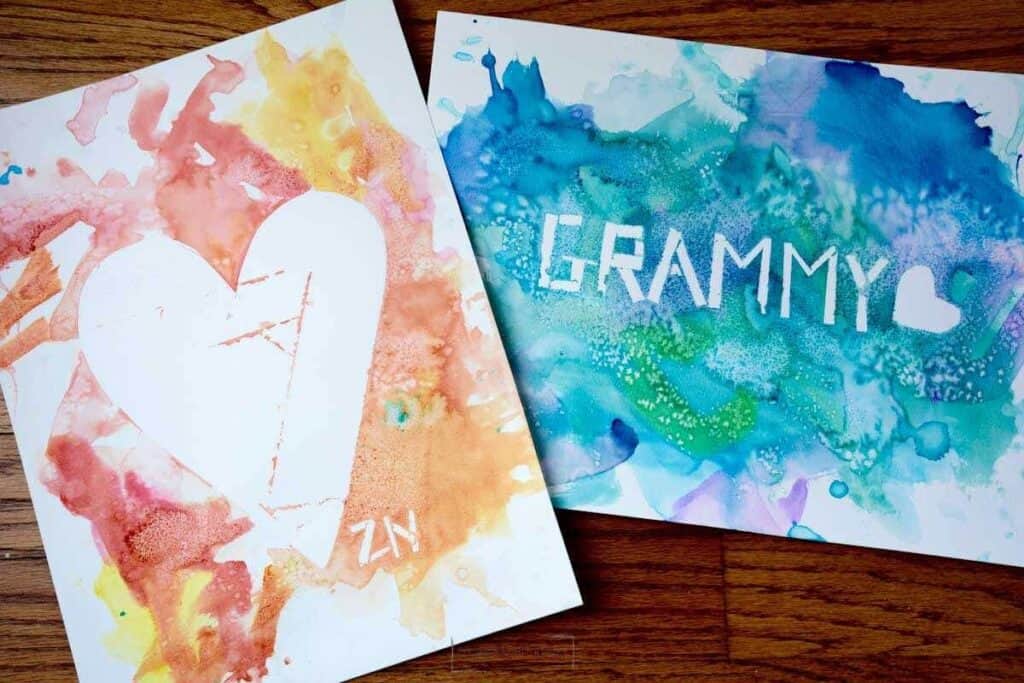
This project would be a great and easy watercolor project to complete for Valentine’s Day or gift for a loved one. However, it doesn’t just have to be heart Art. Any child will love making this easy watercolor painting idea for any special occasion.
Why You Will Love This Art Idea
My 2-year-old daughter and 3-year-old son created the beautiful heart art examples in this post. We plan on giving these to our Grammy on her birthday. I just had to help tape and cut the heart on their papers.
After we were done, my son said, “This was awesome!”
Supplies You’ll Need
Disclosure: This post may contain affiliate links when clicked, we may earn a small commission at no additional cost to you. Read our full privacy policy.
*A thicker paper will allow the paints to mix and will make it easier to pull up the painter’s tape.

Tips For Using Watercolor Paint With Preschoolers
Use Washable Watercolor Paint
For watercolor paints, my toddlers and I used the washable paint that I have linked above. However, for older kids, I love using this Prang Watercolor set. This set is a little more pricey, but I have seen 500 kids use them all year and still works well.
Try Diluted Liquid Watercolor
If you want some different and vibrant colors in your projects, you should check out ordering a set of liquid watercolor paints like these from Sax. You can dilute and mix these to achieve a variety of colors for all your creative ideas. This set of 8 is also great because it will last a very long time for all your projects.
How To Create An Easy Painting
Step 1: Decide On A Image
For instance, I am going to show you how you can create beautiful heart artwork pretty easily using painter’s tape. Any aged kid can cut things out of the painter’s tape and create their images.
BE SAFE – The taping and cutting using an Xacto knife should be done by an adult or an older child.
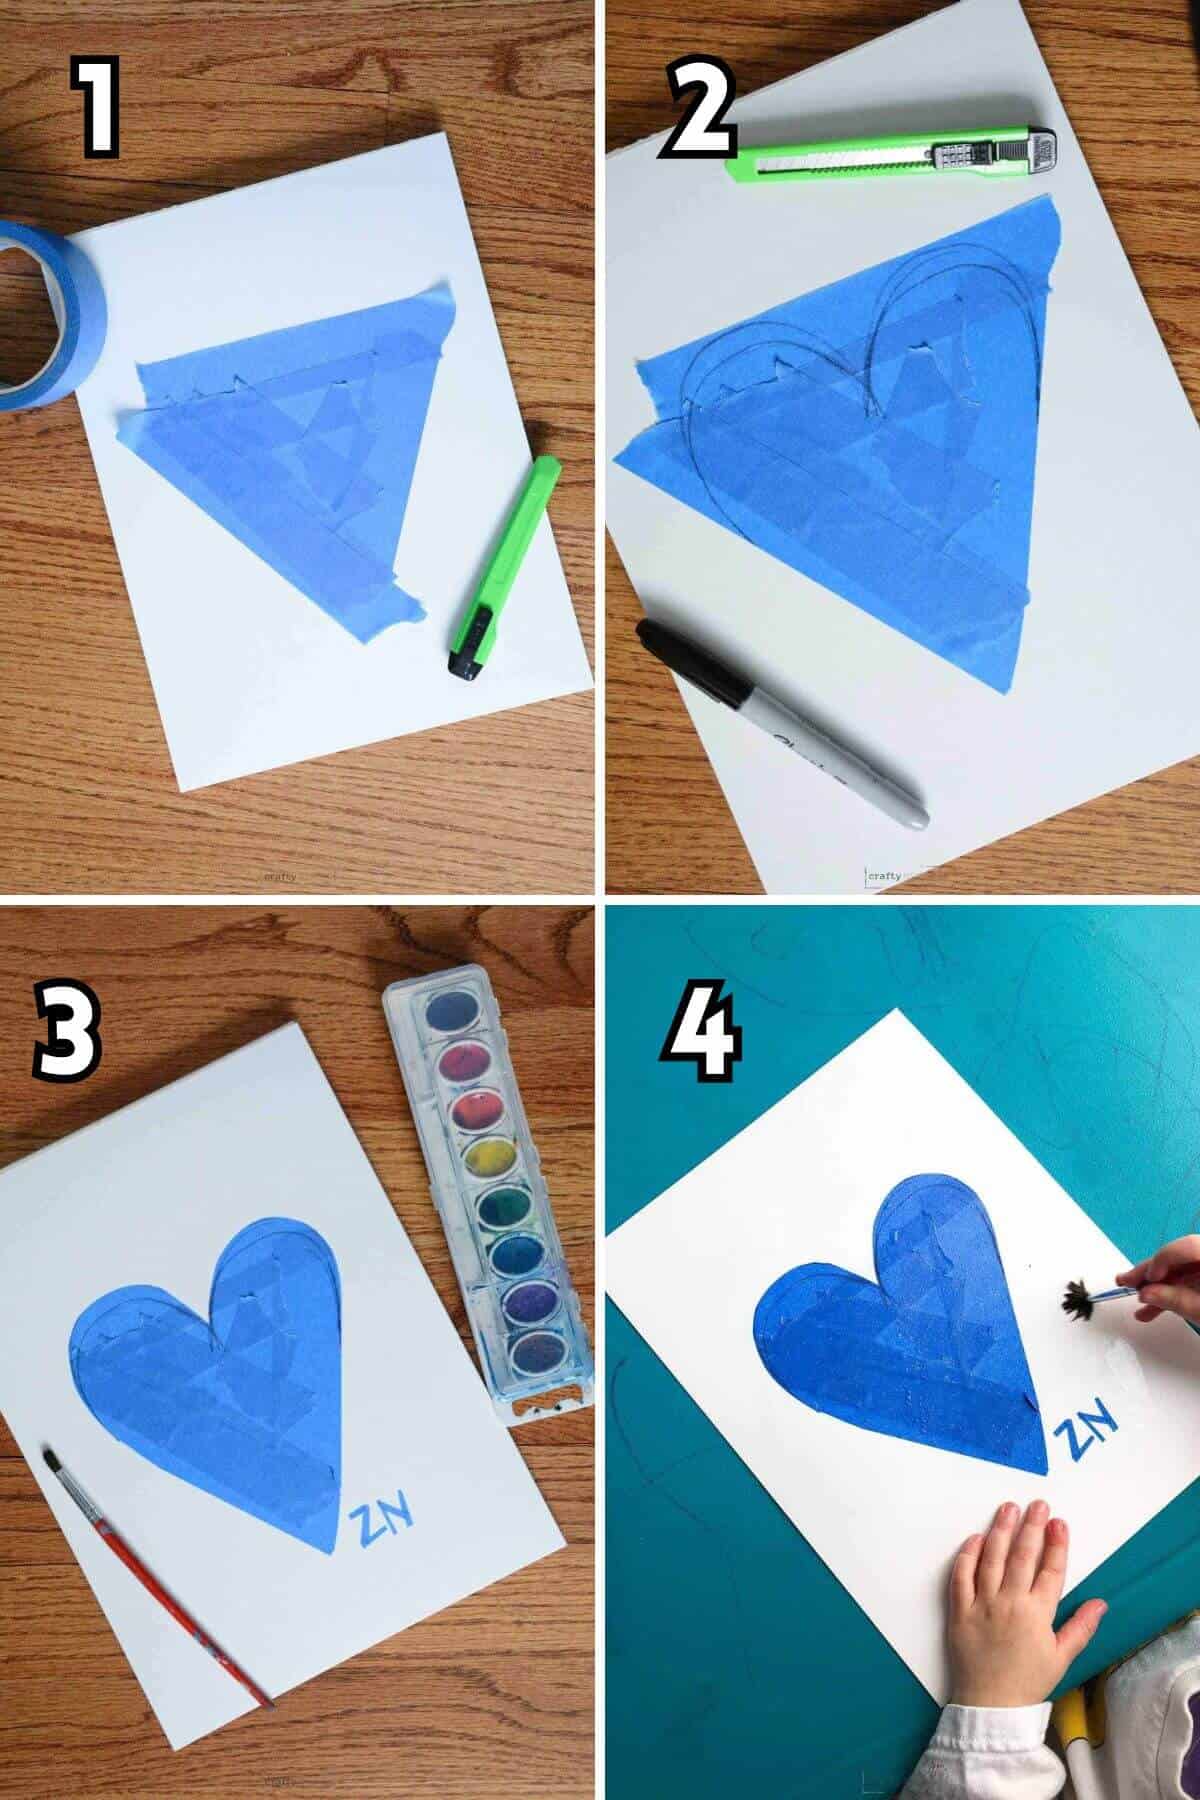
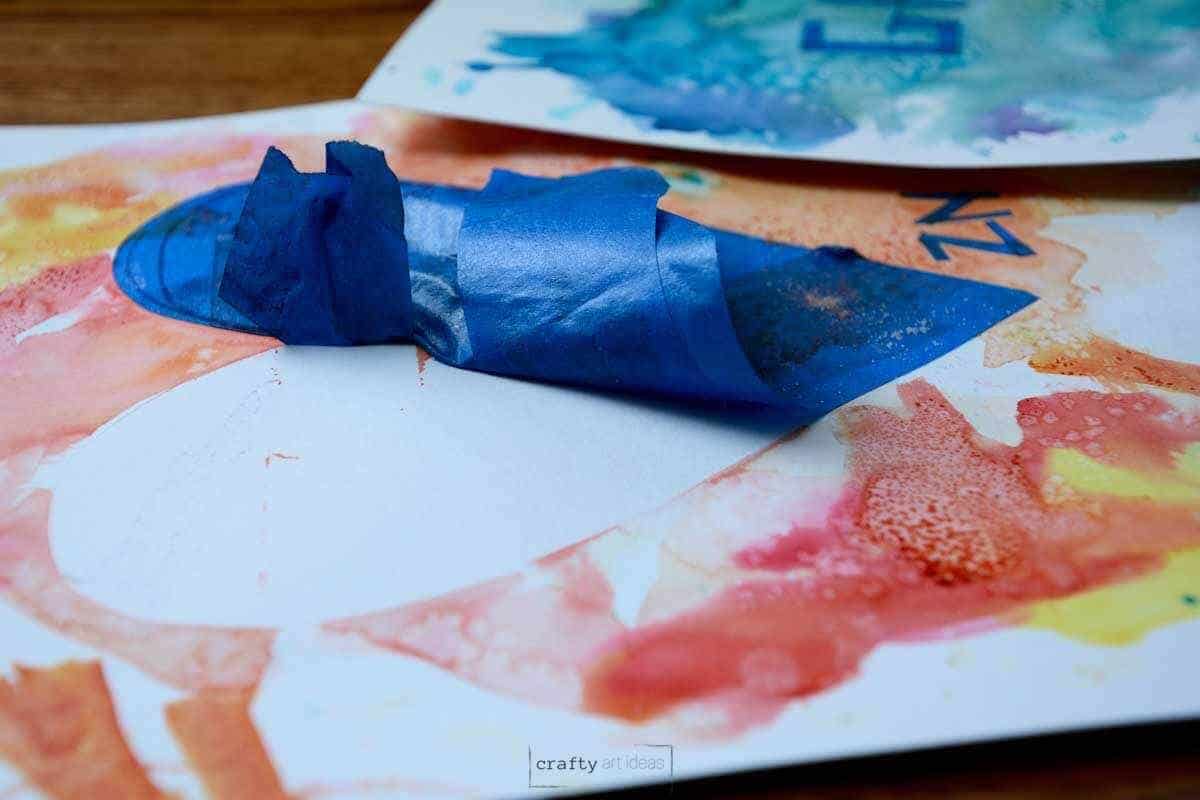
Step 2: Tape Out Larger Shape
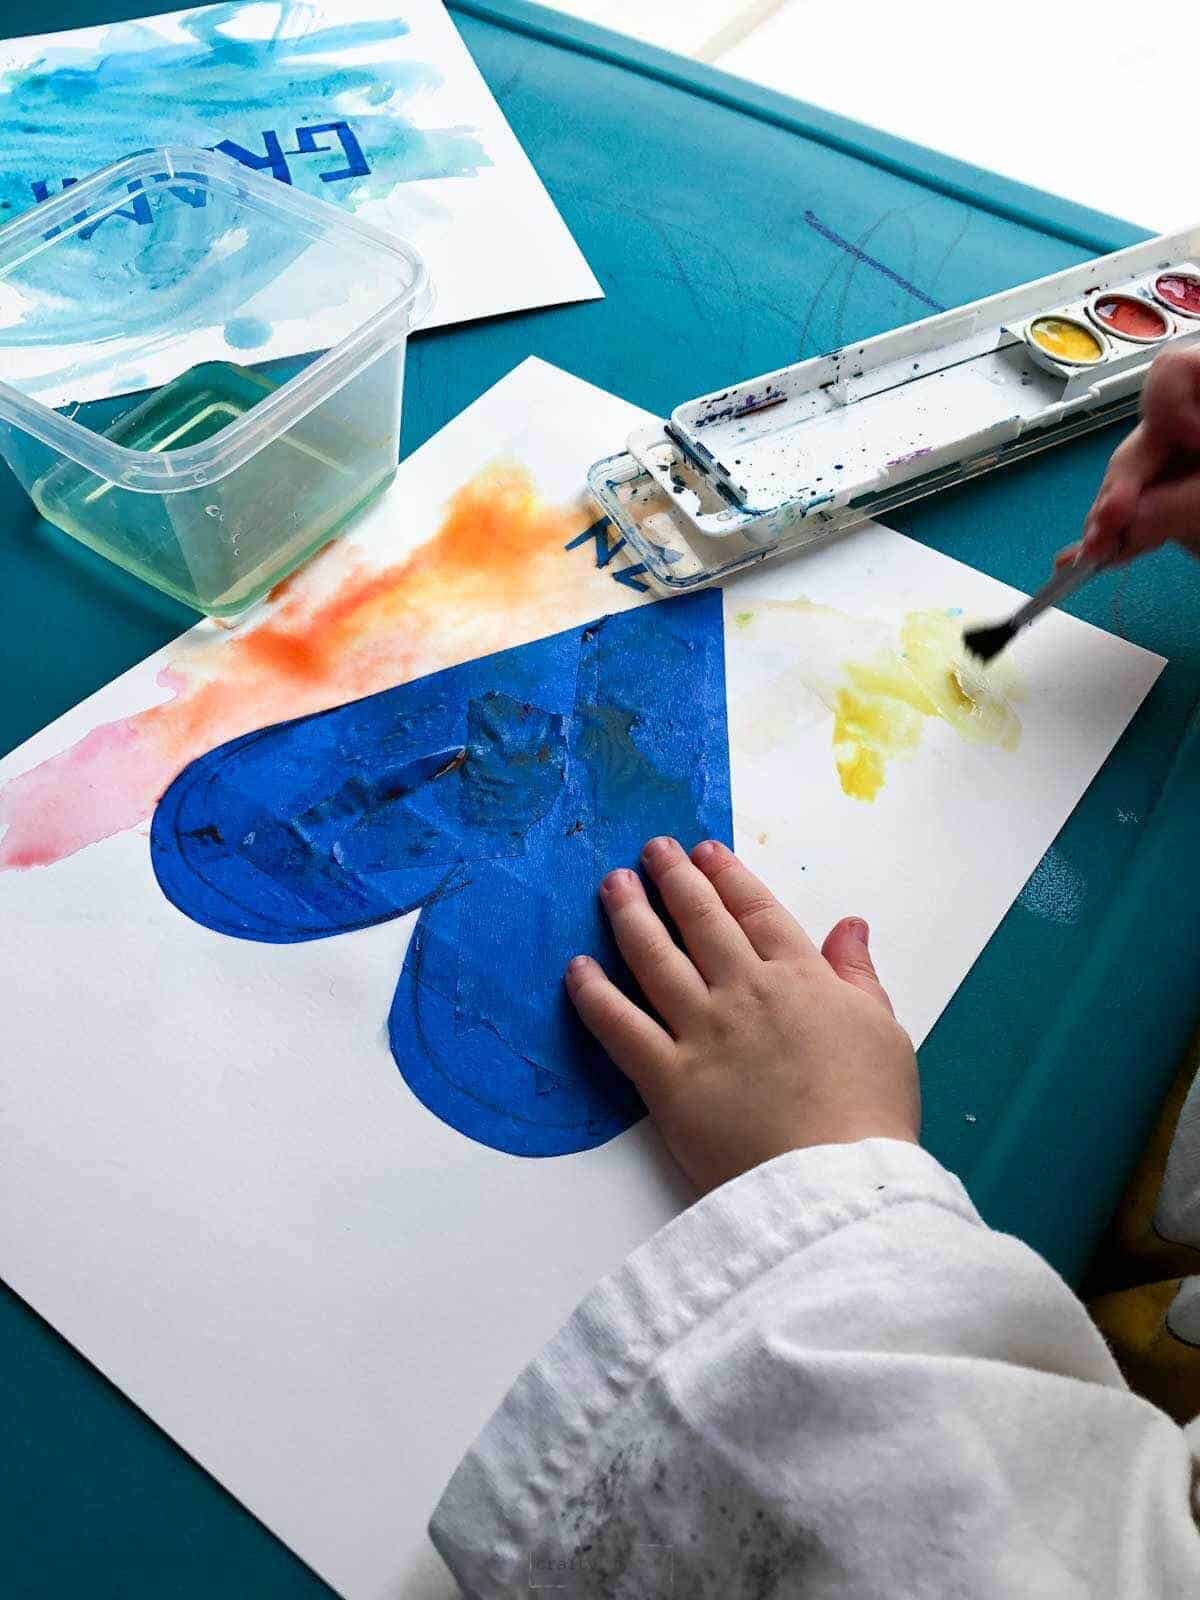
On thicker paper or watercolor paper tape a larger area than you will need. For a heart artwork, I taped a large upside-down triangle first.
Step 3: Sketch Out Heart (or another shape)
Draw an image you will want to cut out on painter’s tape and cut out using an Exacto knife. Be careful not to press too hard.
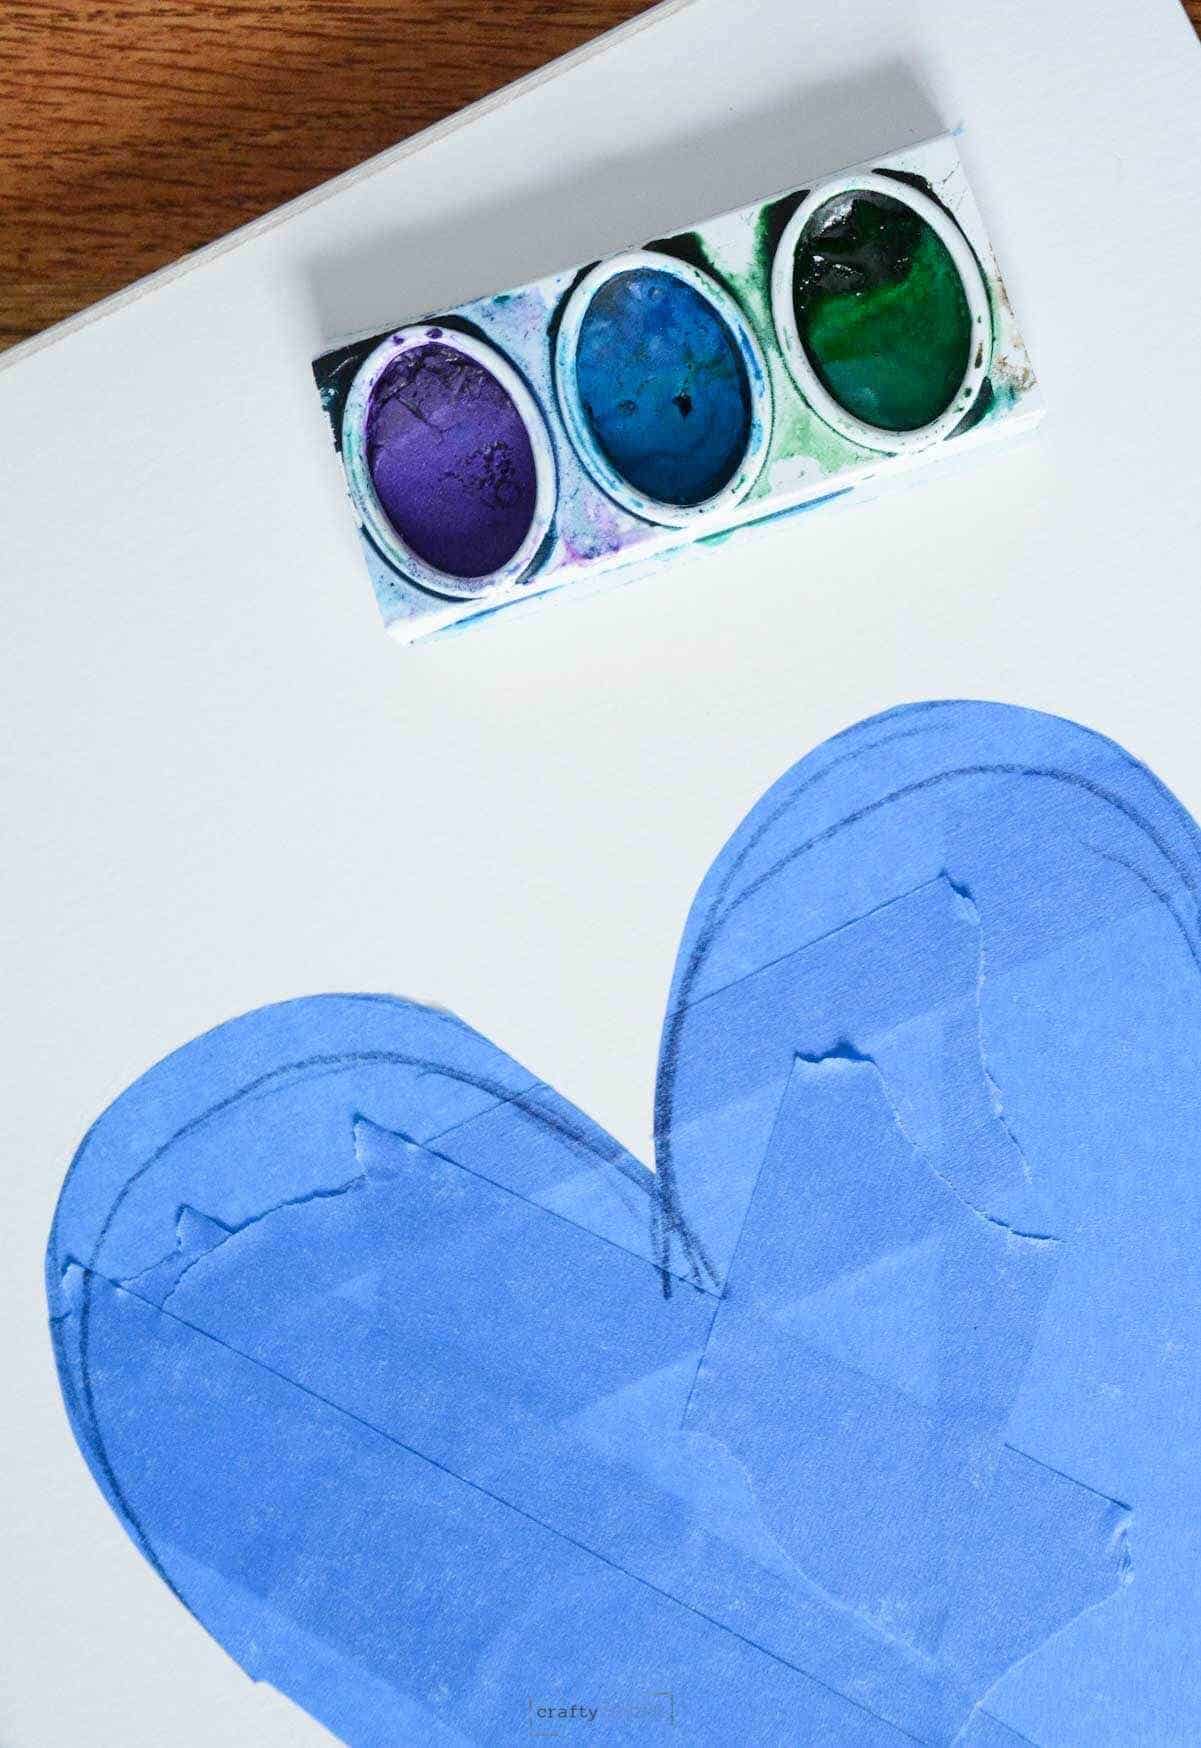
Step 4: Wet The Paper
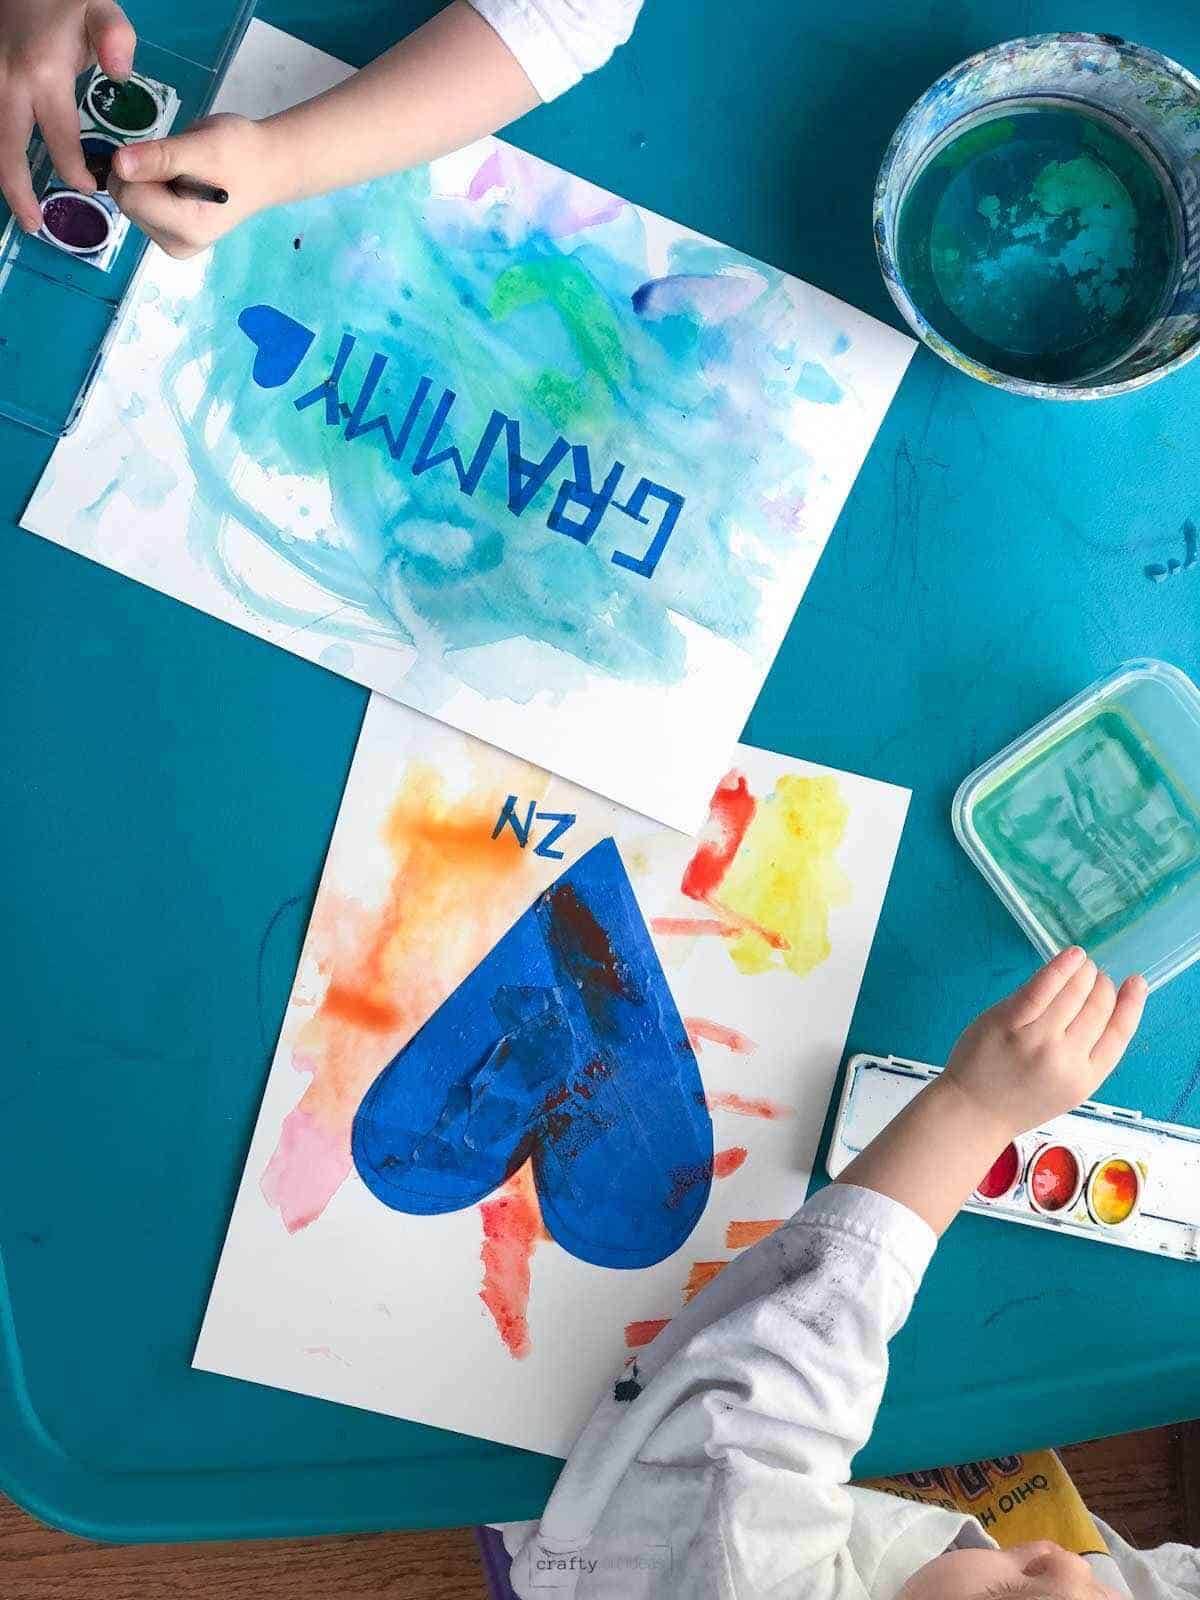
Now we are ready to start painting our heart art! My young children could not wait to start using watercolor paint.
Before the kids start using colors, have them paint some water on the paper. This will easily help the colors blend when they start making their watercolor art project.
Step 5: Start Painting
I had to encourage my daughter to paint in the white space around the heart and not on the heart! She still painted on the heart anyway!
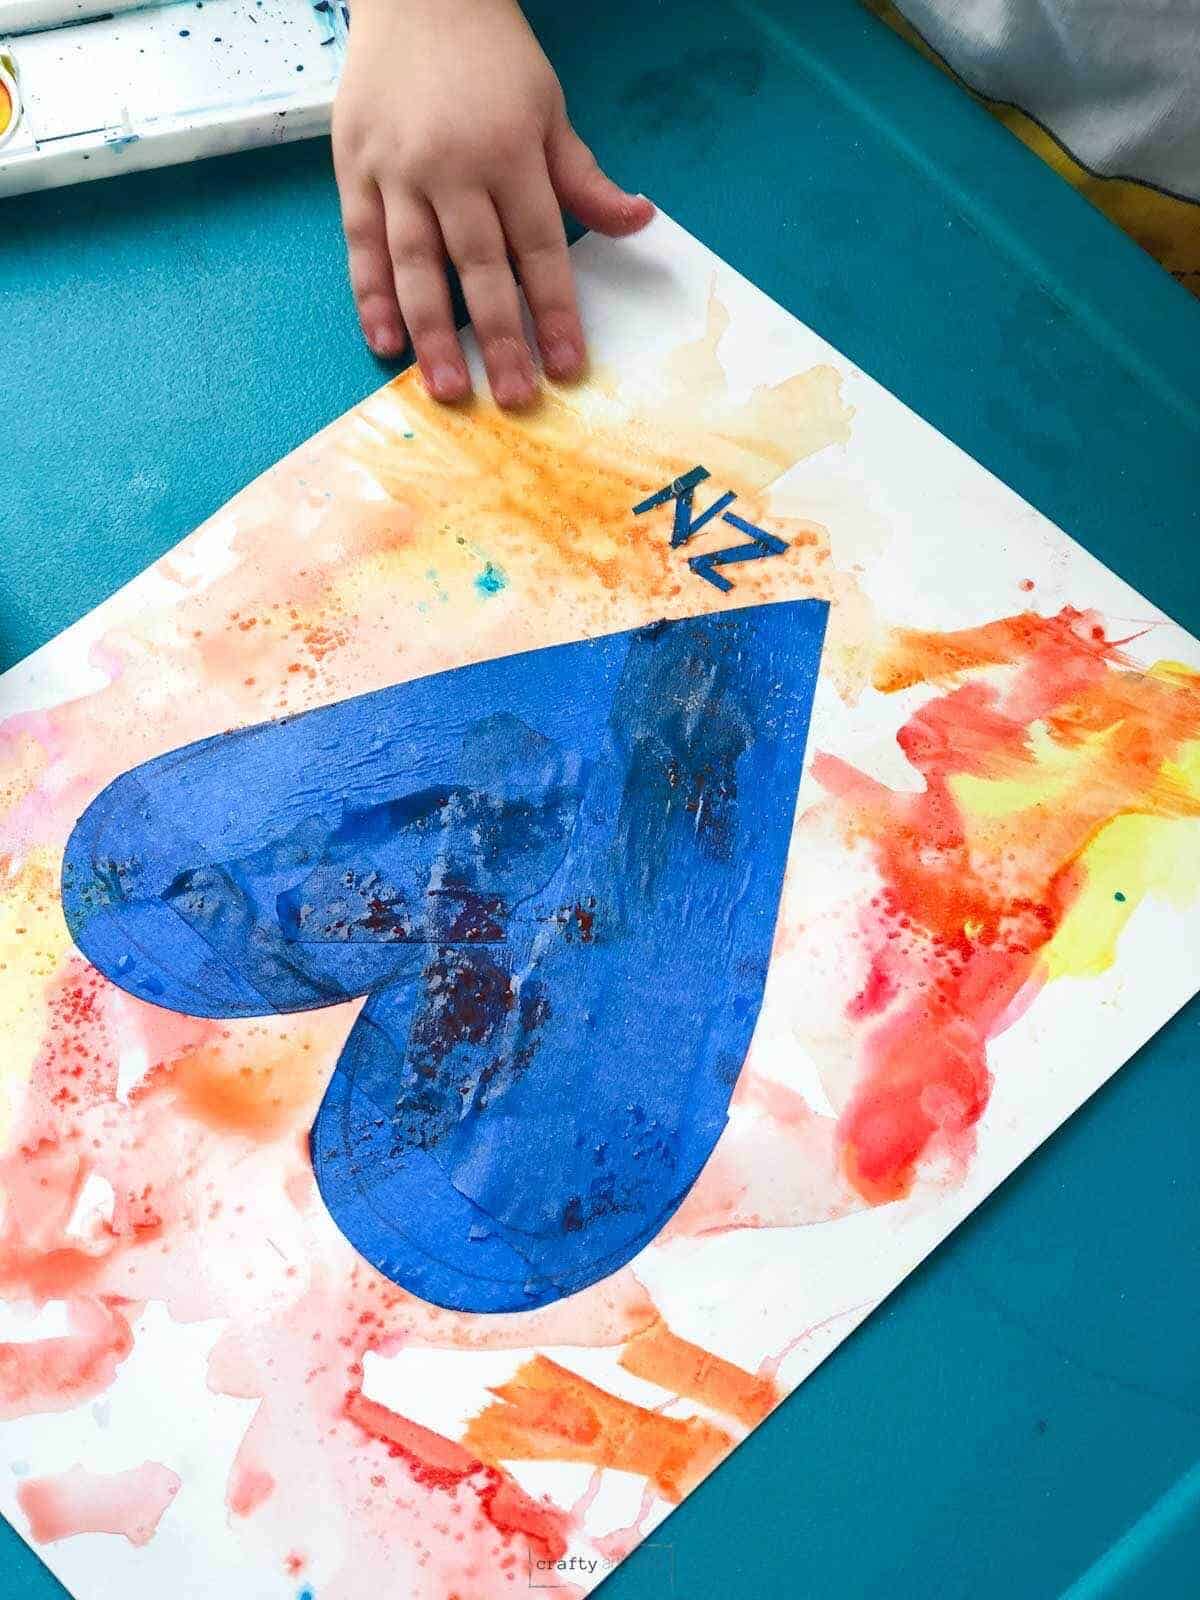
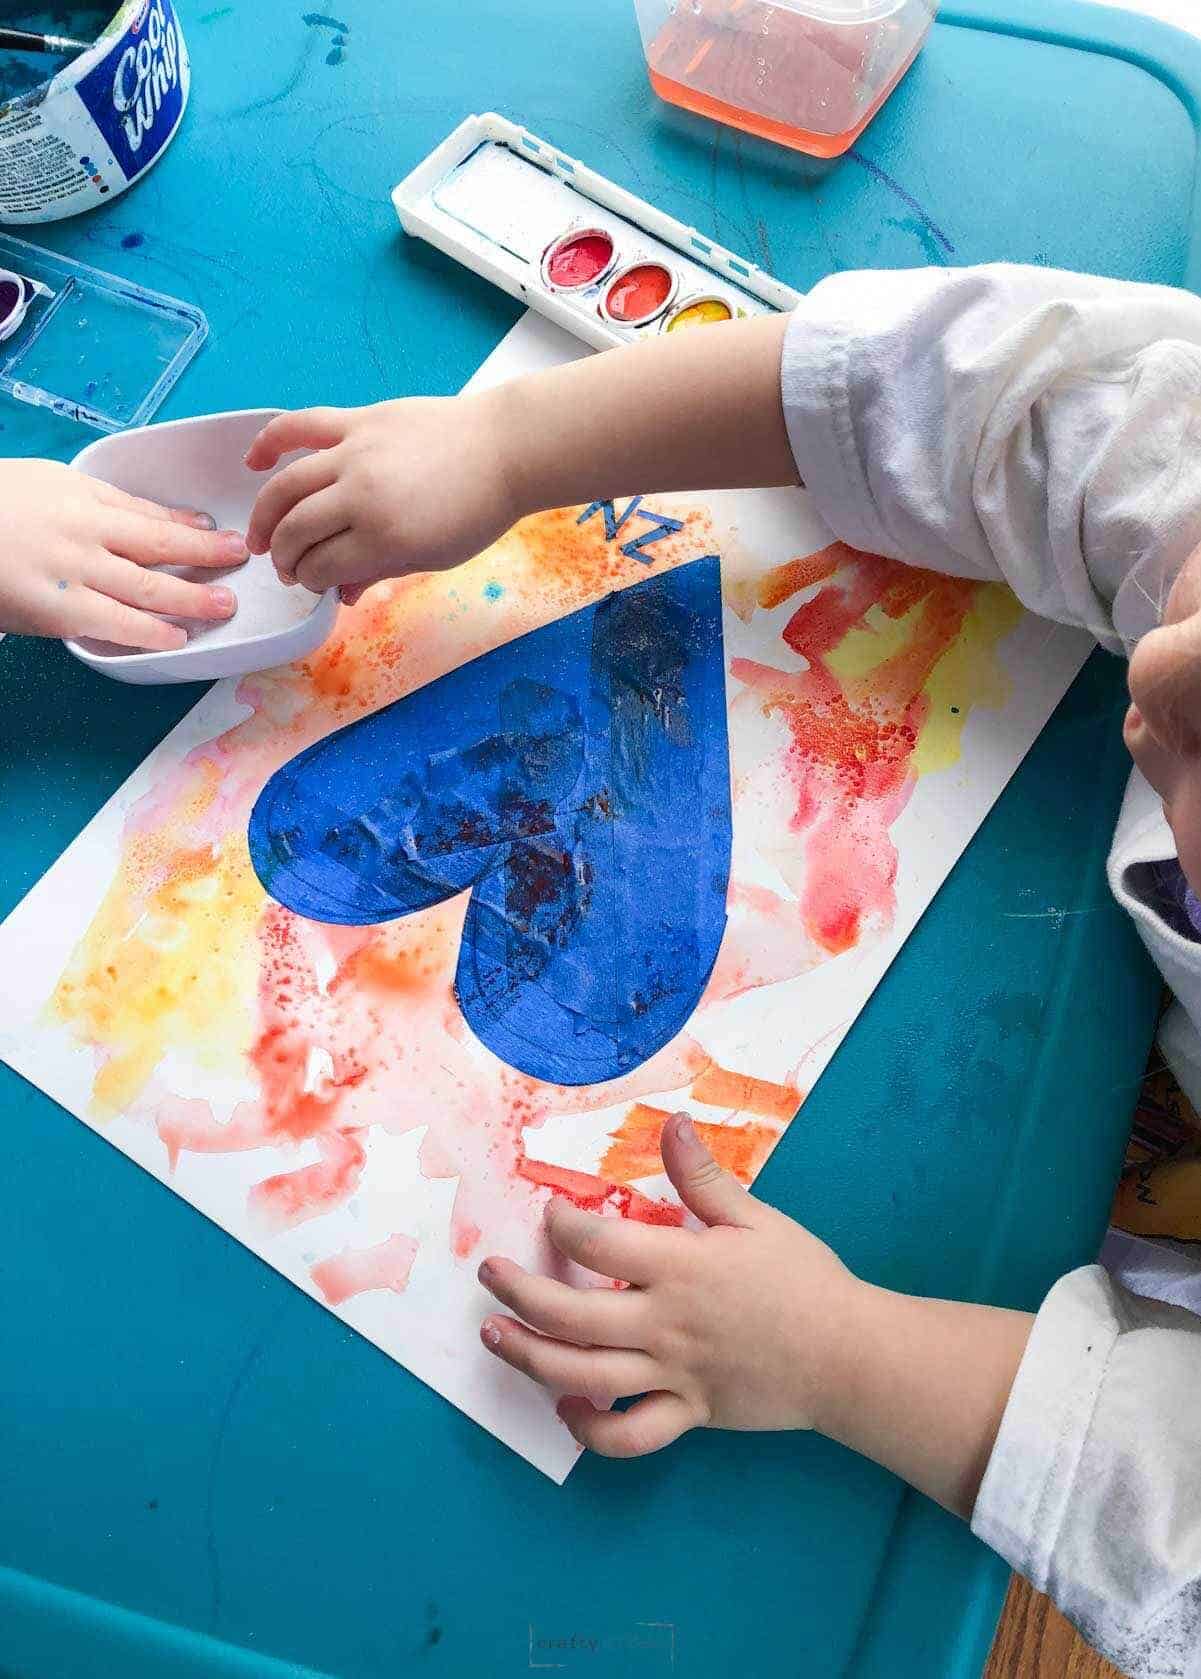
Step 6: Continue Painting
Keep working to cover the white space around the tape area. It does look cool if they leave some space white, but make sure near the tape is painted.
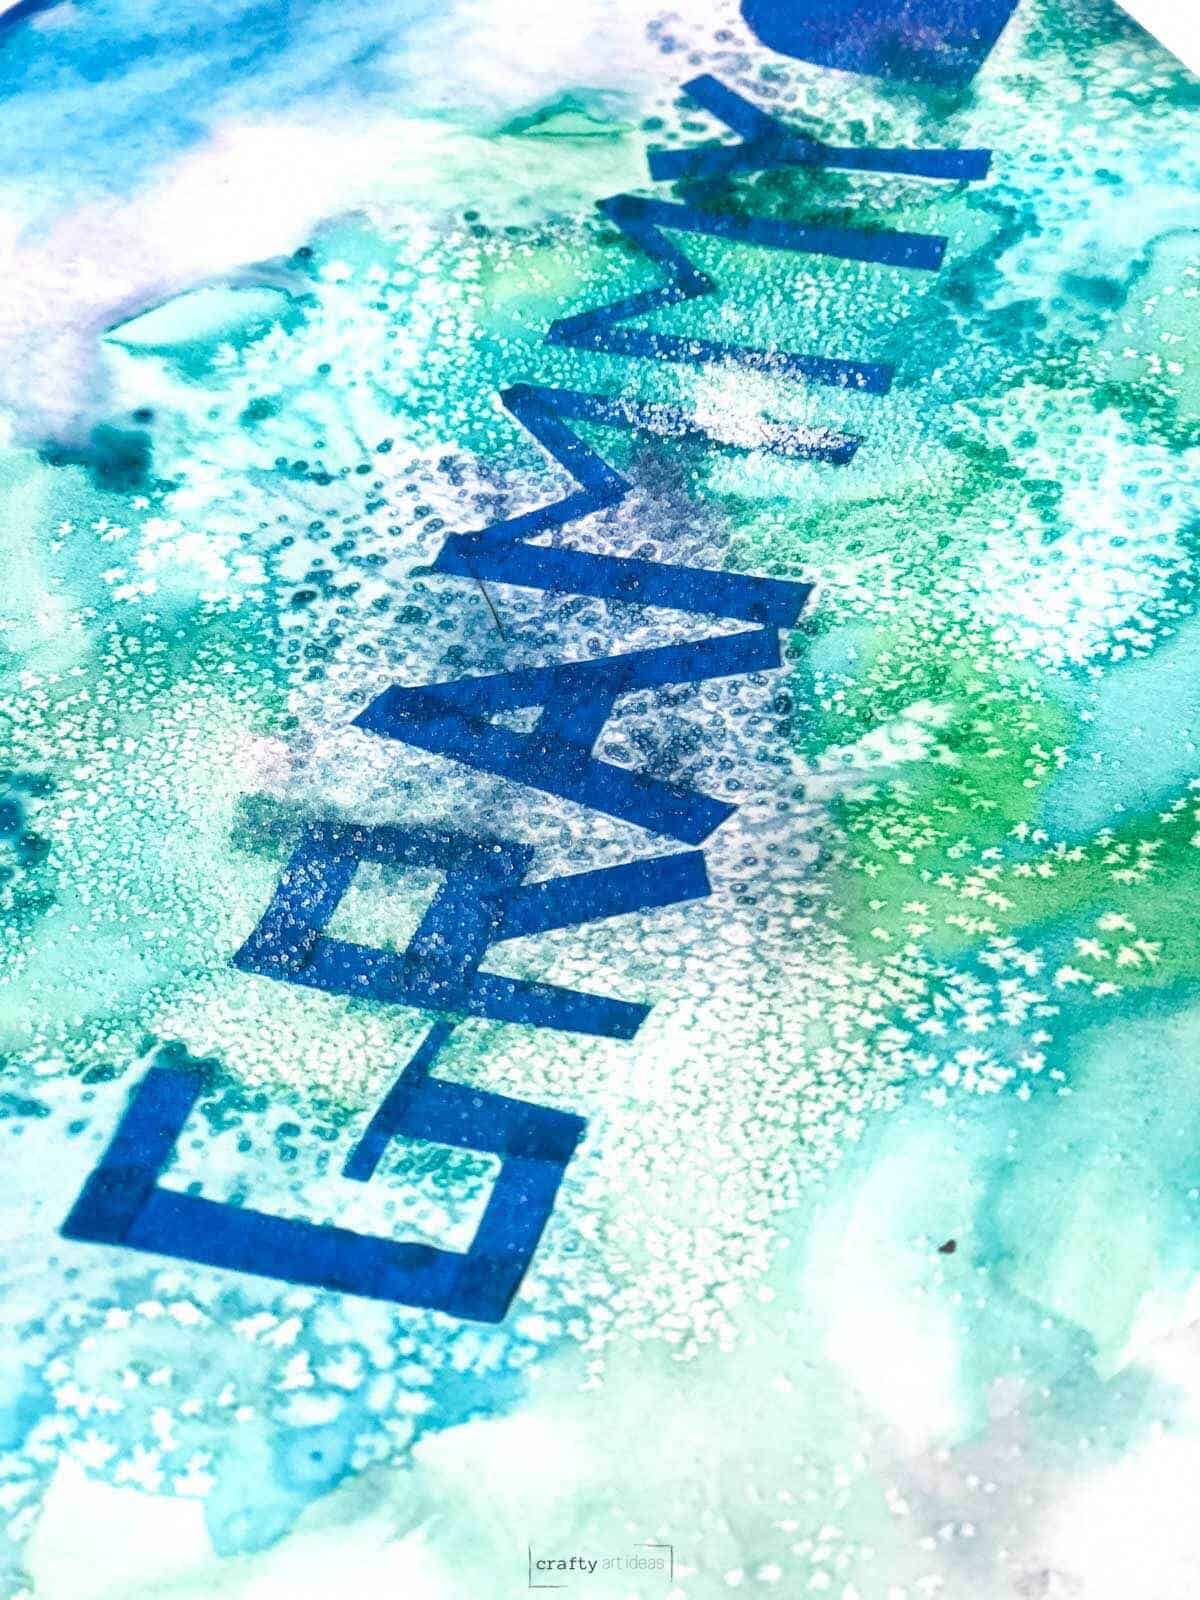
Step 7: Add Salt To Wet Paint
If you want to get a cool effect, sprinkle regular table salt onto the wet watercolor paint. Let the kids see what magic will be created on their watercolor resist art.
Step 8: Let Paintings Dry
You must be patient. Luckily my kids went to the library while their watercolor projects were drying.
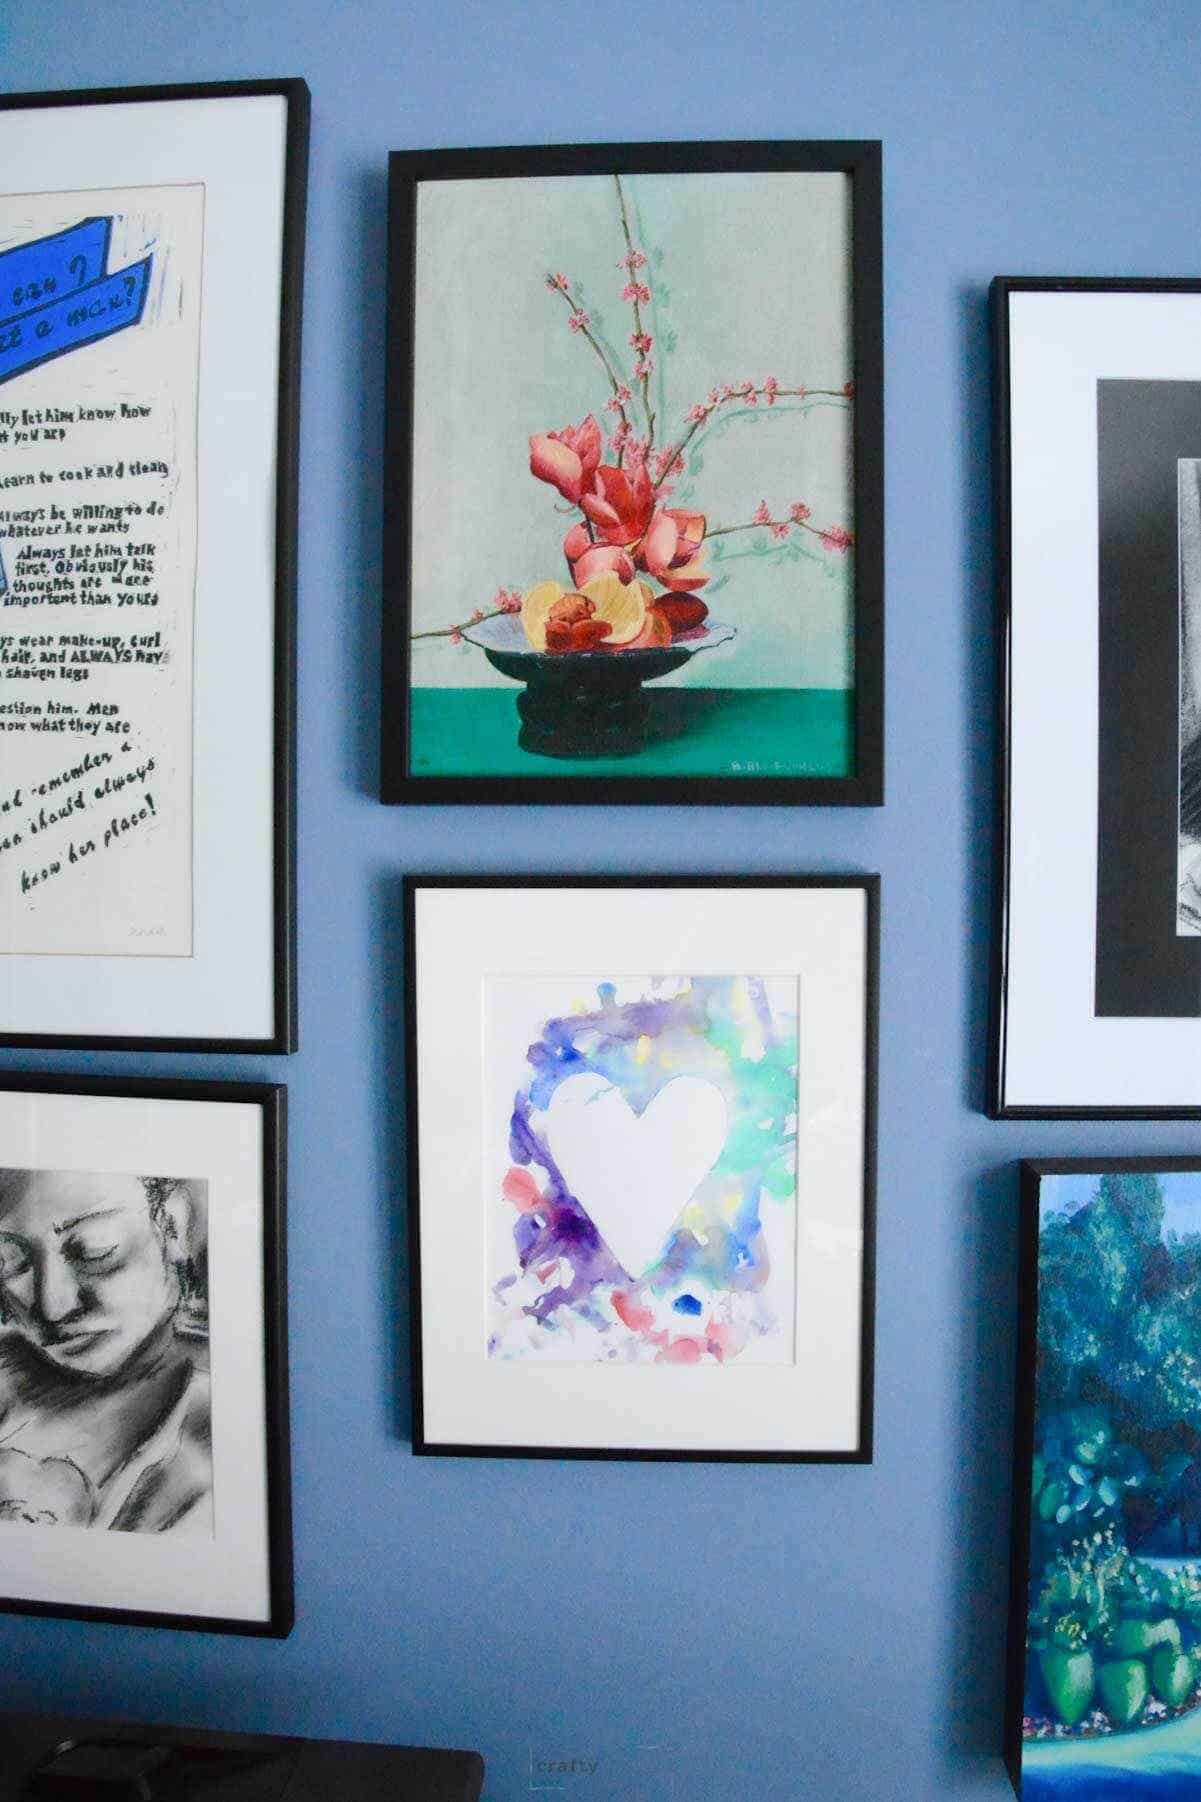
Step 9: Carefully Pull Off The Tape
Carefully remove the tape from your project and see the beautiful watercolor artwork that was created by these little hands.
AVOID A BROWN MESS: Let kids pick between warm and cool colors. Cut the watercolor palette and only give younger children the paint colors that you know will mix well together.
If you separate the colors into warm and cool, they will end up with interesting color mixtures.
Tips
- Colors that are next to each other in the color wheel will mix better than if kids just mix all the colors. But hey, they are kids so let them experiment, too!
- Use other techniques such as drawing with white crayons, using spray bottles or adding cling wrap on wet paint.
I love this simple art project so much that I have even framed one of these heart arts that my three-year-old did as his first painting when he was around 1! It is currently in our art gallery and it fits right in with the rest of the artwork from artists of all ages.
Follow us on Pinterest, YouTube & Facebook for more free art and craft ideas!
More Easy Art Activities For Kids
- Jackson Pollock-Inspired Straw Paintings
- Easy Art Activity With Oil Pastel and Watercolor Paint
- Beautiful Landscape Paintings – using a similar technique by for older children.
We love seeing how kids of all ages can feel successful experimenting with this watercolor painting technique. Not only will you create wonderful & easy watercolor art projects, but you will be creating memories that last forever!
Do you like this art project? Please give us a 5-STAR review below ⭐️⭐️⭐️⭐️⭐️ and have fun being creative with your family.
Easy Watercolor Painting For Preschoolers

Equipment
- Scissors
- Water container
- Paint Brush
- Exacto Knife Optional
Supplies
- Watercolor Paint
- Painter’s Tape
- Heavy Drawing or Watercolor Paper
Instructions
- Tape out an image such as a heart or design using painter's tape.
- Paint water on the paper around the image.
- Use warm or cool color watercolor paint all over the paper.
- Sprinkle salt in wet paint for a fun effect.
- Let painting completely dry.
- Carefully peel off tape.
- Love your awesome watercolor painting.
Notes
- Tape any design you want. Kids can even just rip small pieces.
- Limit your young child to use warm or cool colors to avoid a brown mess when different colors mix.
- Add other watercolor techniques for a fun process art project such as salt, plastic wrap or paint splatter.
Wonderful idea Erin, thank you for sharing your detailed and well explained tutorial. I love that tip about using the exacto knife to carve out the pattern around the masking tape after it’s on the paper. I always thought you had to pre-cut it. Will be using that tip on future projects 🙂
Cheers,
Jasmine