Easy Watercolor Winter Scene Landscape Painting Tutorial

Wintery scenes are fun to paint no matter what age or skill level you are. Use our detailed step-by-step tutorial will guide you through each foolproof step to create your own easy Winter watercolor painting today.
Even though snow can sometimes be a tricky subject we know you will be able to follow along to create a beautiful winter landscape with birch trees.
What We Love About This Winer Art Lesson
Recommended Supplies
This post may contain affiliate links when clicked, we may earn a small commission at no additional cost to you. Read our full privacy policy.
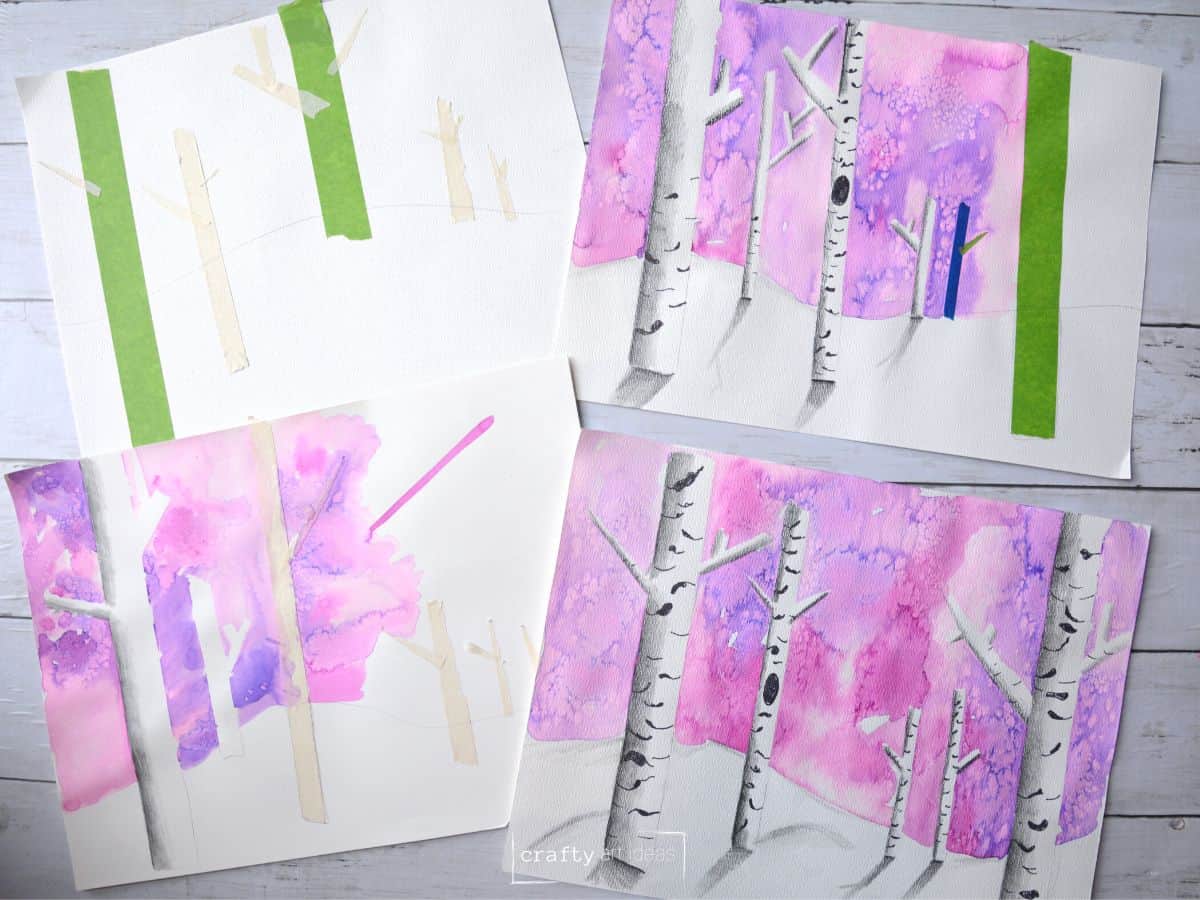
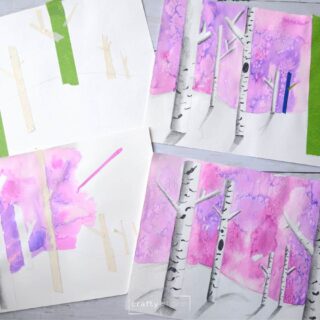
Handy Tip: Use Different Colored Tapes
Using different widths and colors helps kids understand background, middleground and foreground. They could associate the terms with the different colored tapes and how artists show depth.
Prior Skills That Would Be Helpful For Students To Have
- Previous use of watercolor paint (but not 100% necessary)
- How to shade with a pencil and how to create tonal value
- Some knowledge of the concepts of background, middle ground, and foreground
Art Discussion and Analysis
Before You Begin
Start a discussion about how artists create depth in artworks. You can look at different paintings, whether in oil or en plein air.
Most young students will understand that they add a background to their artworks and have previous knowledge of this. Show them a variety of paintings so that they point out that objects closer to you are more oversized and have more detail and as they go back in space, they get smaller with less detail.
After your discussion, children have some understanding of how artists create space in a whole scene.
Winter Scene Step-by-Step Tutorial
Step 1: Sketch Horizon Line
Draw a horizon line as lightly as possible on 12 x 18” watercolor paper. I always say “draw light until you get it right”.
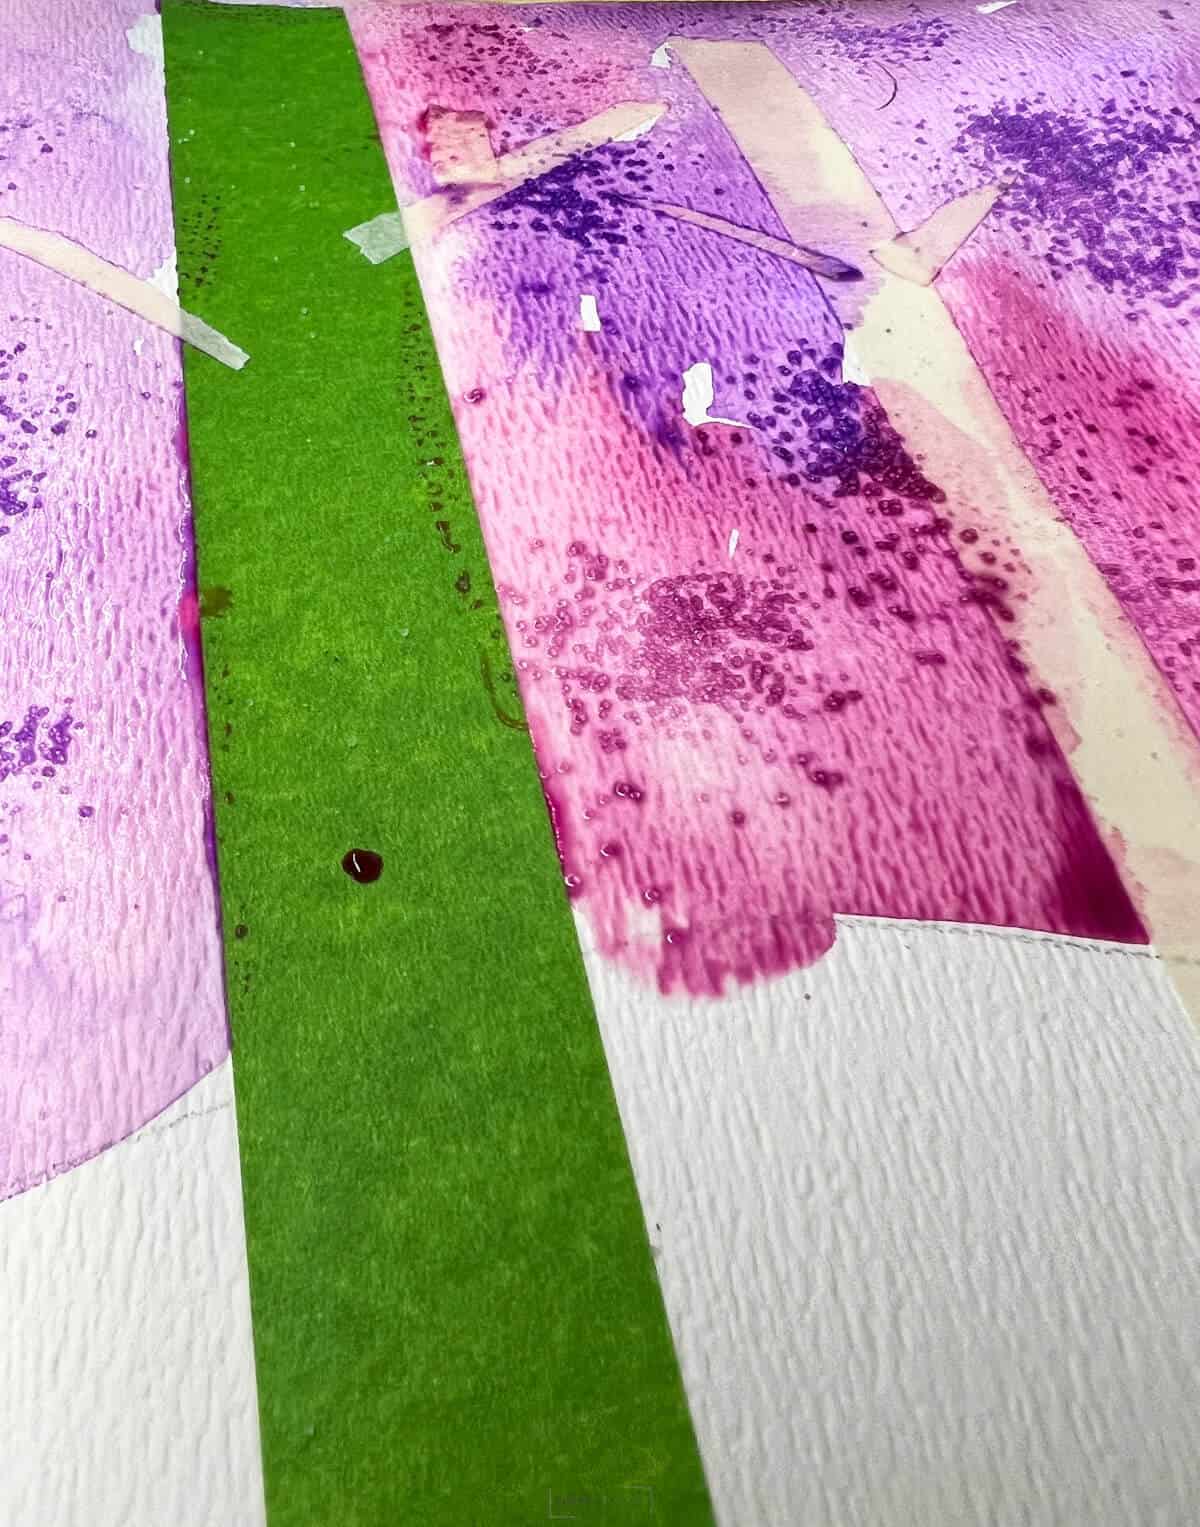
Step 2: Tape Larger Trees
Show students how to add larger trees closer to the bottom of the page and the smallest trees closer to the horizon line.
Step 3: Add More Trees With Tape
Make 5-7 trees in a variety of sizes.
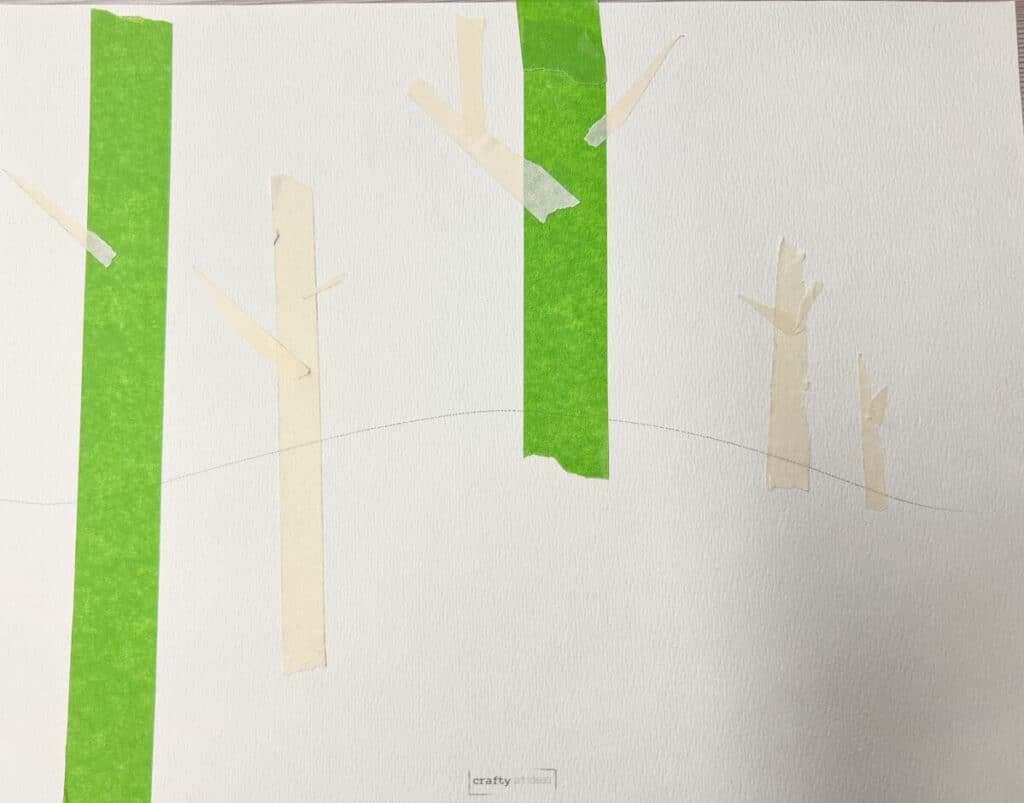
Step 4: Tape Out Tree Details
Add branches, but encourage kids to rip the tape to create more realistic-looking tree branches.
Art Teacher Tip: If you are doing this in the classroom, this is a good stopping point for the day.
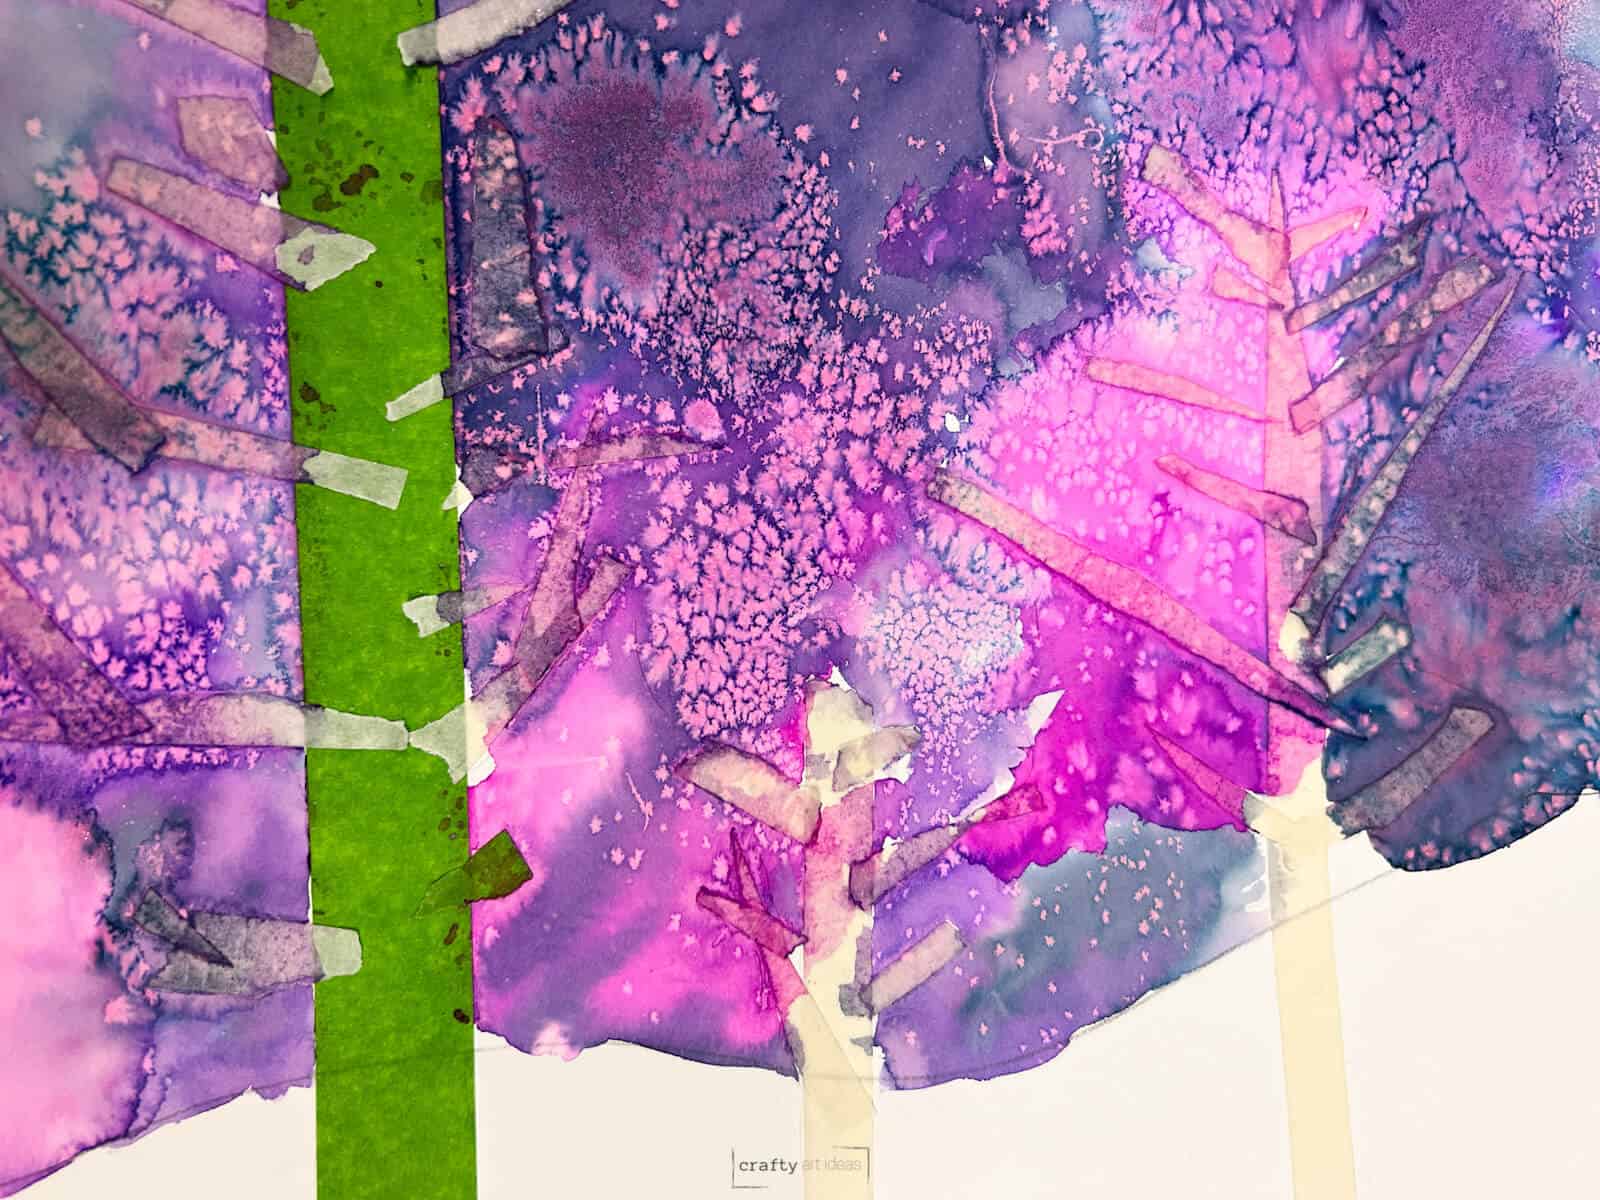
Step 5: Paint Your Sky
Set up liquid watercolors that will blend well together. Use analogous colors or colors that are next to the color wheel. If you want to show your children a cool analogous color song check out this one by Scratch Garden.
You can use any colours of Winter. We used magenta, violet and blue liquid watercolors. In the past, we have also used warmer colors for the sky as well.

Step 6: Experiment with Watercolor Techniques
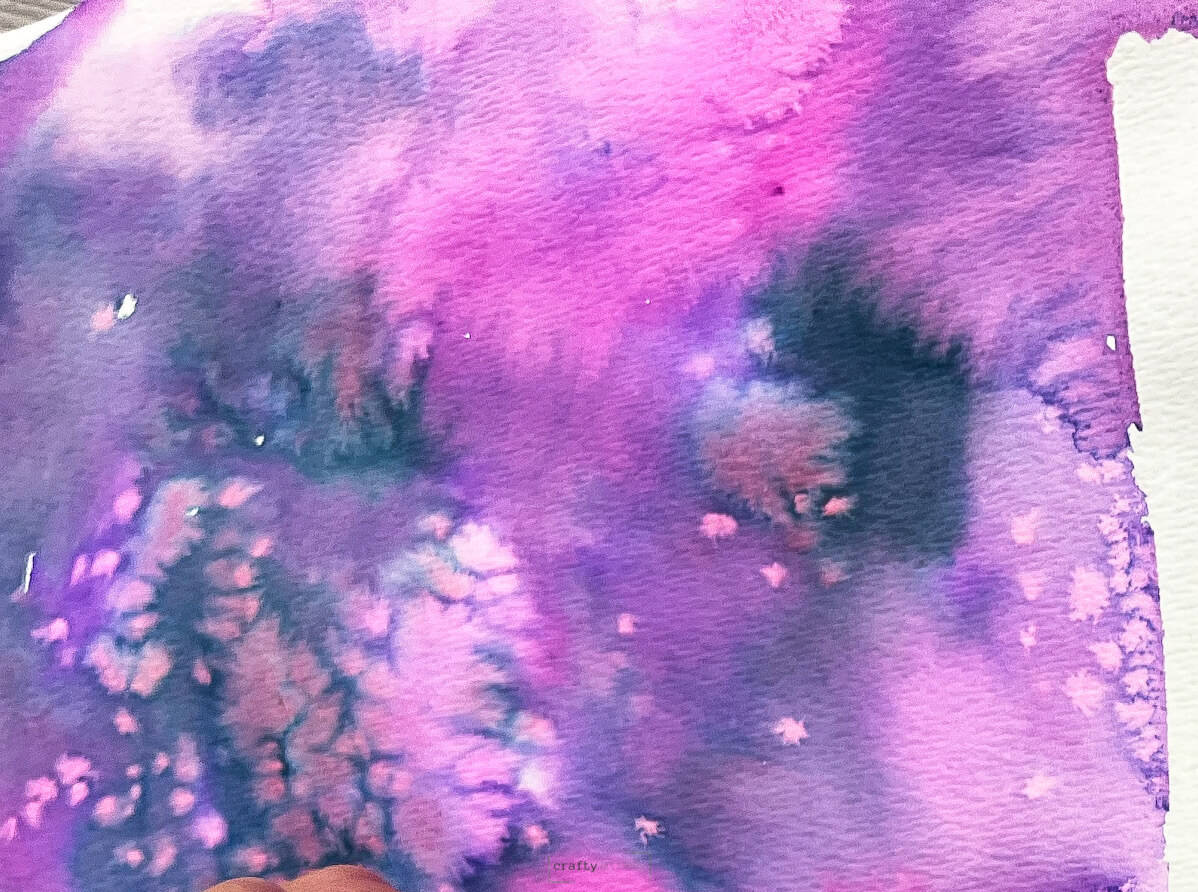
Use a wet-on-wet watercolor technique to help the colors blend in the sky. Show wetting the paper before adding paints.

Work in sections and add salt to the winter landscape skies before the paint starts to dry.
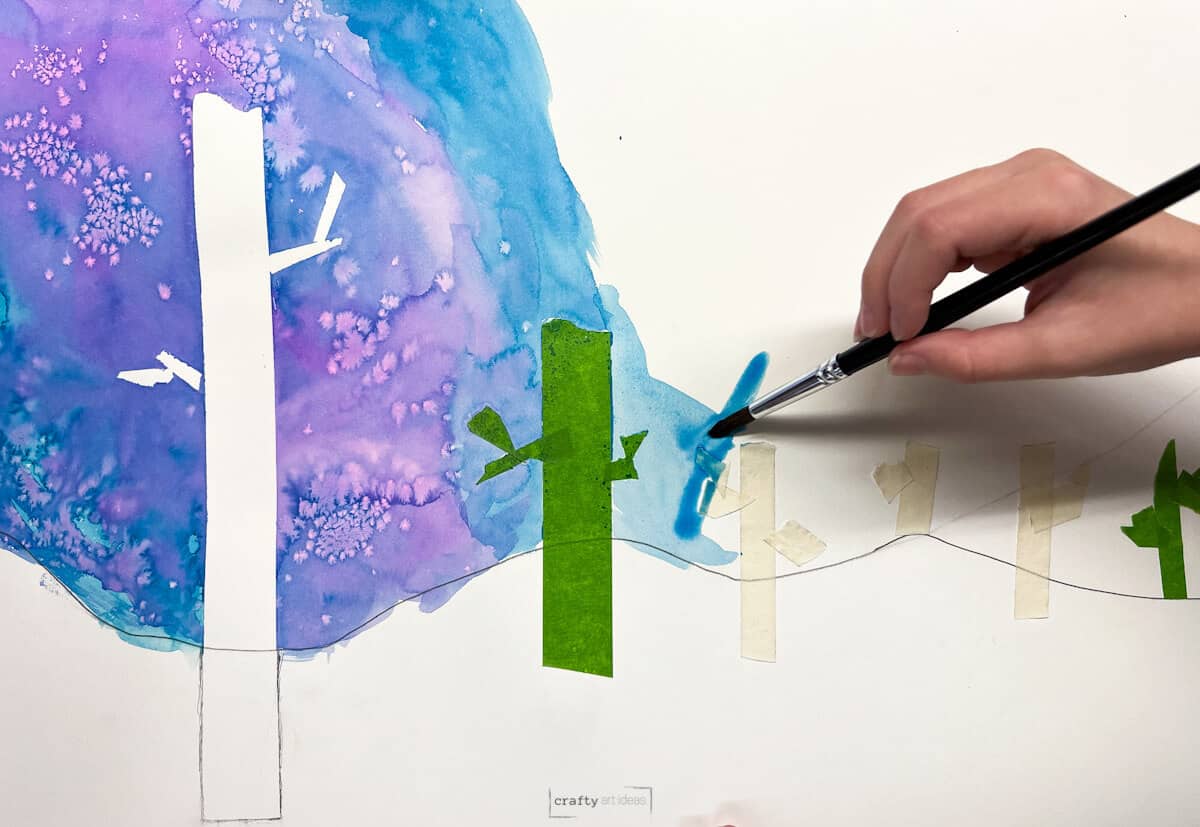
Sprinkle salt into wet watercolor paper for a fun effect.
Tips For Painting Your Sky
- Try to keep the paint above the horizon line so that you still have white snow.
- Place paintings in a flat spot to completely dry.
- White paint could be used to hide any mistakes or drips.
Step 7: Let Paintings Dry
Let the painting completely dry. Another great stopping point if you are doing this project at school.
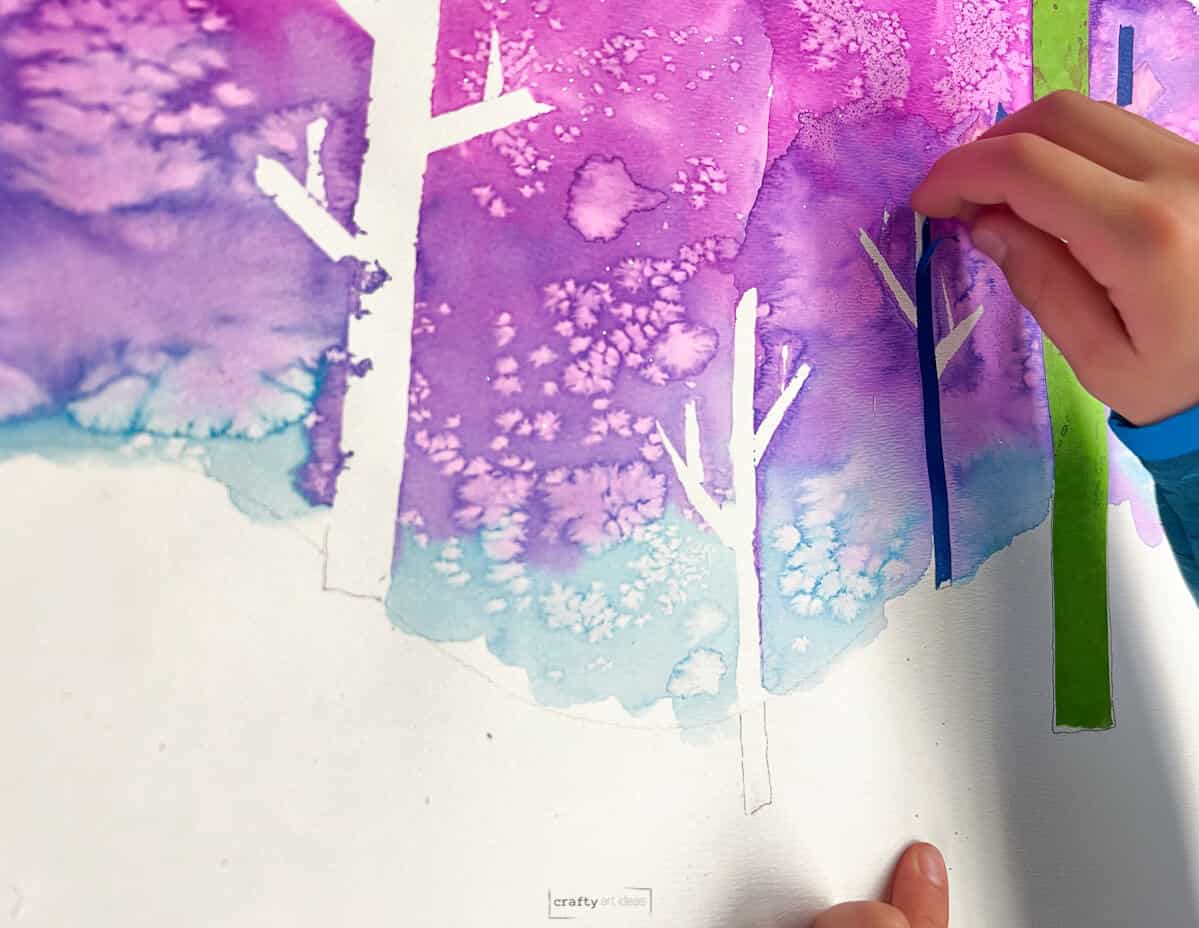
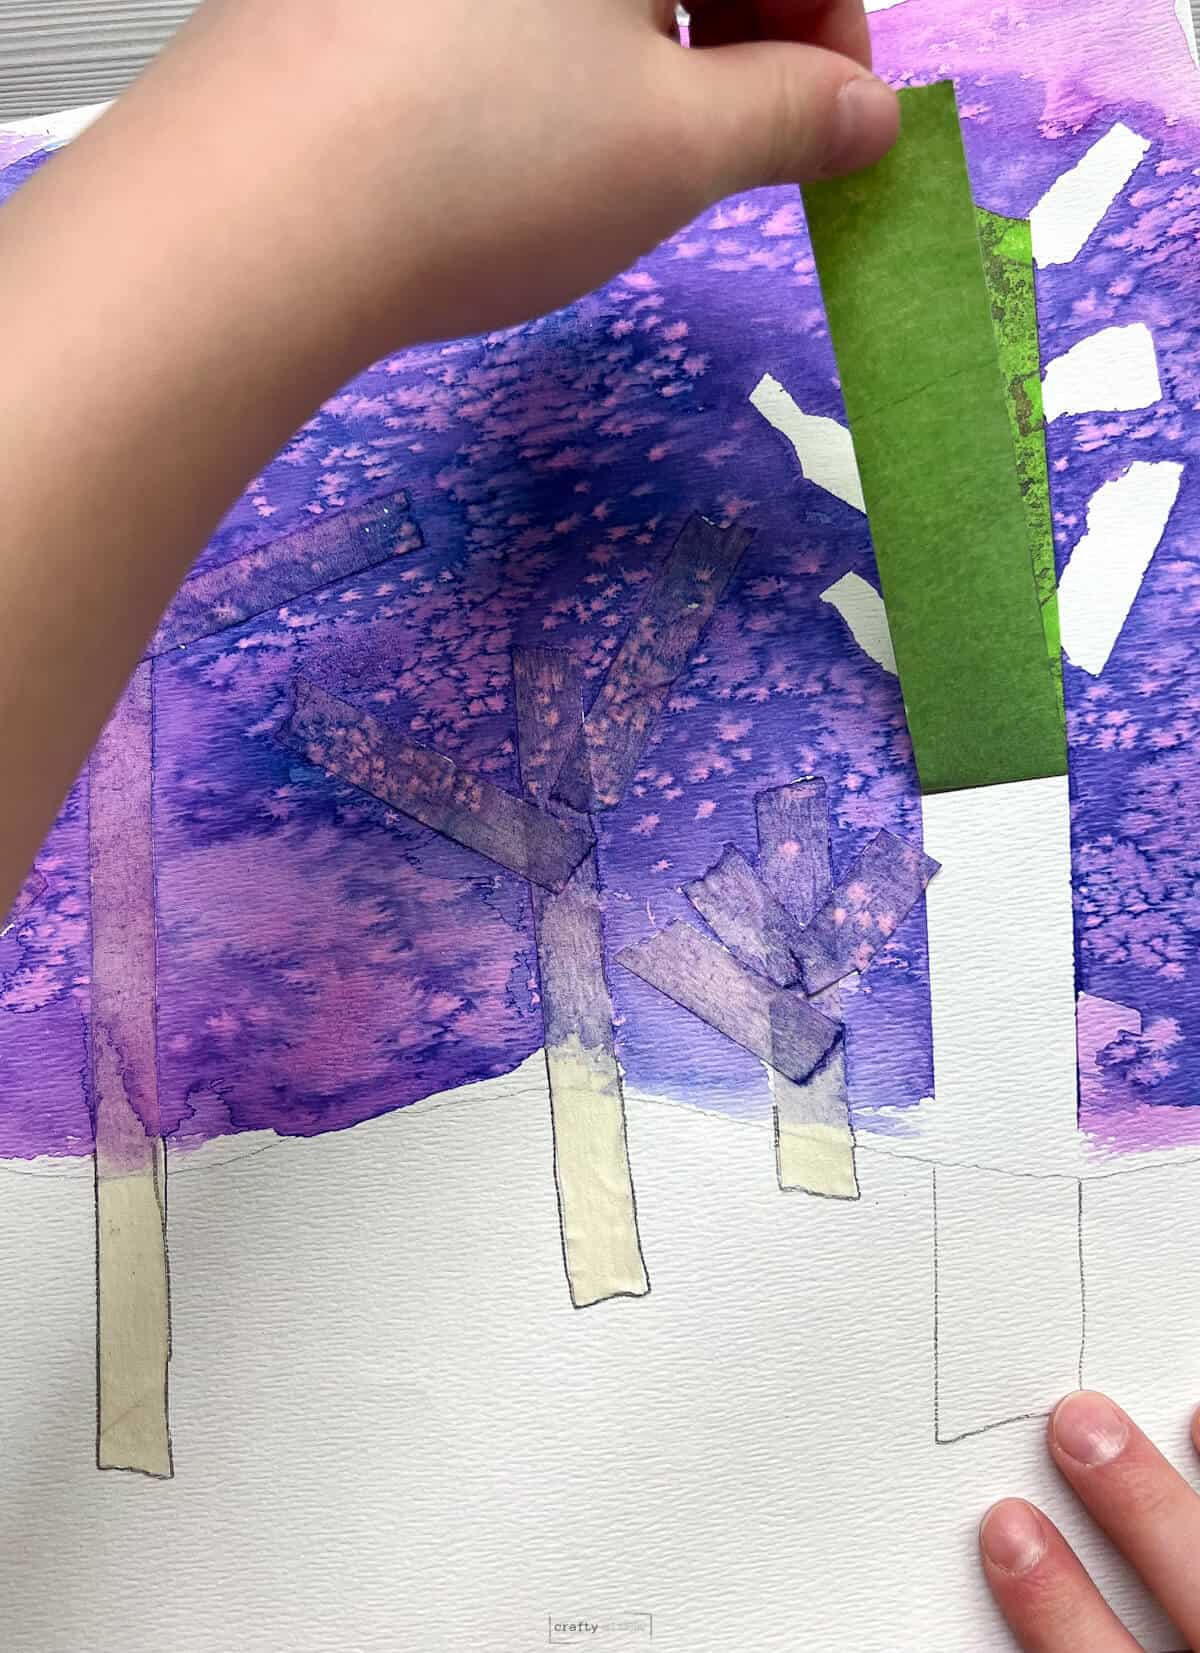
Step 8: Take Off The Tape
Before taking the tape off, trace around the tape that is below the horizon line. Start with the branches first. You may get a little texture on the paper depending on the tape you used. Since it is bark, just tell students you created a tree texture.
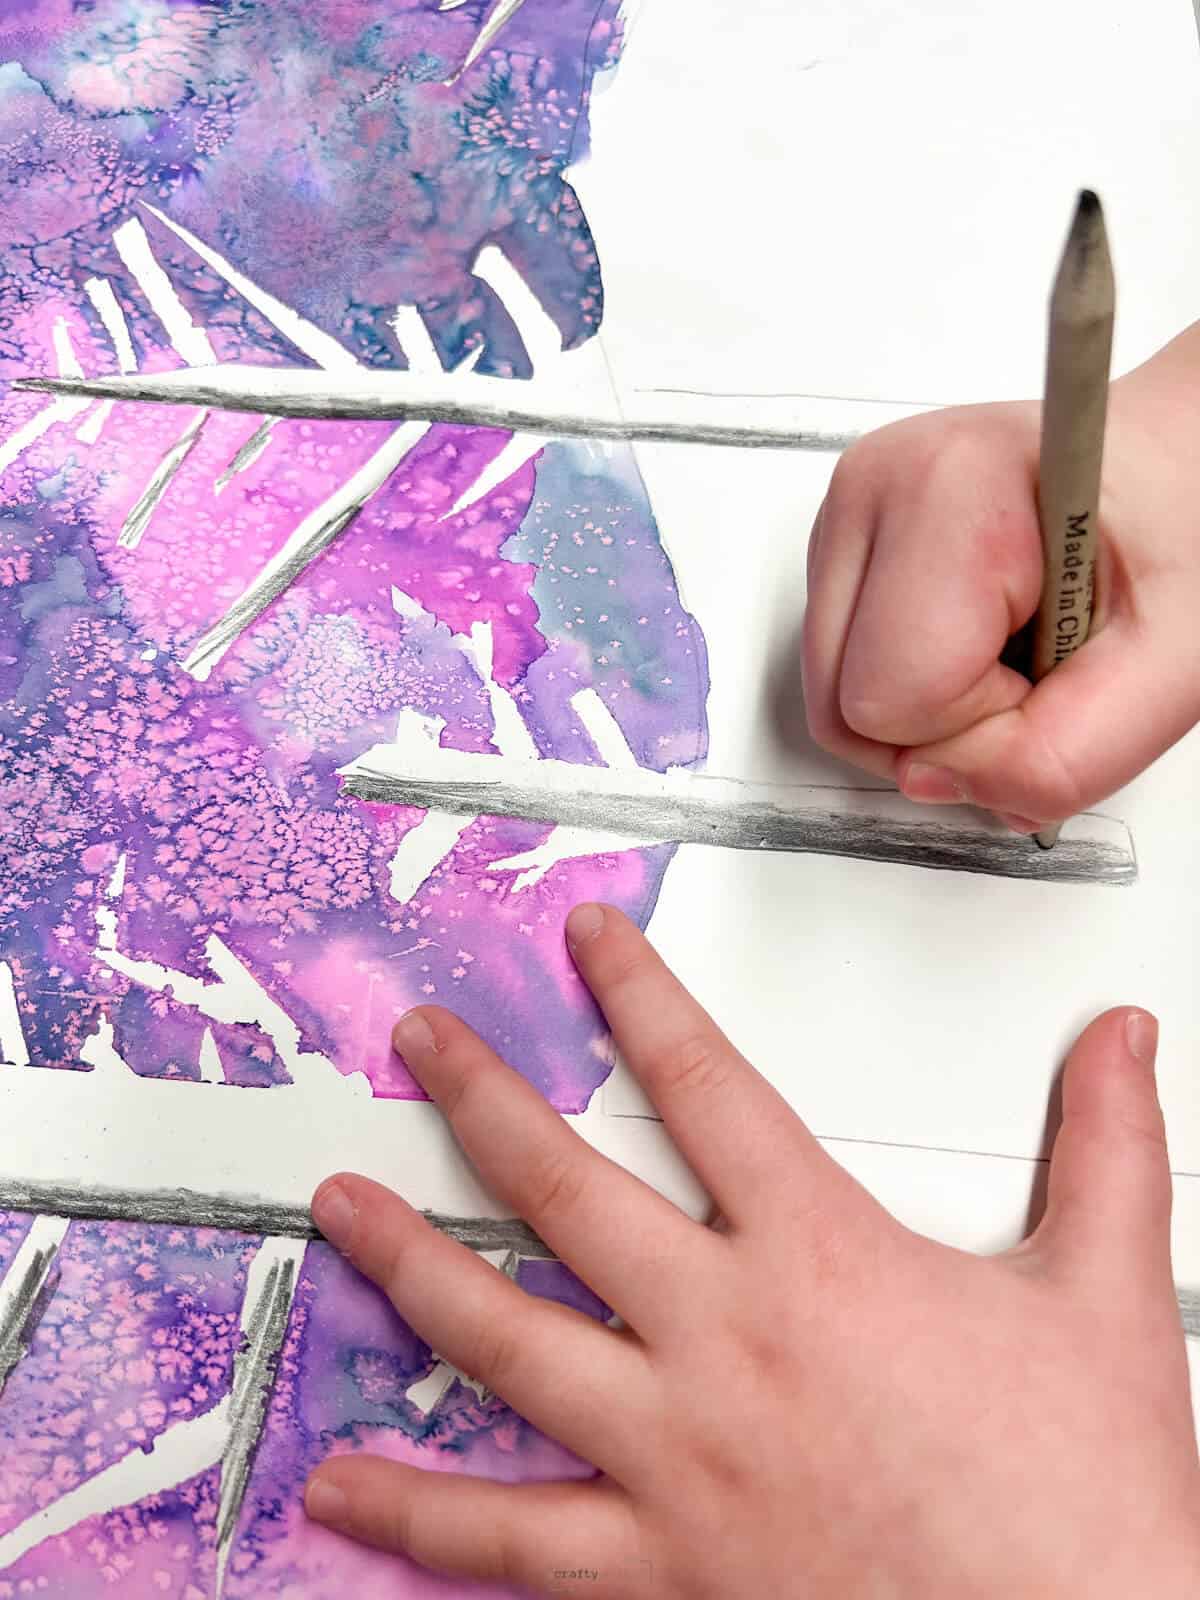
Step 9: Add Shading With Pencil
Next, you will begin to add darker shades with your pencil to the tree to make them look more 3-dimensional.

Add shading to one side of each tree. The darker tone should be on the edge and fade to white in the middle of the tree trunk.
Optional: Use A Blending Stump
You can use a blending stump to help smooth out the shading.
Step 10: Create Cast Shadows
Create a darker shadow area at the base of the tree and fade out as you go further away. You can use a blending stump if you want.
Step 11: Clean-up The Artwork
Erase extra pencil smudges.
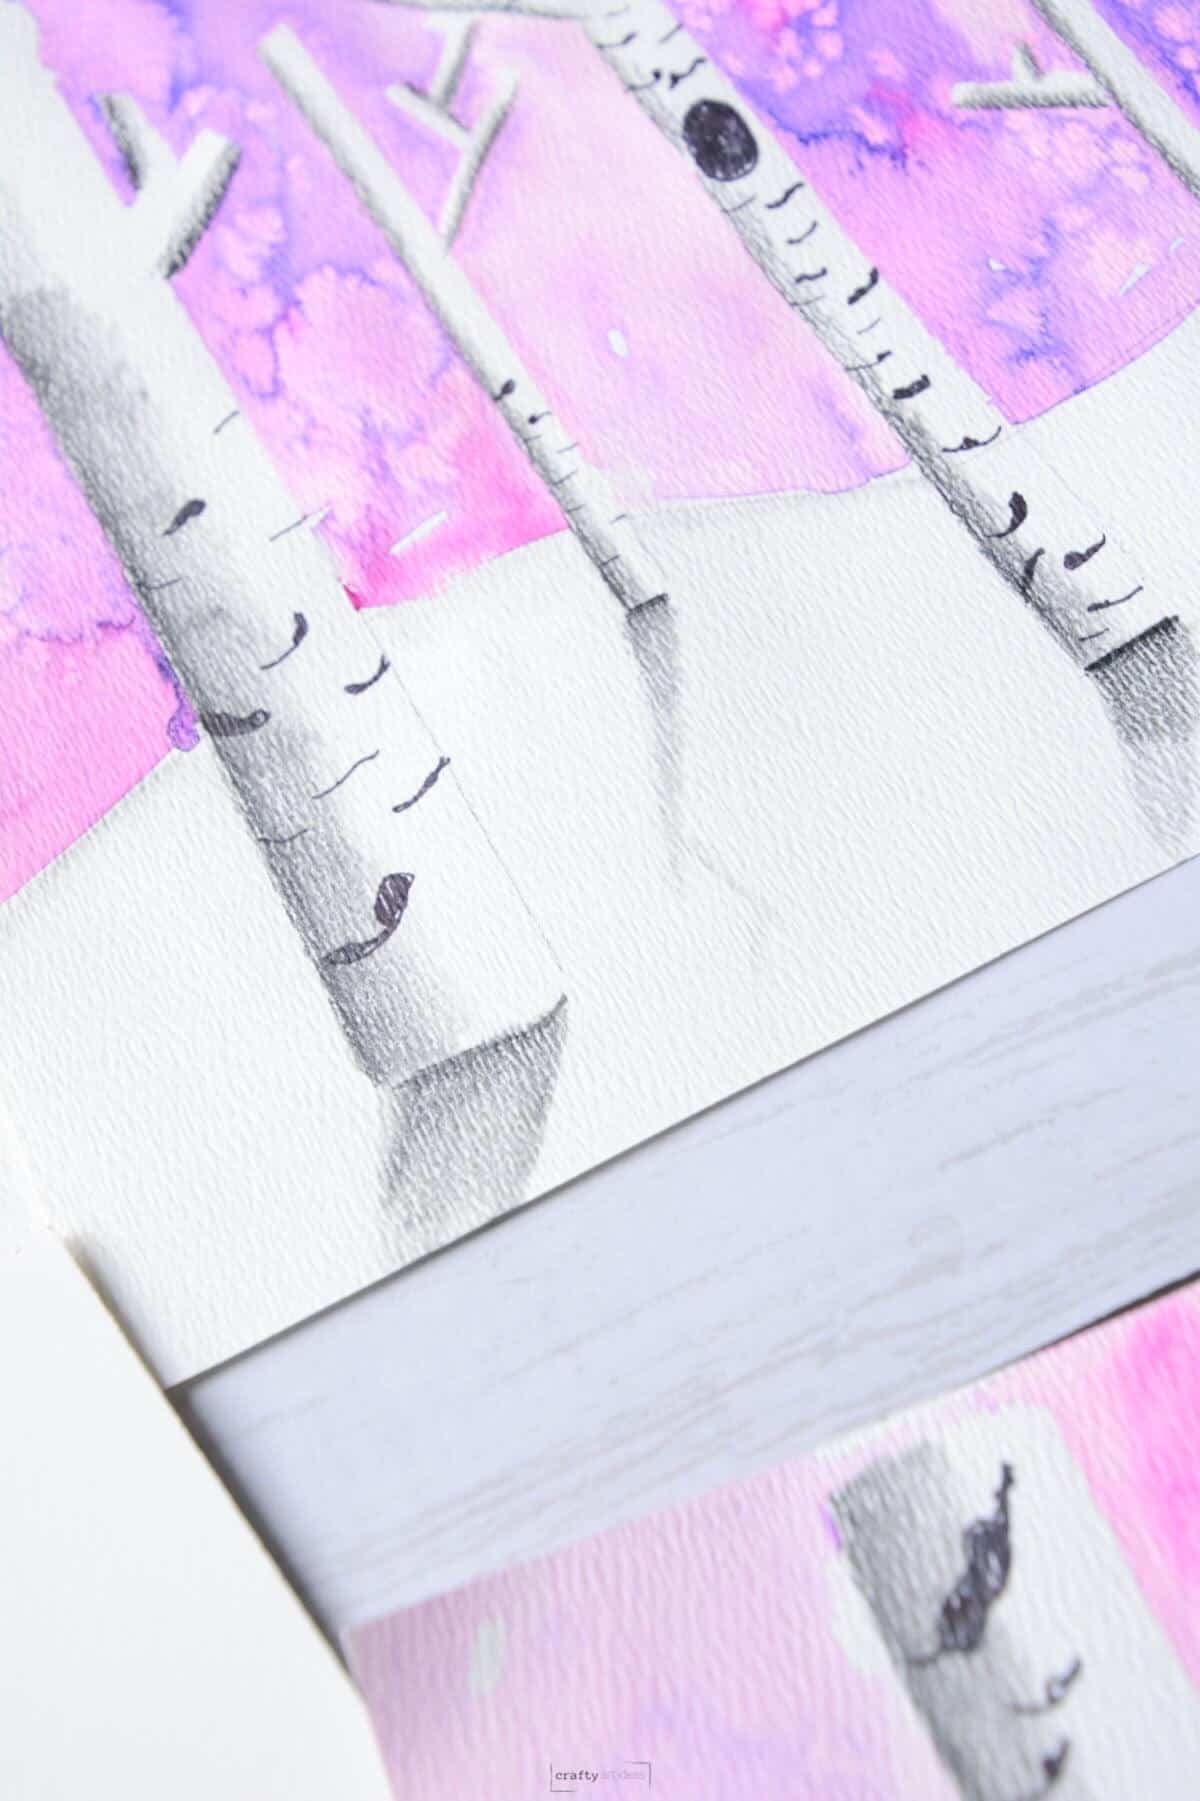
Step 12: Add Birch Tree Designs with Permanent Marker
Look at real birch trees for inspiration. Notice the variety of organic shapes and lines.
Use an ultra-fine permanent marker to create unique birch tree designs.
Read More>>>Did you know you could paint watercolor on canvas board?
Watercolor Painting Tips For Kids
- Only allow 5 pinches of salt
- Use a limited palette of watercolor paints
- Make sure students understand what colors will work well together when mixed
- Look at real trees for inspiration and notice that branches are skinnier than trunks
- Demonstrate and act out size variation by actually using your body and hands so kids understand
- Have kids ask for help if they are ripping their paper when taking the tape off
- Consider making smaller landscapes to use as greeting cards or practice first
Follow us on Pinterest, YouTube & Facebook for more free art and craft ideas!
Art Lesson FAQs
More Upper Elementary Art Lessons
- Awesome Glow In The Dark Landscape Art Project
- How To Paint A Fall Tree With Watercolor Paint
- Easy Snowflake Marker Drawings
- Make Paper Snowflakes In 5 Minutes
- 23+ Snowflake Art Ideas Kids Love
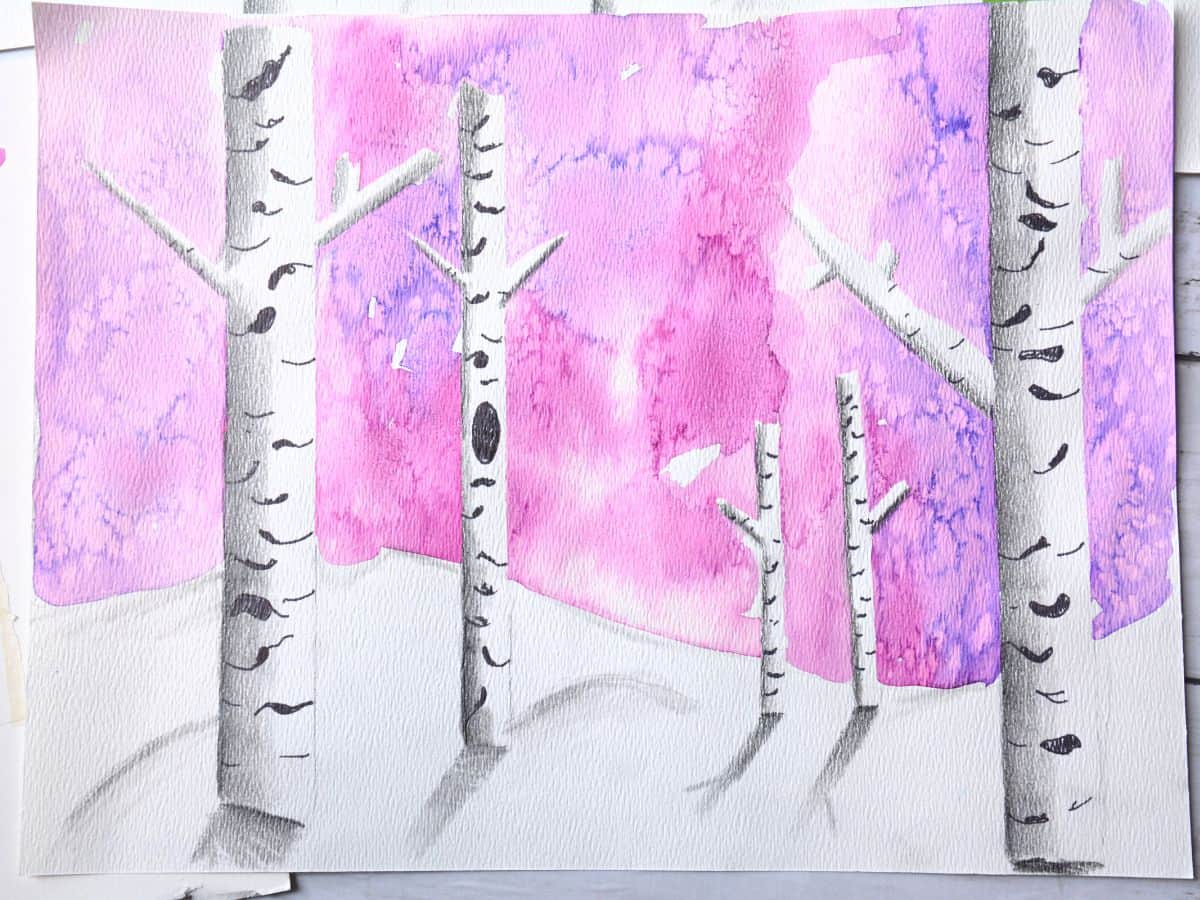
Kids and adults are amazed at how awesome these winter landscape paintings with birch trees turn out.
Do you like this art project? Please give us a 5-STAR review below ⭐️⭐️⭐️⭐️⭐️ and have fun being creative with your family.
Easy Winter Landscape Painting Idea
Equipment
- Pencil
- Blending Stump (optional)
Supplies
- Watercolor Paper or Heavy Drawing Paper
- Ultra Fine Permanent Marker
- Liquid Watercolor Paint colors of your choice
- Salt
- Masking Tape or Painter’s Tape
Instructions
- Draw a horizon line as lightly as possible on 12 x 18” watercolor paper. I always say “draw light until you get it right”.
- Show students how to add larger trees closer to the bottom of the page and the smallest trees closer to the horizon line.
- Make 5-7 trees in a variety of sizes by taping them on watercolor paper.
- Add branches by ripping the tape to create more realistic-looking tree branches.
- Use a wet-on-wet watercolor technique to help the colors blend in the sky. Show wetting the paper before adding paints.
- Work in sections and add salt to the winter landscape skies before the paint starts to dry.
- Once paintings are dry, begin to take the tape off.
- Add shading to one side of each tree. Continue on all tree trunks.
- Add a cast shadow at the base of each tree with a pencil.
- Use an ultra-fine permanent marker to create unique birch tree designs.
Notes
-
- Try to keep the paint above the horizon line so that you still have white snow.
- Place paintings in a flat spot to completely dry.
- Always point out how each artistic choice is unique for the artist. From learning about how to create a foreground, middle ground and background to a wet-on-wet watercolor technique this art project covers a lot of concepts within a short amount of time.
- Only allow 5 pinches of salt
-
- Demonstrate and act out size variation by actually using your body and hands so kids understand
- Look at real trees for inspiration and notice that branches are skinnier than trunks
Love the colors. So vibrant and pretty! Will definitely have to try this project.
Hi Christie. I am glad you love the colors in this watercolor landscape project. Kids love taking the tape off to reveal their trees. Have fun painting.
I love this!
Thanks, Courtney. Good luck with your next art and craft project.