Monet Water Lilies Art Lesson For Kids

Do you love the look of impressionism and want an easy Monet art lesson for your children? Any child can use Claude Monet’s work as inspiration to create this fun water lily art project.

This art project, originally published in November 2022, has been completed by hundreds of first-grade students. Erin updated this Monet art lesson in April 2025, adding key takeaways and an instructional how-to video at the end of the post.
Young children will love this project because the background is super fun to make. This will help them feel like they can’t do it wrong, and we always love it when art projects help build confidence.
Why You Will Love This Art Idea
If you want more ways to teach art history, check out our Klimt Tree of Life painting idea, folk art-inspired landscapes that glow in the dark, or this free Picasso portrait lesson.
Supplies You’ll Need
Disclosure: This post may contain affiliate links when clicked, we may earn a small commission at no additional cost to you. Read our full privacy policy.

More About Materials
- Cool-colored Tissue Paper (blue, violet, green) – Precut the paper into 1″ x 1″ squares for the easiest use with younger children. MAKE SURE TO PURCHASE BLEEDING TISSUE, and not regular tissue paper, if you want your colors to blend.
- Glue Water Mixture – 1:1 ratio of glue mixed with water in a small container
- We recommend using Premier Crayola Tempera paint to achieve sufficient contrast with your tissue paper background. We tried using the washable finger paint, but it didn’t make our water lilies stand out enough.
Claude Monet Resources To Use
There are many ways to teach about the life and work of Claude Monet. Here are a few we have used with elementary-aged children in the past.
- Getting to Know Artist Series (Monet): Currently free on YouTube and lasts around 20 minutes. It is entertaining for children while showing many of his real artworks.
- Getting To Know Artist Series Books (Monet)
- Monet’s Cat by Lily Murray
- Monet and the Waterlily Friends by Judiee Lee
Lesson Modification Ideas
- NO GLUE – Don’t use glue and water to apply tissue paper. You can get a fantastic effect by just painting water on top of bleeding tissue paper for your background. Once the paper dries, you remove it.
- COLLAGE WATER LILIES ON – Create water lilies out of construction paper, inside of drawing them on.
- CREATE TEXTURE – Add textured water lilies by wrapping tissue paper around a pencil tip and gluing it onto the surface.
Step-by-Step Instructions

Before You Begin
Discuss and analyze his work with children. One of the things children find most interesting is the sheer size of some of his paintings. This website shows images of him standing with his Water Lily Paintings.
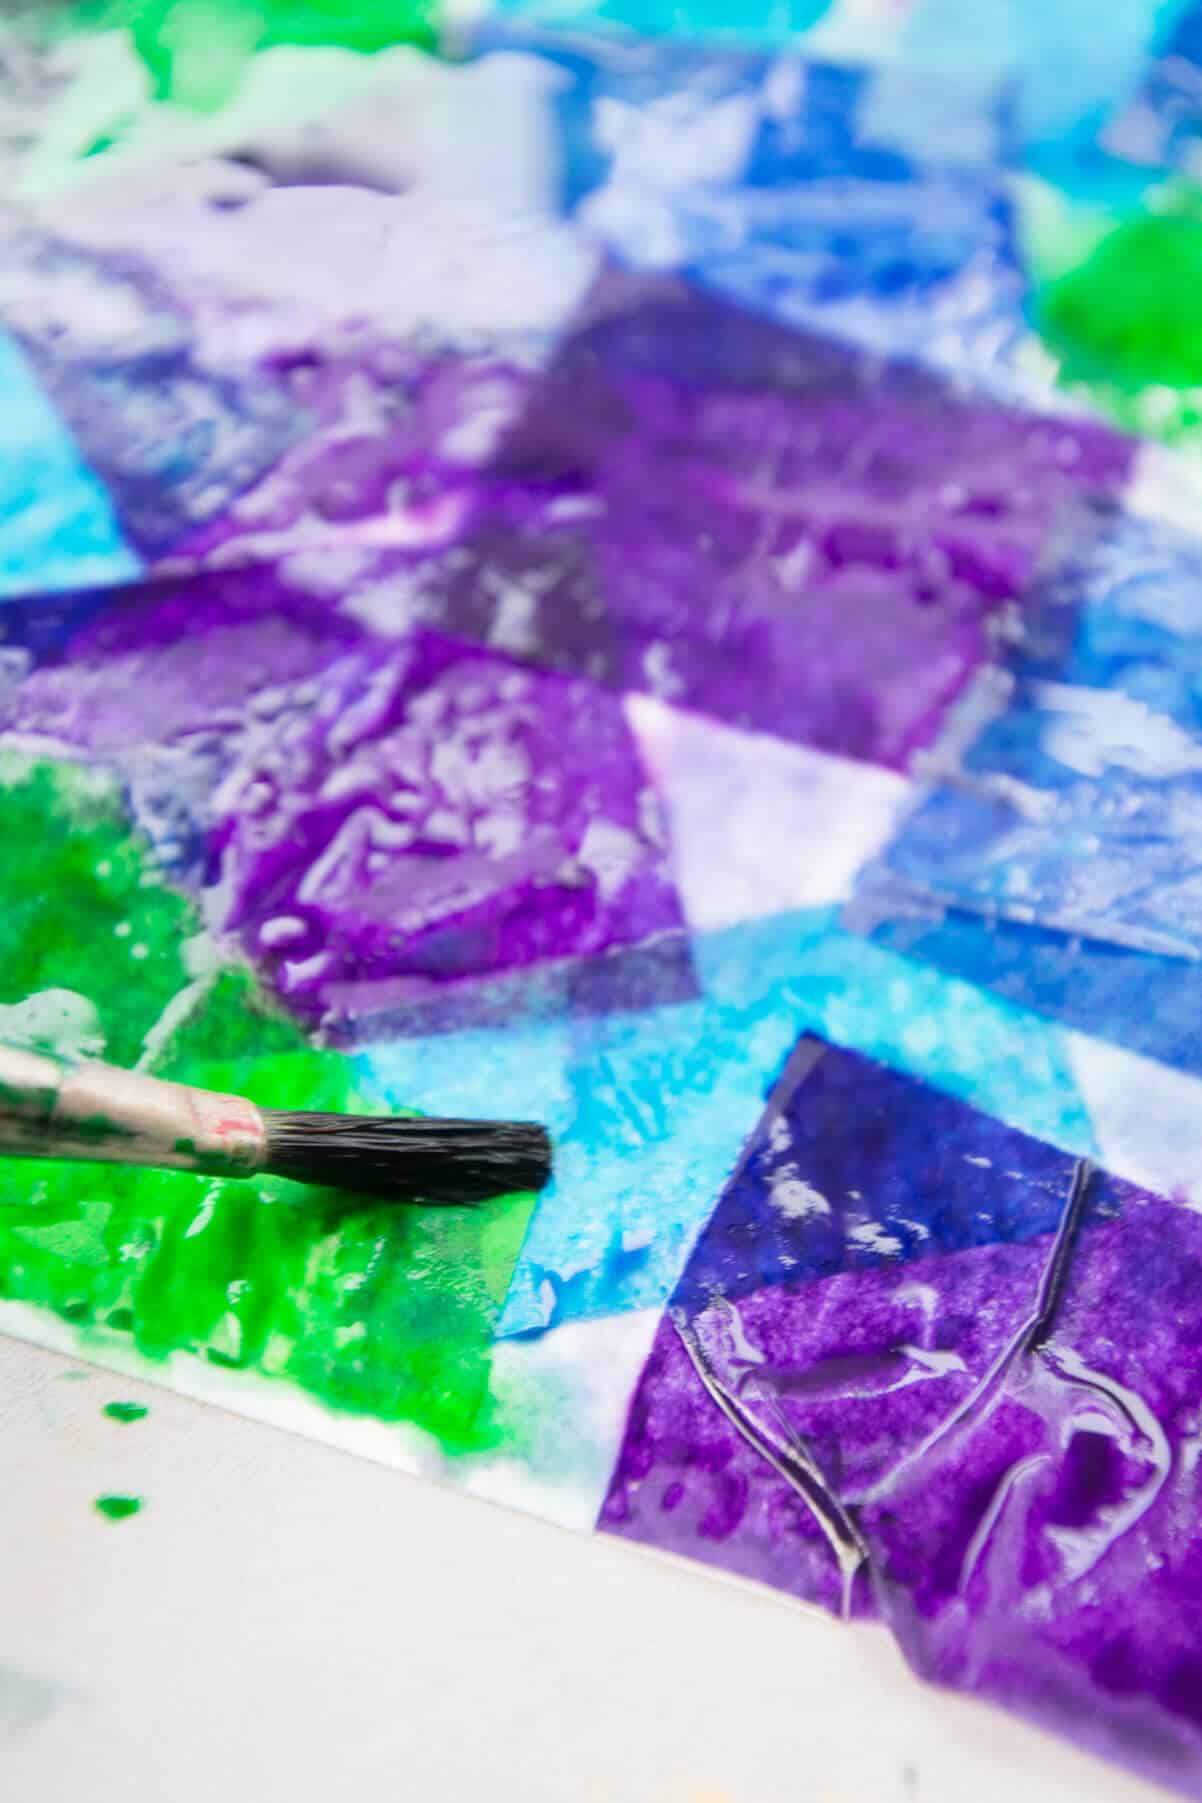
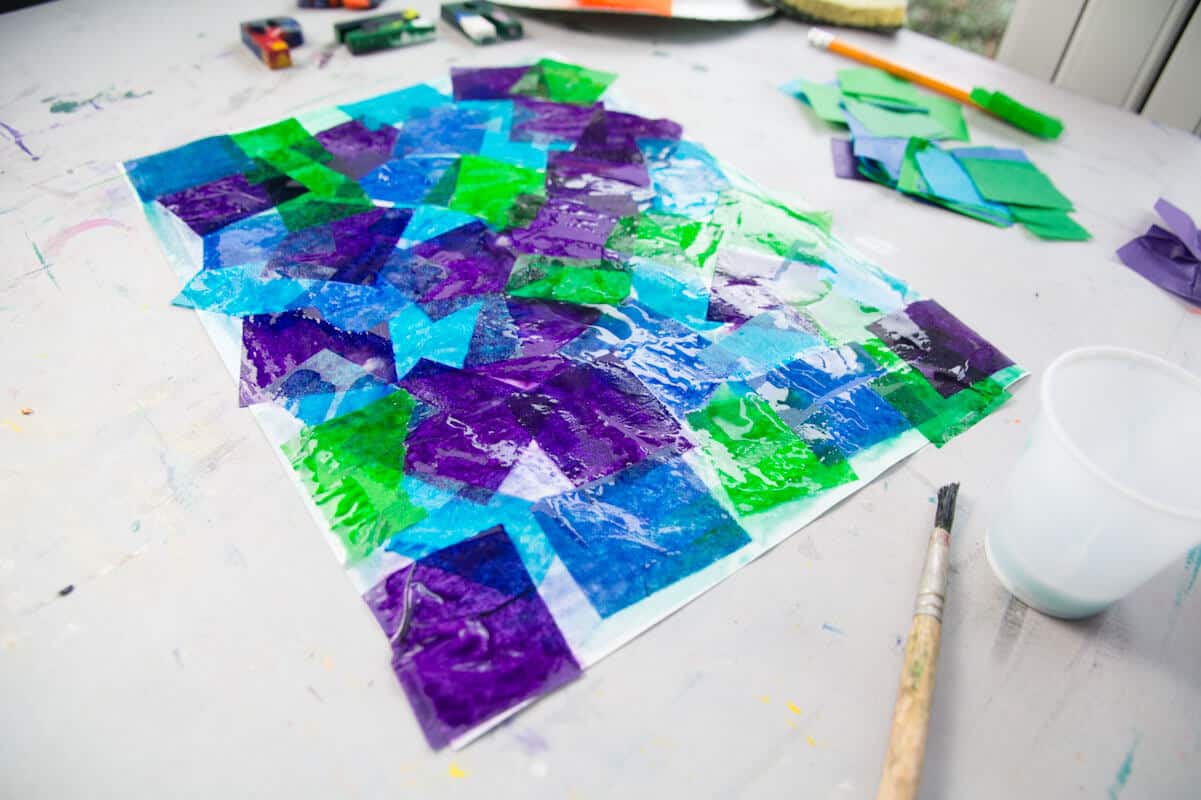
Step 1: Fill The White Paper With Bleeding Tissue Paper
To do this, you will put a 1″ x 1″ square of tissue paper on a piece of paper and paint the glue-water mixture over it. Keep repeating this and overlapping different colors until the paper is completely covered.

It can be difficult for kids to keep the paper completely flat, but encourage them to dab, dab, stroke, stroke over the paper and leave it once it is on.
Step 2: Let The Paper Fully Dry
The tissue paper collage will probably be pretty wet and take a while to dry.
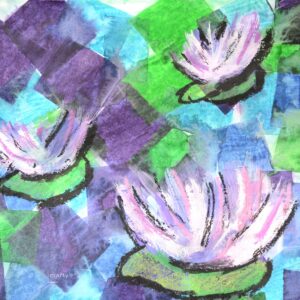
Step 3: Paint Water Lily Flowers
Use pink, purple, and white tempera or acrylic paint on a tray. Dip your brush into two colors and create repeated curved lines for each water lily flower.
ART TEACHER TIP – Do not give children water to rinse their brushes in between. You want the colors to mix naturally.

We recommend creating at least three different flowers in various sizes to help make the foreground, middle ground, and background.

Step 4: Let Dry
Step 5: Draw Lily Pads With Green Oil Pastels
With green oil pastels, create organic shapes around your painted lily flowers. Blending a little black or blue on the edge of your lily pad will also make it stand out.
ART DEMO – Our quick YouTube tutorial shows how we completed that step.

Follow us on Pinterest, YouTube & Facebook for more free art and craft ideas!
Art Lesson FAQs
If you are doing this project in a classroom setting, it will take 3-4 40-minute classes. If you are doing it at home, it can take up to 1 hour to complete.
Pre-cut squares are easier for children to use. However, this project looks better if you rip the bleeding tissue paper to create more organic shapes.
No, you can eyeball the mixture to get a 1:1 or 1:2 ratio of water to glue. You can probably even get away with 1/3 glue and 2/3s water, depending on the glue you are using.
RELATED PROJECTS
More Famous Artist Projects
Search our whole collection of artist-inspired projects, from Piet Mondrian to Eric Carle.
Remember that all kids’ art projects should be open to interpretation, and encourage each child to put their own spin on creating their masterpiece.
Do you like this art project? Please give us a 5-STAR review below ⭐️⭐️⭐️⭐️⭐️ and have fun being creative with your family.
Monet Water Lily Art Lesson
Equipment
- Paper Plate, Tray or Palette
Supplies
- Cool Colored Bleeding Tissue Paper blue, violet, green paper precut into 1" x 1" squares
- Glue Water Mixture 1:1 ratio of glue mixed with water in a small container
- 1 piece 9" x 12" Tagboard or Heavy White Drawing Paper
- Oil Pastels green and black or blue
- Tempera Paint Violet, Magenta and White
Instructions
- Create a tissue paper collage with cool-colored bleeding tissue paper and glue/water mixture. Fill the whole page with overlapping shapes.
- Let the background fully dry.
- Use pink, purple and white tempera or acrylic paint on a tray. Dip your brush into 2 colors and create repeated curved lines for each waterlily flower.
- Let paint fully dry.
- Create organic shapes with green oil pastels around your painted lily flowers. Blend a little black or blue on the edge of your lily pad to help it stand out.
Video
Notes
- It can be difficult for kids to keep the paper completely flat when collaging the tissue paper. Encourage them to dab, dab, stroke, stroke over the paper and leave it once it is on.
- We recommend creating at least 3 different water lilies in various sizes to help show foreground, middle ground and background.
- If there is not enough contrast between your water lilies and background, you can add a second coat of paint once the painting dries or use pink and purple oil pastels.