Easy Valentine’s Day Watercolor Painting Idea

Hearts are the perfect shape to practice your watercolor painting skills. Use our simple painting tutorial to make a fun Valentine’s watercolor painting. The best part is that this beginner-friendly painting can be done in less than 15 minutes!
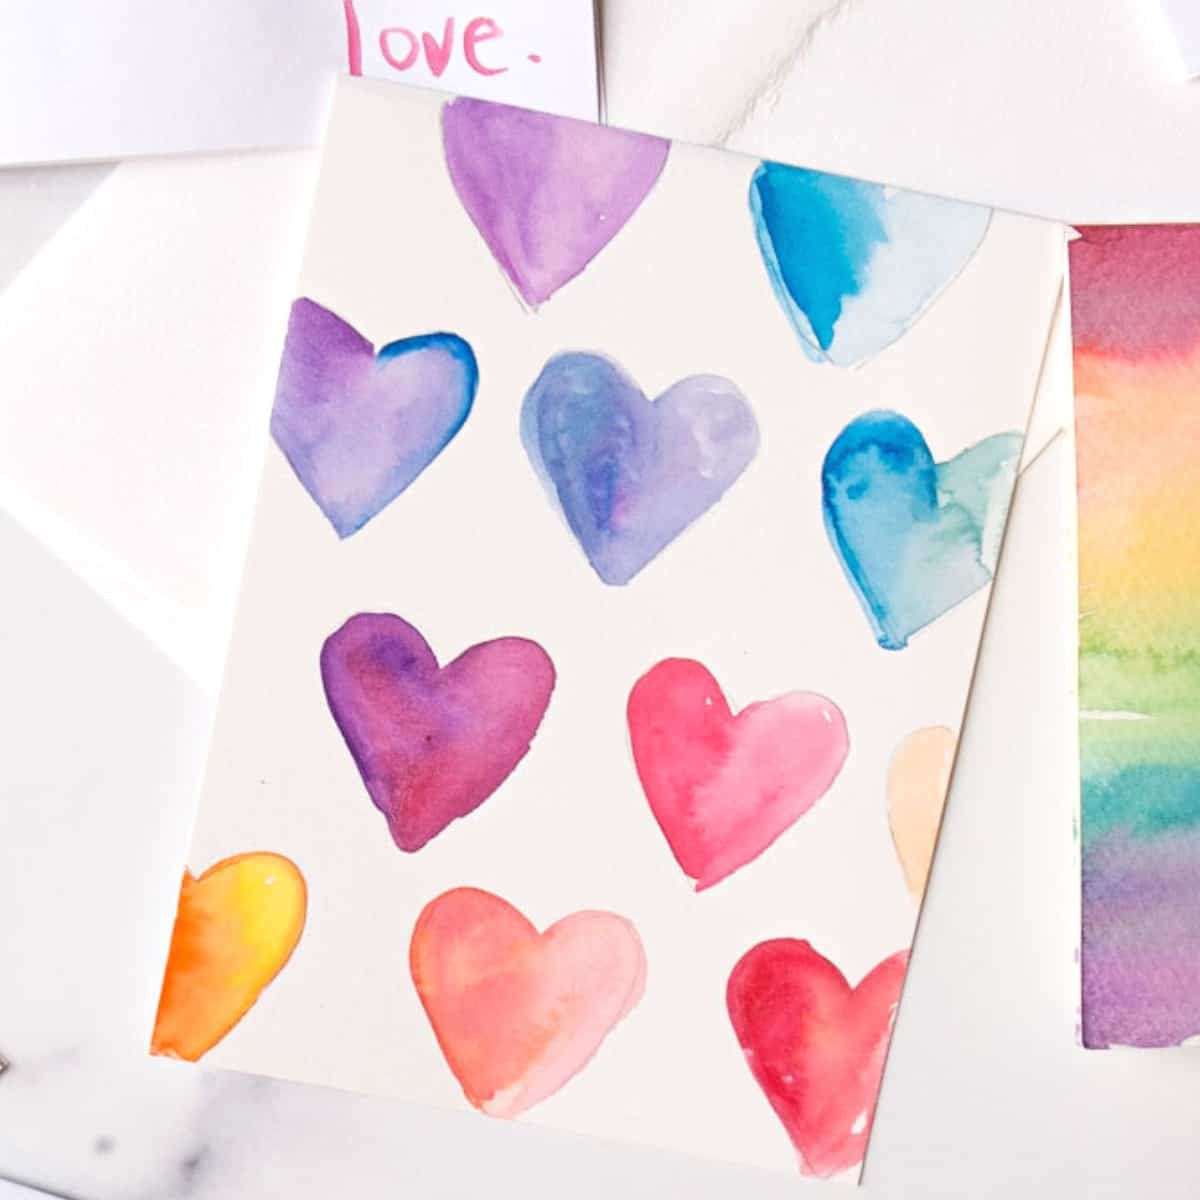
We love creating heart art projects with kids! From simple bleeding tissue paper hearts to preschooler-approved watercolor paintings, February is the perfect time to start creating. Adults and older children will love this easy painting idea! Time to start creating!
Notes About Main Supplies
Disclosure: This post may contain affiliate links when clicked, we may earn a small commission at no additional cost to you. Read our full privacy policy.
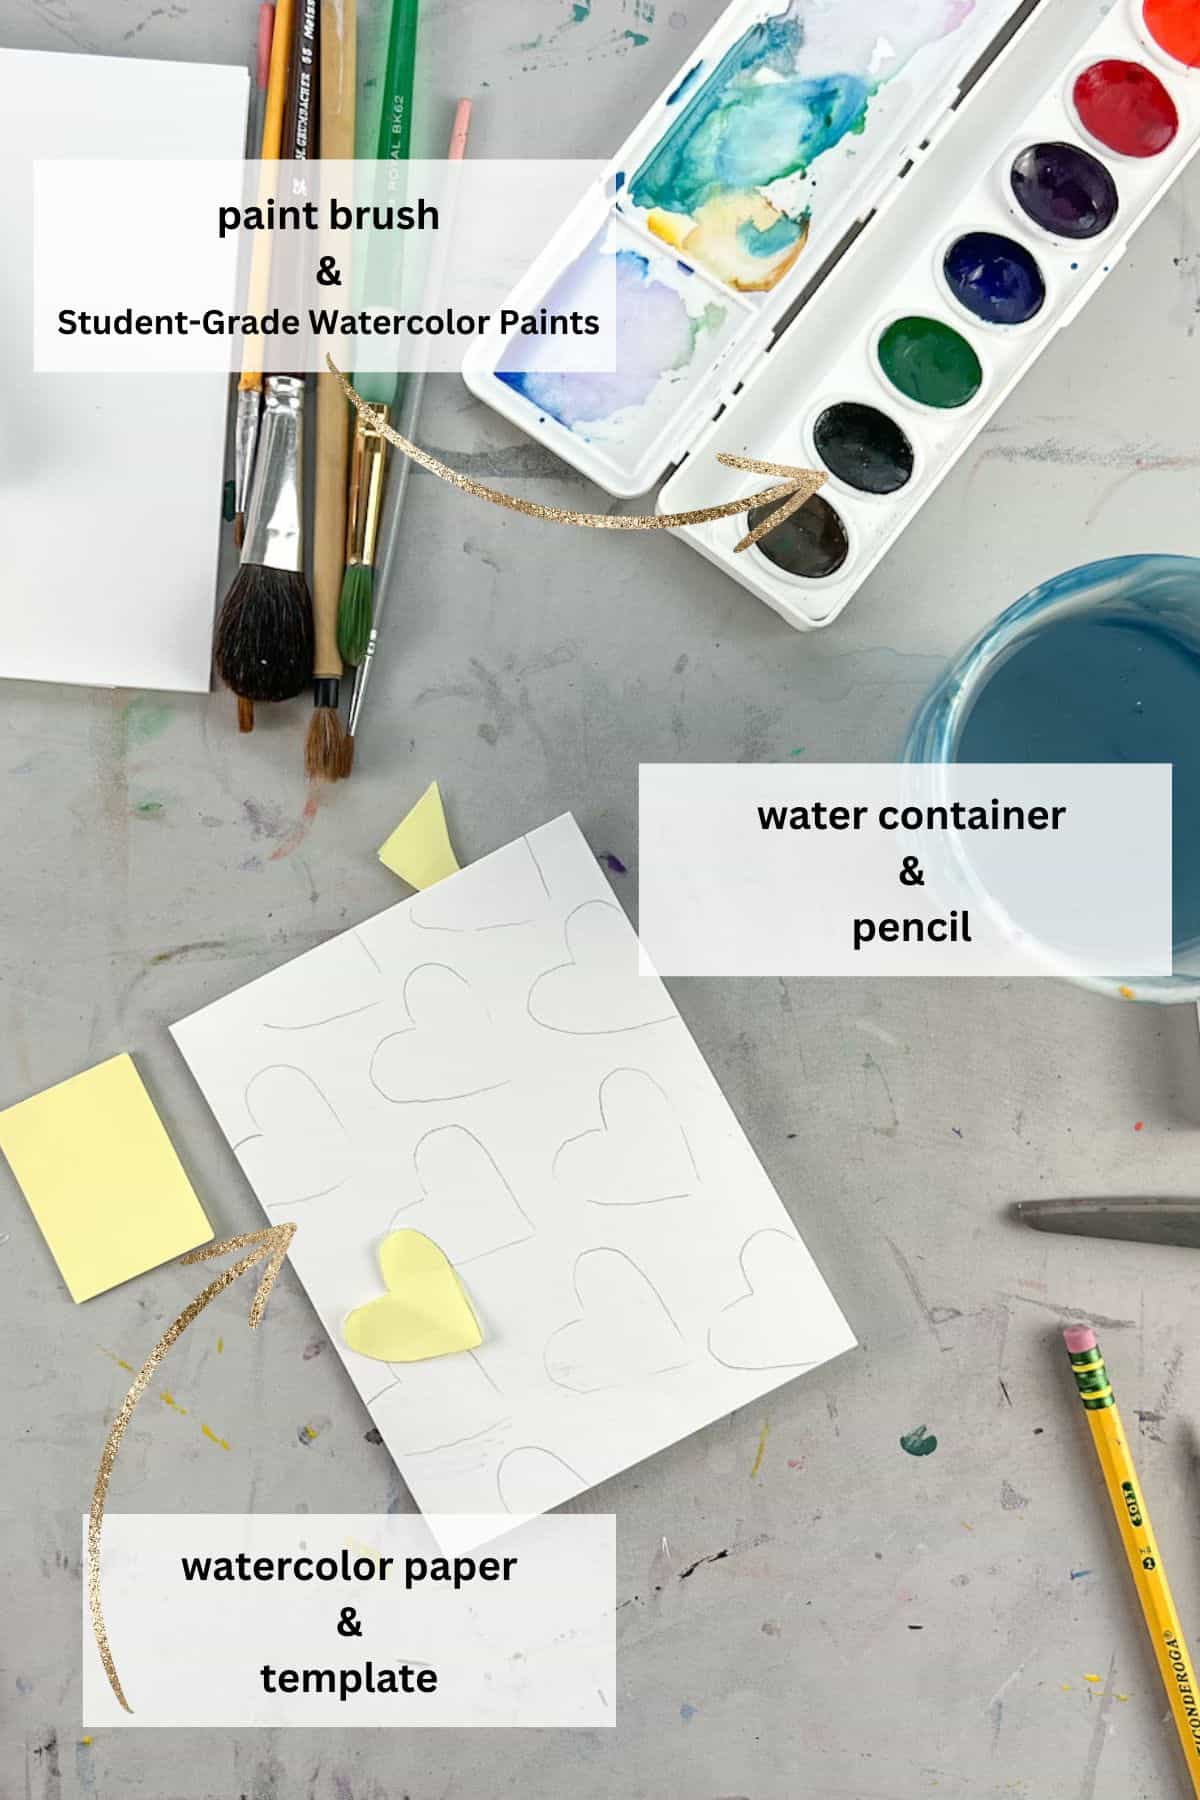
A complete list of supplies is found in the how-to card at the end of the post.
Plan Your Colors
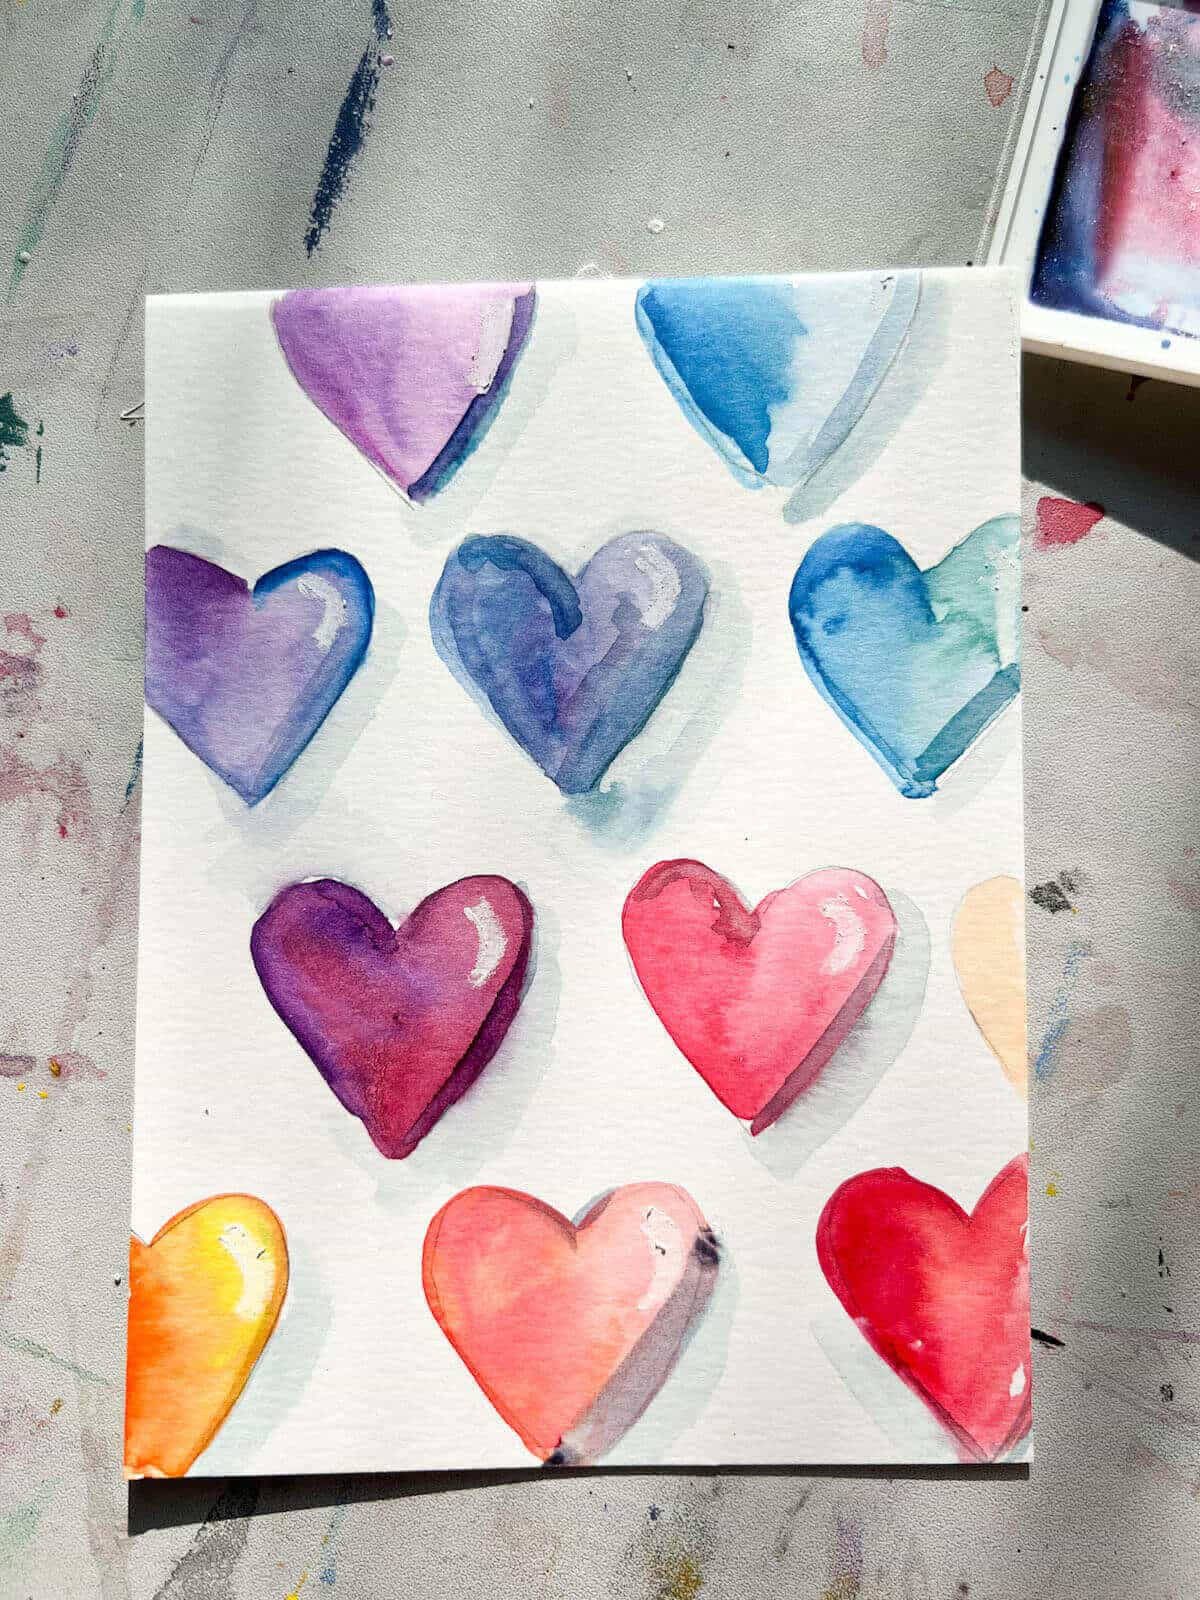
Choosing watercolor paint color combinations for each heart is the hardest part. Each heart will get two colors mixed together.
ART TEACHER TIP – Choose colors next to each other on the color wheel to create an ombré effect in our watercolor hearts.
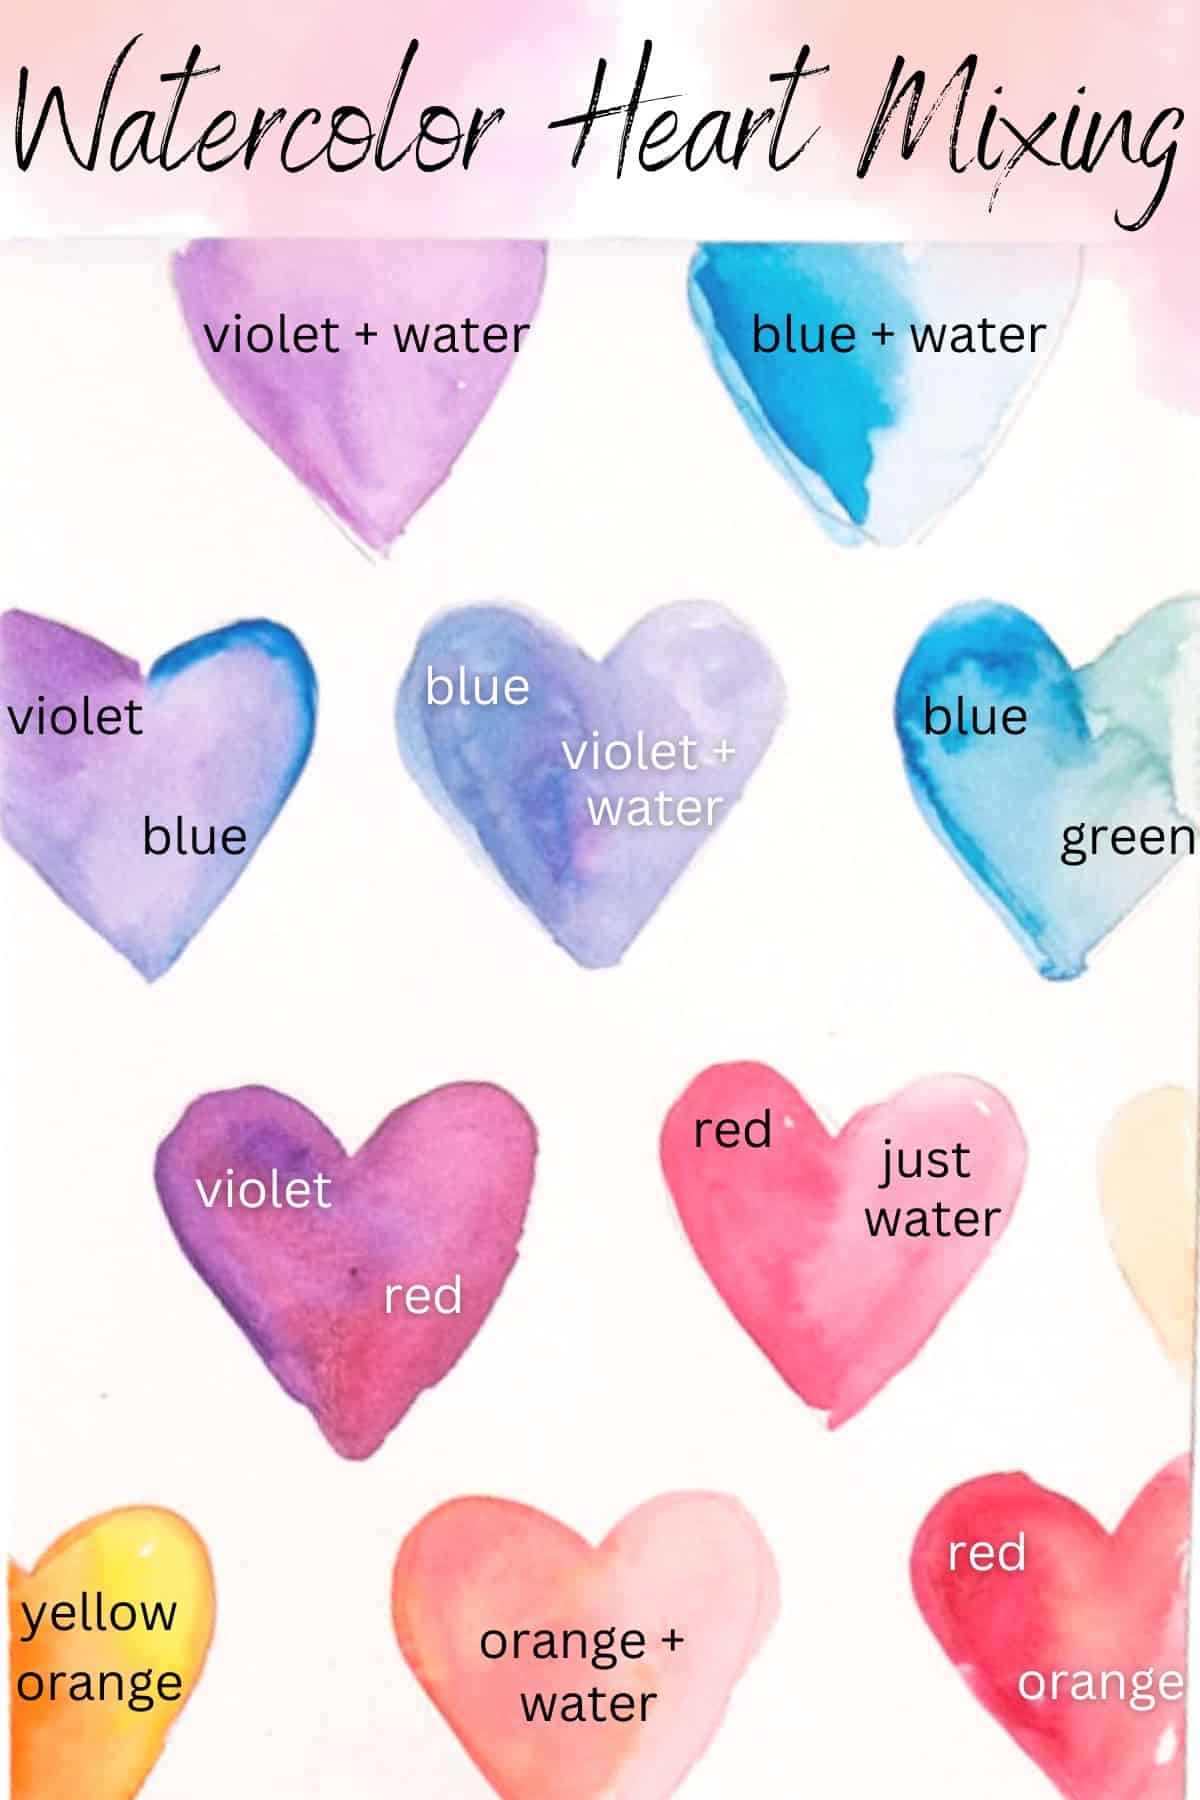
If you look at our painting, you can see that the top hearts are violet to violet blue and then blue. The middle and bottom hearts are red-violet, red, red-orange, orange and yellow-orange.
RELATED PROJECT IDEA – Have extra watercolor paint and tape? See how you can make a simple and easy winter watercolor landscape painting.
Rainbow Heart Watercolor Painting Tutorial
Before You Begin
Tape your watercolor paper to a cardboard or flat surface for best results. This will stop it from bubbling up while painting.
You can use regular painter’s tape or masking tape. Just be careful when you pull up the tape once your painting is dry.

Step 1: Cut Out A Small Heart
Cut out a small heart from a folded piece of paper.
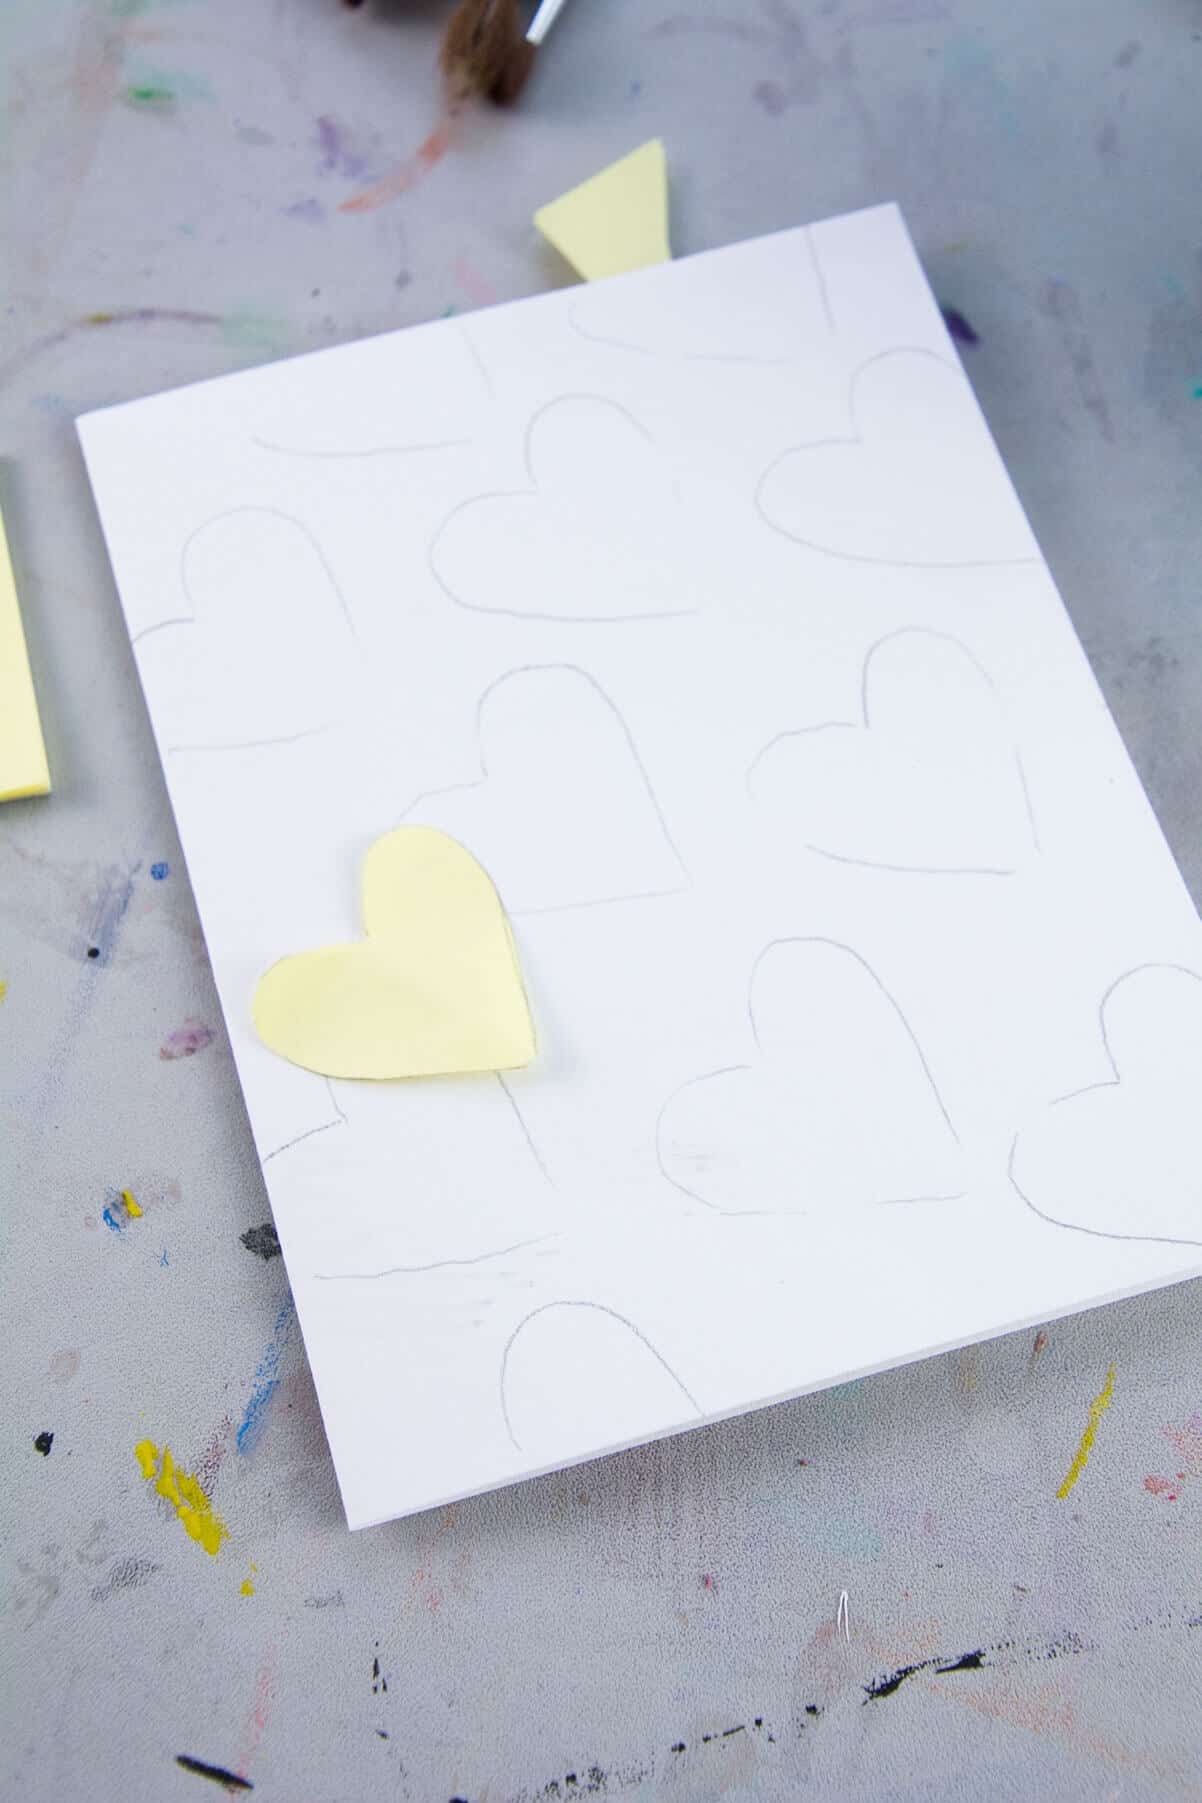
Step 2: Trace Multiple Hearts On The Paper
Lightly use your pencil to trace around the hearts. Start in the middle of the paper and try to space them out evenly. You could measure if you want, but we eyeballed it.
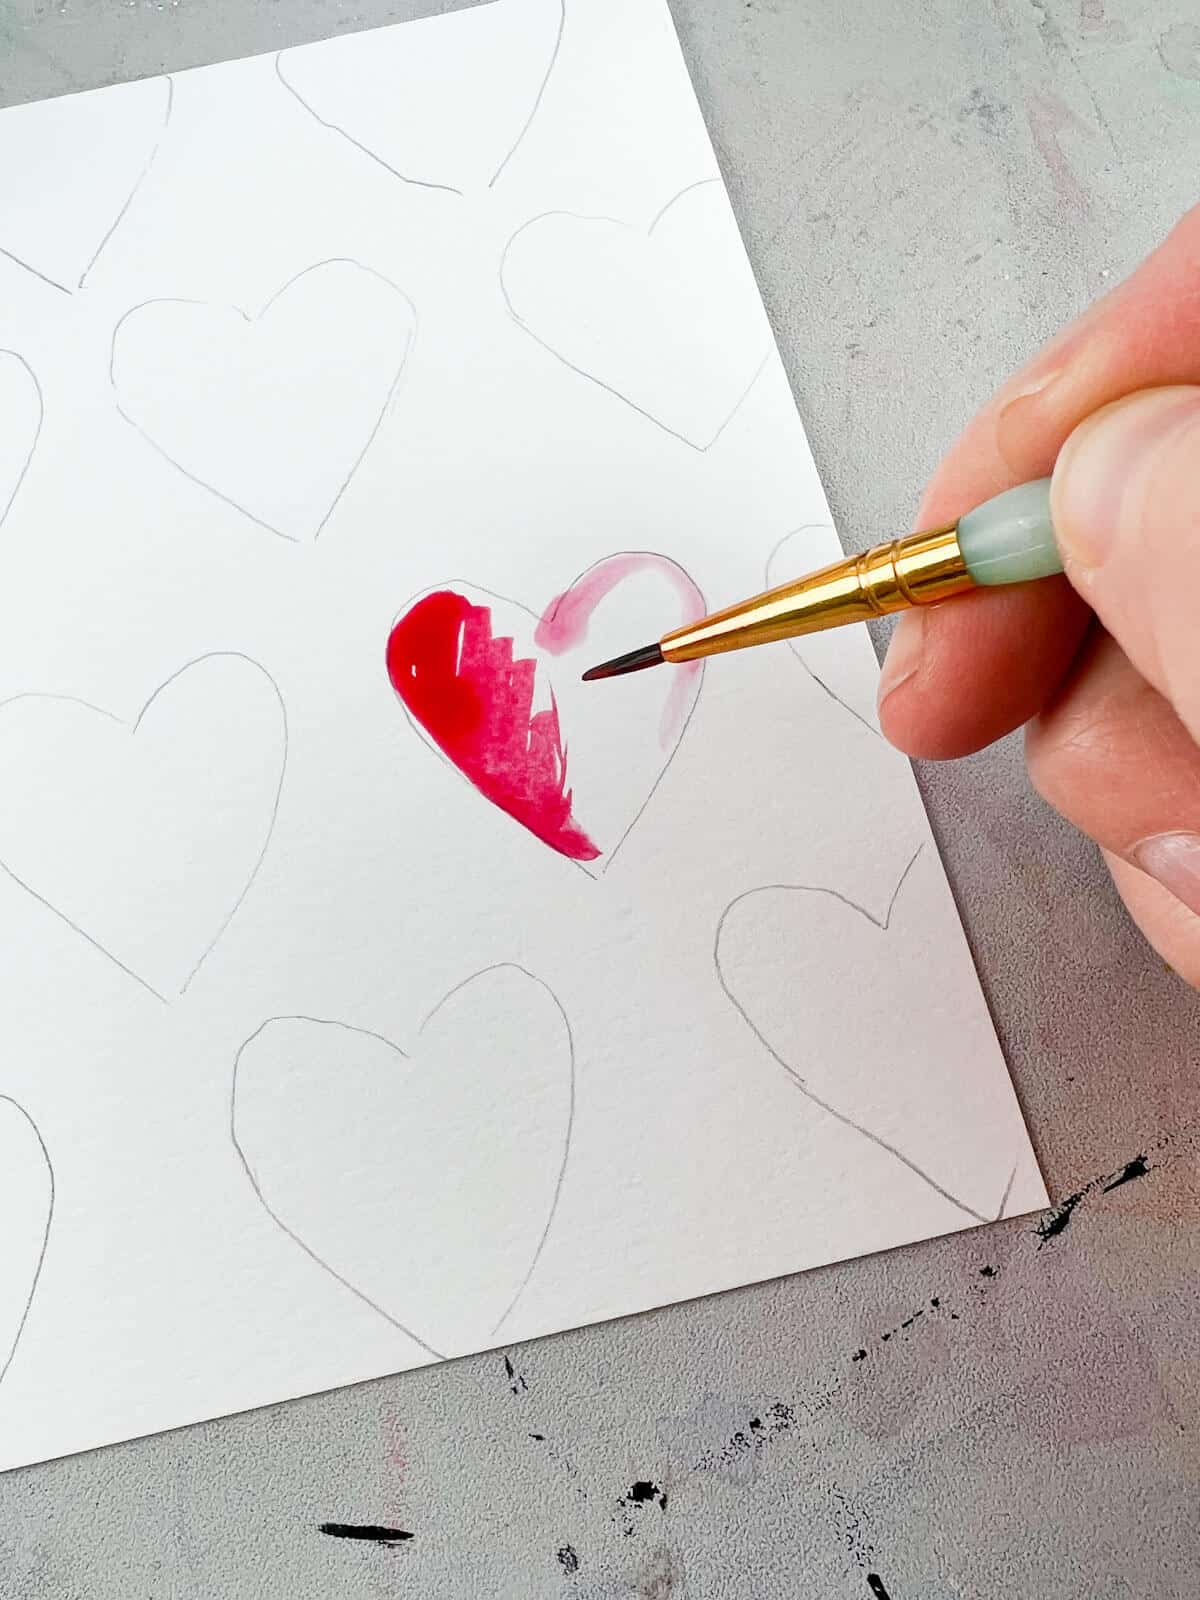
Step 3: Start To Paint Hearts
Each heart will get two colors or be diluted with water.
Start painting one side of the heart with red using a small brush. Add water to your brush and pull the paint to the other side.

Step 4: Repeat Painting All Hearts
Repeat this process, but use two colors next to each other. The labeled picture above can help you see what colors we mixed. You can change this idea to fit your color scheme.
Step 5: Let The Painting Dry

Optional: Add Details
You can see below how we added highlights and shadows to complete the painting.
Tips For Adding Highlights & Shadows
- For Shadows – If you want your hearts to look more 3-dimensional you could add a cool colored wash to the same side of each heart.
- For Highlights – You could use a white oil pastel or pen marker to add a bit of a crescent shape on the lighter side of the paint.

WARNING! Just be careful if adding shadows. We just liked the simple Valentine’s watercolor painting before adding shadows. With watercolor paint, sometimes less is more!
Follow us on Pinterest, YouTube & Facebook for more free art and craft ideas!
Extra Tips
- Regular heavier-weight white paper can work for watercolor paintings (especially with children) but you will have better success with actual watercolor paper.
- You can trace the hearts diagonally or straight across. Either pattern will work.


More Heart Art Projects
- COOL DIY CRAYONS: Learn How To Make Heart Crayons
- FUN CHALK DRAWING IDEA: Jim Dine Inspired Chalk Heart Art Lesson
- EASY ART: Fun Textured Tissue Paper Hearts For Kids
Have fun gifting that special someone this awesome watercolor card. You could even make this easy flower craft to go along with it.
Do you like this art project? Please give us five stars below 🤩🤩🤩🤩🤩 and have fun being creative with your family.
Easy Watercolor Valentine’s Painting

Equipment
- Small Paintbrush
- Pencil
Supplies
- Card Stock or Watercolor Paper
- Liquid Watercolors or Watercolor Palette
- Post-it or extra paper to make a small heart template
Instructions
- Cut out a small heart from a folded piece of paper.
- Lightly use your pencil to trace around the hearts. Start in the middle of the paper and try to evenly space them out.
- To start paint one side of the heart with red using a small brush. Add water to your brush and pull the paint to the other side.
- Repeat this process, but use two different colors that are next to each other.
- Let paintings dry completely.
Optional Steps
- Use a white oil pastel or pen marker to add a little crescent shape on one side of the top of the heart.
- Add a cool colored wash to the same side of each heart.
Notes
- You can change the watercolor paint colors to fit your own color scheme.
- Less is more with watercolor sometimes. Don’t overwork the hearts.
- You can trace them diagonally or straight across. Either pattern will work.
- If making Valentine’s cards from your paintings, consider buying premade watercolor cards.
interesting and affordable options. It would also be helpful to know price of whole craft experience
Hi Eli. Thanks for the feedback. I guess it depends on what supplies you already have and what you might have to purchase or the quality of paper you want to use on your watercolor heart painting.
thanks so much for this wonderful tutorial!
Hi Erin,
Thank you for the simple tutorial. I’m not ready for too much shading so I’m glad it isn’t necessary. Last time I painted with watercolors I was in high school…(40 years ago).
I also wanted to say hi because my maiden name is Nutter, which isn’t very common.
Take care!
Amy
Hi Amy. It is nice to meet you. Yes, just have fun painting. The best part about anything we post is that you can always change it to fit your style and skills.