Easy Chalk Pastel Heart Art Project
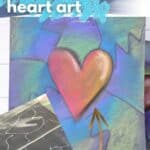
Chalk pastels are a fun medium for children to learn to use. This beginner-friendly project is perfect for experimenting with this new material while making chalk pastel heart art.
Disclosure: This post may contain affiliate links when clicked, we may earn a small commission at no additional cost to you. Read our full privacy policy.
Why You Will Love This Art Idea
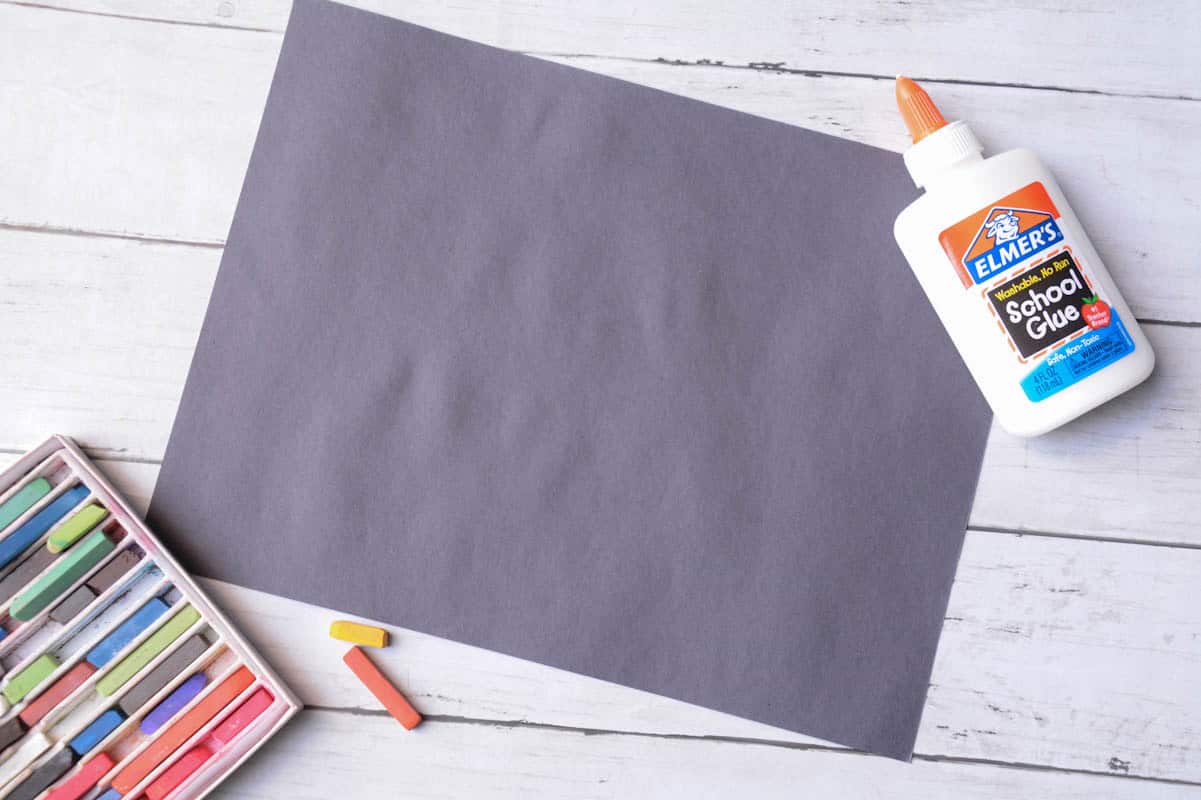
Recommended Supplies
- Chalk Pastels (we used Nu-pastels)
- 9″ x 12″ Tru-Ray Black Construction Paper: trust us, this is the best construction paper that will not fade and is a heavier weight than others you will buy
- Glue Bottle
- 12″ x 18″ Extra Paper: for under the projects when working
Optional Supplies
- Pencil: if you would like to sketch first
- Blending Stump or Paper Towel for blending
Do you need another project idea that uses the same supplies? Check out our fun chalk art name lesson, perfect for the beginning of the school year.
Why do we use Nu-Pastels?
When I inherited an art room, there were so many sets. However, once I started using them with children, I realized why. They last a long time and come in a variety of colors.
What artist do we use as inspiration?
- Keith Haring: show an image of some of his artworks with hearts and action lines. Children should be able to interpret different feelings about what those lines mean. We love using this Keith Haring book with children (they think it is super funny).
- Jim Dine: uses simple heart shapes and a lot of colors in his heart paintings.
You can start a conversation about how a simple heart shape can convey messages and ideas in different ways.
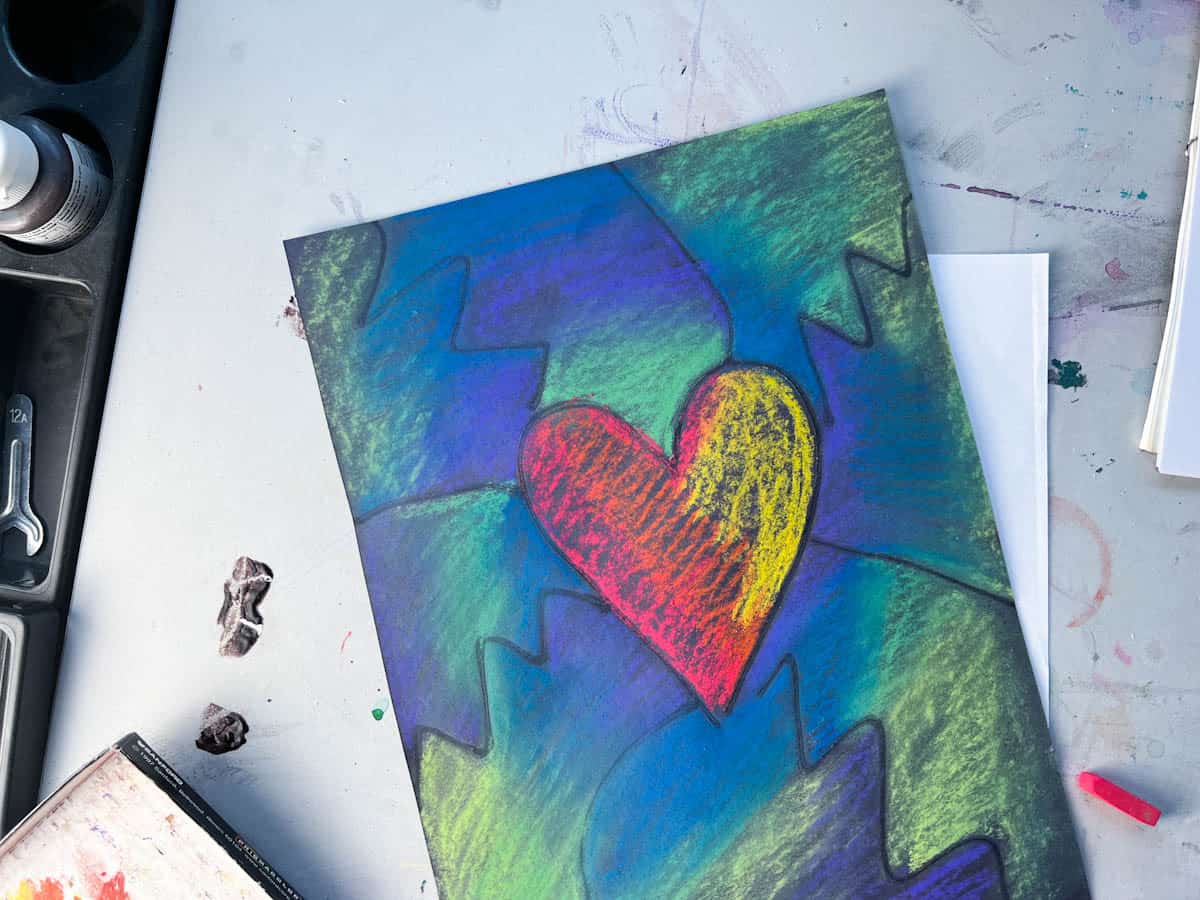
How To Create A Chalk Pastel Heart Art
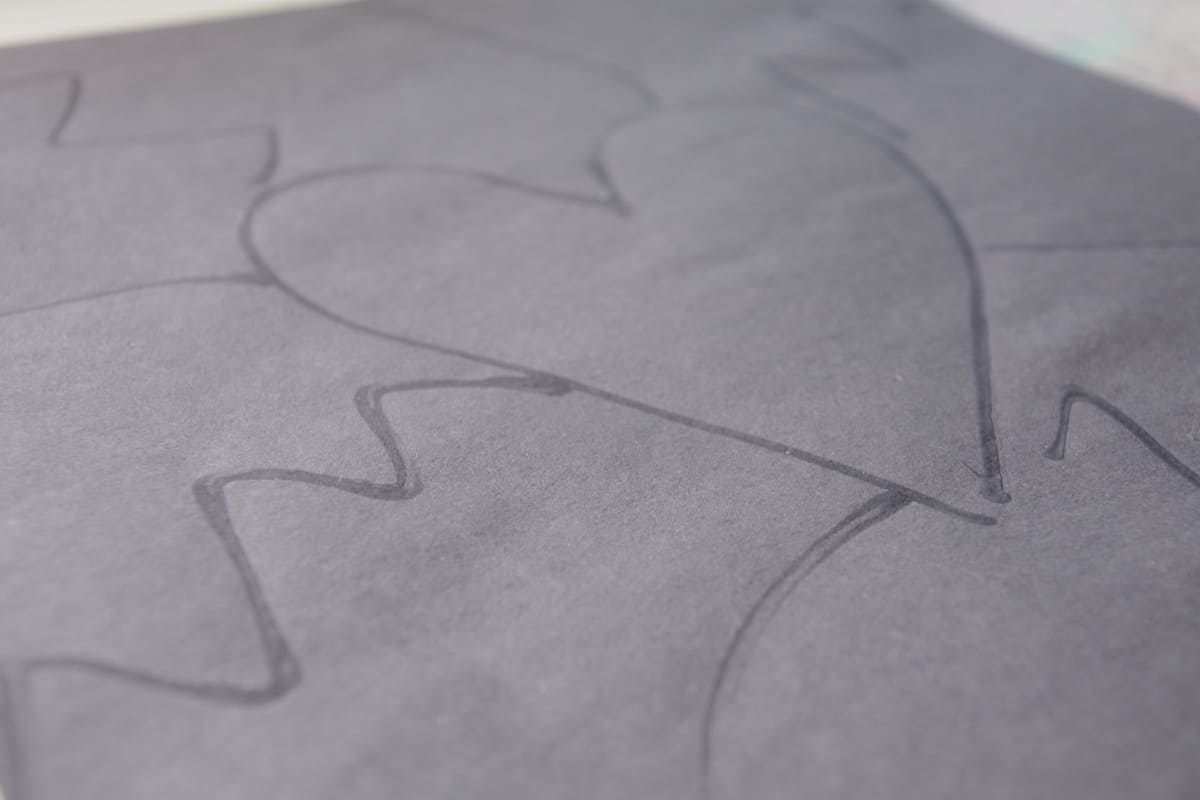
Step 1: Draw A Heart With Glue
Use a glue bottle in the center of your page to create a large heart. We love when there is a variety of heart shapes and sizes. Encourage each drawing to be unique.
Step 2: Add Action or Pattern Lines
Add 8-10 zigzag, straight or wavy lines radiating out from the heart.
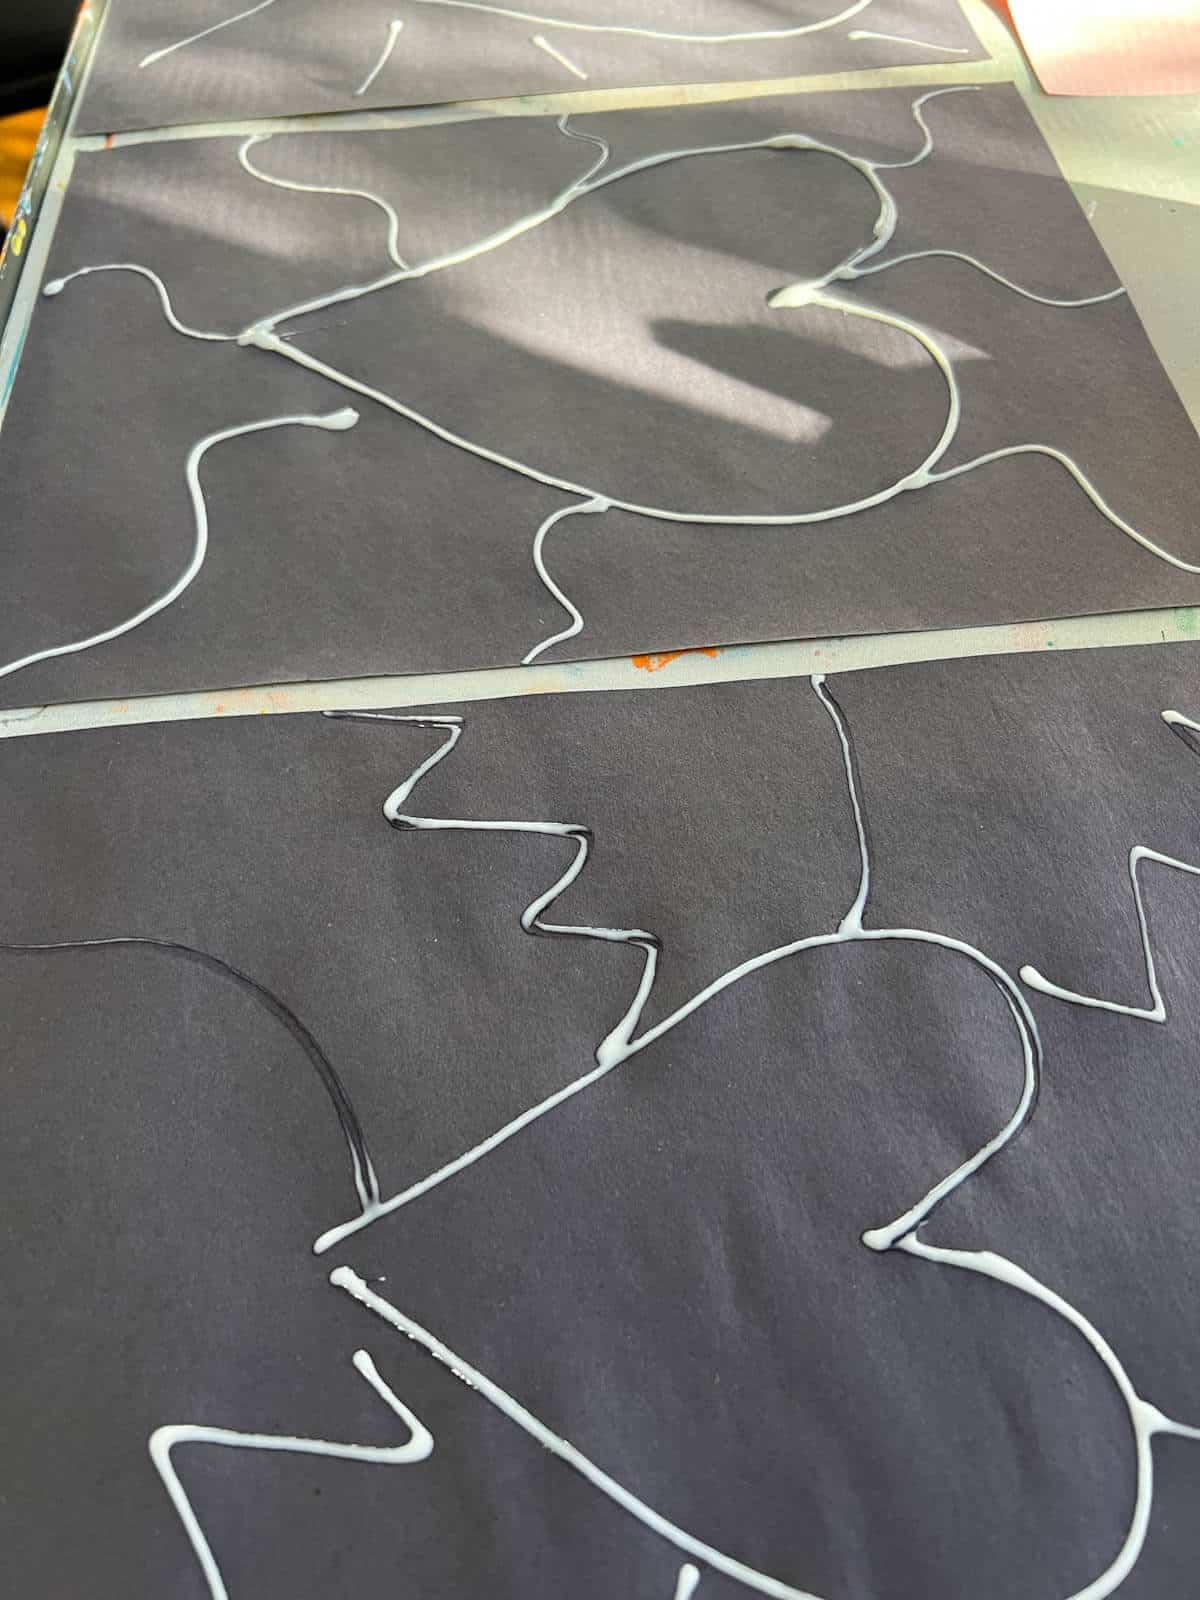
Step 3: Let The Glue Dry
Make sure you place the glue drawings in a flat space to fully dry.
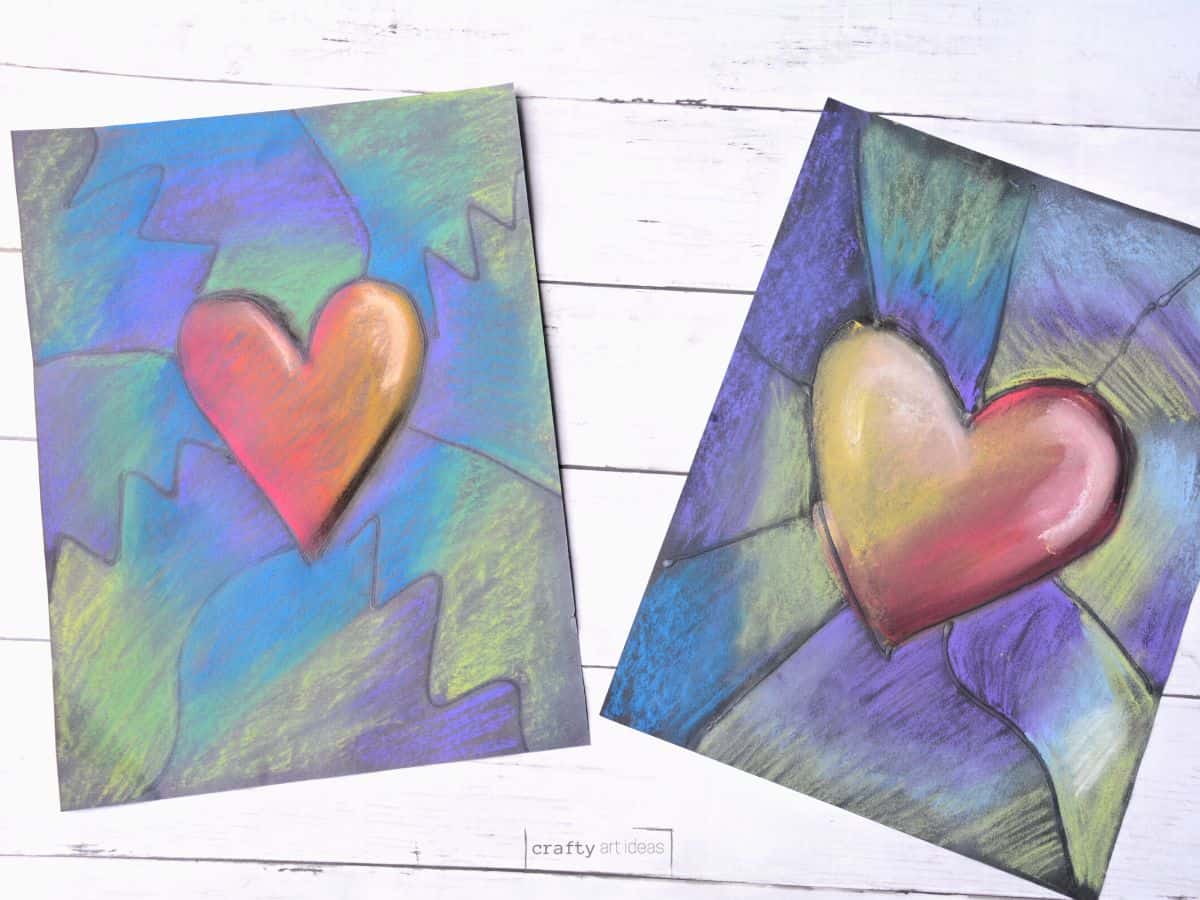
Step 4: Add Warm Or Cool Colors To The Background
Lightly color with chalk pastels. You do not need a ton of color to get a fun look. Work with an extra paper under projects to help with the mess.
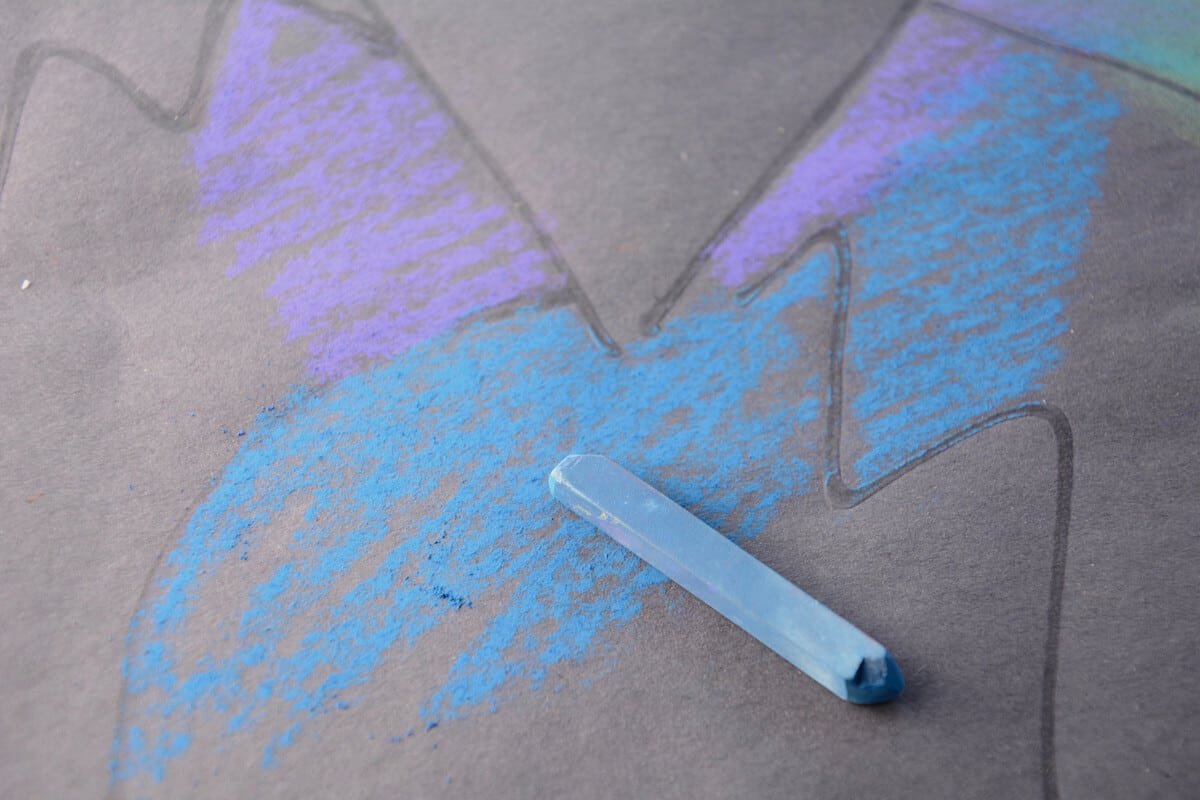
Use your finger, paper towel or blending stump to mix colors.
Step 5: Continue Working On The Background
Keep working on the background with the same set of colors (warm or cool).
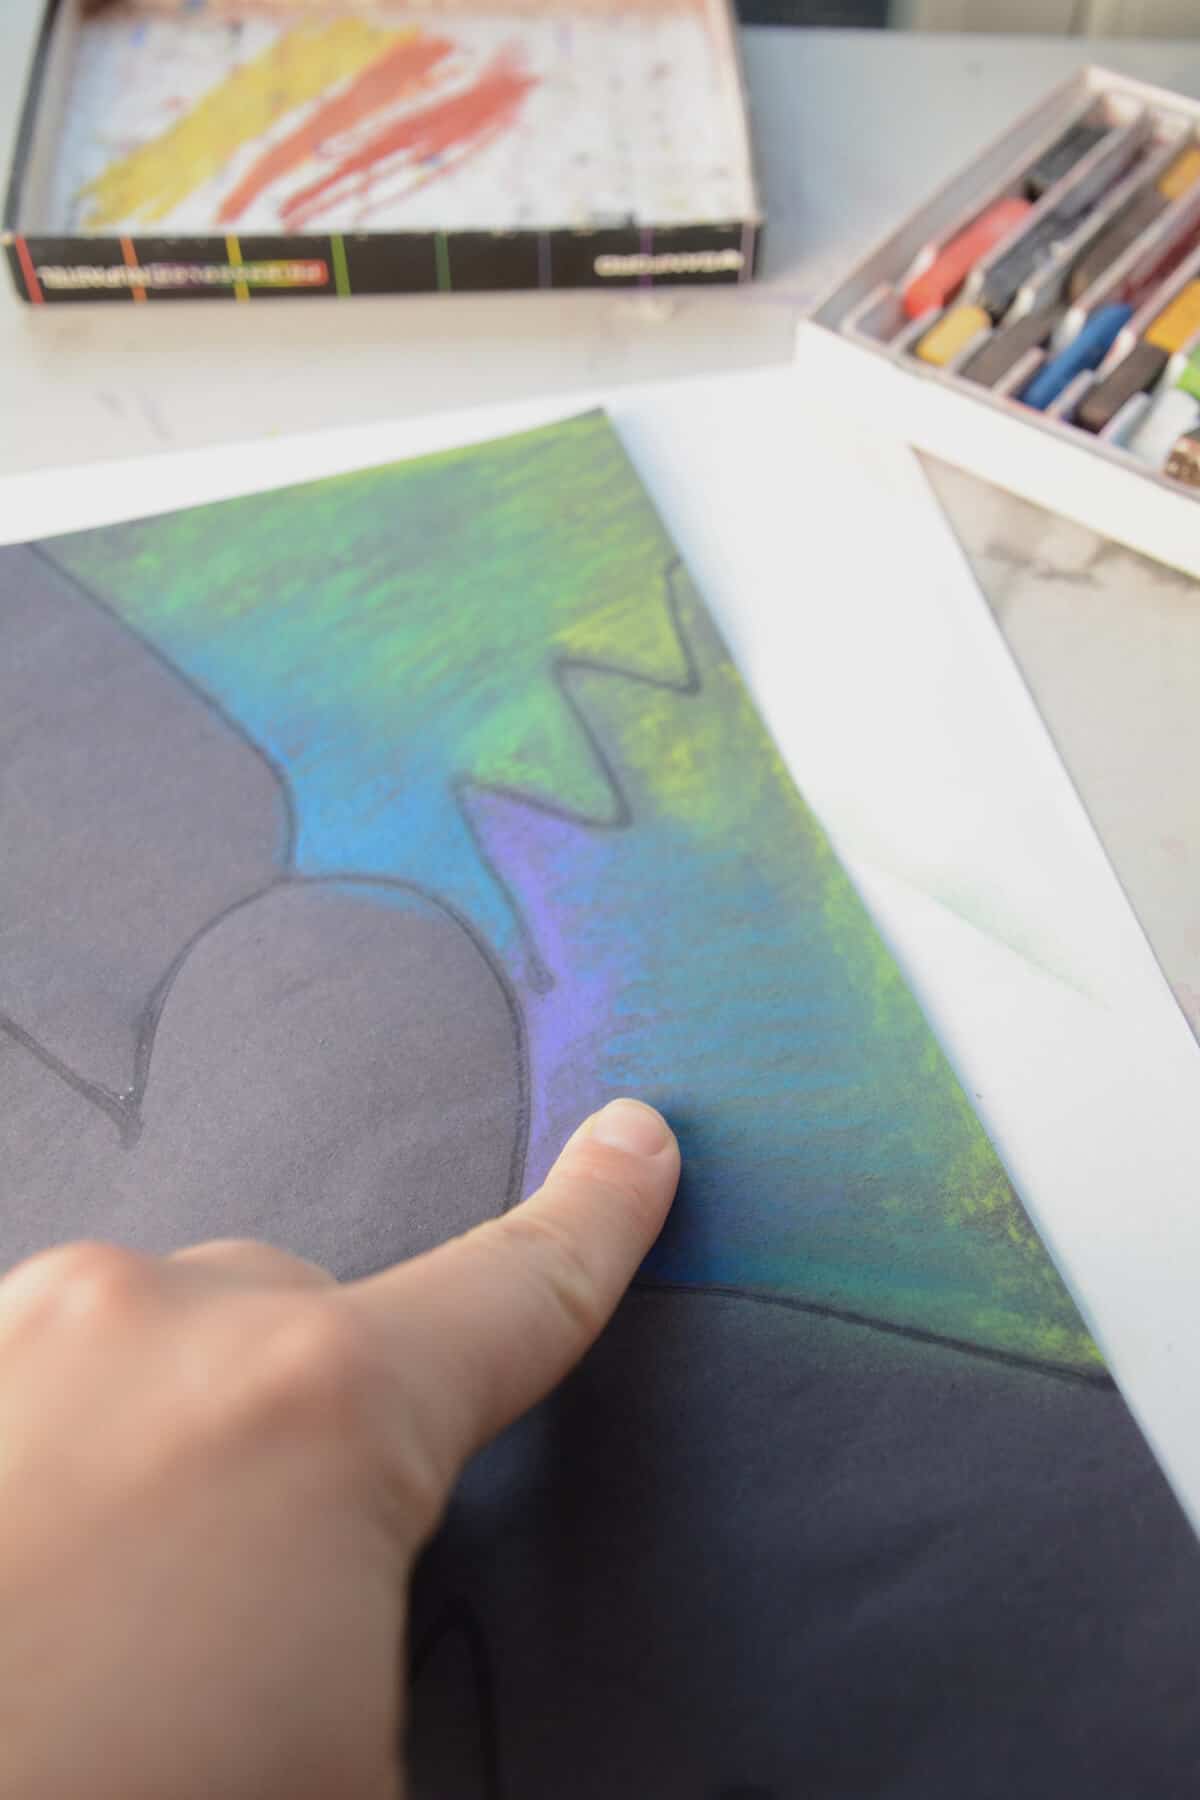
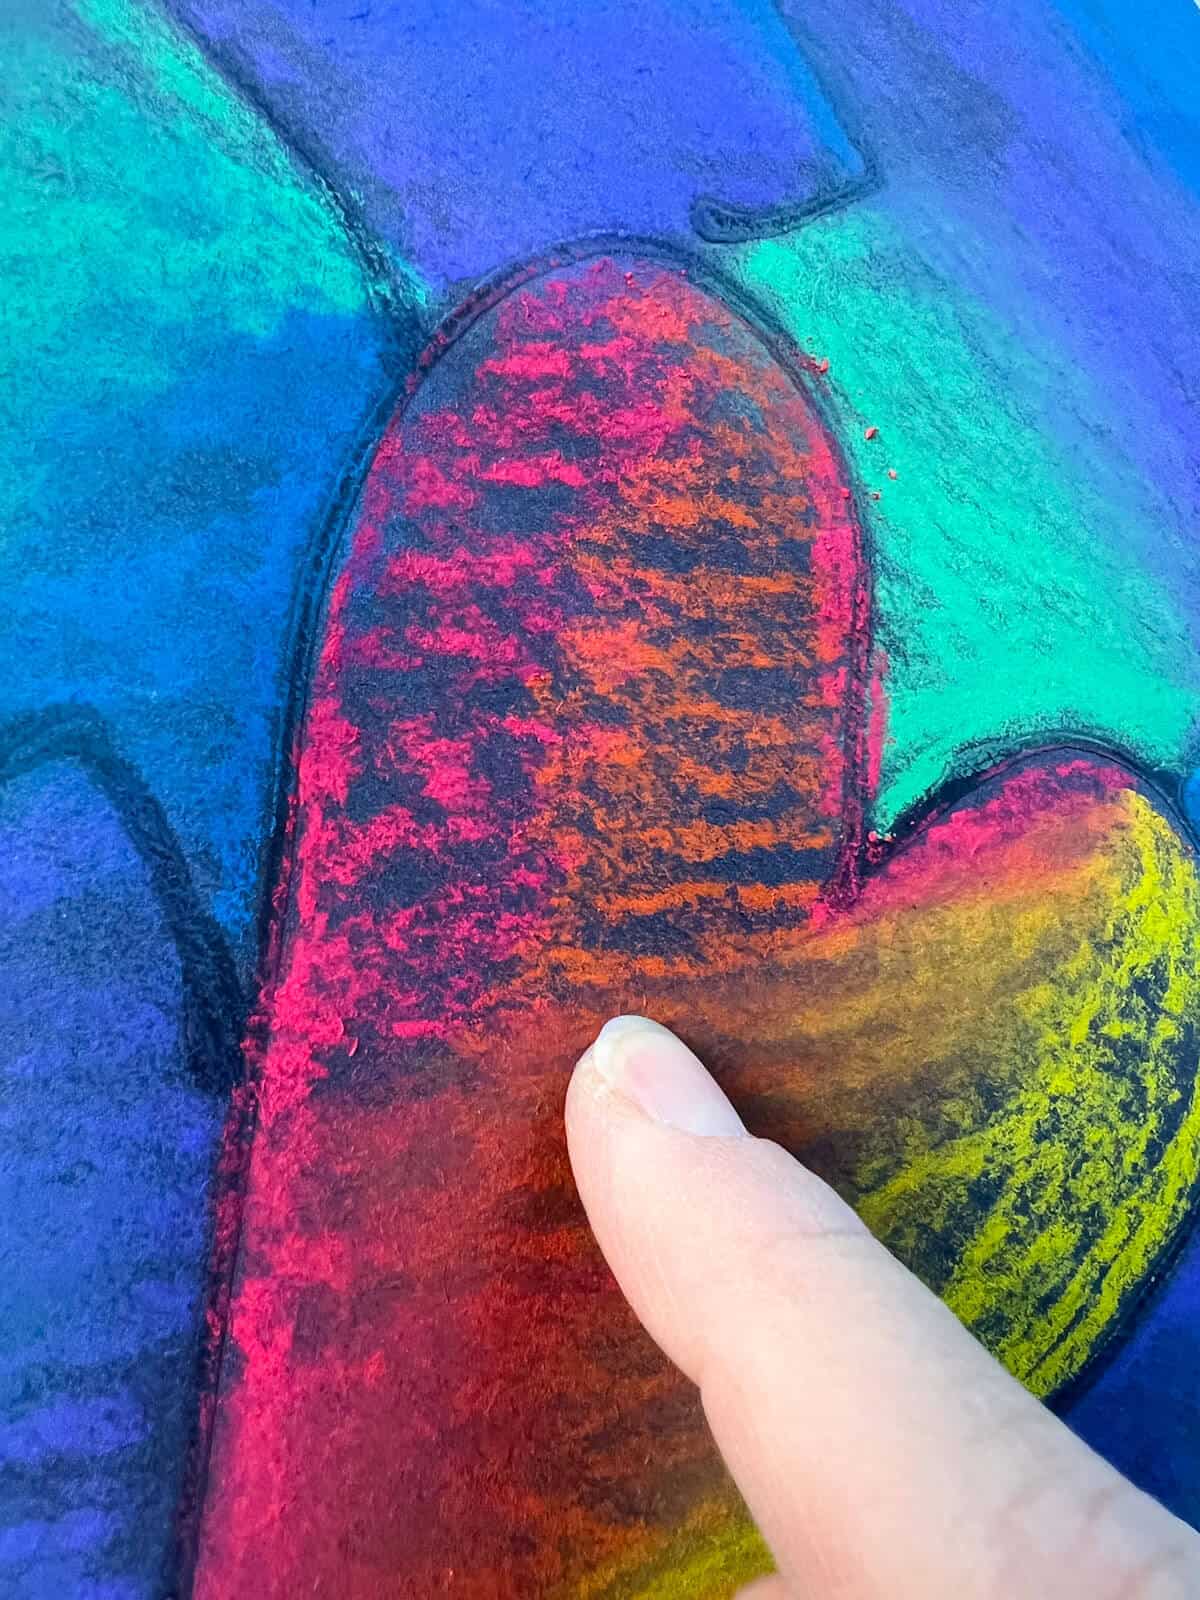
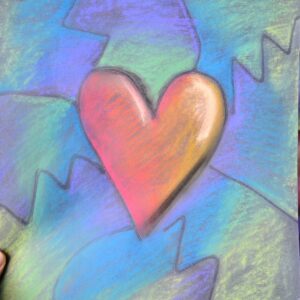
Step 6: Add Opposite Colors Inside The Heart
Lightly add the warm or cool color inside the heart. When you blend, overlapping colors will create a fun new color.
Blend with your finger, paper towel, or blending stump.
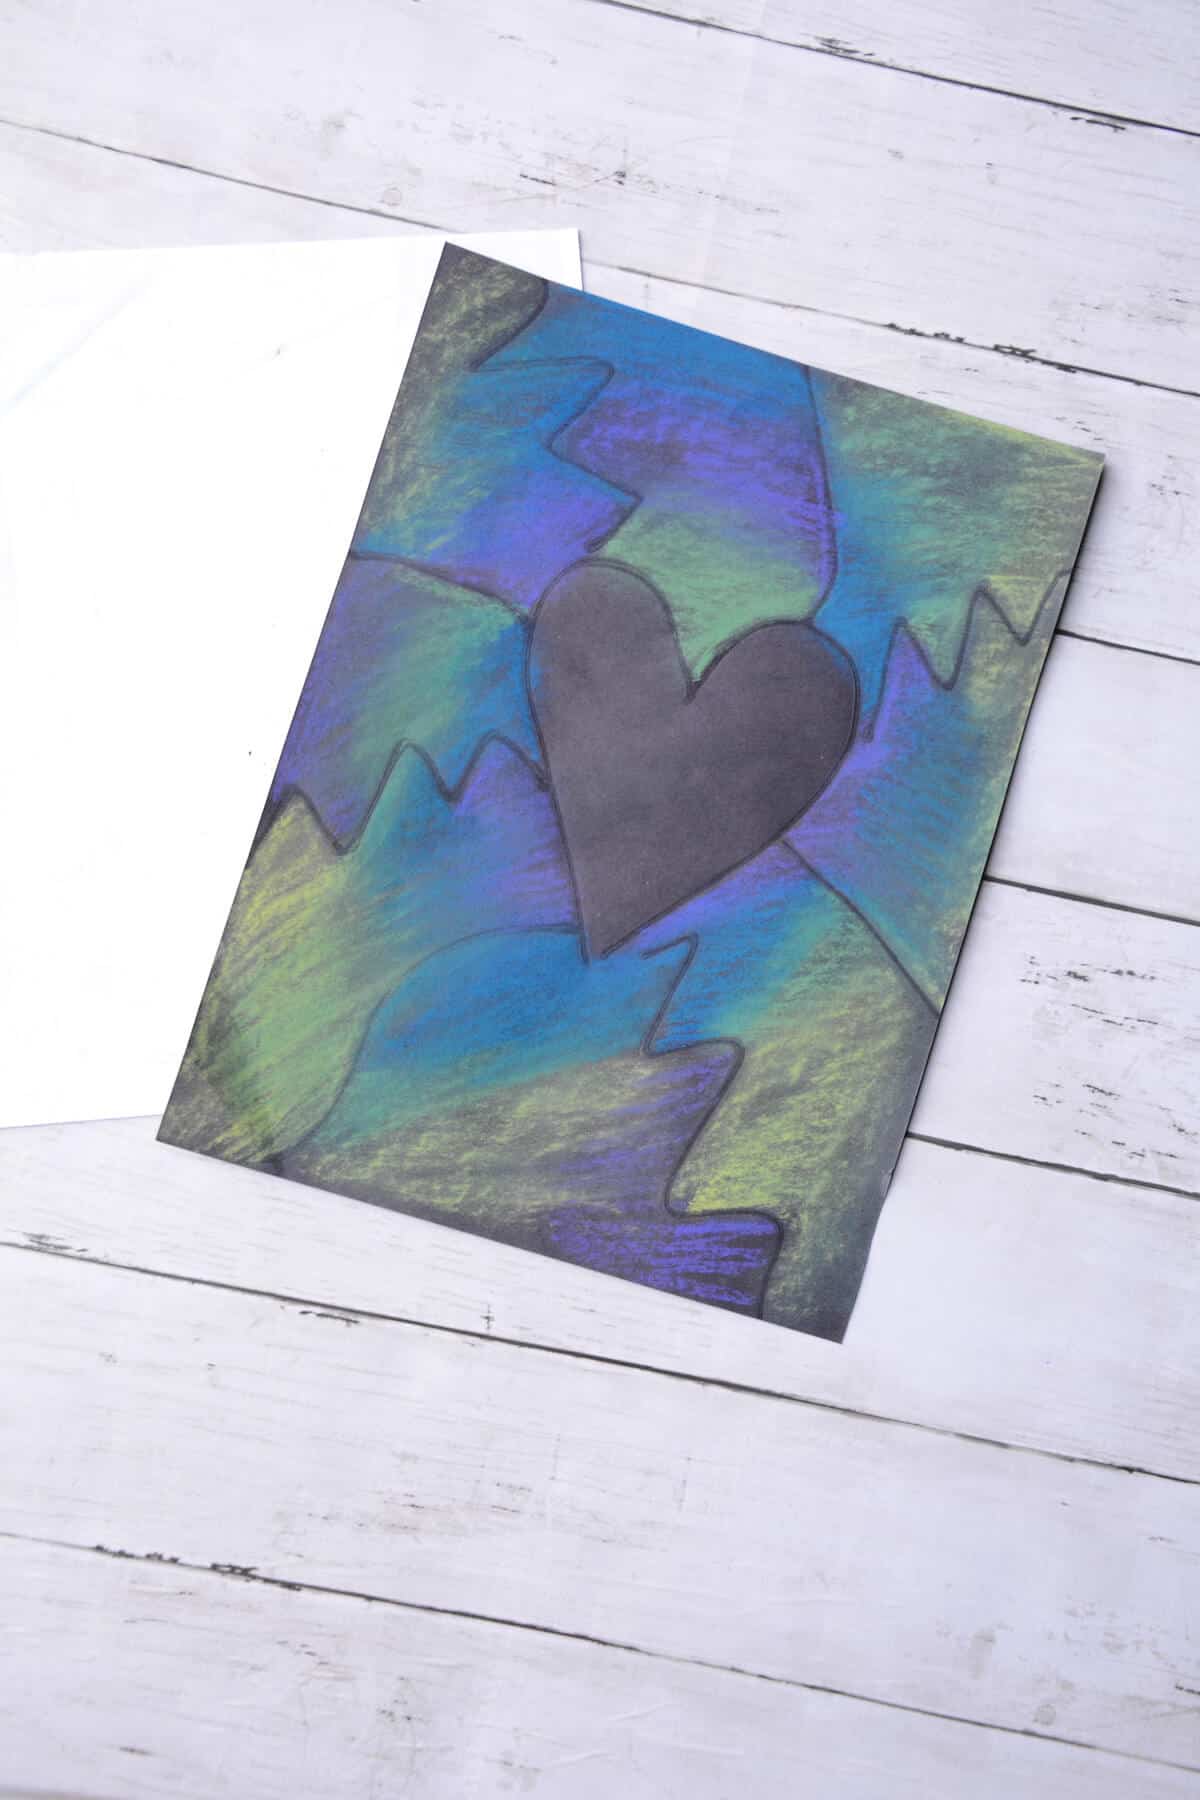
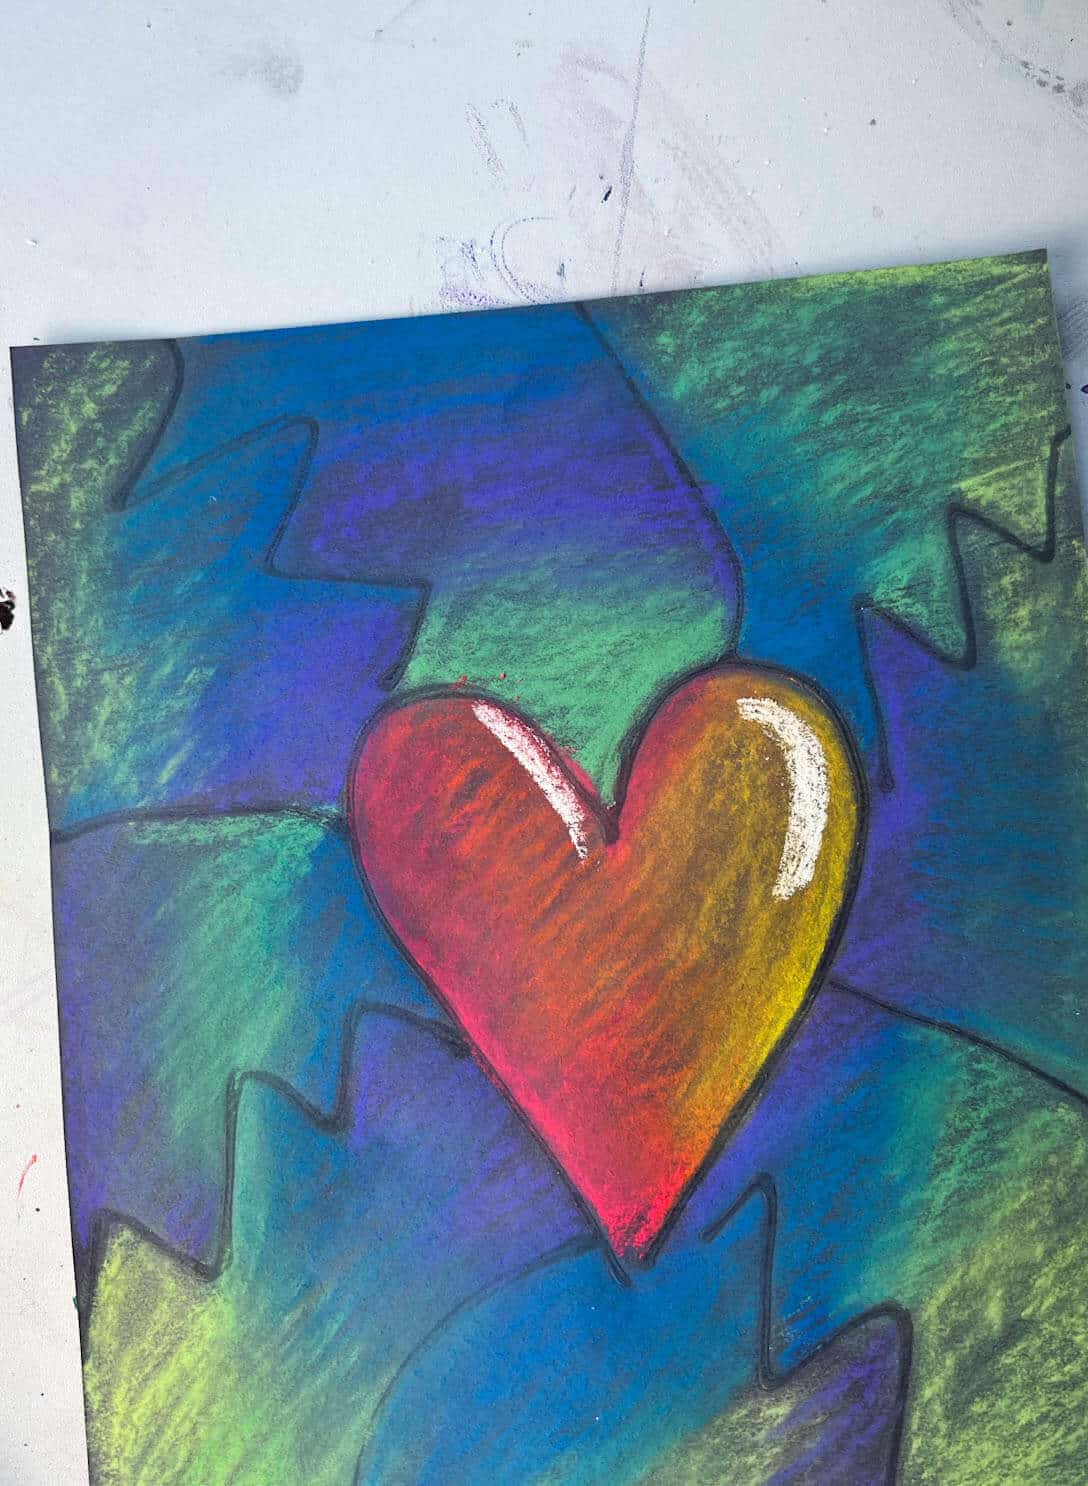
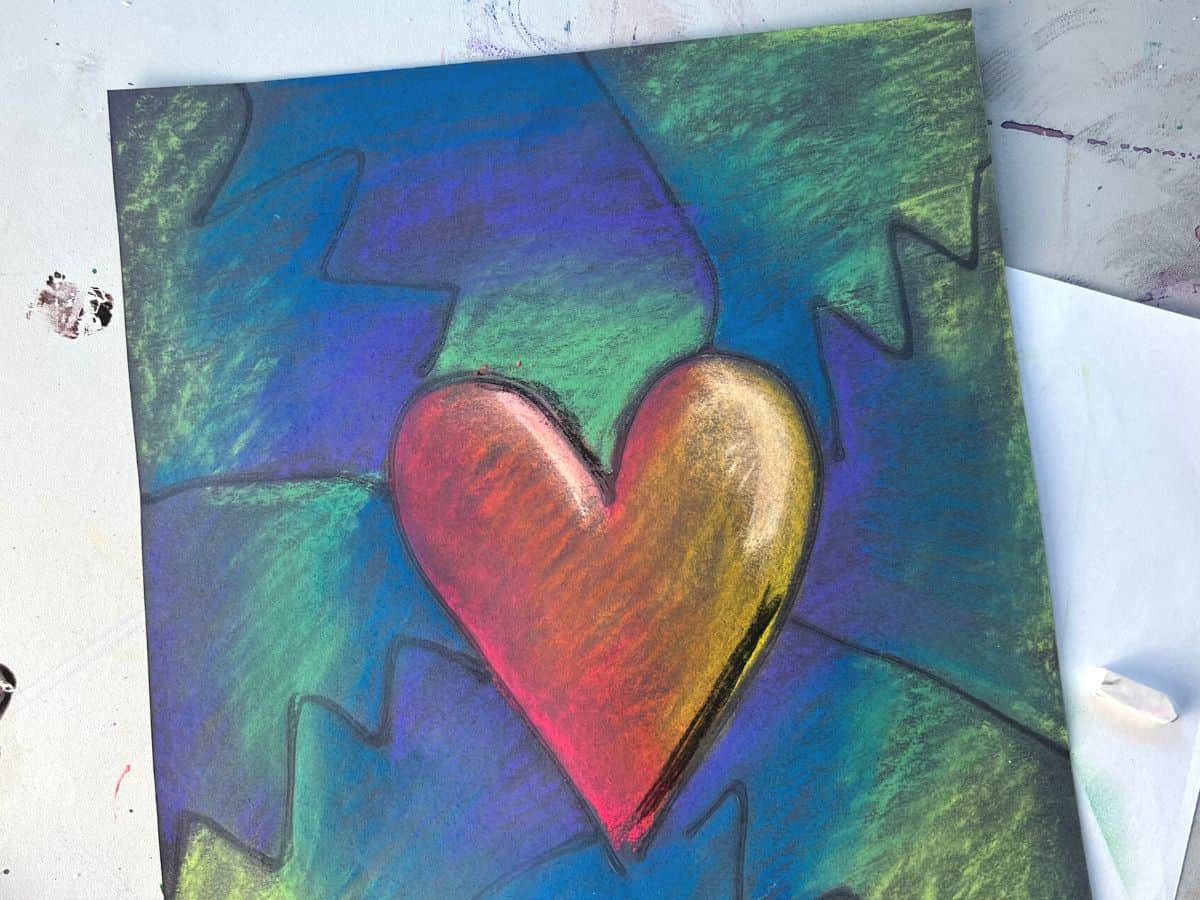
Step 7: Add A Highlight
Use a white pastel to add a crescent shape on one side of the heart. You also add it to the edge of the top.
Use your finger to blend the pastel with the colors.
Step 7: Add A Shadow
Add black chalk pastel to the edge of the heart on the same side as the highlight. Again, blend with the surrounding colors.
A little bit of black goes a long way. You can always add more black, but it is hard to remove it.
Do you have to add a shadow and highlight?
No, you do not have to add this depending on how well children or beginner chalk pastel artists may do. However, it does add extra depth with just a few white and black accents and blending.

This glue and chalk pastel technique could also work well on large mandala art for kids.
Follow us on Pinterest, YouTube & Facebook for more free art and craft ideas!
Art Project FAQs
No, I have found that it is suitable for children just to start drawing with glue. If they sketch with a pencil first, they add too many details.
It depends on how much glue is put on. Make sure you find a flat space for the glued drawings to dry so that they stay intact.
Yes, you could use oil pastels or construction paper crayons on this project. However, you just won’t be able to blend as much as you do with chalk pastels.
You can use a workable fixative or hair spray. We also recommend sending this art home in a paper folder to help limit smudging.
For this project, you can use school glue, clear glue or Glue-All. White glue dries clear enough for what we are accomplishing, but if you want a more black outline then try clear glue. If you want a more raised texture then use Glue-All.


Related Elementary Art Ideas
- UNIQUE LANDCAPE PROJECT: Folk Art Landscapes That Glow-In-The-Dark
- FUN WITH INK: Tips for Using Ink Daubers With Kids
- CLAY FOR KIDS: 11 Pinch Pot Ideas For Beginners
- FAV 1ST GRADE LESSON: Monet Water Lilies Art Lesson
Do you like this art project? Please give us a 5-STAR review below ⭐️⭐️⭐️⭐️⭐️ and have fun being creative with your family.
Chalk Pastel Heart Drawings
Equipment
- 12″ x 18″ Extra Paper
- Blending Stump optional
- Pencil optional
- Workable Fixative or Hair Spray
Supplies
- Chalk Pastels we used Nu-pastels
- 9" x 12" Tru-Ray Black Construction Paper
- Glue Bottle
Instructions
Draw With Glue
- Use a glue bottle in the center of your page to create a large heart.
- Add 8-10 zigzag, straight or wavy lines radiating out from the heart.
- Place drawings on a flat surface to fully dry.
Use Chalk Pastels
- Choose warm (reds, oranges, yellows, pinks) or cool colors (blues, green, violets) for your background.
- Lightly color with chalk pastels. You do not need a ton of color to get a fun look. Work with an extra paper under projects to help with the mess.
- Use your finger to blend the colors in the background.
- Use the opposite colors inside the heart. Lightly add the warm or cool colors inside the heart. Overlapping colors will create a fun new color when you blend.
- Blend heart colors with finger, blending stump or paper towel.
- Use a white pastel to add a crescent shape on one side of the heart. You also add it to the edge of the top.
- Add shadows with black chalk pastels and blend with your finger.
- Spray your drawings with hair spray or workable fixative.
Notes
- We love when there is a variety of heart shapes and sizes. Encourage each drawing to be unique.
- Encourage only using one finger to blend chalk pastels and lightly coloring to not make too much dust. This will help children not be a complete mess.
- Any bottled glue will work, but Glue-All will give your more texture.
- You can use a workable fixative or hair spray to seal drawings when finished.
- We also recommend sending this art home in a paper folder to help limit smudging.
Thank you
Hi Donna. I am glad you liked this pastel art lesson!