How To Make A Creative Ocean Habitat Shoebox Diorama Project

Did your kid just get assigned to make a habitat project? Find all the ideas and tips below to create a fun ocean habitat diorama using simple materials. Grab that shoebox and let’s get started!
After learning about habitats, the food chain, and animals, children may be given an open-ended habitat project to complete at home. Choosing the right animal can be a daunting task, but don’t worry, we have you covered.
From our wolf diorama example to creating this fun underwater habitat, you can use these tips and ideas no matter what animal you choose.
What is a diorama?
Dioramas for school projects are normally created in a shoebox to show a small model of a different scene or environment.
Our Favorite Way To Start
Over the years, I have found that the best way to make a diorama is to use a shoebox with an attached lid. You can open the box and add extra support to create more space for your diorama.
NOTE: Some people try to securely attach everything so the shoebox diorama can open and close easily when finished. I just prefer to keep the box open so that you don’t have to worry about messing up all the hard work.
Supplies You’ll Need
Disclosure: This post may contain affiliate links when clicked, we may earn a small commission at no additional cost to you. Read our full privacy policy.
Notes About Supplies
- Don’t skimp on adding extra light inside the box. Adding a few battery-powered tealights really illuminates the sea.
- You can modify this anyway you want.
- Don’t forget about the outside of the box; add paper or paint to complete the whole ocean habitat.
- You can find shells, glitter, and small rocks in your Dollar Store craft aisle.
SAFETY FIRST – Always have an adult help with hot glue and poking through cardboard.
How To Make An Ocean Habitat Project
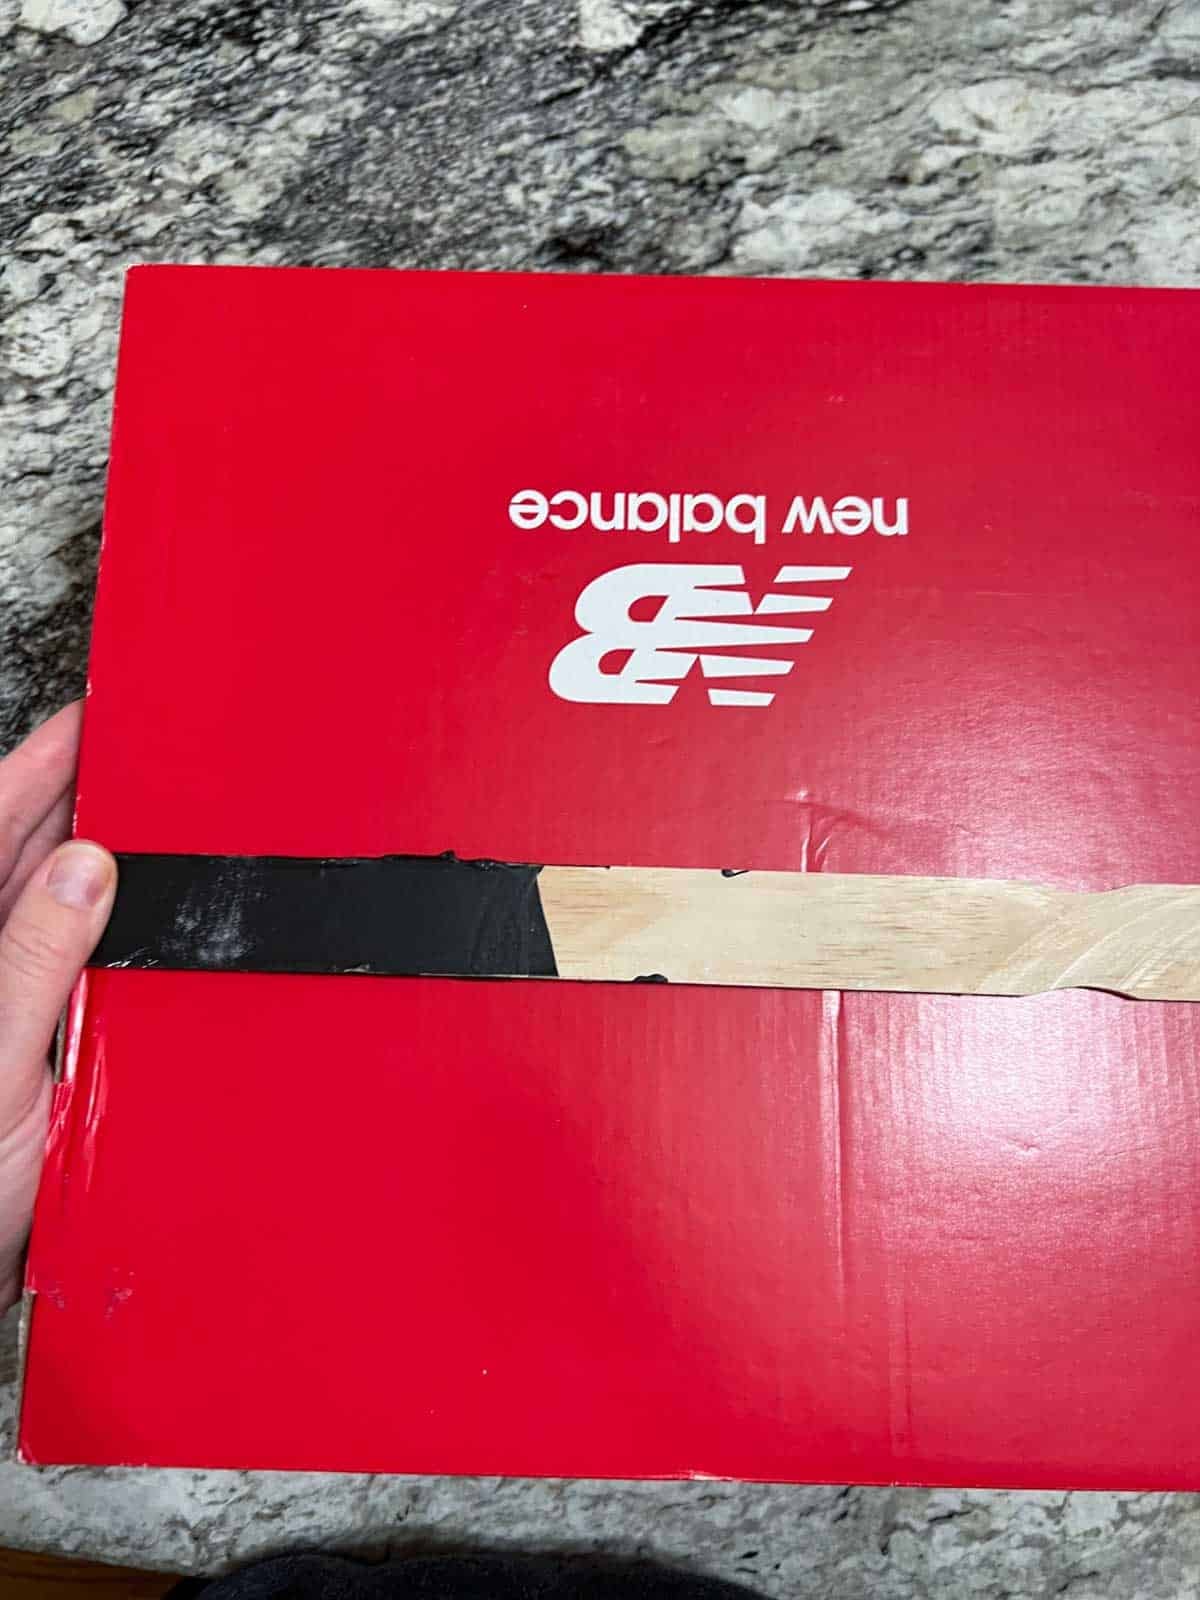
Step 1: Secure The Shoebox
This diorama is made from a box with a lid. Use packing tape to attach a old ruler, paint stick or just use tape to keep the lid secure.
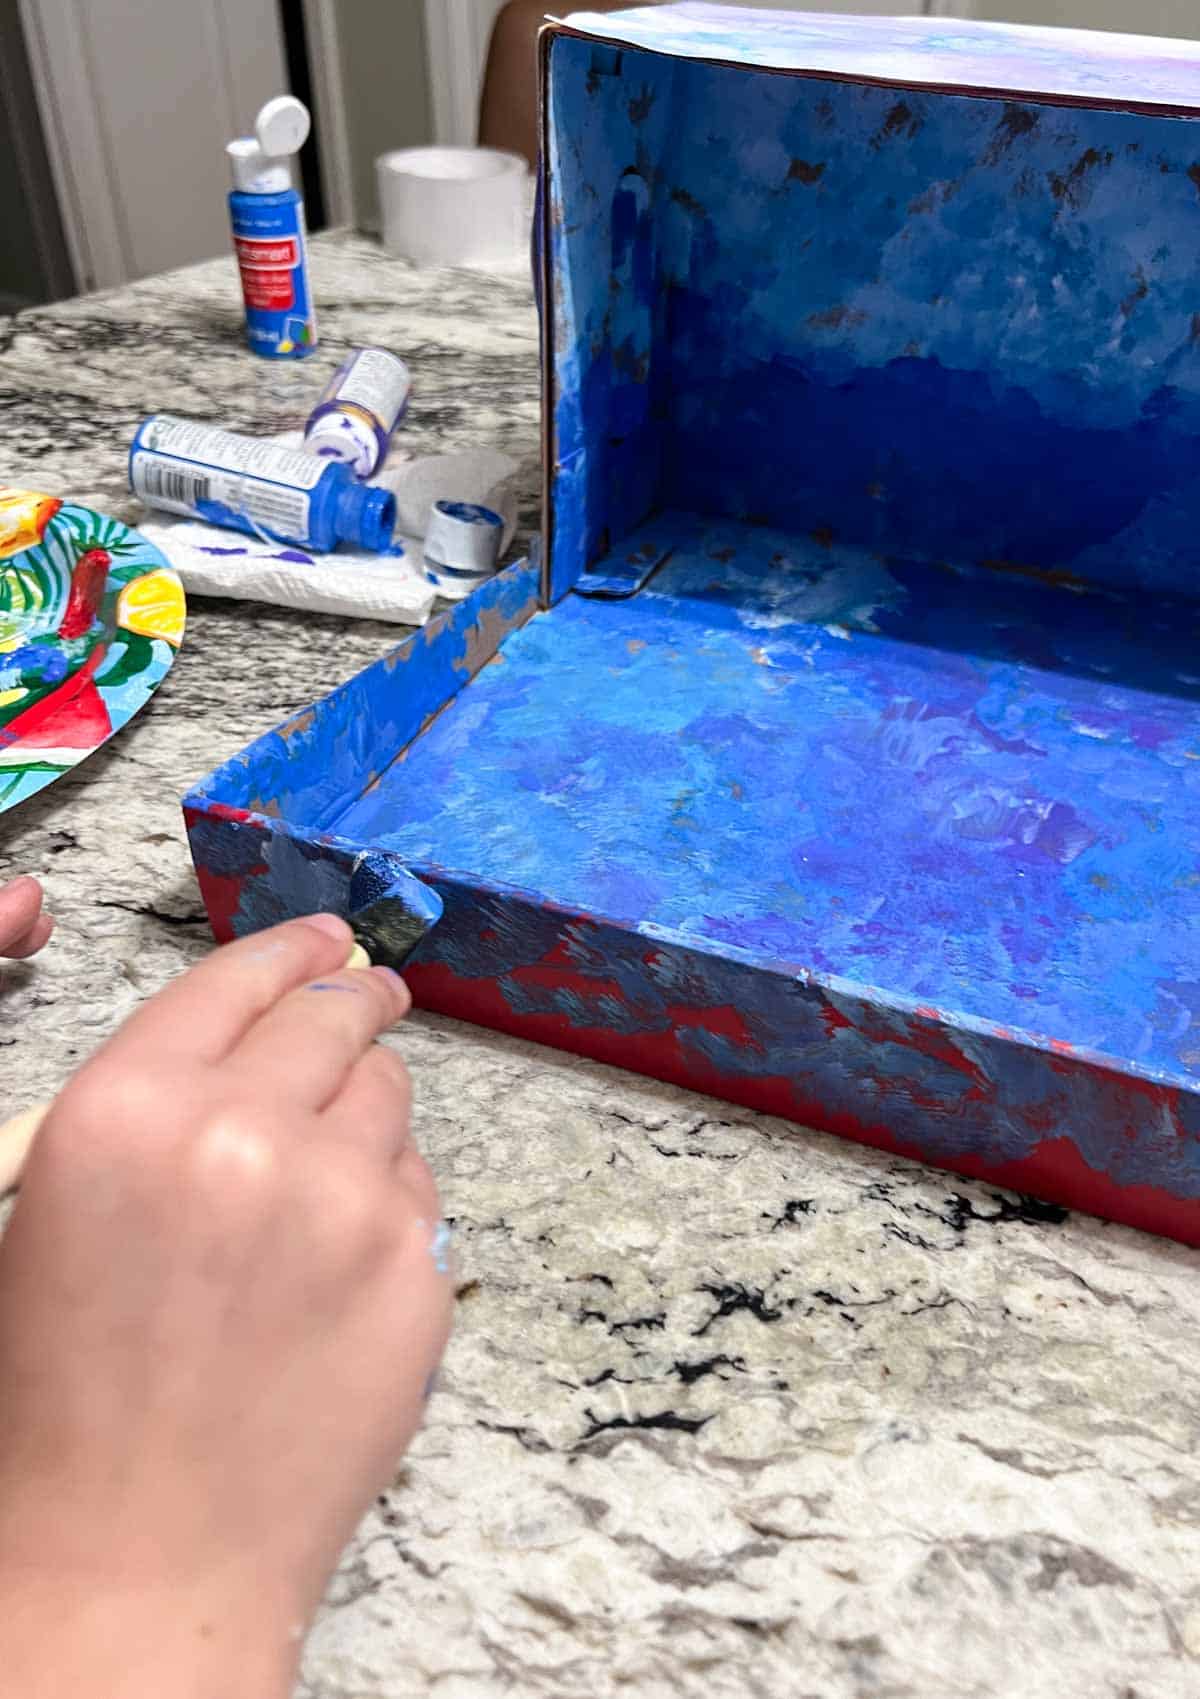
Step 2: Start Painting
For an ocean-themed diorama, dabbing paint or sponge painting different blues will help give you that underwater vibe.
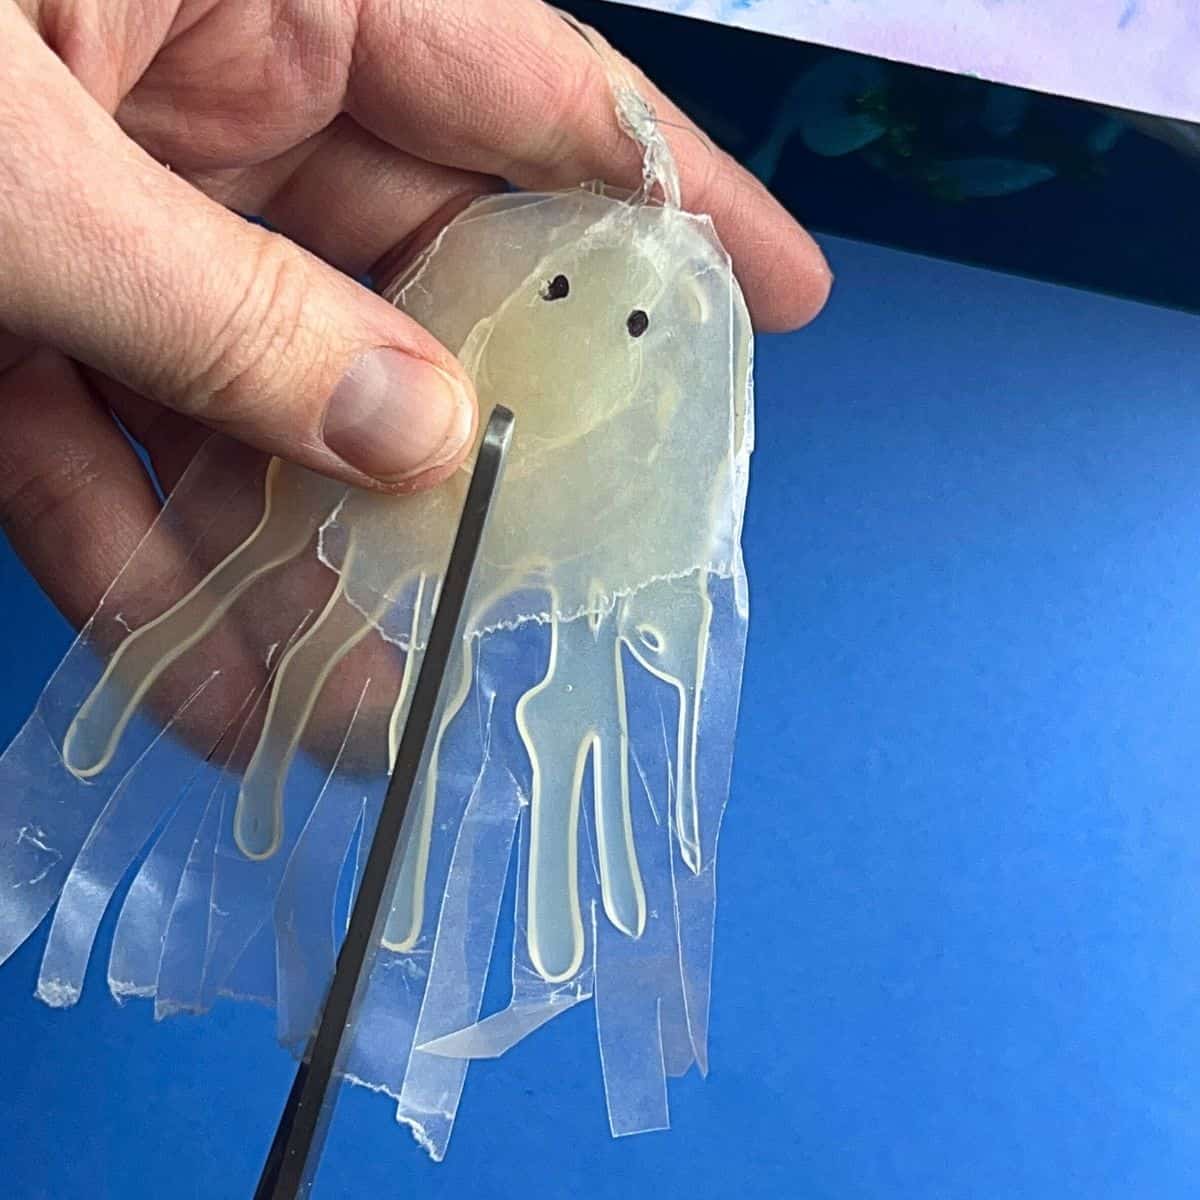
Step 3: Create Animals
To create the jelly fish in this project, an adult used hot glue on wax paper in the shape of jellyfish. Fishing line was added to the hot glue so that these could hang. Once cool, the student was able to cut out the animal.
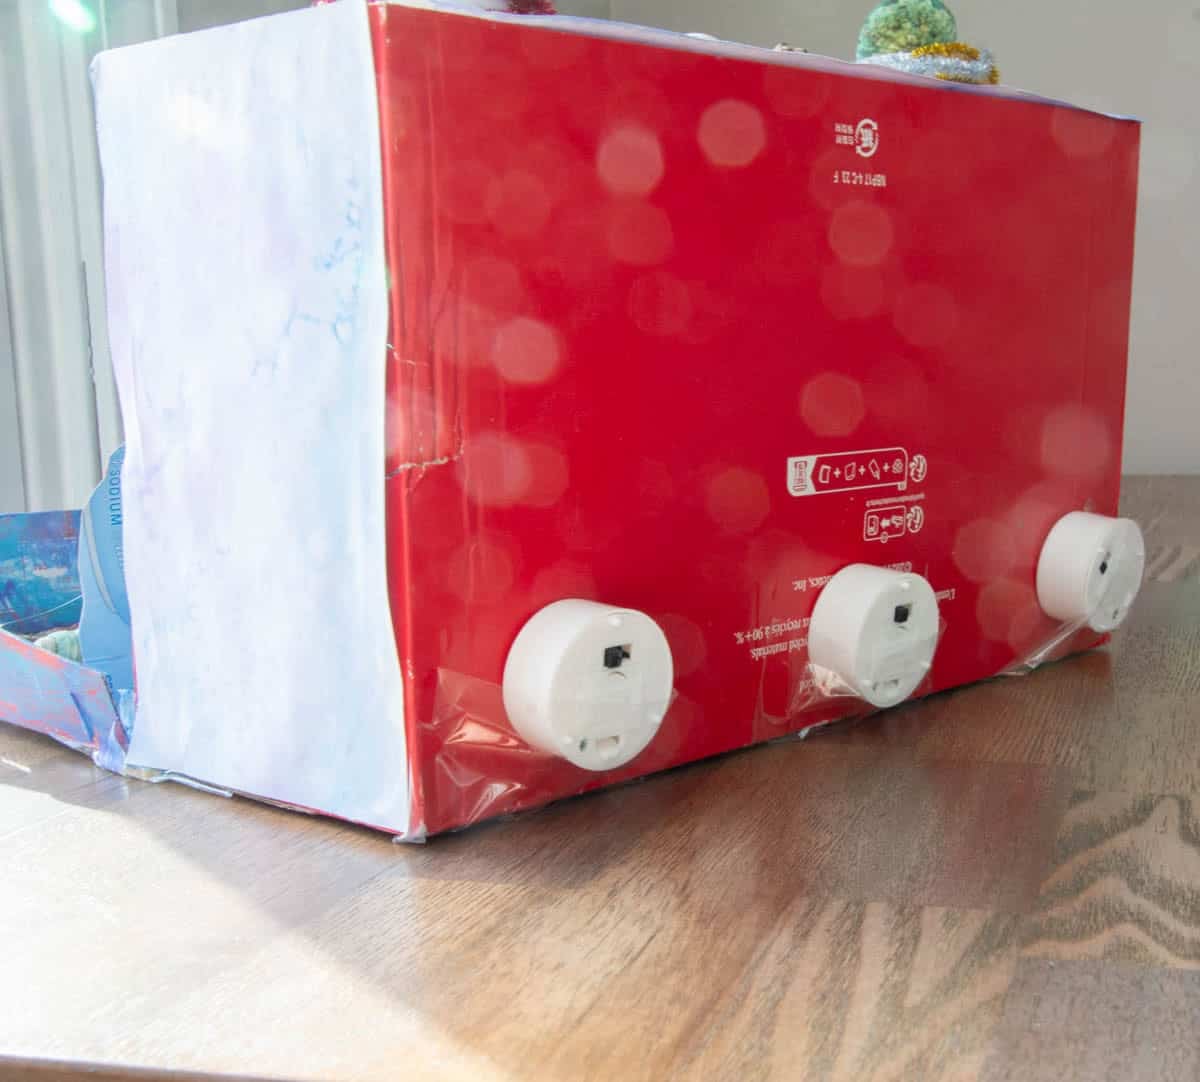
Step 4: Add Lights
Poke a small hole through the box where you would like to add lights. Use packing tape on the outside to secure the tea light without taping over the switch.

Step 5: Add Seaplants
Children can use a variety of materials to create coral, seaweed and other plants or animals. The seaweed was made by twisting pipe cleaners and blue tubing together. An adult should help hot-glue the items in the box.
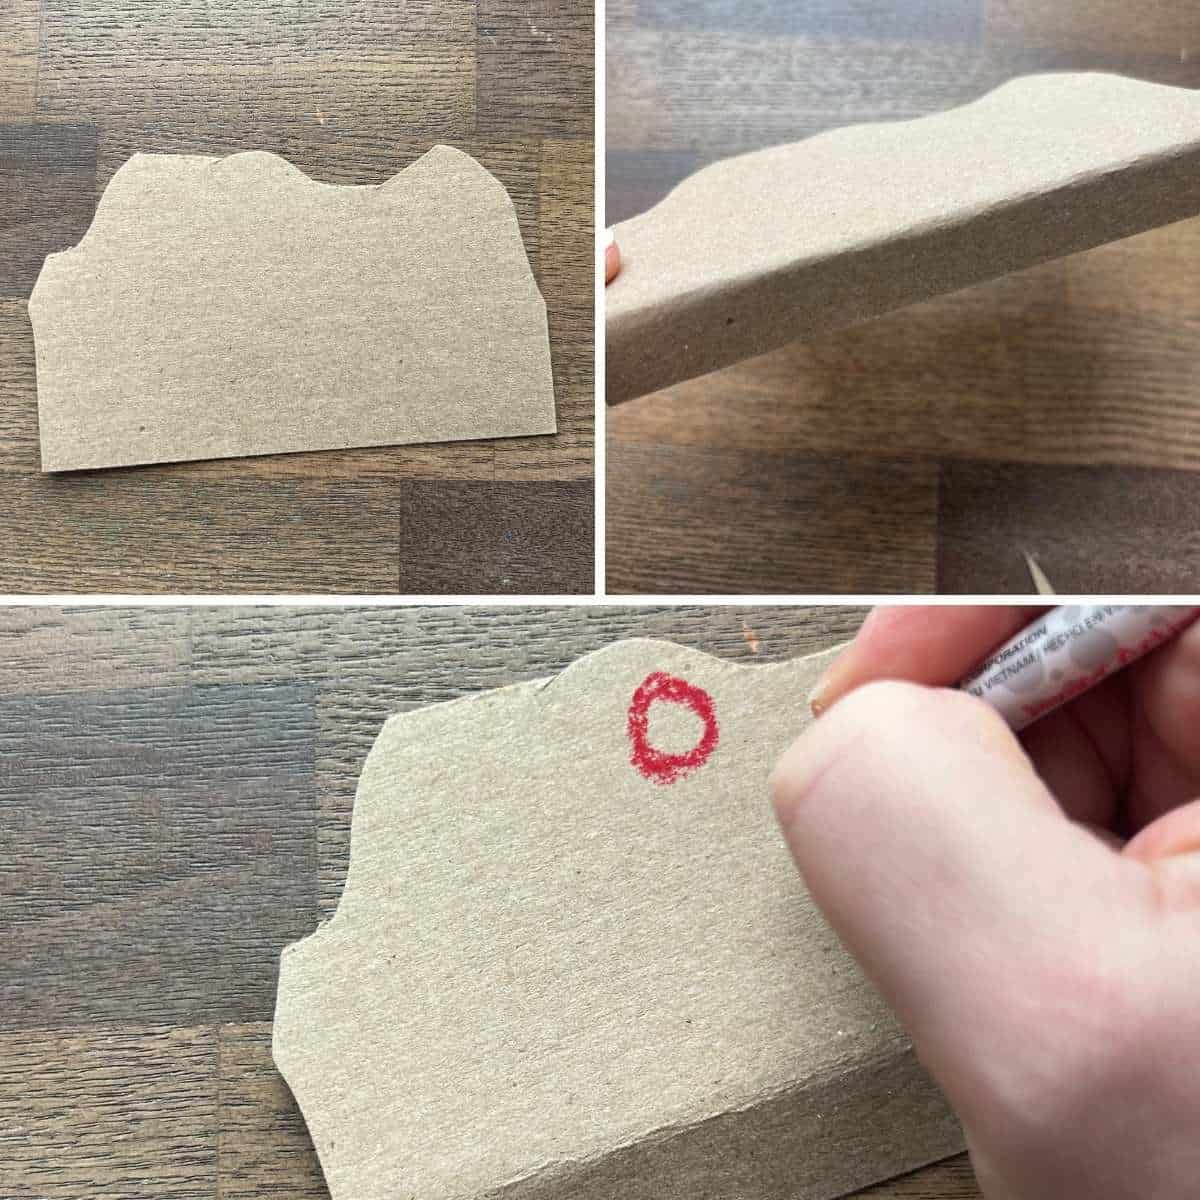
Step 6: Make and Add Coral
Coral was created out of old cardboard and drawing materials. Fold the edge so that they will stand up once glued.

Step 7: Hang Animals
Poke small holes on the top of the box for the fishing line to go through. Add tape, glue or add the fishing line to an item that can be moved above the box.
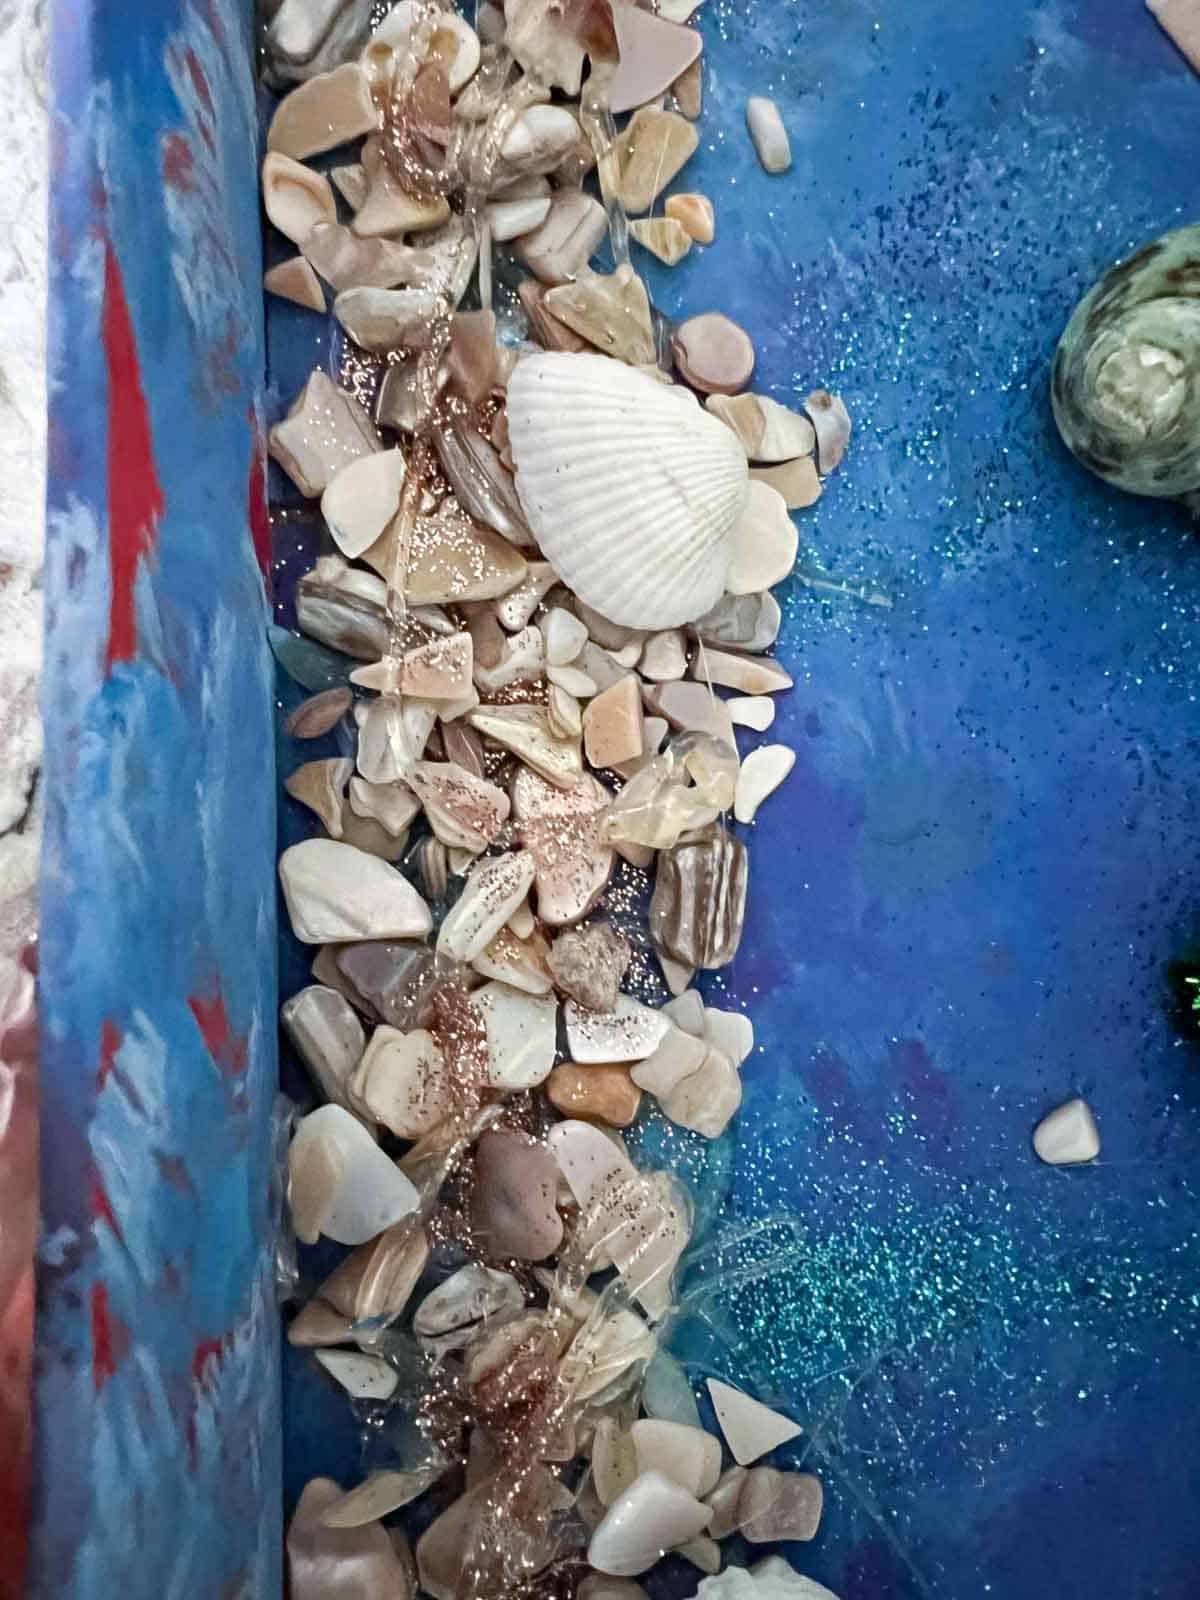
Step 8: Add Extra Details
Small rocks, gold glitter and seashells were used to complete the ocean shoebox project.
Tips
- OTHER OPTIONS – Instead of sponge painting, ripped paper could create a cool underwater feel.
- AT LEAST 3 LIGHTS – the more light the better!
- PURCHASE THE ANIMALS – Instead of making jellyfish, you could purchase small fish and other animals.
- USE MODEL MAGIC ANIMALS – Model Magic is a great material for kids to work with to sculpt other sea creatures or animals.
Our Favorite
Related Projects
Follow us on Pinterest, YouTube & Facebook for more free art and craft ideas!
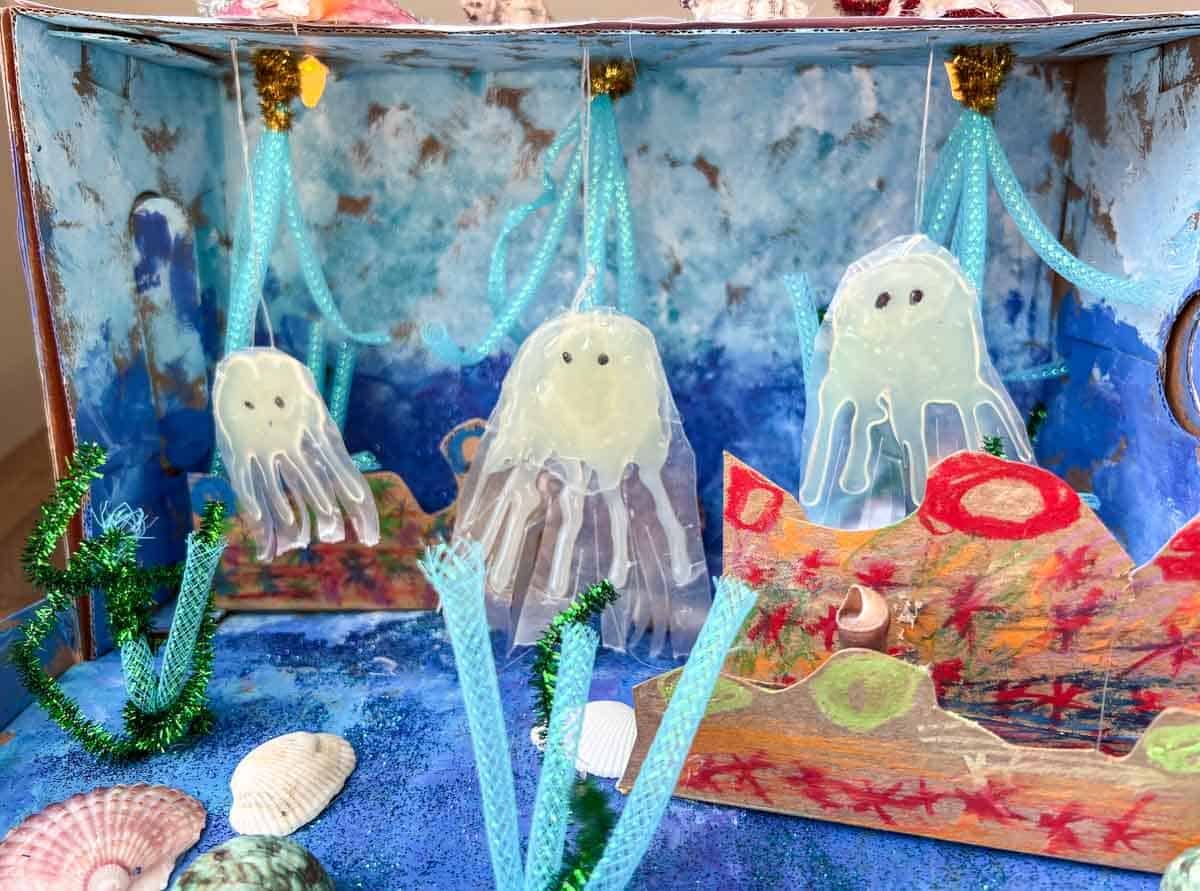
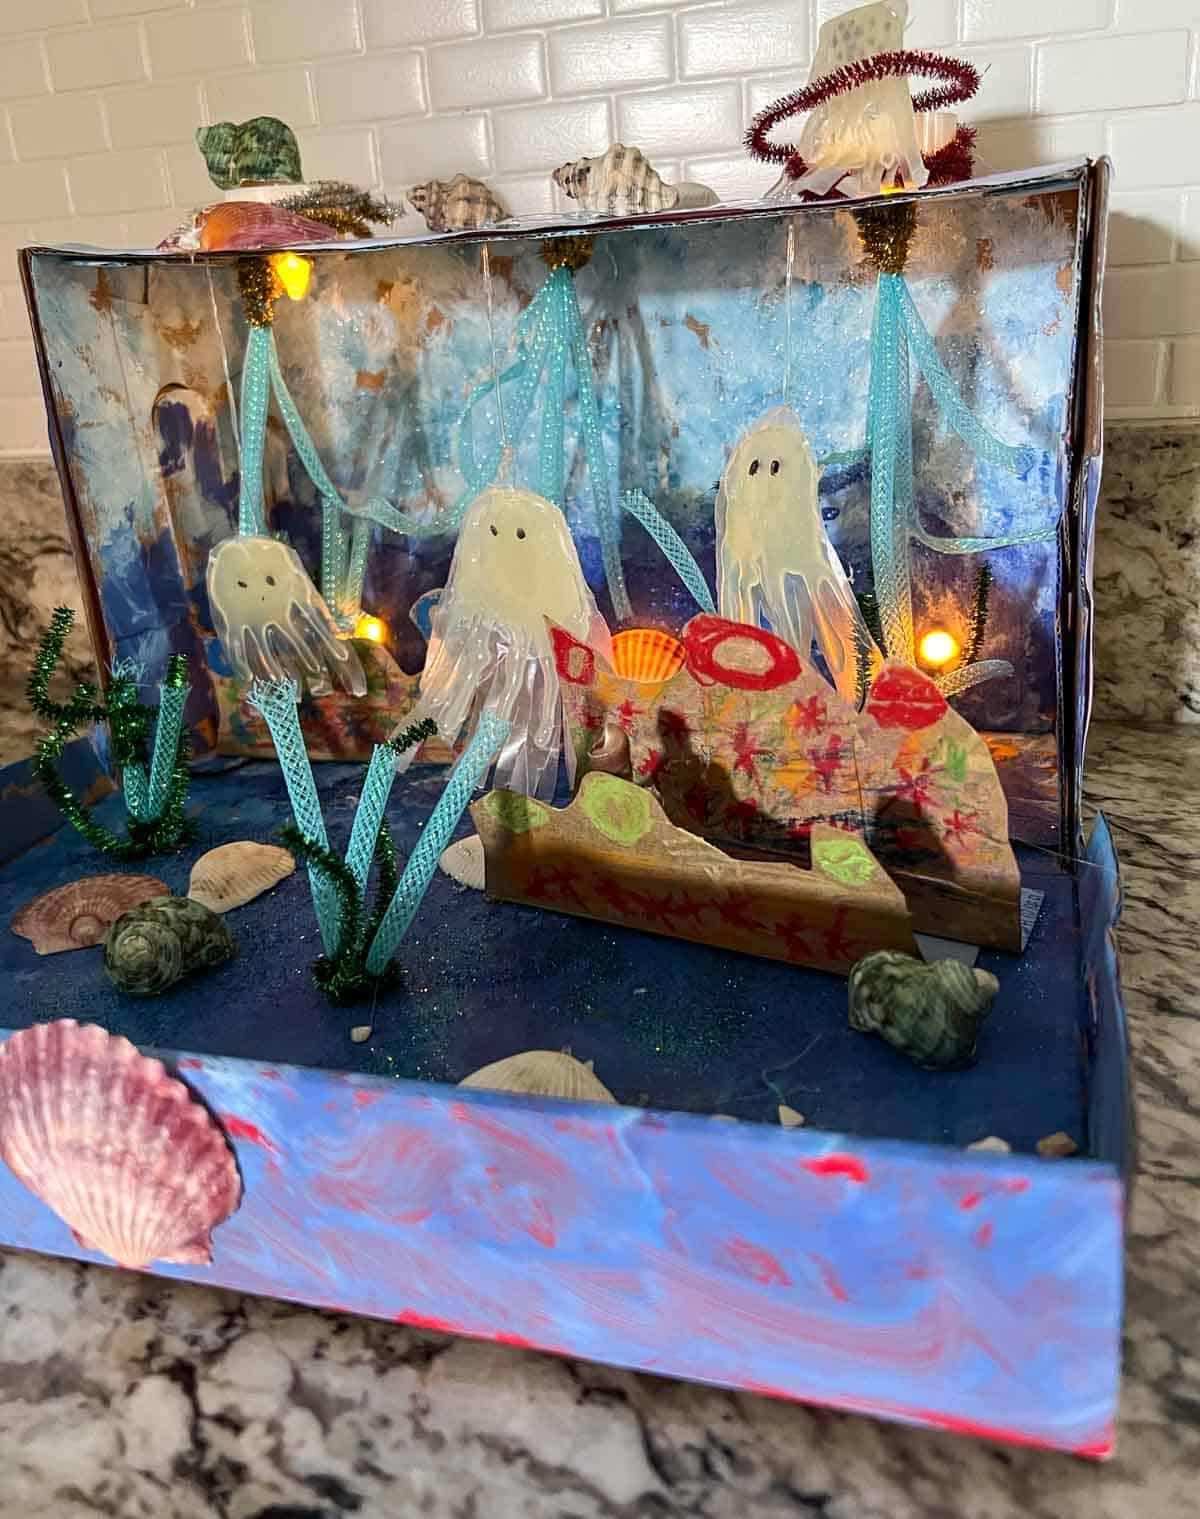
The best part about creating an ocean habitat diorama is adding your own special touches. Whether it’s a hidden treasure chest, a colorful sea turtle, or a glowing mermaid, let your imagination swim free! Remember, there’s no right or wrong way to complete a habitat project! Grab that shoe box and start making!