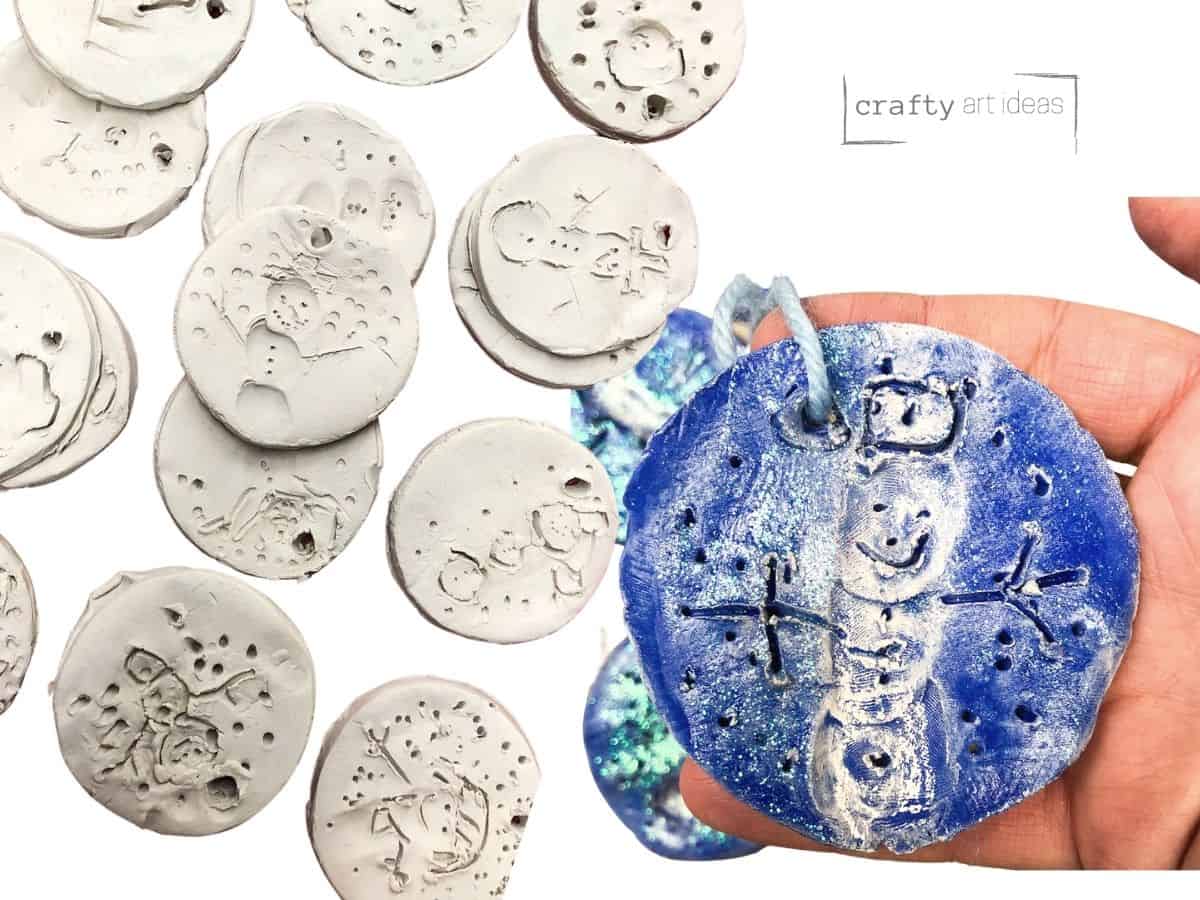
Easy Clay Thumbprint Snowman Ornament
We love it when you can do a small clay project with young children. This homemade clay ornament idea is a great way to do a quick ceramic lesson.
Disclosure: This post may contain affiliate links when clicked, we may earn a small commission at no additional cost to you. Read our full privacy policy.
Does it have to be an ornament?
This is a super fun way to create a Christmas ornament that doesn’t have to really be a DIY Christmas ornament. Snowmen are a great neutral subject matter to use with children. I always tried to avoid doing holiday projects, so these easy snowmen ceramic pendants can be hung anywhere.
This works for all. No matter if a kid decides to take it and put it on their Christmas tree or another hangs it on a door knob. Children know that these snowman crafts make fantastic gifts and are a lot of fun to make.
What age is this easy ceramic project appropriate for?
We love doing this project with kindergarten students and older. Younger students could complete these as well. They just might need a little extra help.
The hardest part is understanding how much pressure to put on the wooden skewer when drawing your snowman details. The younger children may cut through the clay due to their fine motor abilities. You normally can flip the ornament over and push the little slab back together.
Can you make these thumbprint snowmen as a whole class?
You can. With younger students, we find it is best to do this as a station. The actual drawing and creating of the snowman only take each child a few minutes.
We also recommend that when they are finished you flip over the clay slab and write their names so they do not poke through the clay.
Could you use air drying clay?
Yes, these would be perfect with air dry clay. You can even follow very similar steps when adding color as we will show.
You may just not want to let them color with the white crayon as the pressure could break the air dry project a little easier than a fired slab. Children should just paint around the snowman and make sure you add a clear coat to the clay to protect it.
Supplies
- White Clay
- Small Container of Water
- Rolling Pin or knowledge of how to through a large clay slab
- A circular item like an old cup or cookie cutter
- Work surface or clay mat
- Wooden Skewer
- Watered Down Blue Acrylic or Tempera Paint
- White Crayon (optional)
- Clear Coat (We used Glitter Mod Podge for our ornaments).
- String
What needs to happen in advance?
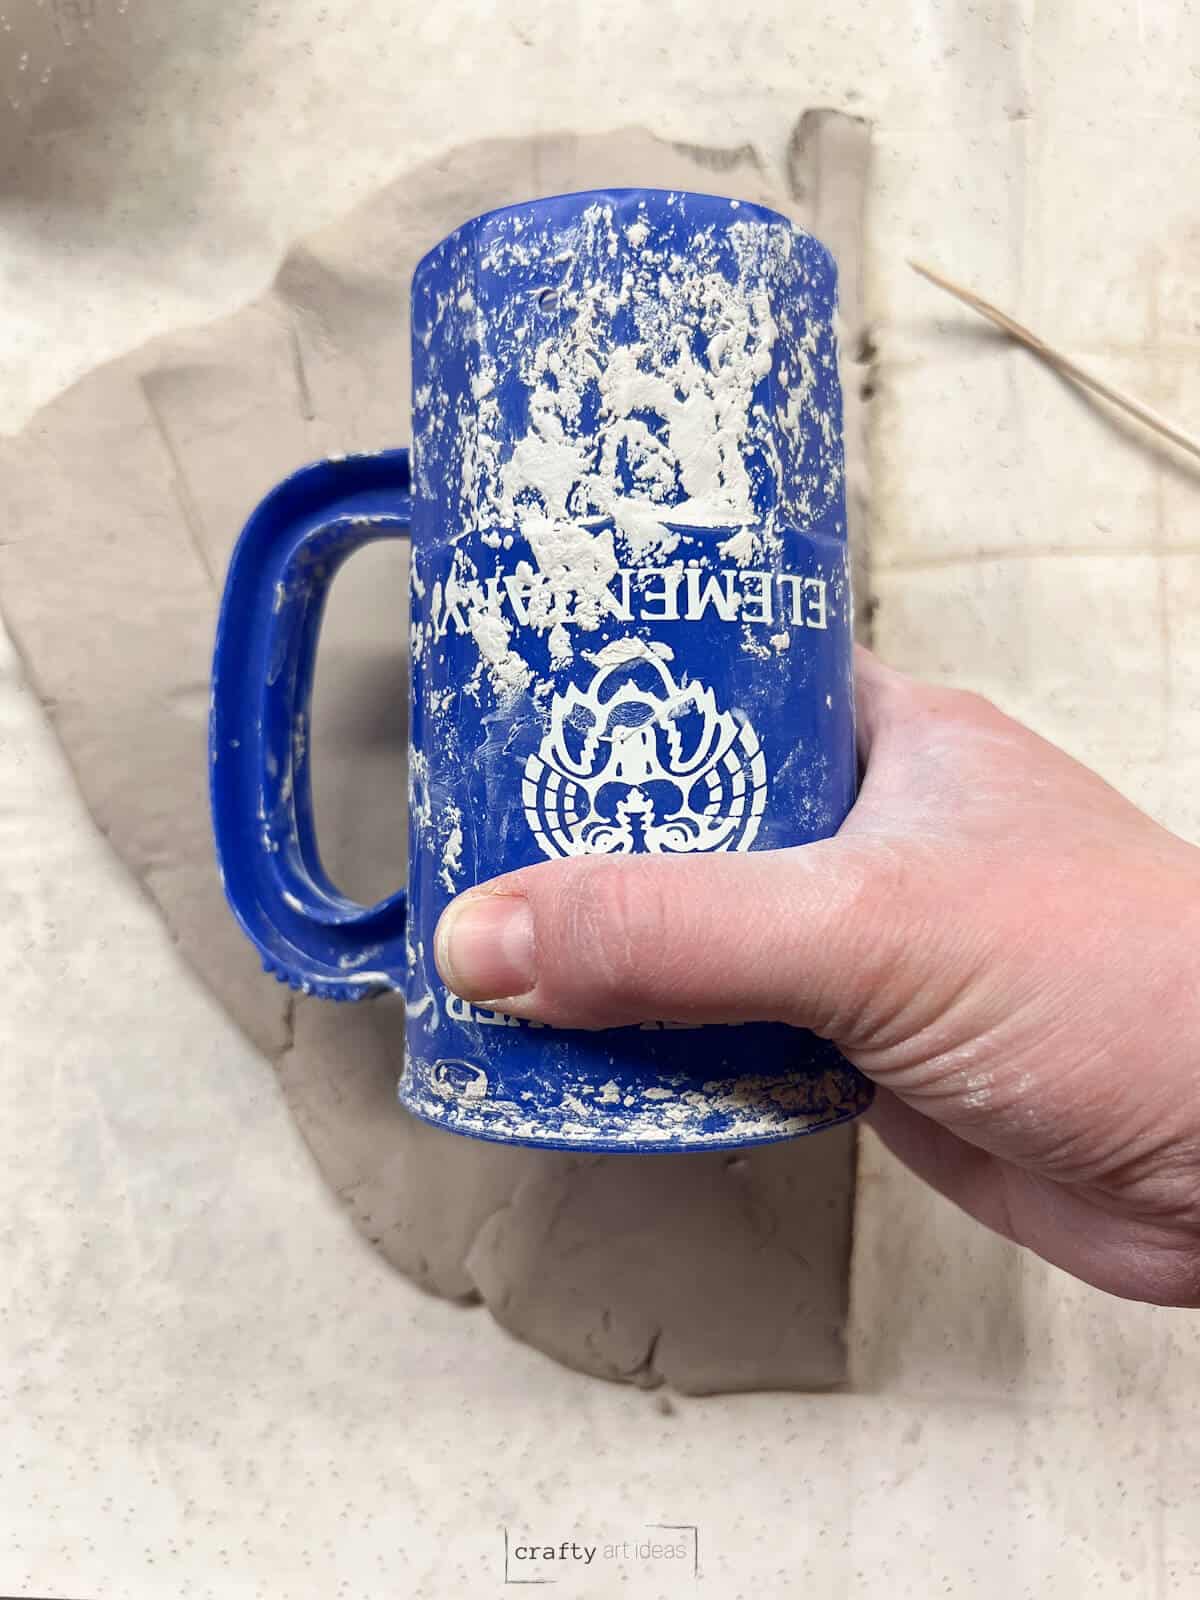
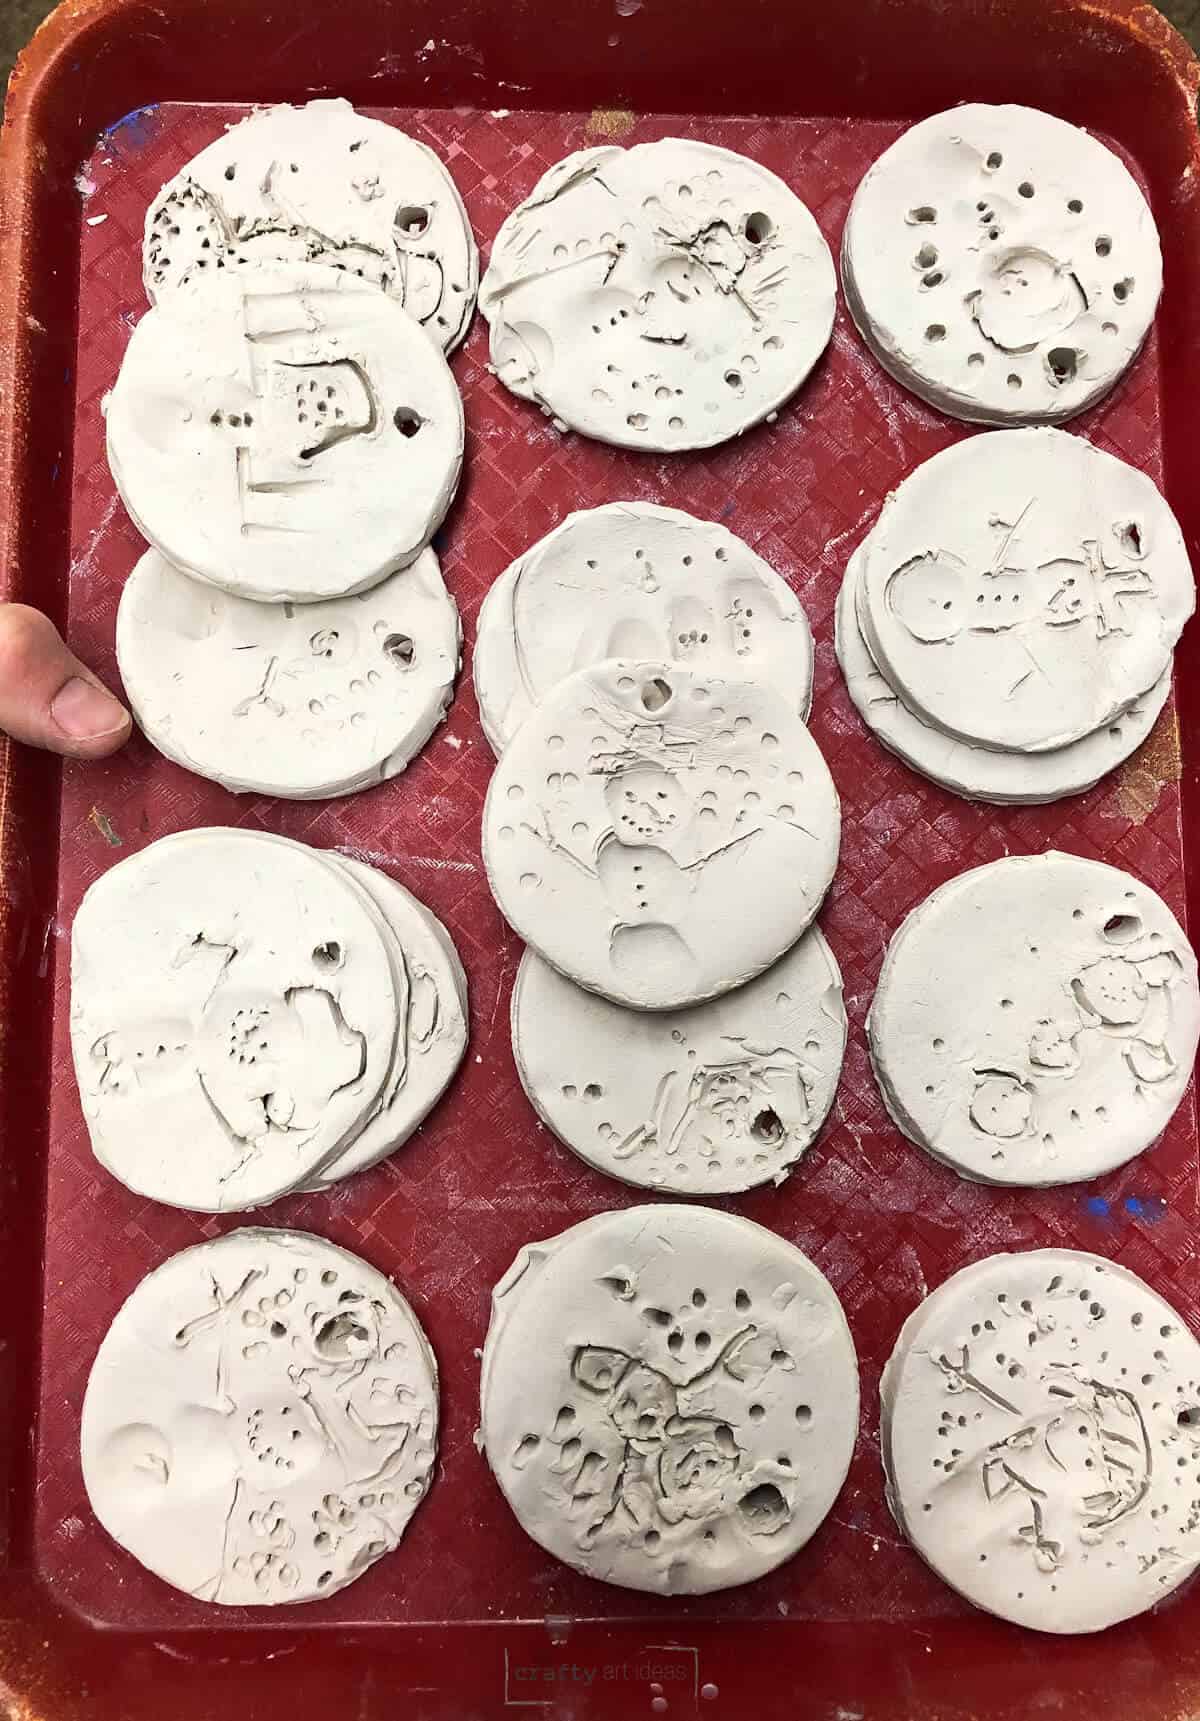
A teacher or adult could make the small circle slabs. Older kids and even kindergartners could roll and cut their own. However, it would take a little longer. You will have to decide depending on the time and amount of students you have.
If a teacher is doing it beforehand:
- Throw a large slab about ⅛” -¼” thick. Thicker is better than thinner since these are not that big.
- Use a cookie cutter or old cup to cut out the circles.
- Place circles on a tray and cover with plastic until ready to use. Do not prep these too far in advance as they will dry out.
If students are making small slab circles:
- Give each kid a small amount of clay.
- They can use a rolling pin or the palm of their hand to flatten clay.
- Use the cookie cutter or cup to help make a small circle slab.
How To Create An Easy Clay Snowman Ornament
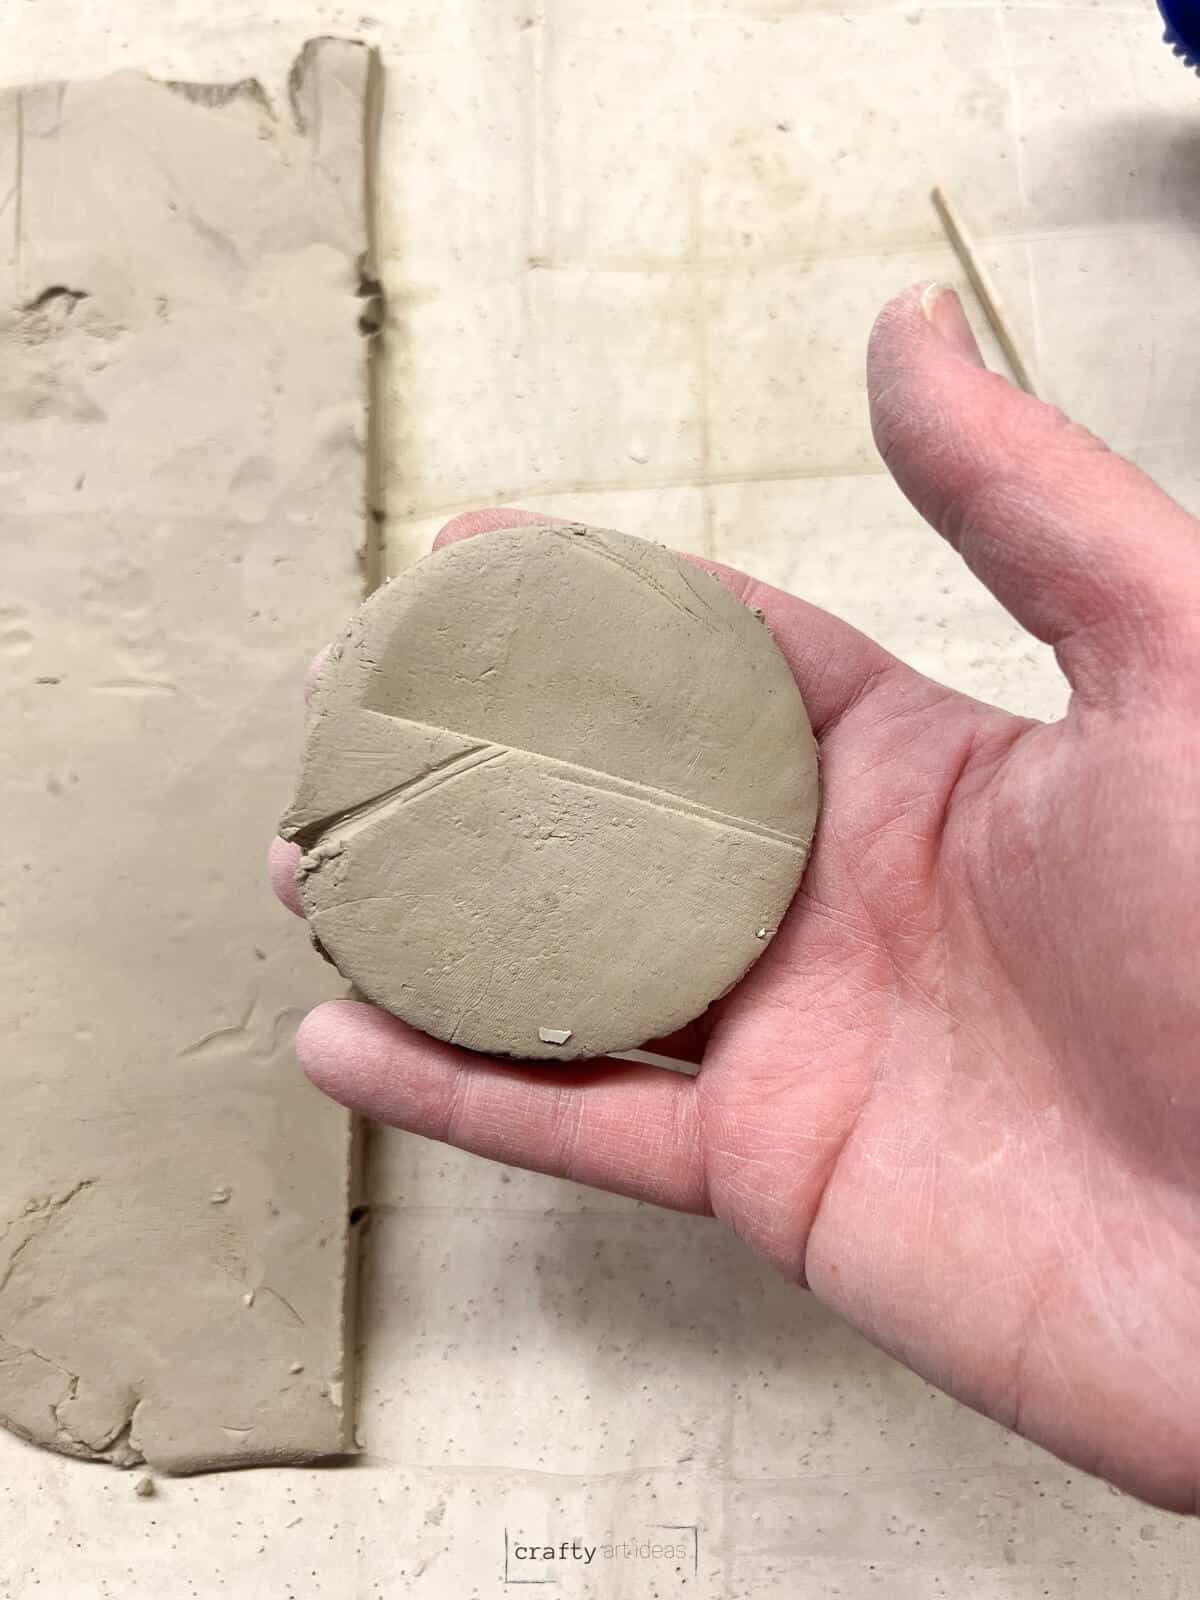
Step 1: Rub Water On Edges Of Slab
Give each child a clay circle or have them make a small slab of clay. The child should use his/her finger and dip in the water. Rub the water around the edge of the circle to make it smoother.
Step 2: Press Fingers Into Clay Circle Slab
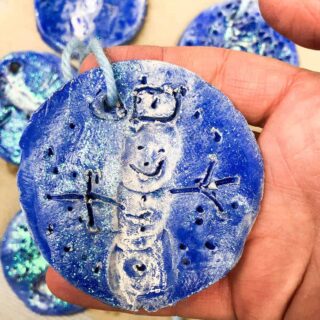
The child’s thumb will push in three thumbprints that are touching. This makes the snowman’s body.
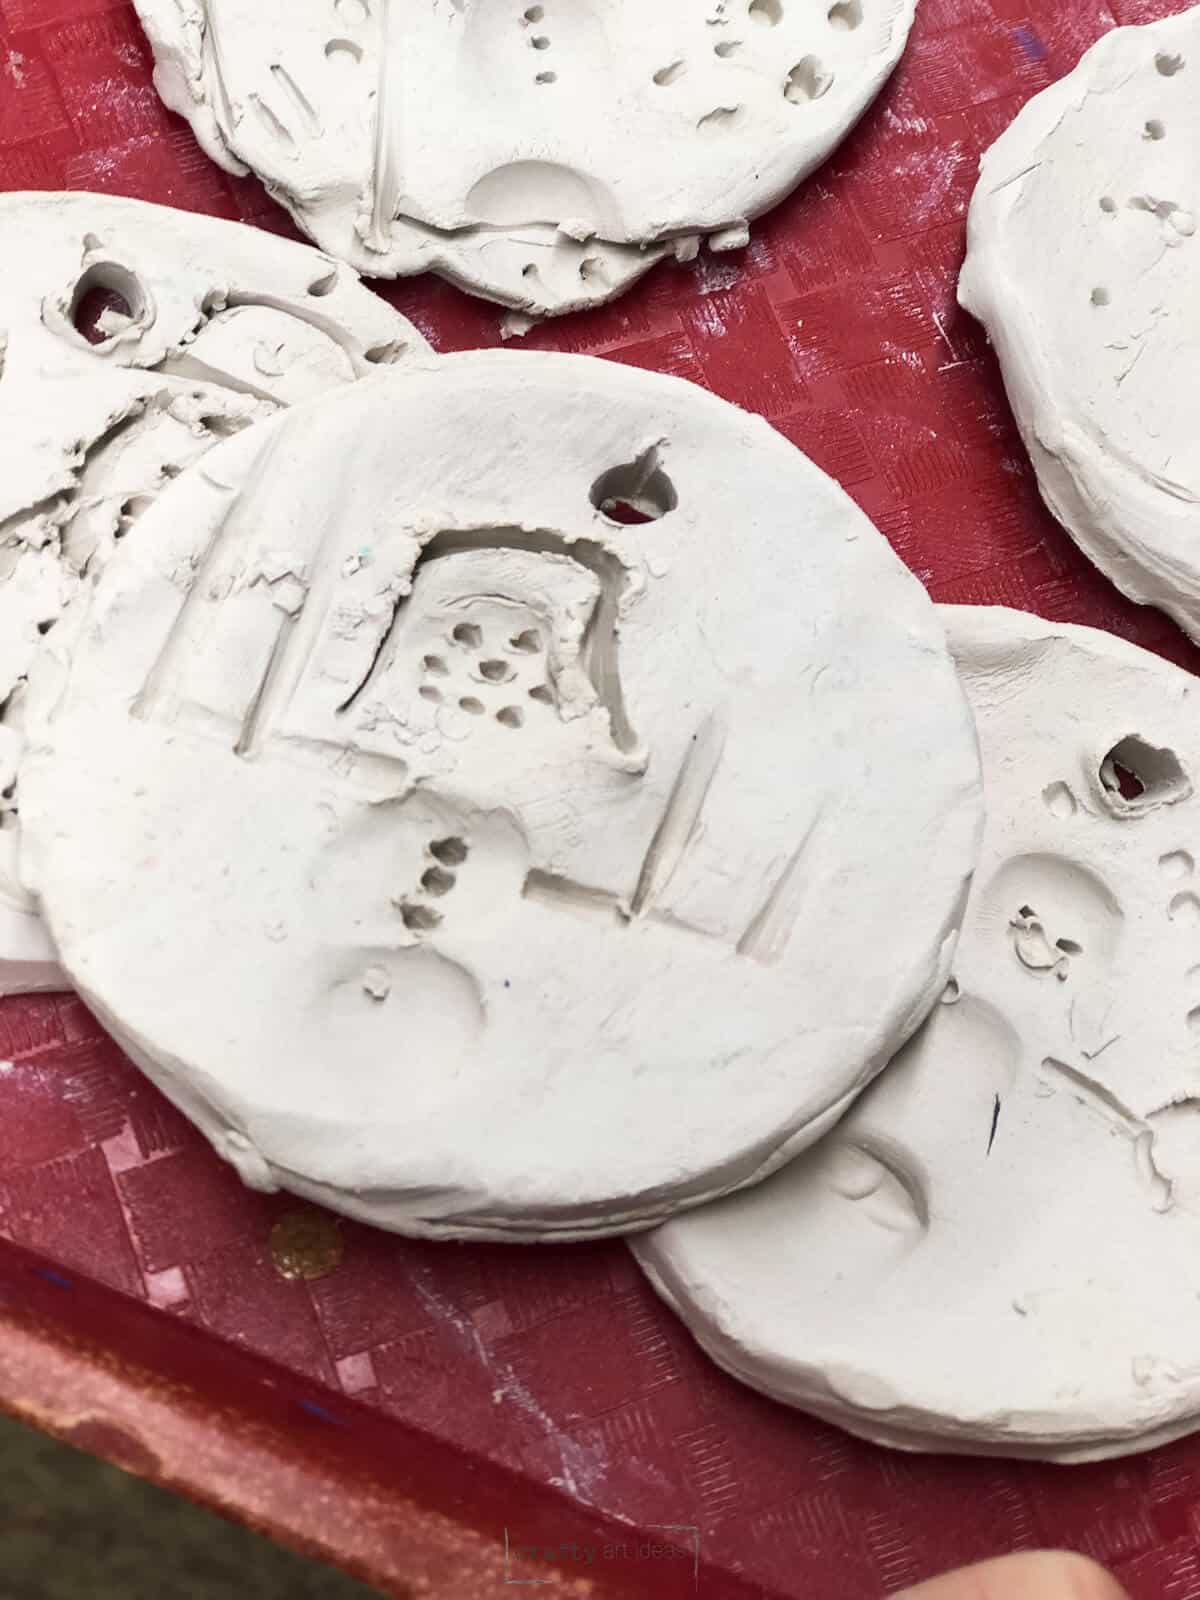
Step 3: Add Snowmen Details
Each child will get a wooden skewer to draw in snowman details such as eyes, nose, coal mouth, scarf, buttons and a hat.
Optional: Add Snowflakes
You can even flip over the skewer to stamp in snowflakes around the snowman.
Step 4: Add A Hole For Hanging
Poke a hole through the top with the skewer and write the child’s name on the back with a wooden skewer or needle tool.
Step 5: Let Fully Dry
Let dry until not cool to the touch.
Step 6: Run Bisque Fire
Run a kiln for a bisque fire. Feel free to stack these on top of each other in our kiln to really maximize space.
How To Add Color
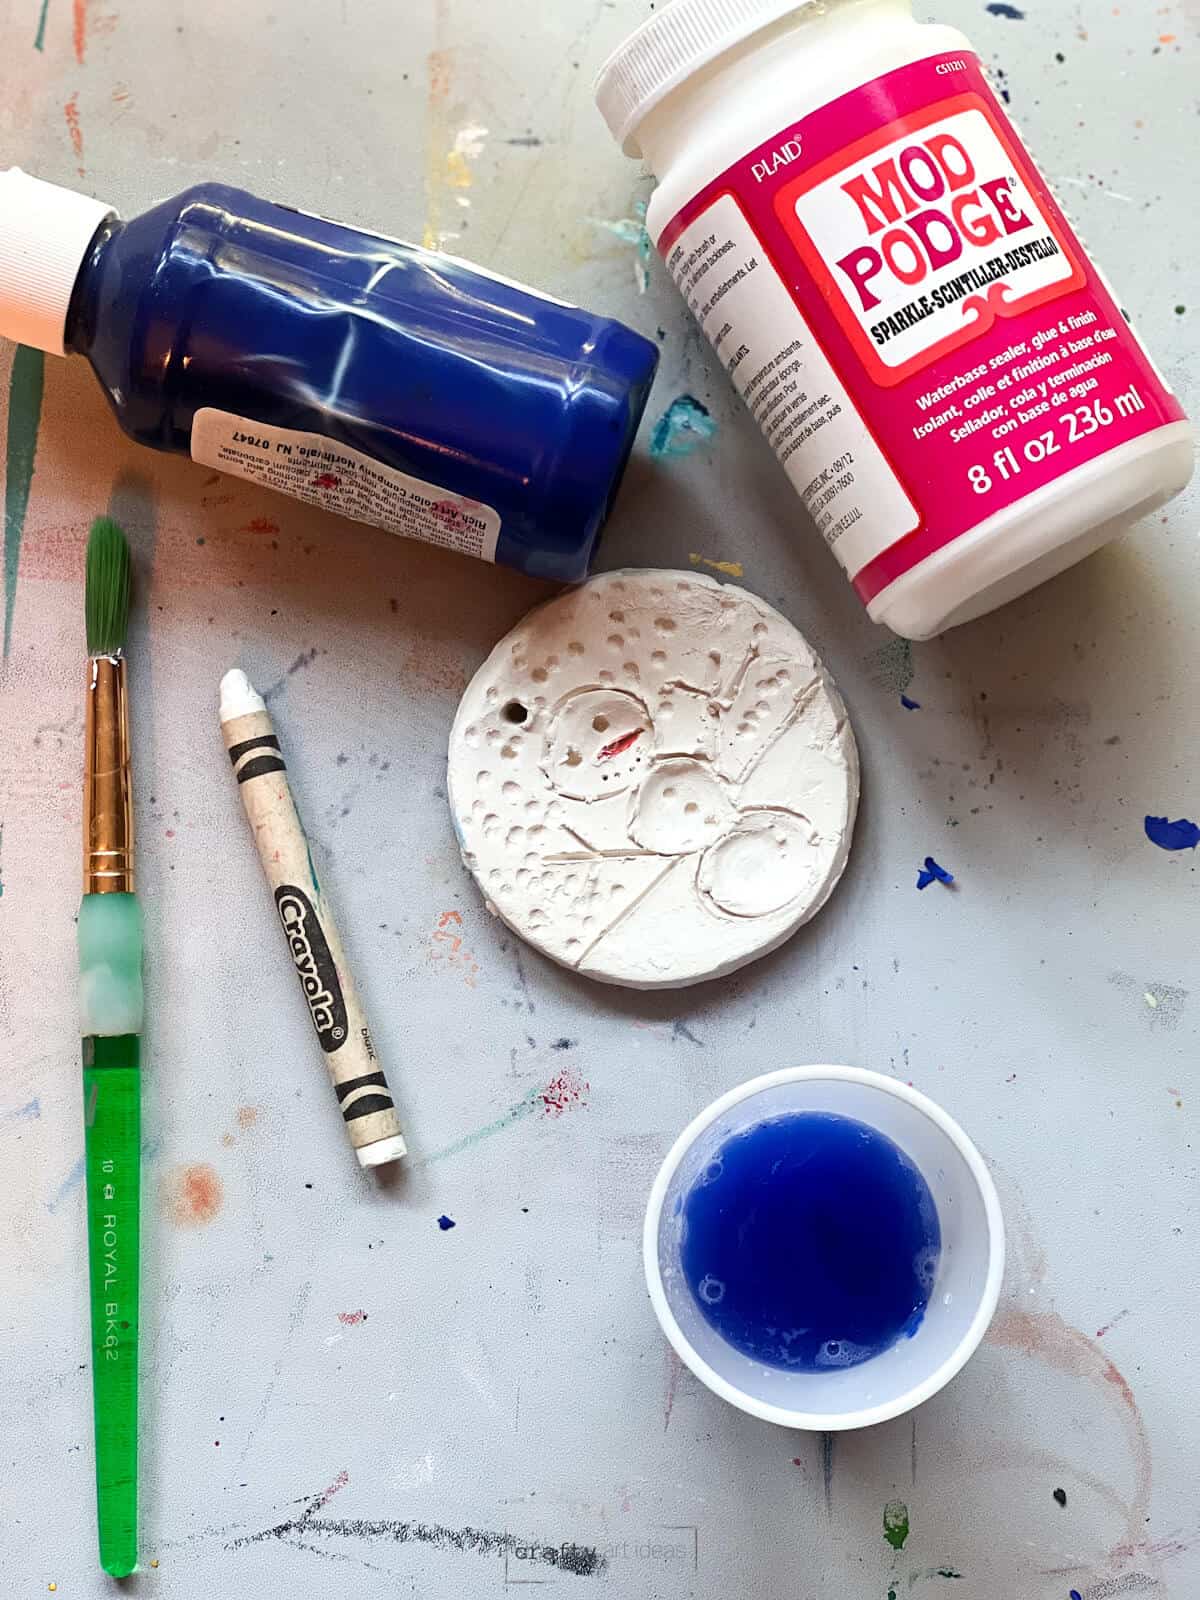
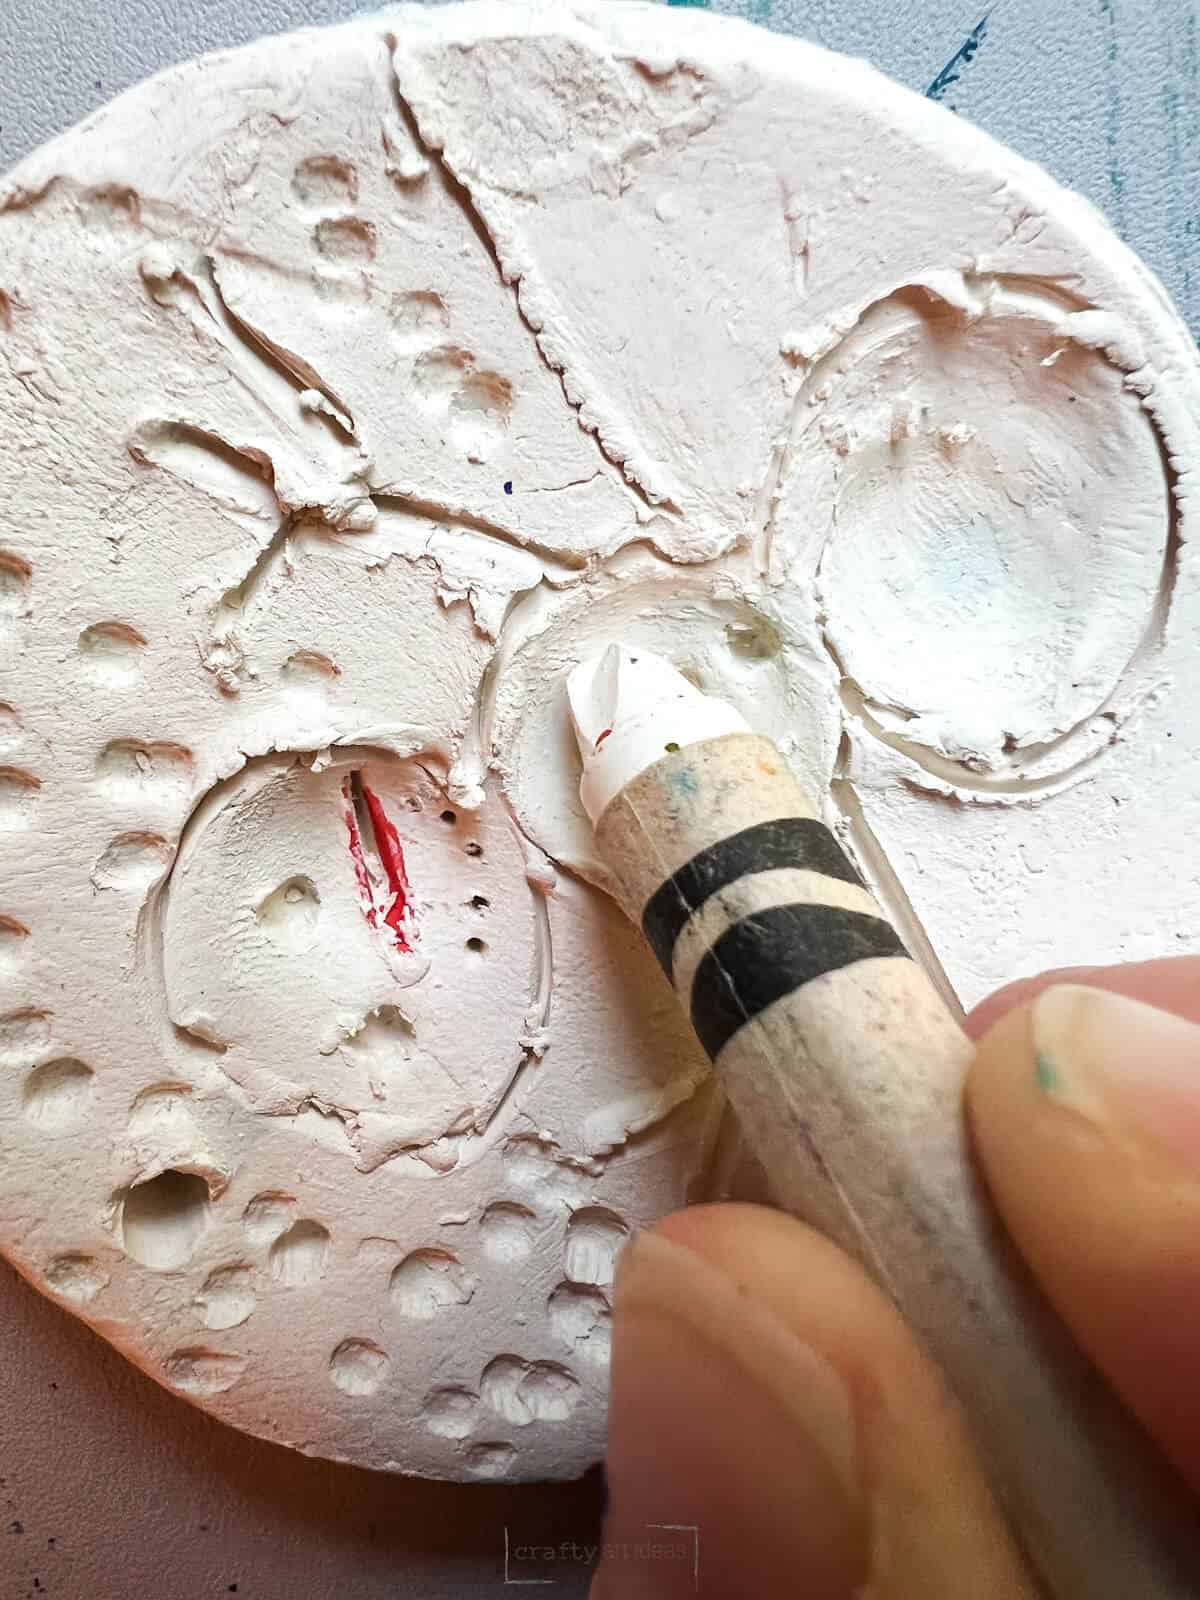
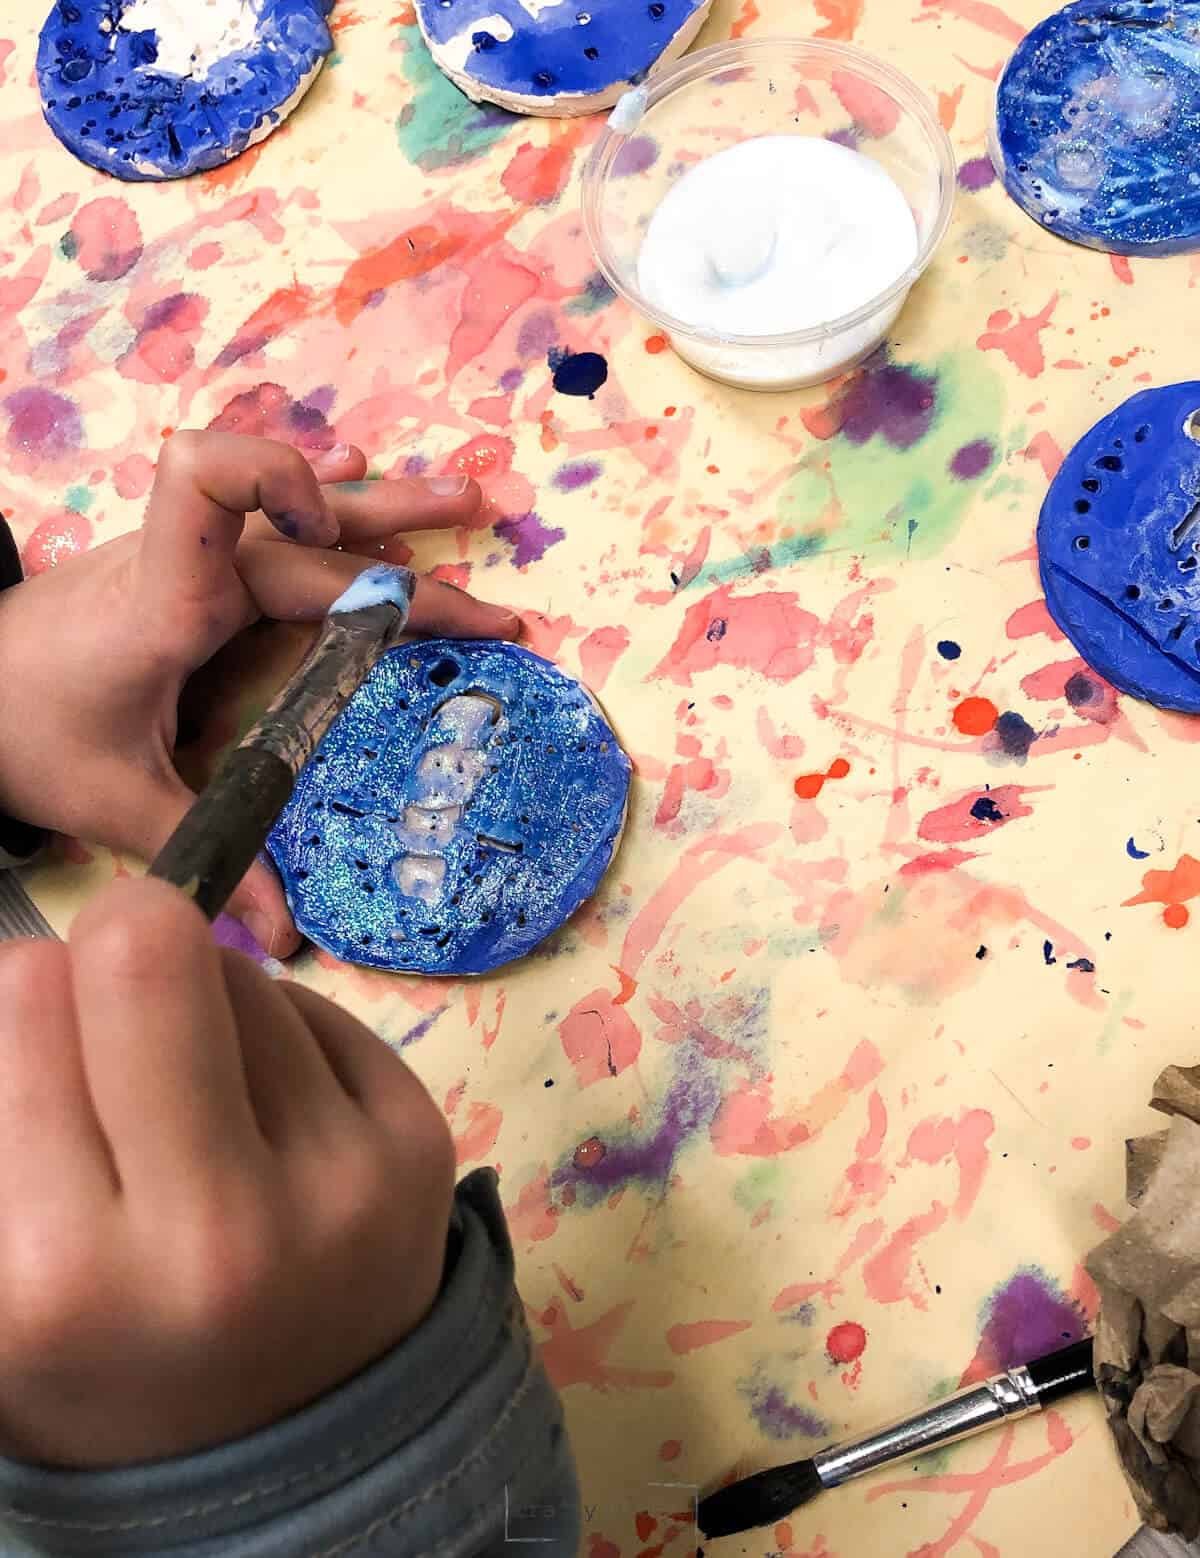
Step 7: Color Snowman With White Crayon
Use a white crayon to color the snowman. Encourage kids to press hard enough and color as much as they can in the body. You can also use an orange crayon to accent the carrot nose.
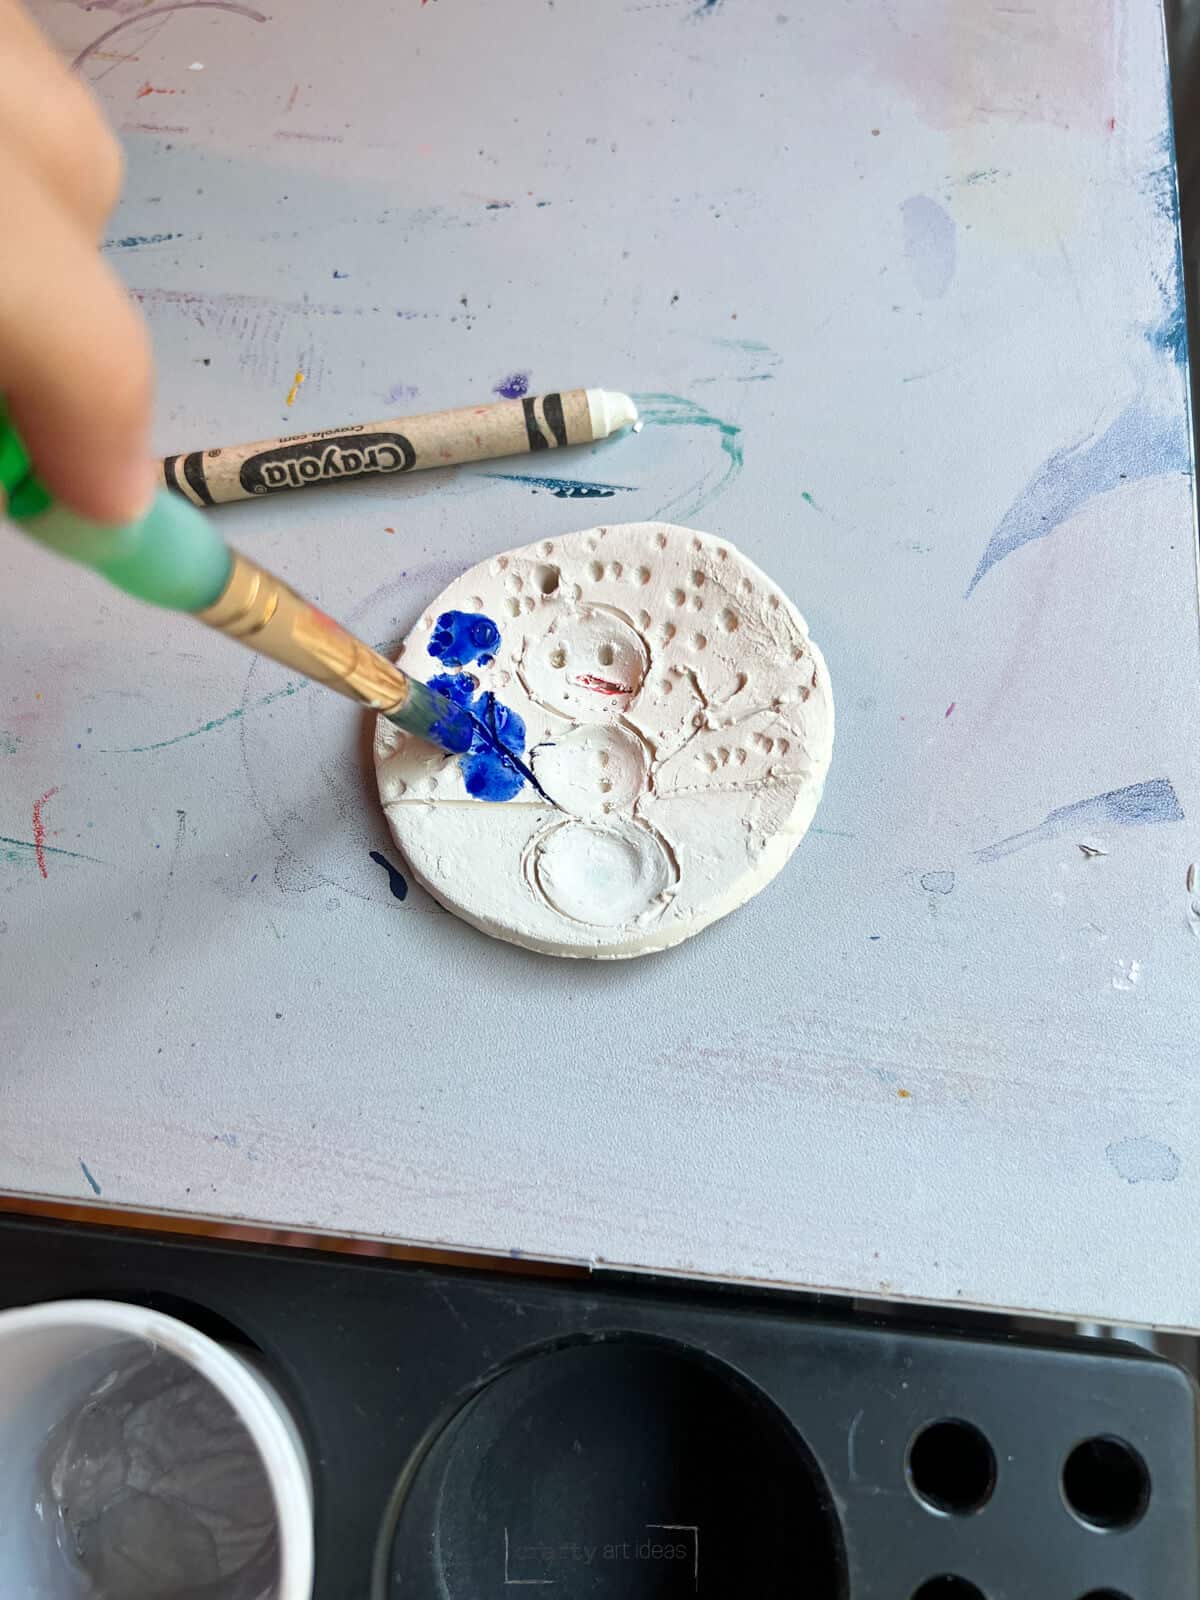
Step 8: Cover Project With Diluted Blue Paint
Paint watered-down blue acrylic or tempera paint on the whole clay ornament. Even getting the sides.
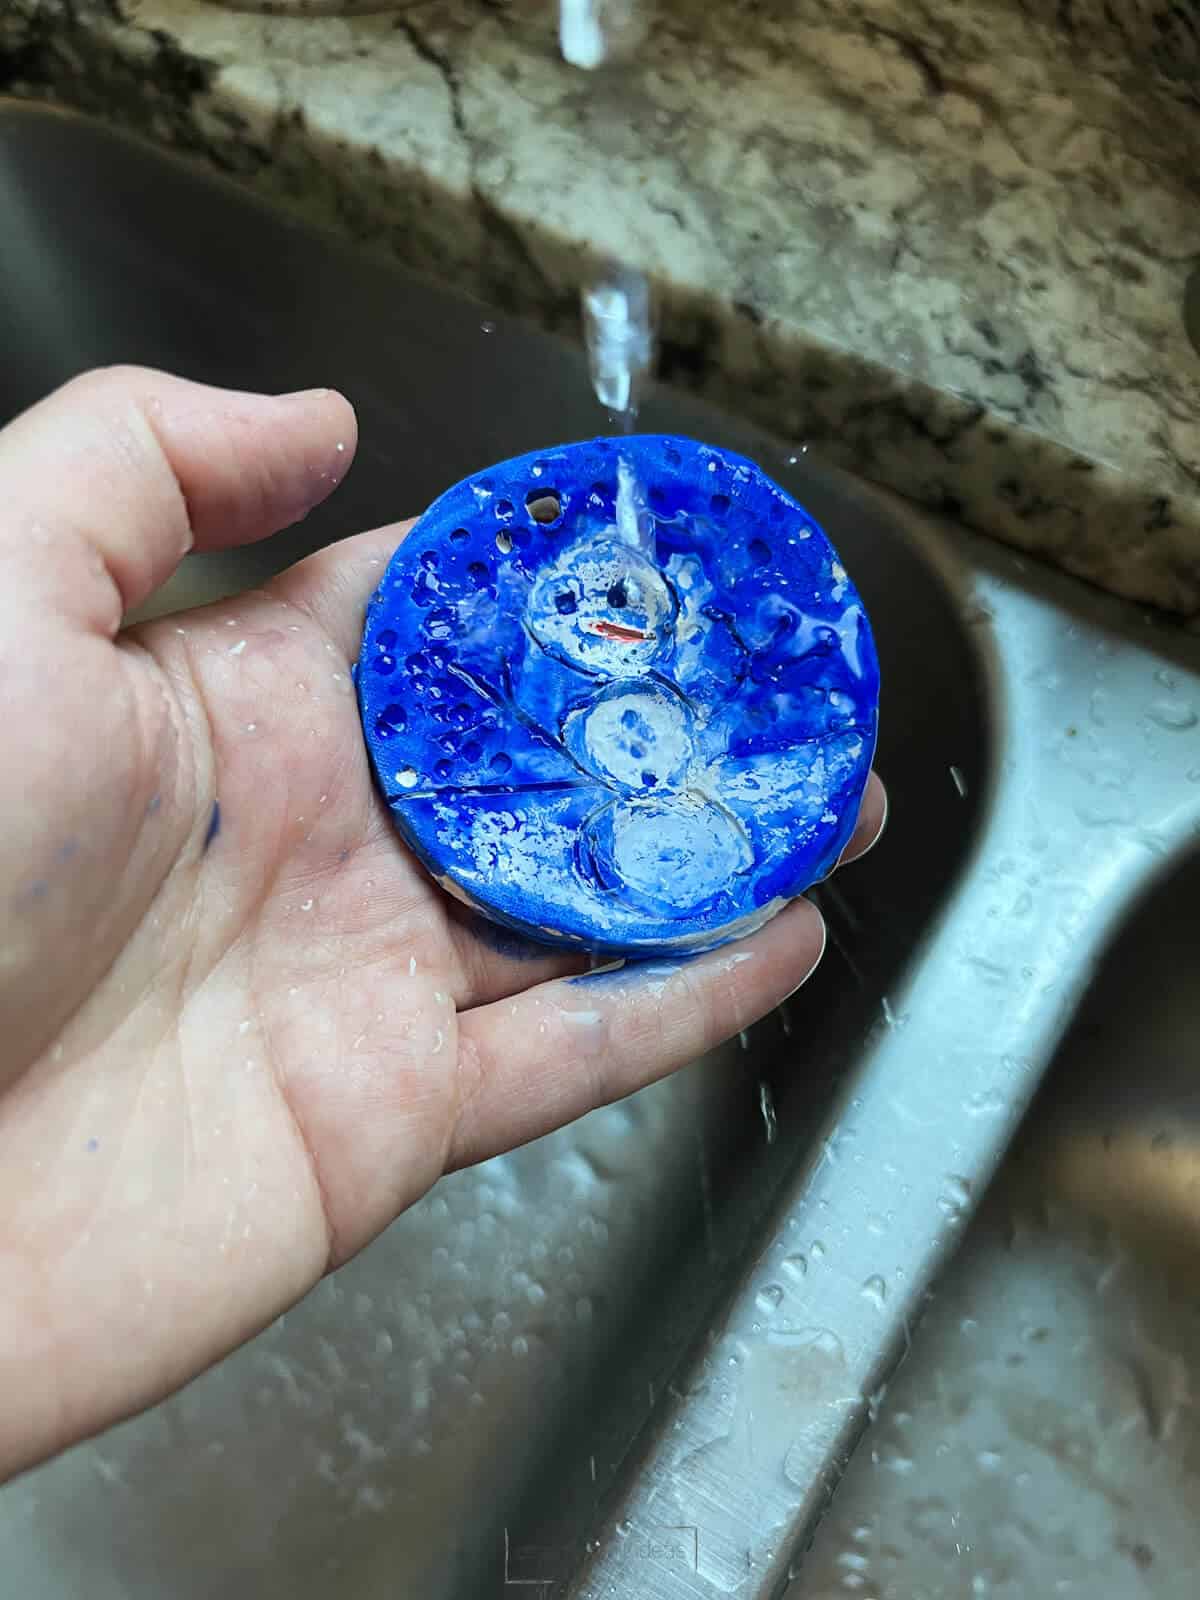
Step 9: Rines Under The Sink
Rinse the project under the sink so that the white crayon resists where the paint was. This is so much fun so encourage the child to help you.
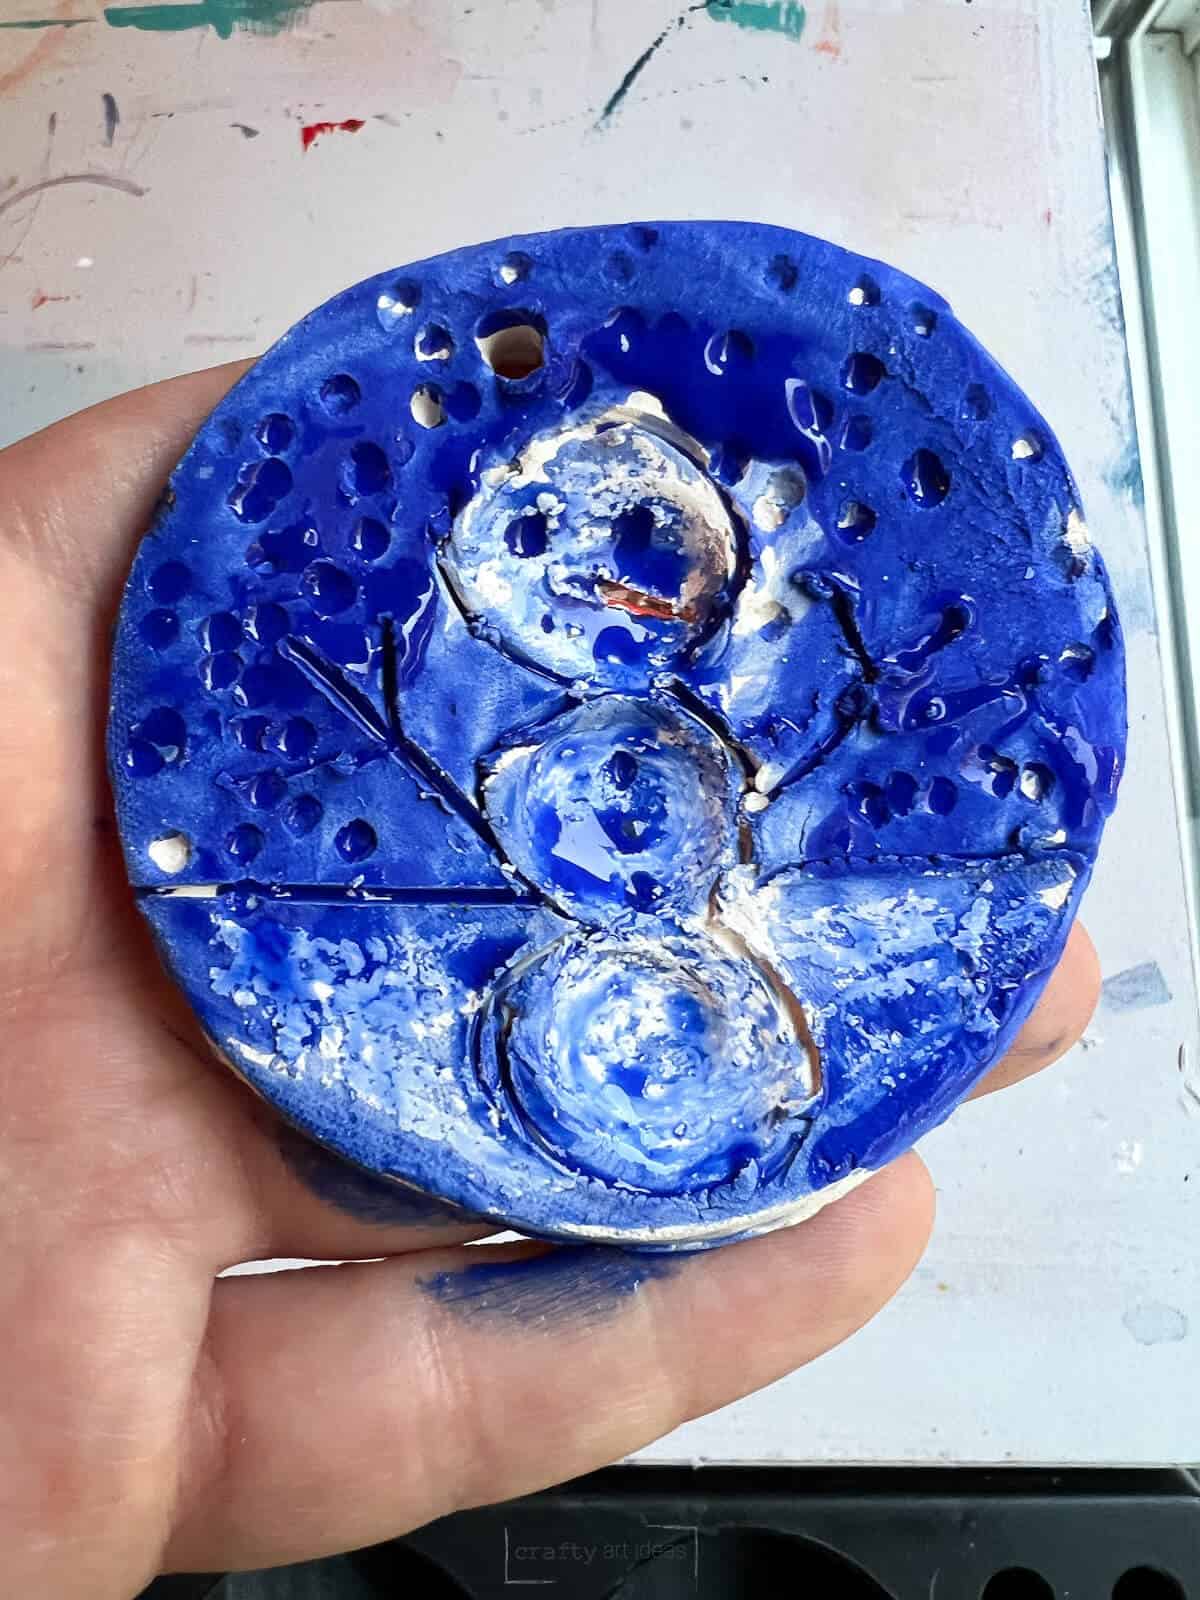
Step 10: Add A Clear Coat
Add a layer of glitter Mod Podge to seal the project.
Step 11: Let Dry And Add String
Let dry and add a string to hang their thumbprint clay snowman wherever they want.
Tips for Tempera Resist On Clay
We get a lot of questions about how to use oil pastels on clay. Every art teacher loves a good old resist painting technique and doing it on clay is super fun! Here are a few tips:
- Make sure kids press hard enough with the white crayon
- Use your finger to help get the excess paint off when running it under the sink
- Paint the edges of the project
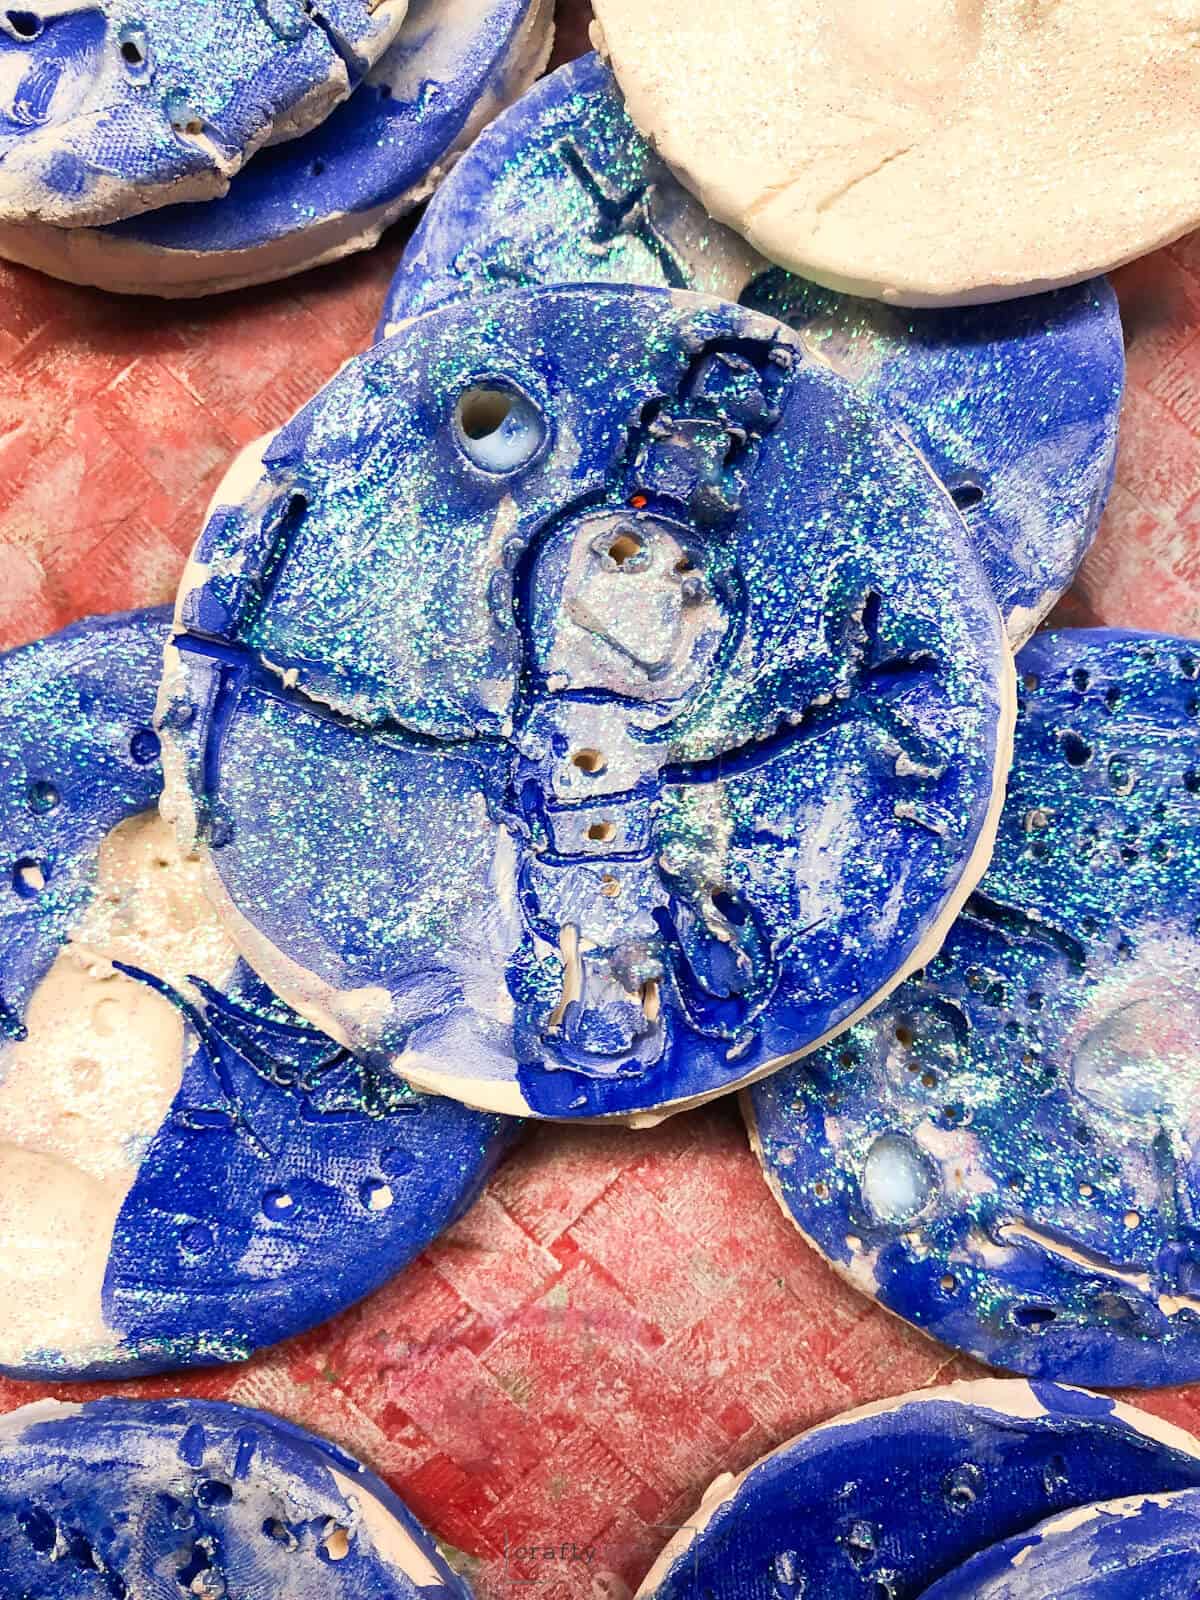
- Don’t worry about what it looks like at first. In the picture below you can see how we covered the whole snowman before rinsing it.
- If you don’t like what it looks like, you can always try again or just paint over it.
Follow us on Pinterest, YouTube & Facebook for more free art and craft ideas!
More Art Projects and Crafts For Young Children
Families will enjoy this snowman craft and will cherish the winter keepsake for years to come. The child’s fingerprints help make such a great keepsake ornament for the whole family to enjoy.
The children love these easy DIY snowman ornaments and clay projects.
Do you like this art project? Please give us a 5-STAR review below ⭐️⭐️⭐️⭐️⭐️ and have fun being creative with your family.
Easy Thumbprint Snowman Ornaments For Kids
Equipment
- Small container of water
- Rolling Pin
- Wooden Skewer
Supplies
- White Clay
- Circle item like an old cup or cookie cutter
- Work surface or Clay Mat
- Watered Down Blue Acrylic Paint
- White Crayon optional
- Clear Coat We used Glitter Mod Podge for our ornaments
- String
Instructions
- Start with a small clay circle slab. The child should use his/her finger and dip in the water. Rub the water around the edge of the circle to make it smoother.
- Kids will then take their thumbs and push in three thumbprints that are touching. This makes the snowman’s body.
- Each child will get a wooden skewer to draw in snowman details such as eyes, nose, scarf, buttons and a hat.
- You can even flip over the skewer to stamp in snowflakes around the snowman.
- Take the clay ornament and write the child's name on the back with a wooden skewer or needle tool.
- Let dry until not cool to the touch.
- Run a kiln for a bisque fire.
- Use a white crayon to color the snowman.
- Paint watered down blue acrylic or tempera paint on the whole clay ornament. Even getting the sides.
- Rinse the project under the sink so that the white crayon resists where the paint was.
- Add a layer of glitter Mod Podge to seal the project.
- Let dry and add a string to hang their thumbprint clay snowman wherever they want.
Notes
Tips for Adding Color To Clay
- Make sure kids press hard enough with the white crayon
- Use your finger to help get the excess paint off when running it under the sink
- Paint the edges of the project
- Don’t worry about what it looks like at first. In the picture below you can see how we covered the whole snowman before rinsing it.
- If you don’t like what it looks like, you can always try again or just paint over it.