Easy Slab Clay Cat Project For Kids

Are you looking for a quick and easy clay project? This simple clay slab ceramic project is perfect for you. Find out how you can build this slab cat project with kids in under 25 minutes with students in 2nd grade and up!
I have taught this clay cat lesson to hundreds of students over the years. I originally published this clay tutorial in April 2022, but it was recently updated in October 2025 with more precise instructions, improved formatting, and my key takeaways.
I always loved doing this ceramic slab project after finishing our Laurel Burch-inspired cat lesson in 2nd grade. This easy clay project can be built in one class (and we all know how much easier that is).
Why You Will Love This Kid Clay Idea
Who was Laurel Burch?
According to Laurel Burch Studios, Laurel Burch was an artist who was born in 1945. In the 1960s, she began creating colorful and playful artworks in San Francisco, CA. Now her artworks can be found reproduced on a wide range of items, from T-shirts to bags.
I actually scored this bag at a garage sale, and the kids really do love seeing artwork and designs in person.
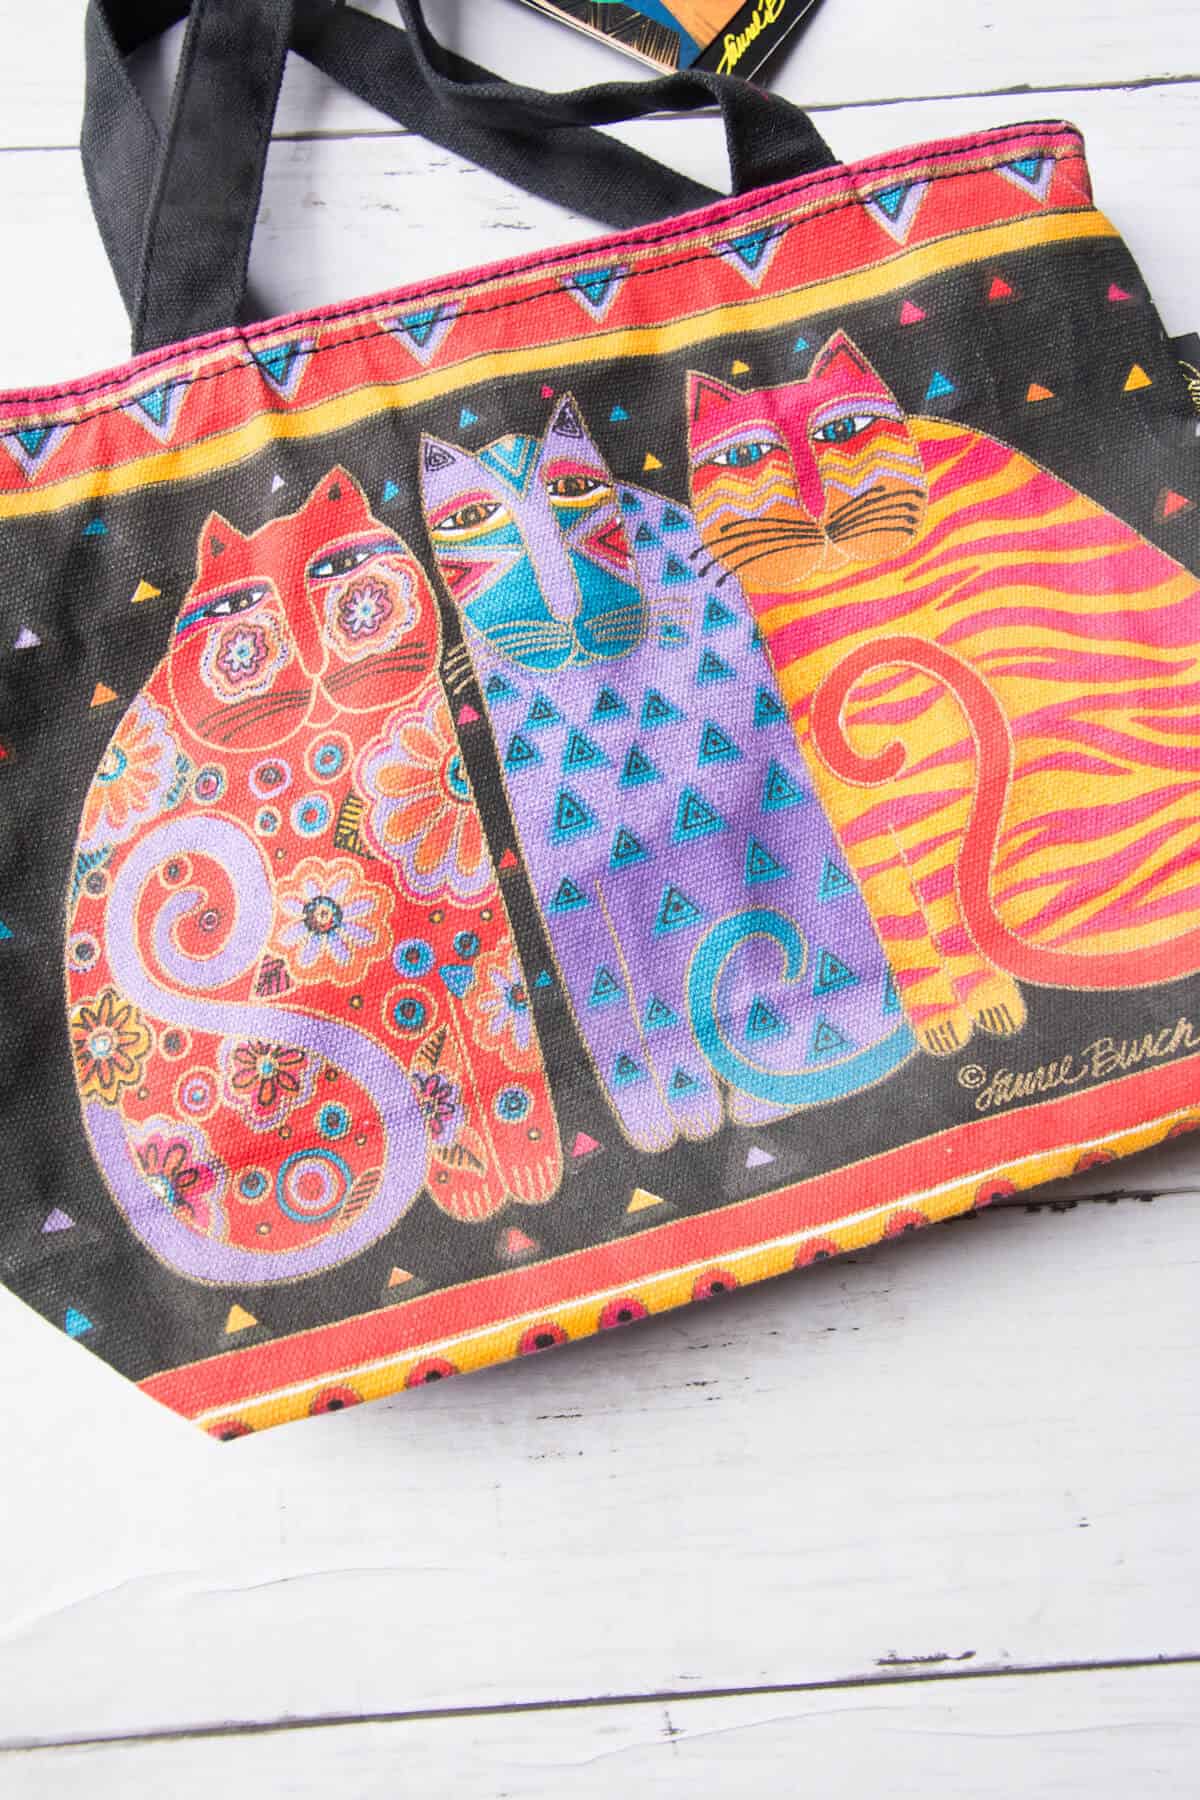
Laurel Burch did not have any formal training as an artist. Wikipedia notes that she always struggled with osteoporosis and had over 100 different bone breaks in her lifetime. She still overcame her physical obstacles to share her creativity with the world.
By sharing her life experiences with children, you can help them understand how people persevere and overcome challenging times.
Erin
Not to mention her patterned cat and other animal artworks, which are perfect for discussing with young children; they love how playful, colorful, and creative these artworks are.
Notes On Supplies You’ll Need
Disclosure: This post may contain affiliate links when clicked, we may earn a small commission at no additional cost to you. Read our full privacy policy.
You can get the full list of supplies in the printable how-to card at the end of the post.
Before You Begin
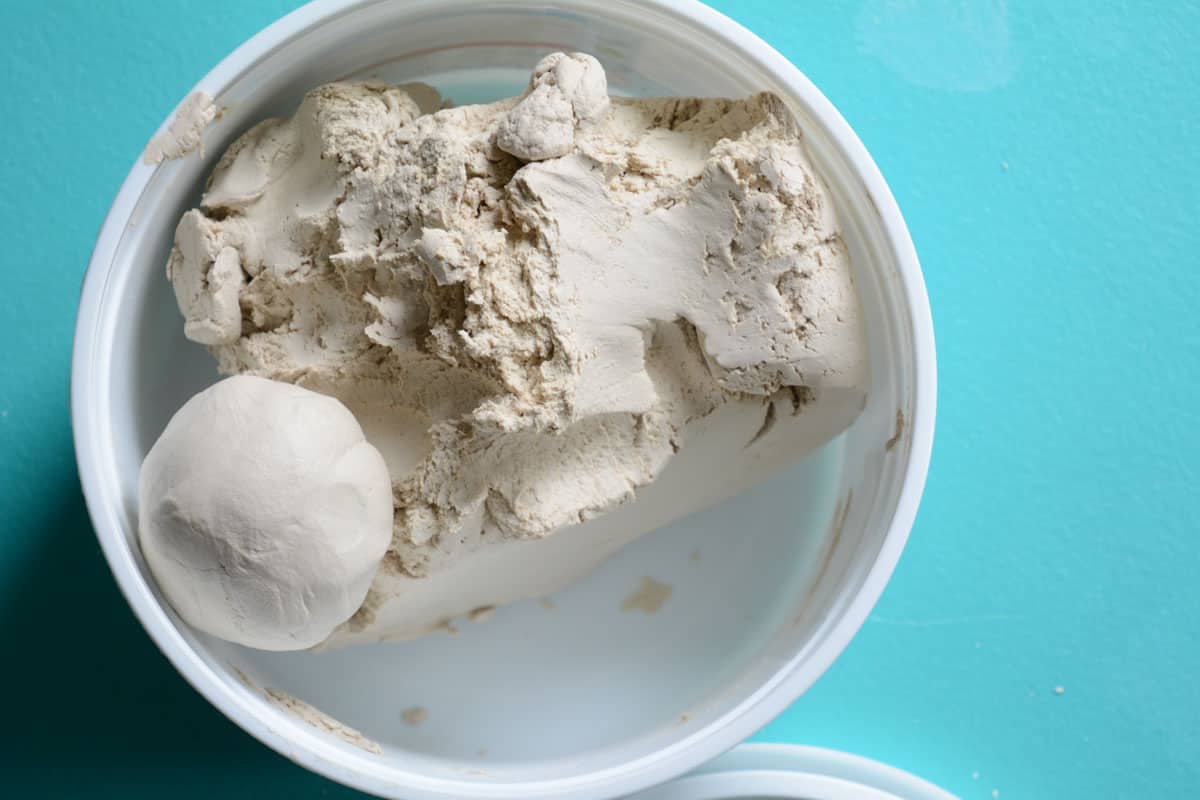
For this particular project, I preferred to make the slabs in advance so that there is enough time to build and clean up within a 40-minute class. You can have children roll their own slabs, just note that it will take more time.
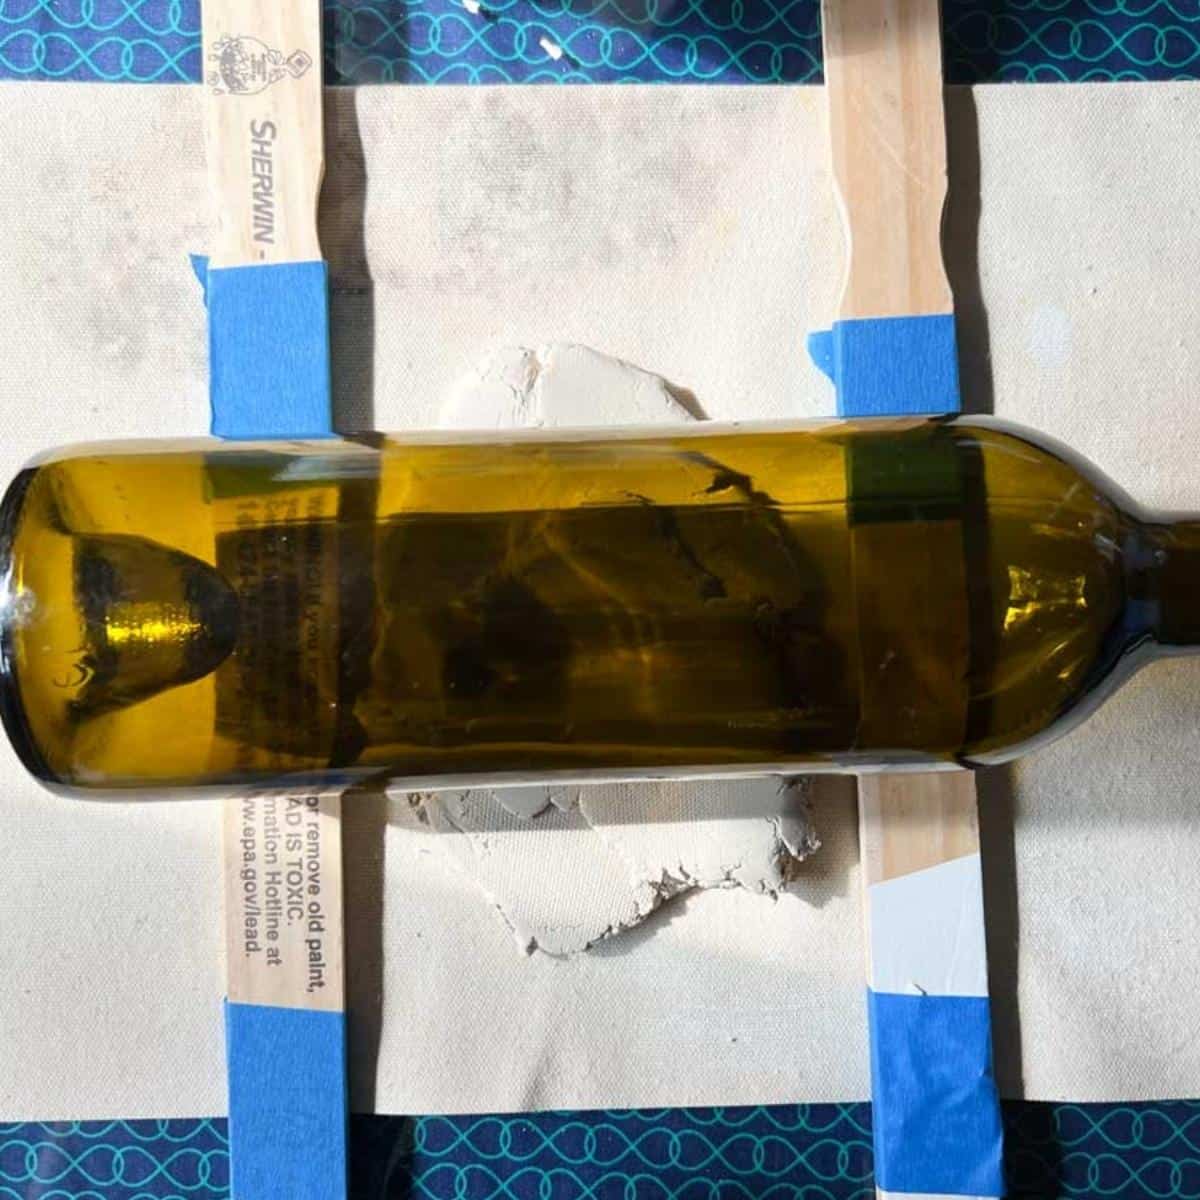
ART TEACHER TIP – If you have students roll clay slabs, tape together old wooden rulers or large wooden paint sticks as guides for the desired thickness.
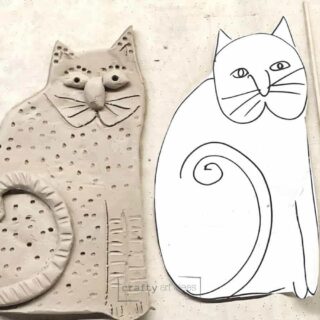
How To Build A Clay Cat
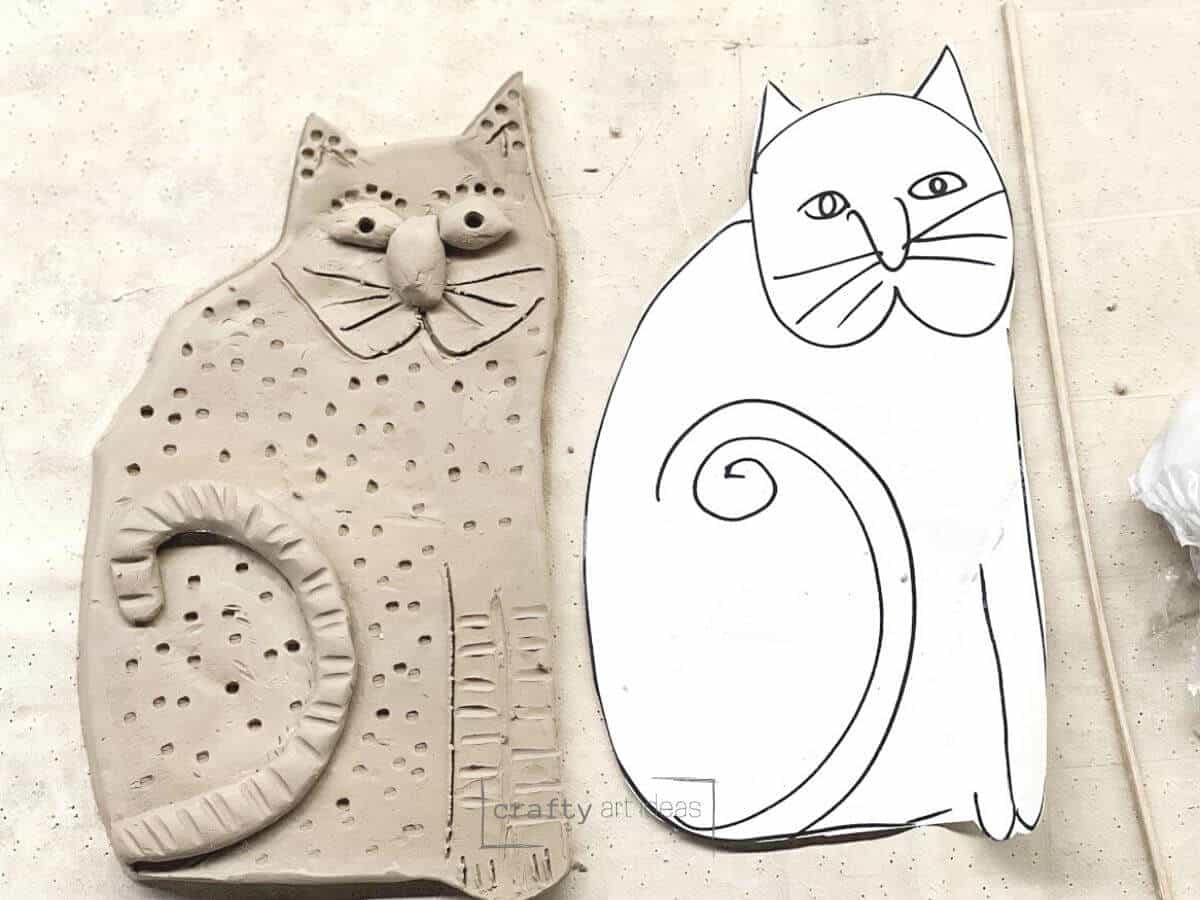
Either pre-create each slab for the students or give each child a ball of clay to work with. Create a clay slab by using a rolling pin to form a pancake-shaped slab large enough to fit the cat template.
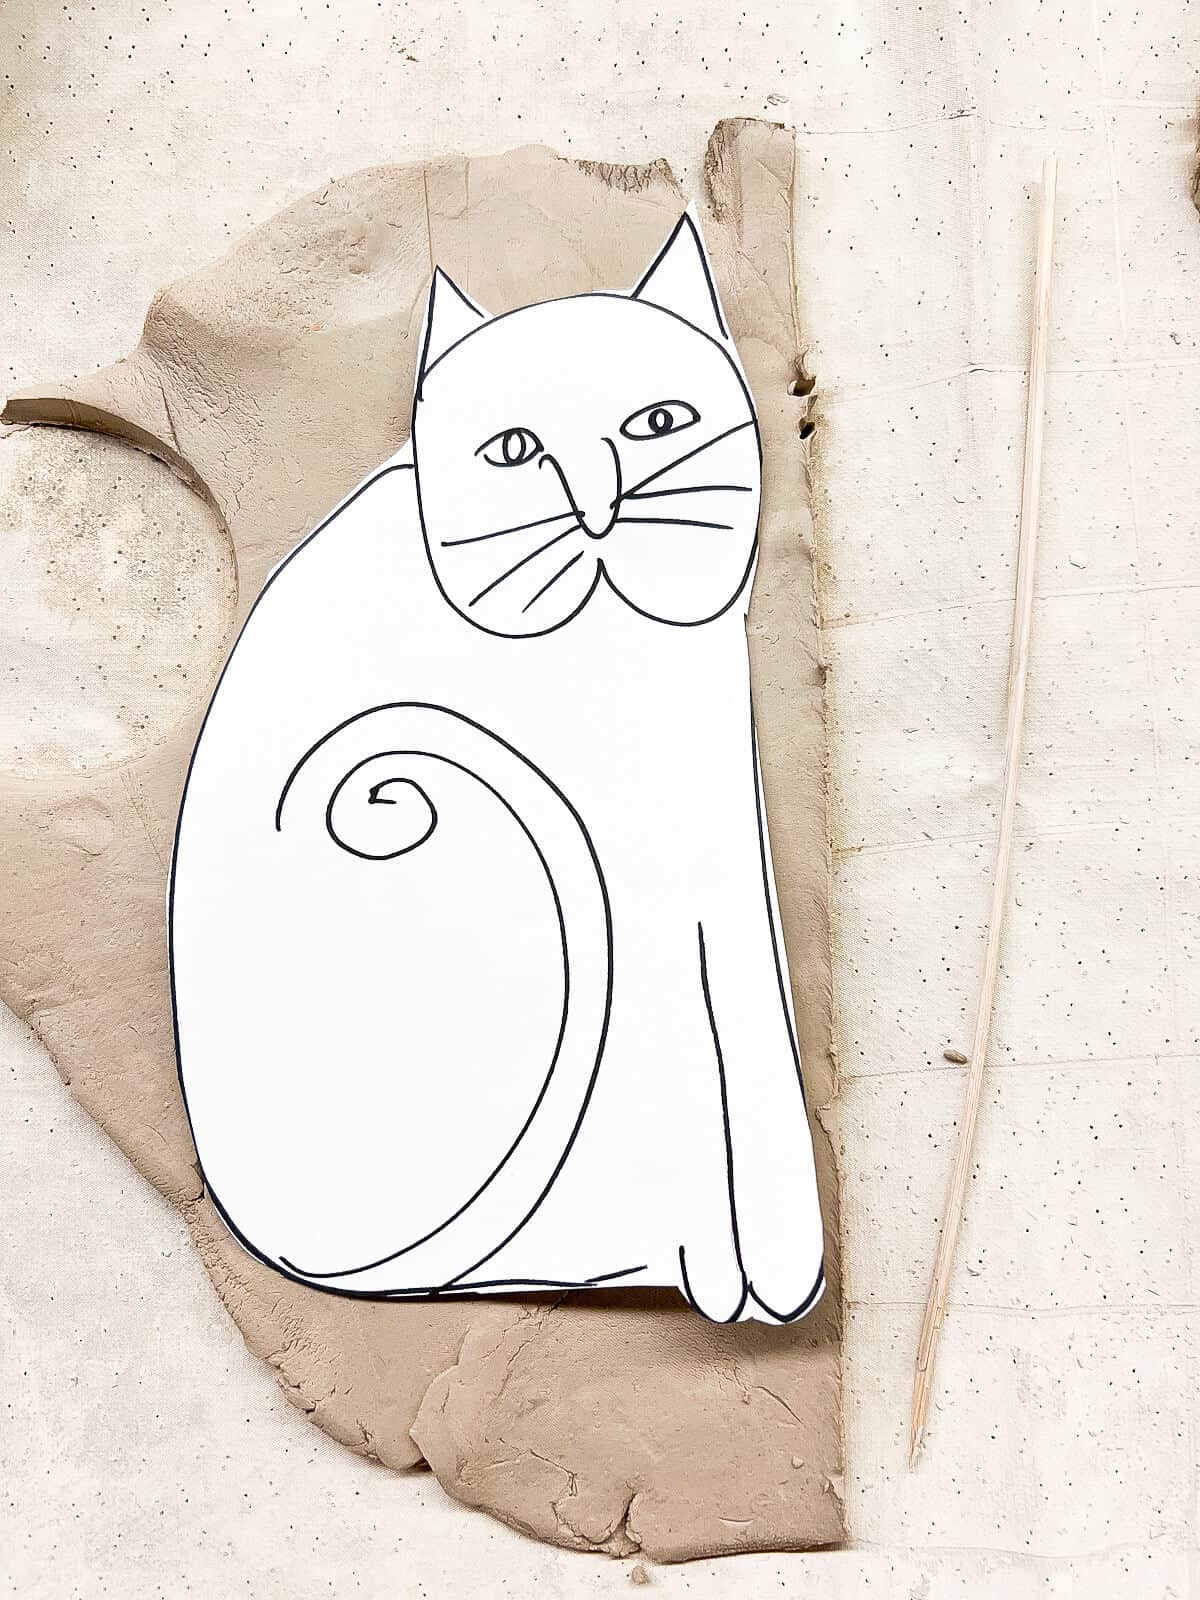
Step 1: Place Cat Paper On Clab Slab
Line template on an even clay slab. Make sure the whole cat shape is covered underneath.
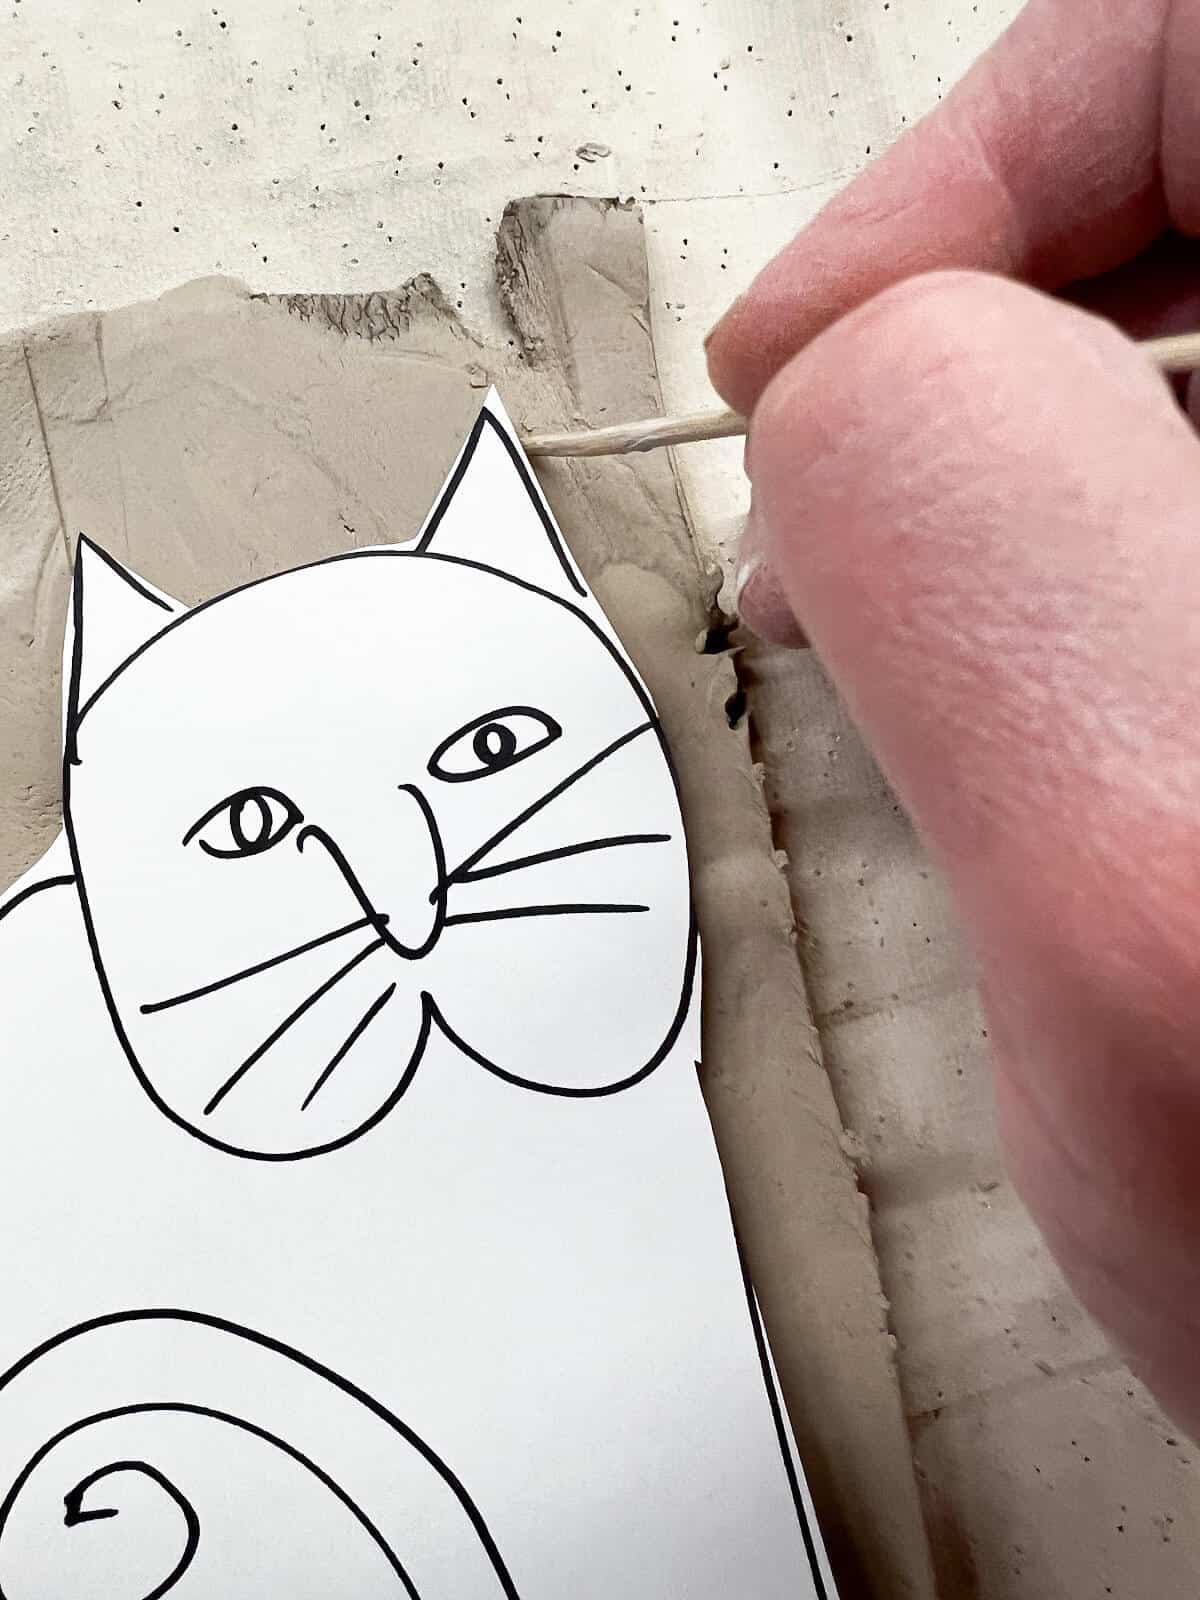
Step 2: Cut Out The Cat Shape
Use a wood skewer to cut around the cat template.
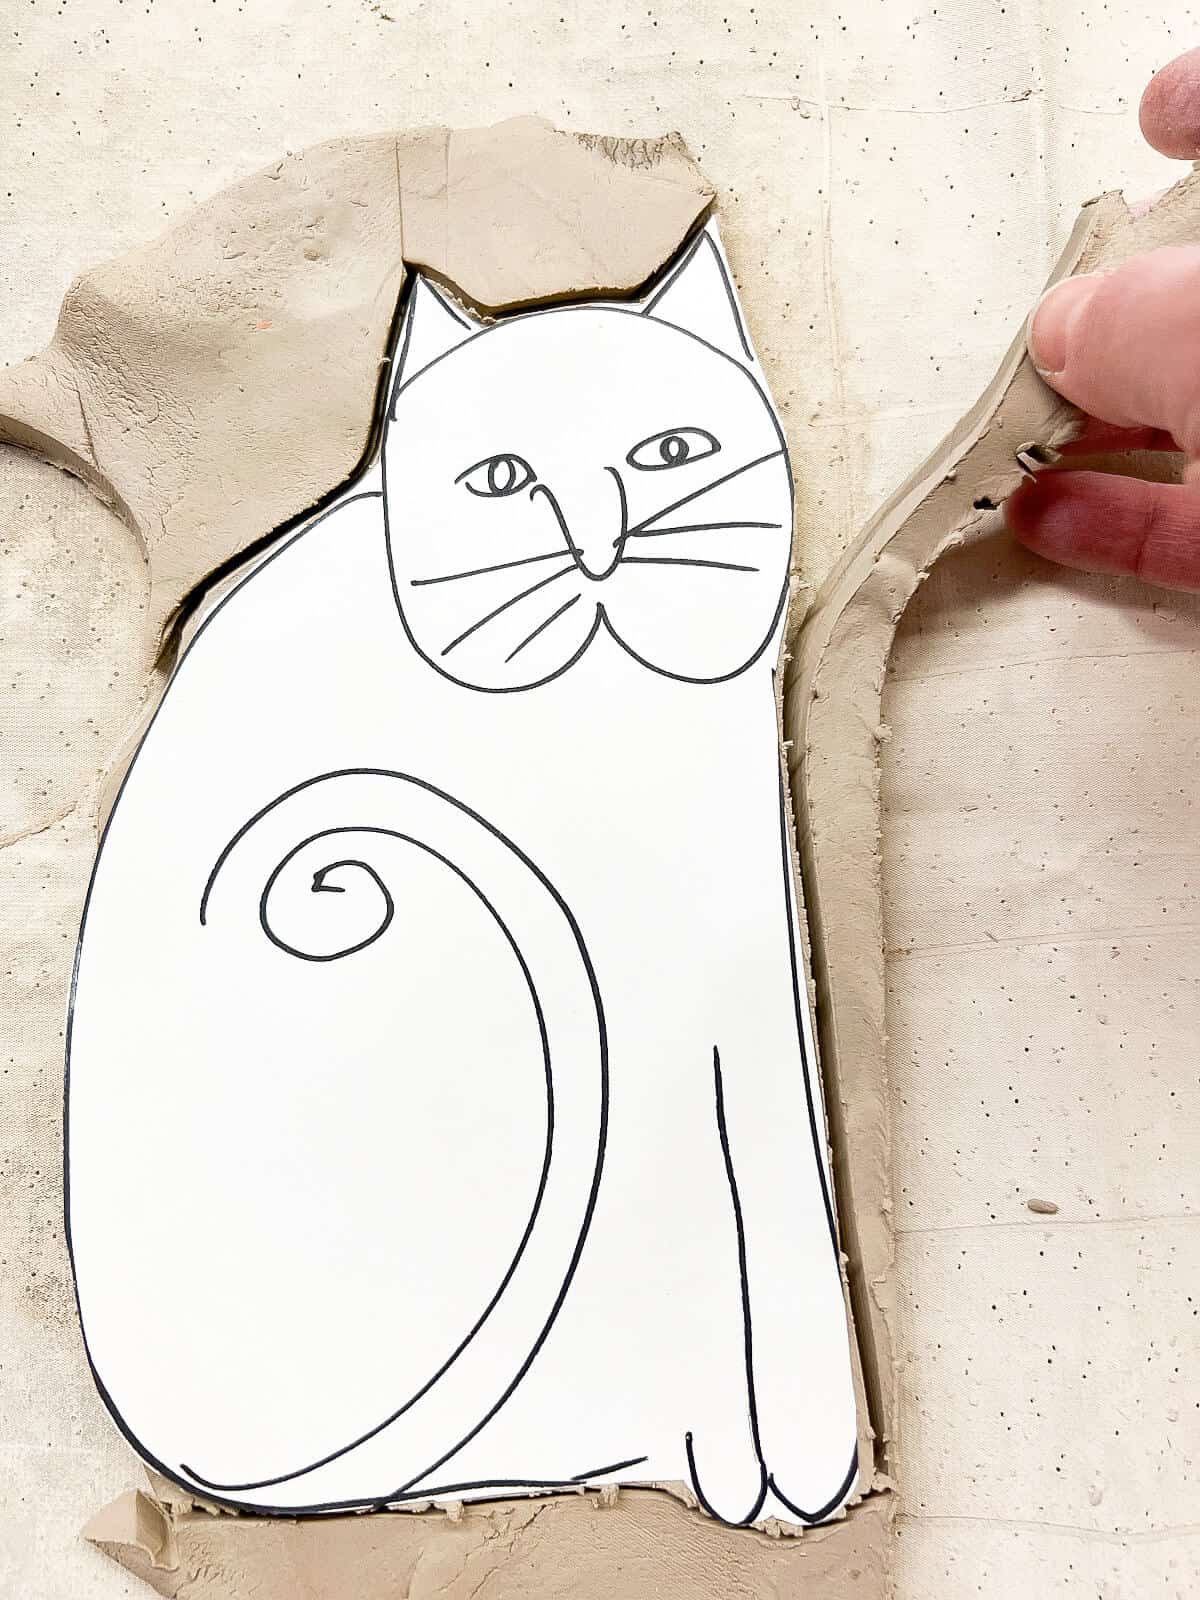
Step 3: Remove Excess Clay
Pull the extra clay off the slab. Kids are always amazed at how this works!

Step 4: Smooth Edges
Dip one finger in water and lightly smooth the edges.
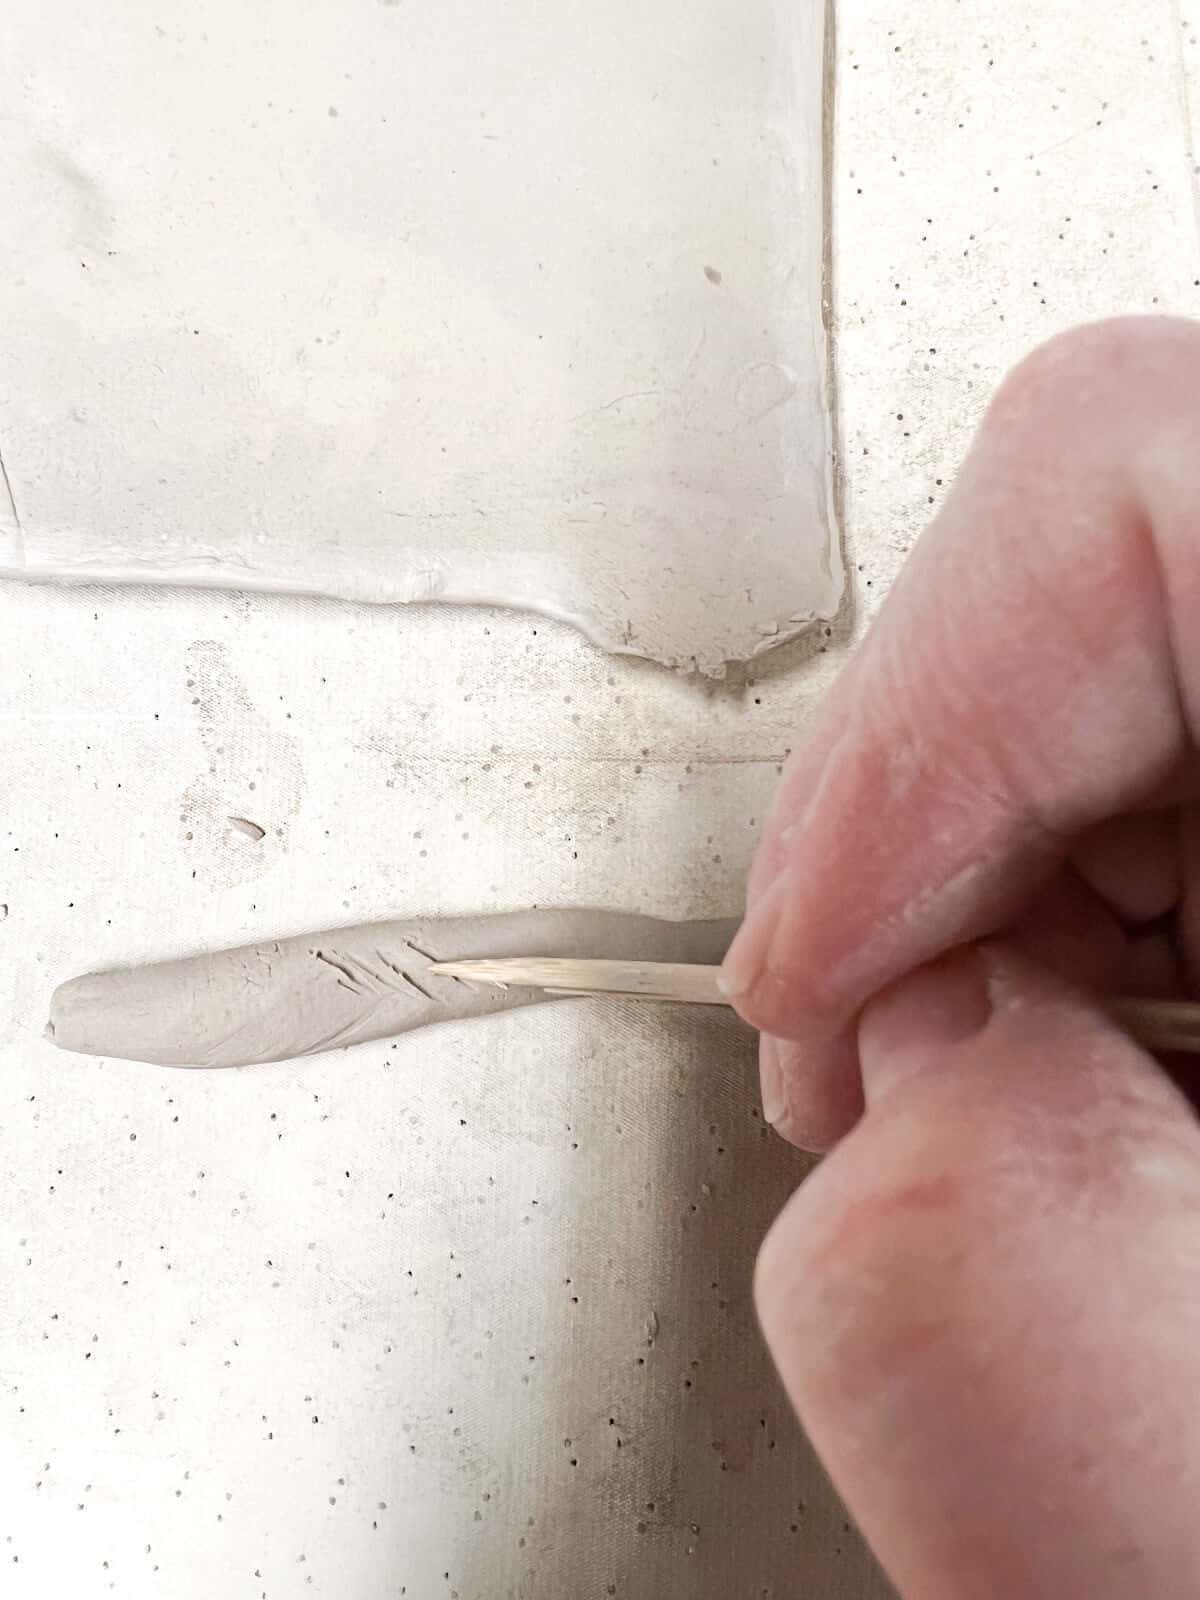
Step 5: Make A Tail
Roll a coil to be used as a tail from the extra clay that was cut off.
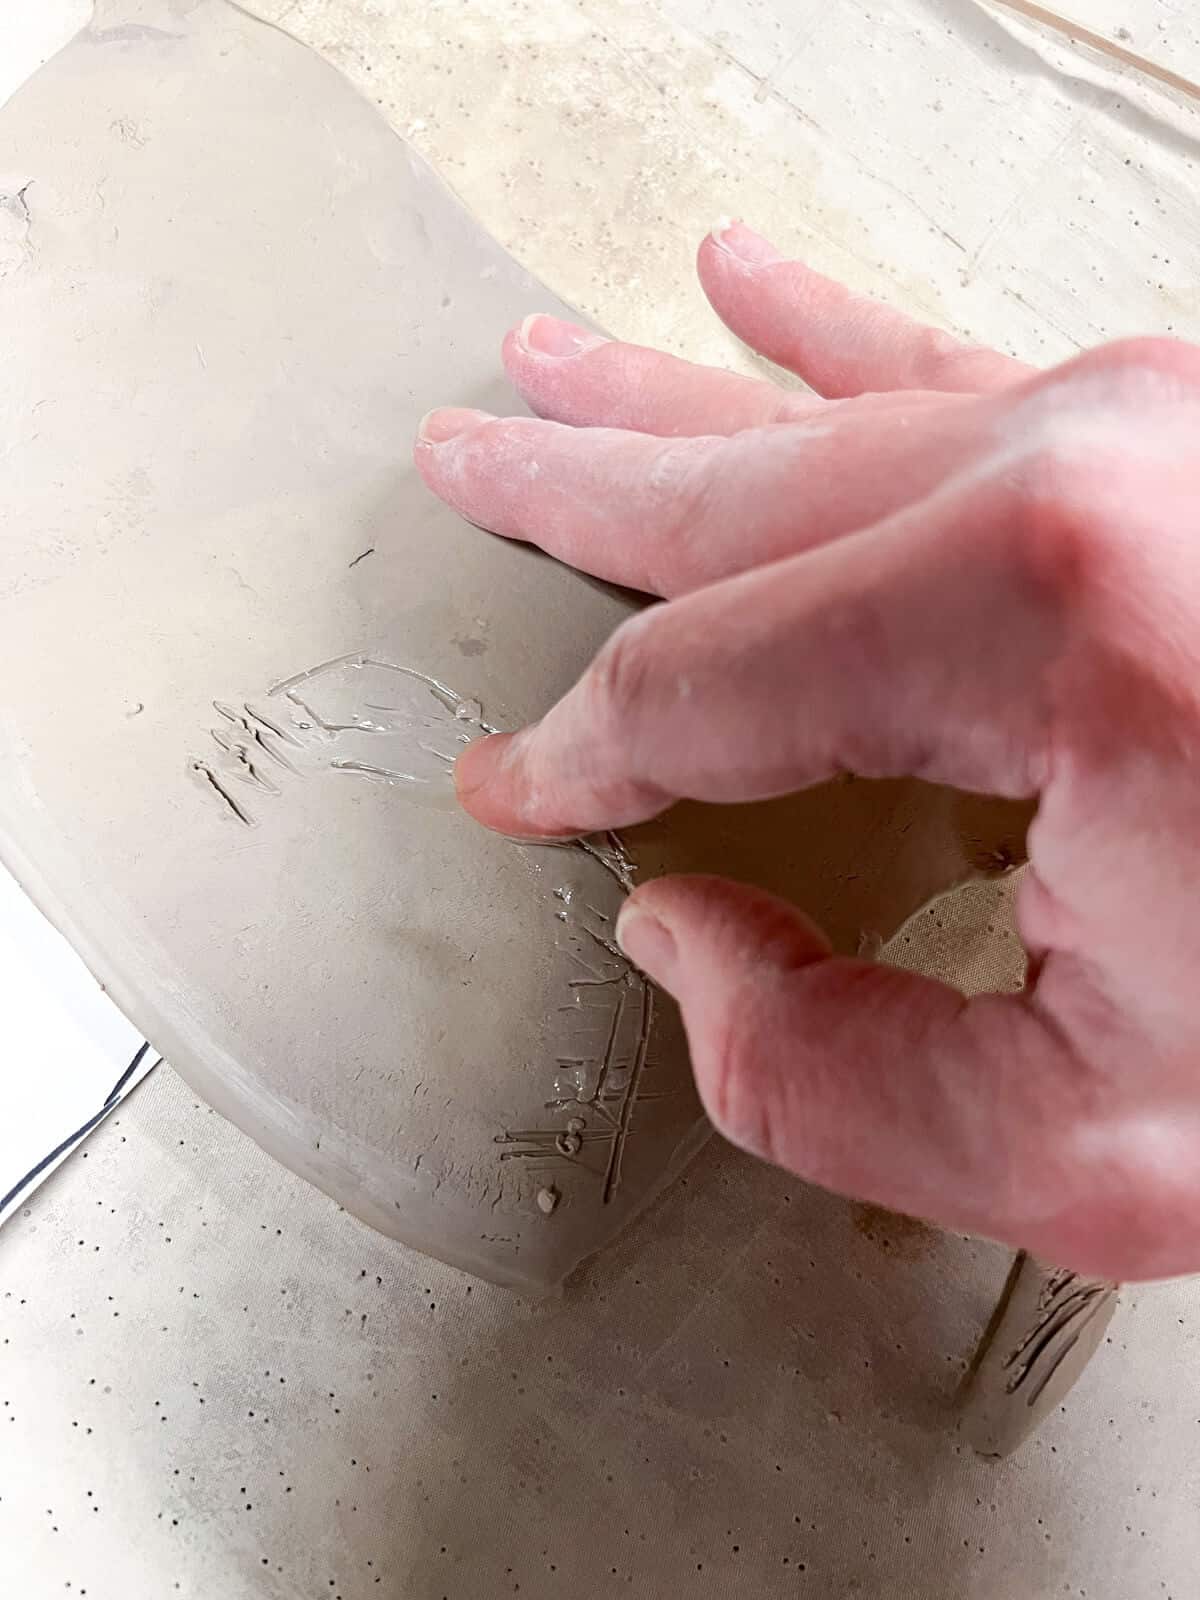
Step 6: Attach Clay Tail
Use score lines on the parts that you are attaching and use one finger dipped in water to “make fake clay slip”.

Step 7: Build And Attach Other Details
Create other relief parts of the cat. Score, add water and attach.
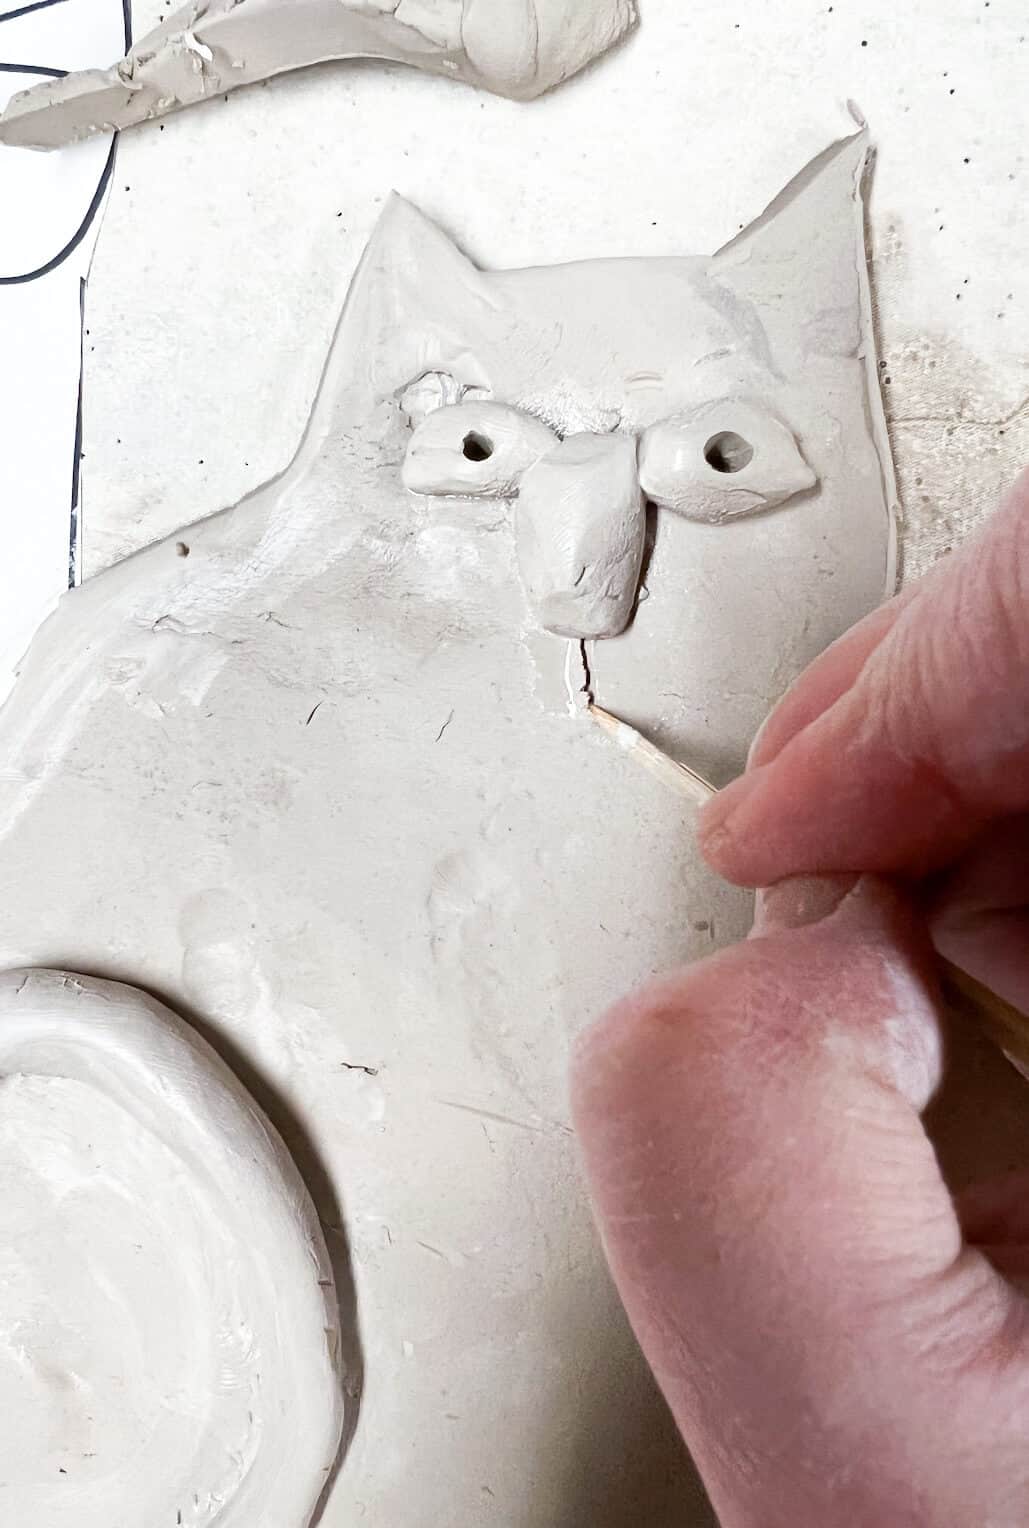
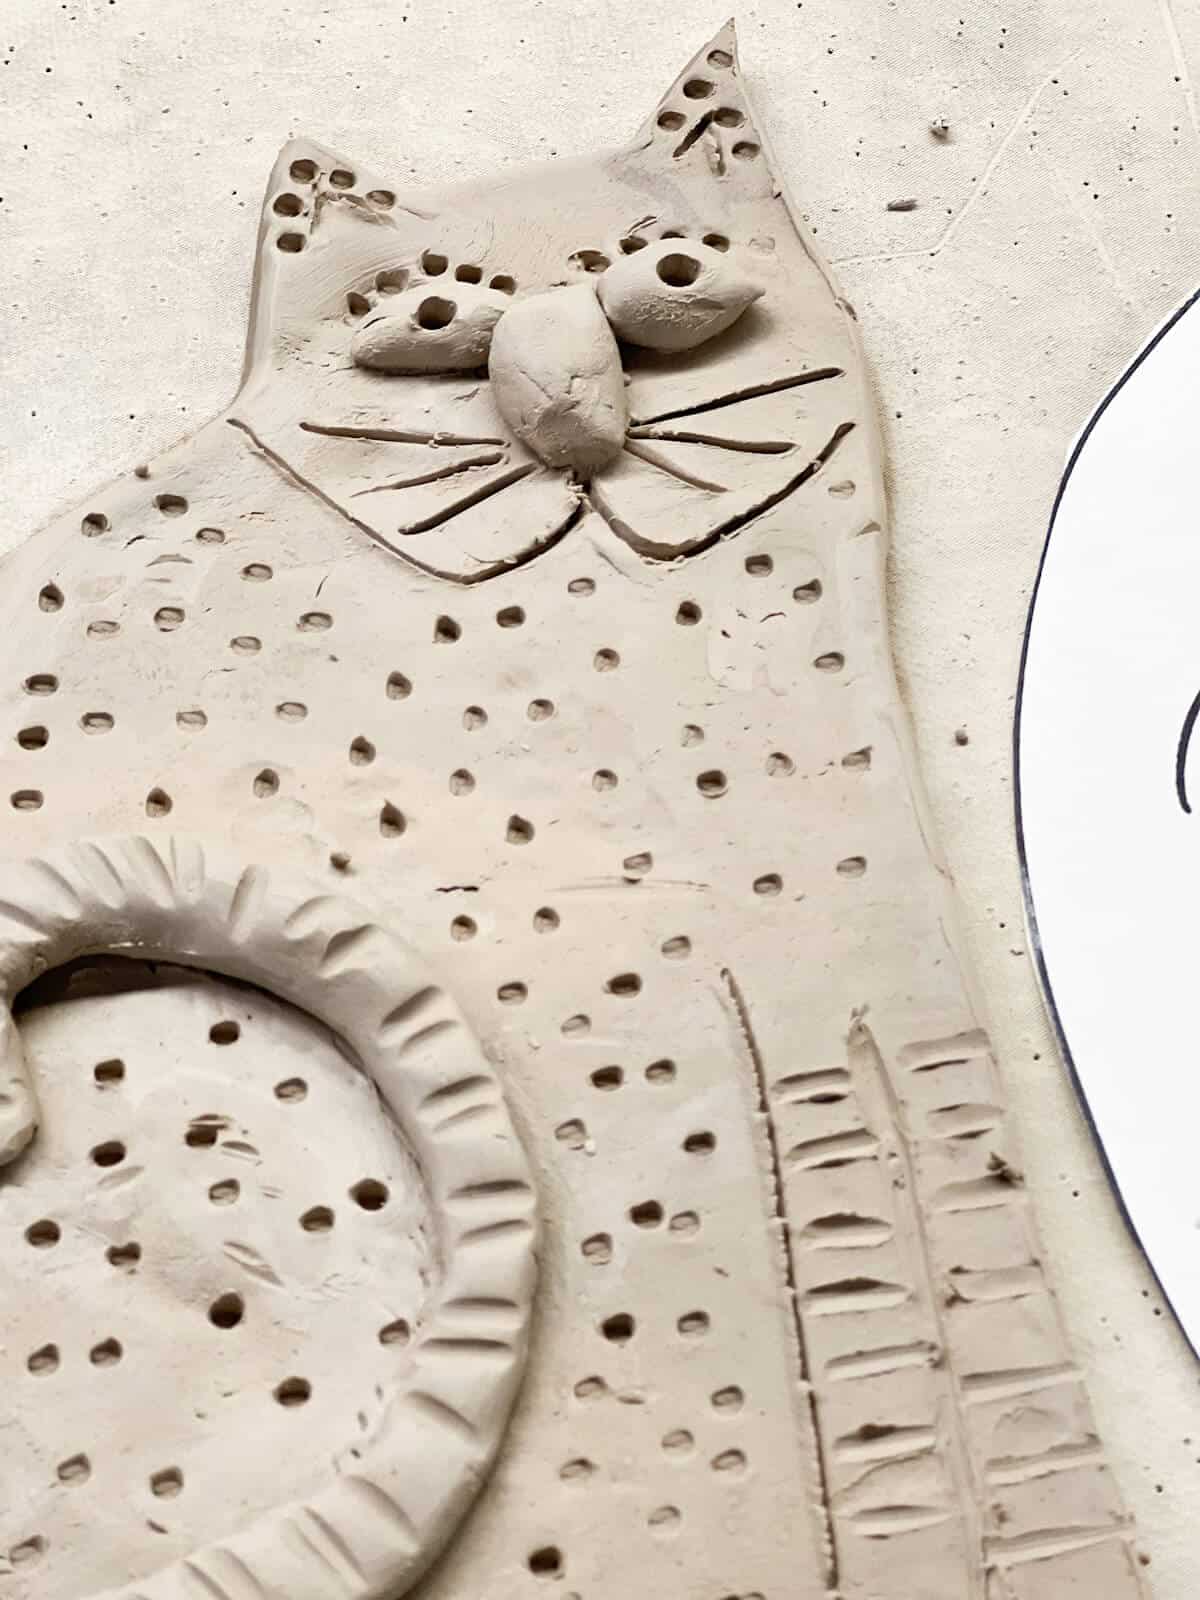
Step 8: Draw Extra Textures
Use a skewer or needle tool to draw or poke other details and patterns.
Step 9: Let Dry & Fire
We like to let the kids’ clay projects dry for about a week. However, these are thin, so you may be able to get away with them being dry enough in 4 days. Just make sure they are not cool to the touch.
Run a bisque fire in your kiln according to the type of clay you ordered.
RELATED CAT ART – If you have an earlier finisher, have them check out this easy cat sketch or 4 other cat drawing ideas for kids.
Options For Adding Color To Clay
Since it is challenging to load a kiln with glazed slabs, alternative options should be considered, such as applying watercolor paints to clay, using oil pastel and ink wash, or employing acrylic paint.
Steps For Using Oil Pastel Resist On Clay Cat
NOTE: This technique is best suited for fired clay. If making a clay cat out of air-dry clay, I recommend painting the clay with acrylic paint and a sealer.
Read our full tutorial on how to use oil pastels on clay for a fun glaze alternative.
- Color the clay by pushing hard. Be careful in delicate areas.
- Kids can blend colors, but really encourage them to cover the clay with color.
- Create a 1:1 ratio of water and ink or black acrylic paint.
- Paint wash over the whole clay project.
- Run the project under the sink.
- Let dry.
- Optional: Use a clear coat of your choice to finish the clay project.
Slab Project FAQs
This clay cat art lesson is best for 2nd graders and up. If you help children pre-make a slab, you can do this with children of any age. Younger children may need help to ensure they do not cut through the clay when creating their designs. As with any fine motor skill, some children will grasp this concept, while others will continue to struggle to control the pressure they apply.
Yes, it creates a different look on the finished fired clay. Making sure students really grind the old oil pastels will yield rich colors. When using an ink or acrylic wash, ensure it is rinsed to achieve the desired effect. Adding a clear coat or sparkly Mod Podge can also give a fun effect.
Our Favorite
Easy Clay Projects For Kids
Follow us on Pinterest, YouTube & Facebook for more free art and craft ideas!
Kids will love creating this fun clay slab art project. It is the perfect quick art lesson to explore texture, ways to create relief designs in clay, while expressing personality with a whimsical clay cat.
Do you like this art project? Please give us a 5-STAR review below ⭐️⭐️⭐️⭐️⭐️ and have fun being creative with your family.
Clay Cat Art Project
Equipment
- Kiln
- Wooden Skewer
- Clay Placemat
- Small container of water
Supplies
- White Art Clay Low Fire
- Oil Pastels
- Black Acrylic Paint
- Wooden Skewer
Instructions
- Either pre-create each slab for the students or give each child a ball of clay.
- Create a slab by using a rolling pin to make a pancake large enough to fit the cat template.
- Place template on even clay slab.
- Use a wood skewer to cut around the cat template and pull the extra clay off the slab.
- Roll a coil to be used as a tail.
- Use score lines on the parts that you are attaching and use one finger dipped in water to “make fake clay slip”.
- Create other relief parts of the cat. Score, add water and attach.
- Use a skewer or needle tool to draw other details and patterns.
- Let dry. We like to let kid clay projects dry for about a week. However these are thin, so you probably could get away with them drying in 4 days. Just make sure they are not cool to the touch.
- Run a bisque fire in your kiln according to the clay you order.
- Add color by glazing, painting or even using oil pastels.
Notes
- An adult should carefully write the names on the back of the clay cats with a needle tool.
- An adult or teacher can have the slabs premade or can teach children how to make their own slab before beginning to form their clay cat.
Can I use air dry clay for this project?
Hi. Jane. Yes, you should be able to do this slab project with air dry clay. Just be careful because it will be more fragile due to being a slab.