How To Draw Simple Cats For Kids (4 Easy Ways)
Let’s break down a cat into simple shapes to create different cat doodles and drawings that kids and beginners can easily recreate.

This drawing tutorial was originally published in December 2022 but was completely updated in September 2025 with new step-by-step images and final drawings.
Whether you are looking to sketch a cute cat or use this cat shape as the beginning of a larger animal art project, use these 4 simple cat drawing ideas kids can easily do.
ART TEACHER TIP – Remind children that their projects are to look unique and that they do not have to look precisely like this guided drawing.
How To Draw A Simple Cat
Whether drawing a cat lying down, sitting or just looking super cut, you can always break down each sketch with simple shapes and remember to draw lightly so you can erase.
Cat Drawing #1
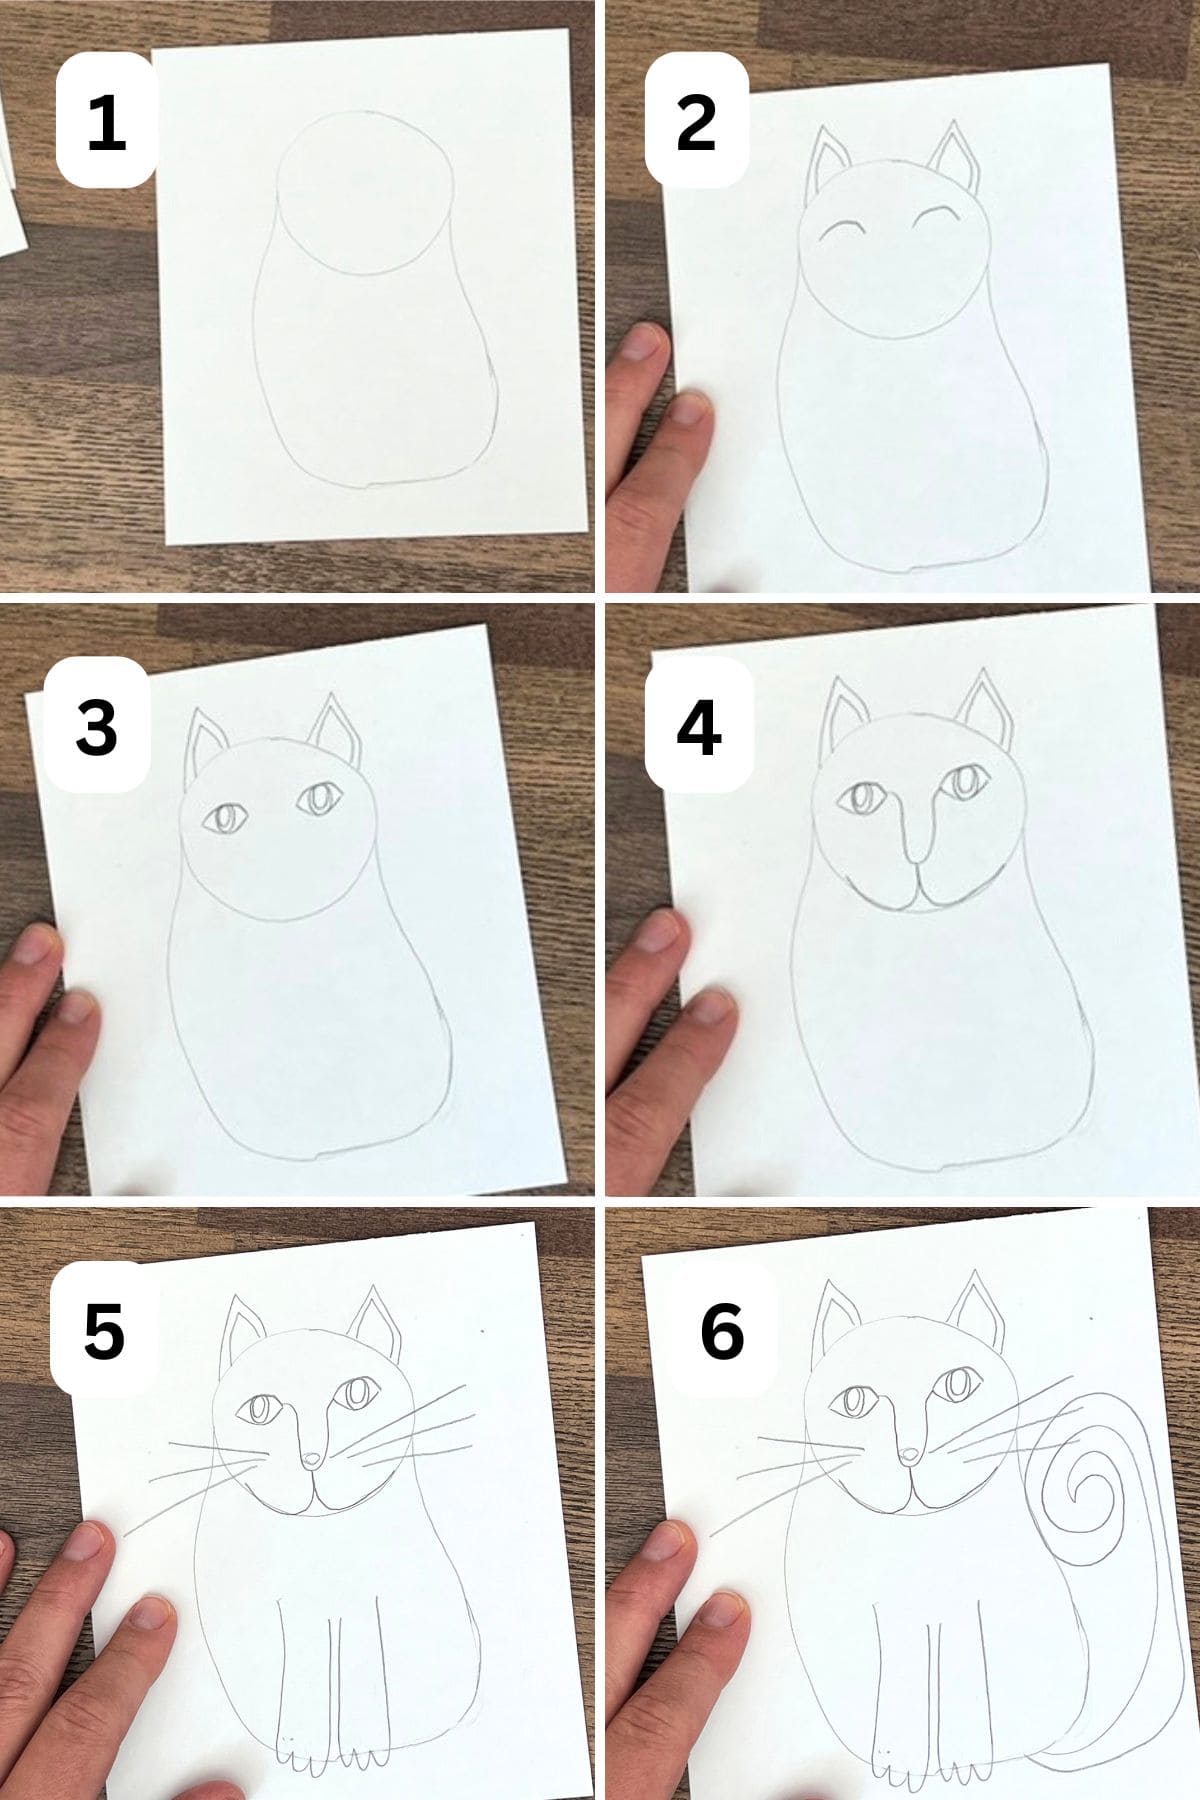
This is the basic drawing that we use to create folk art cats in our Laurel Burch art lesson. Add patterns or extra details to complete the simple cat drawing.

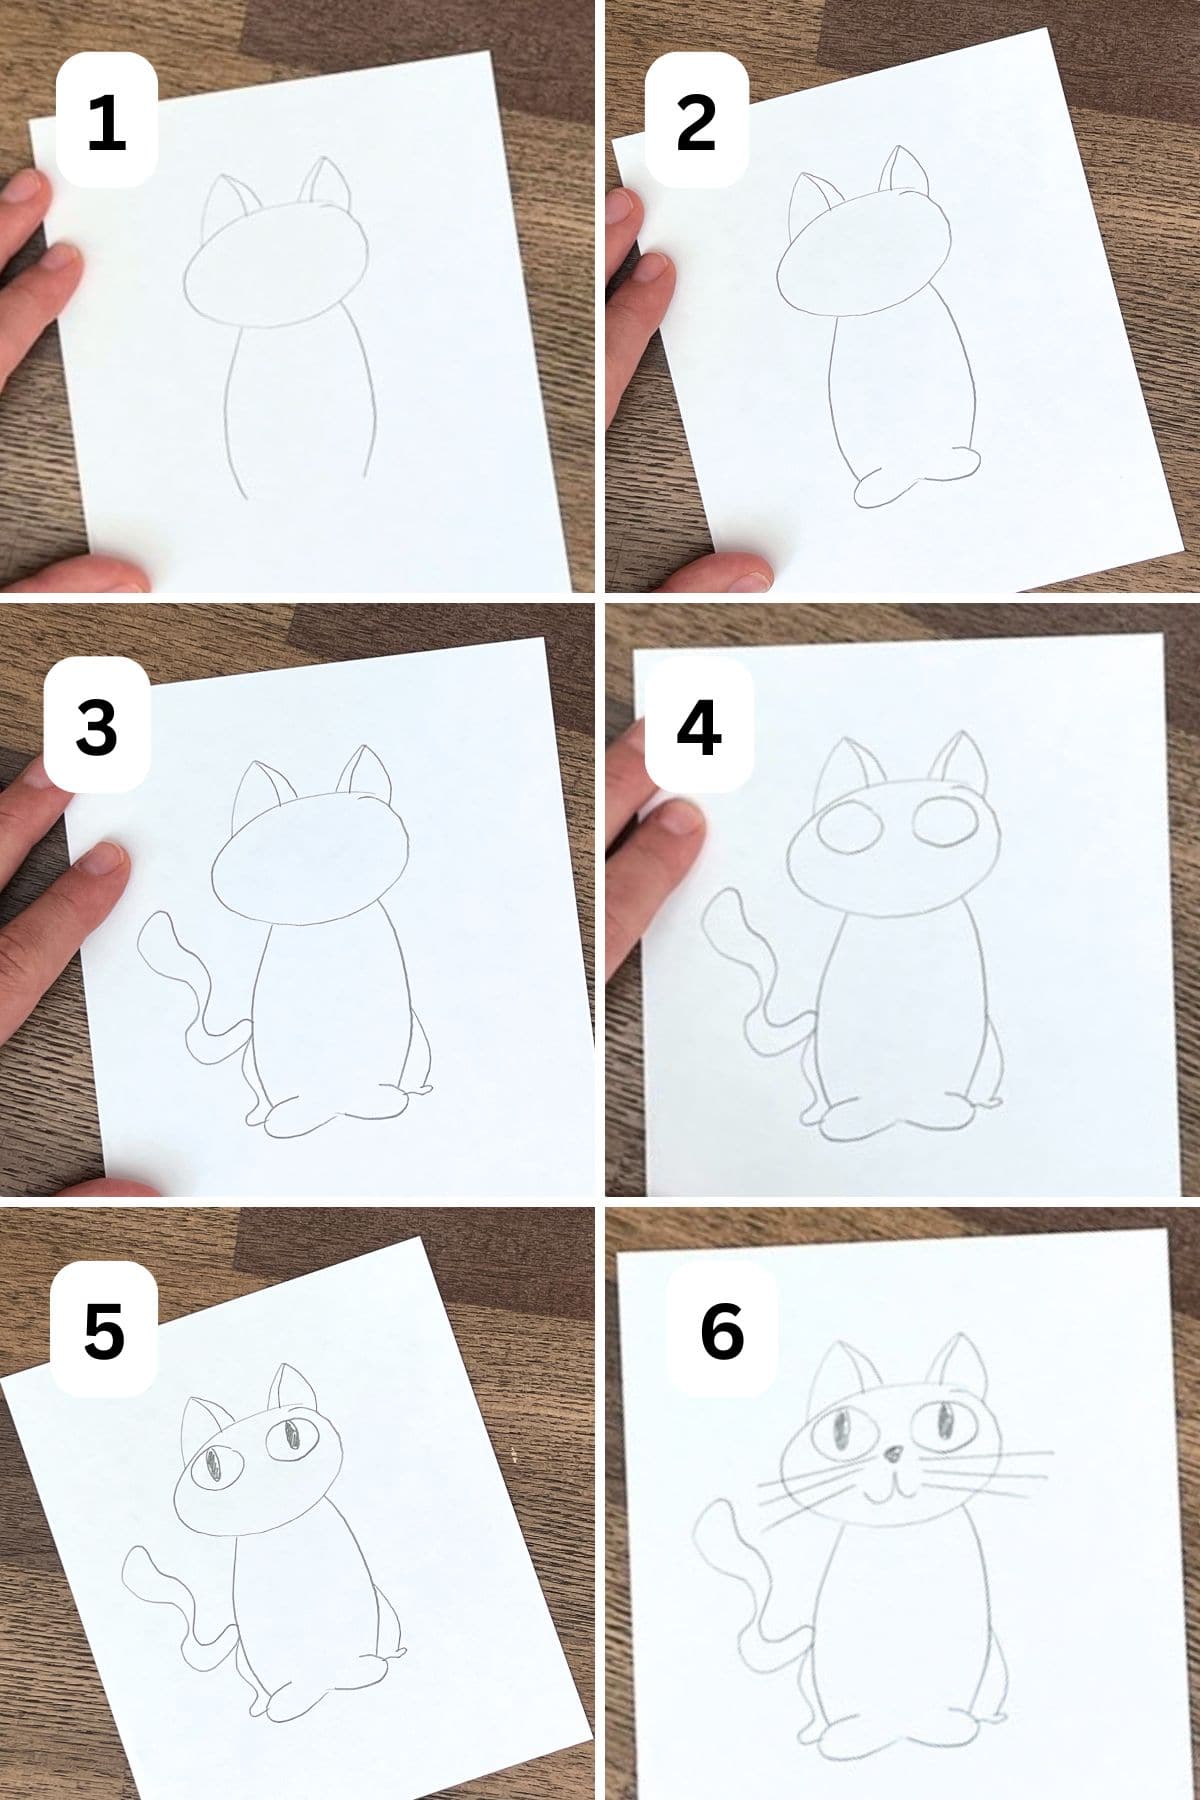
Simple Cartoon Cat Drawing #2
The eyes make all the difference. Practice adding different shapes to see how the cat’s attitude will change.
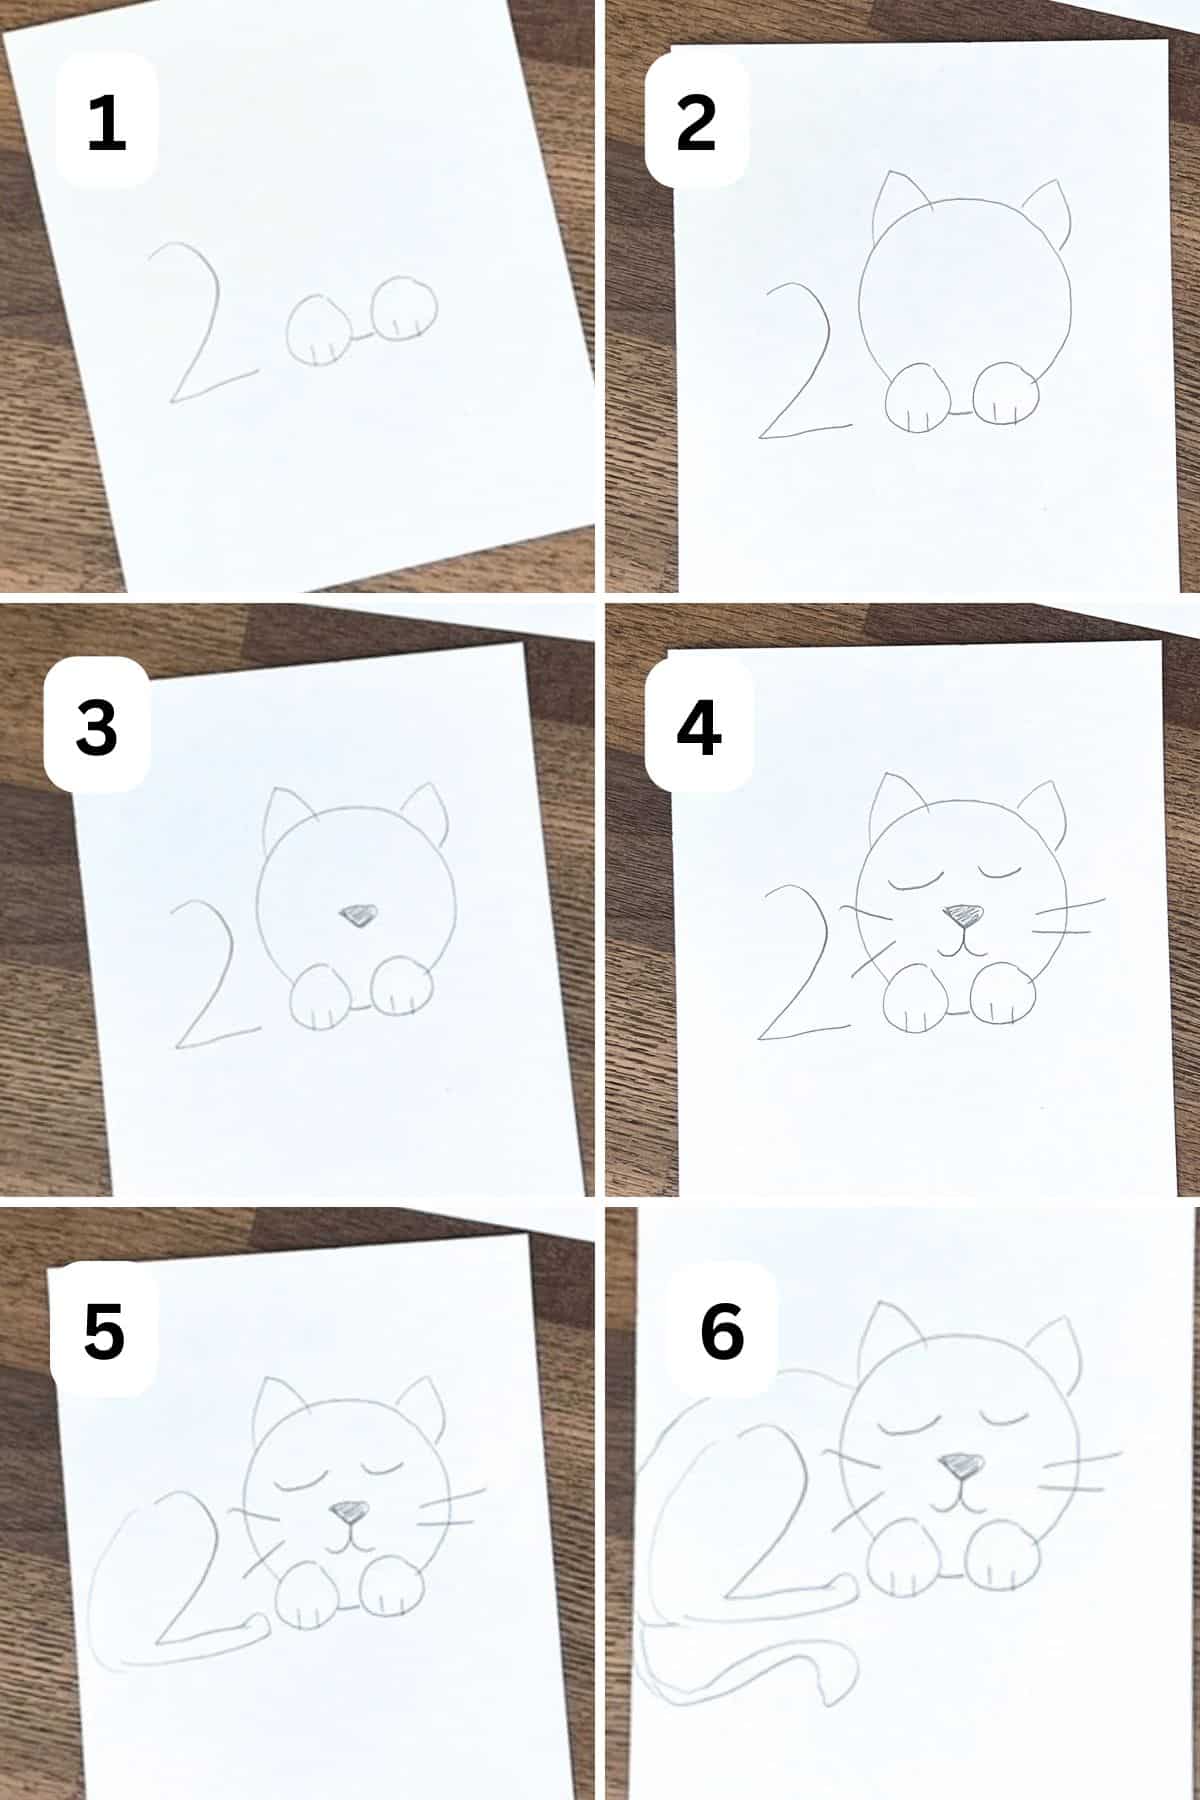
Cat Laying Down Sketch #3
Start with a basic 2 line for the back legs.
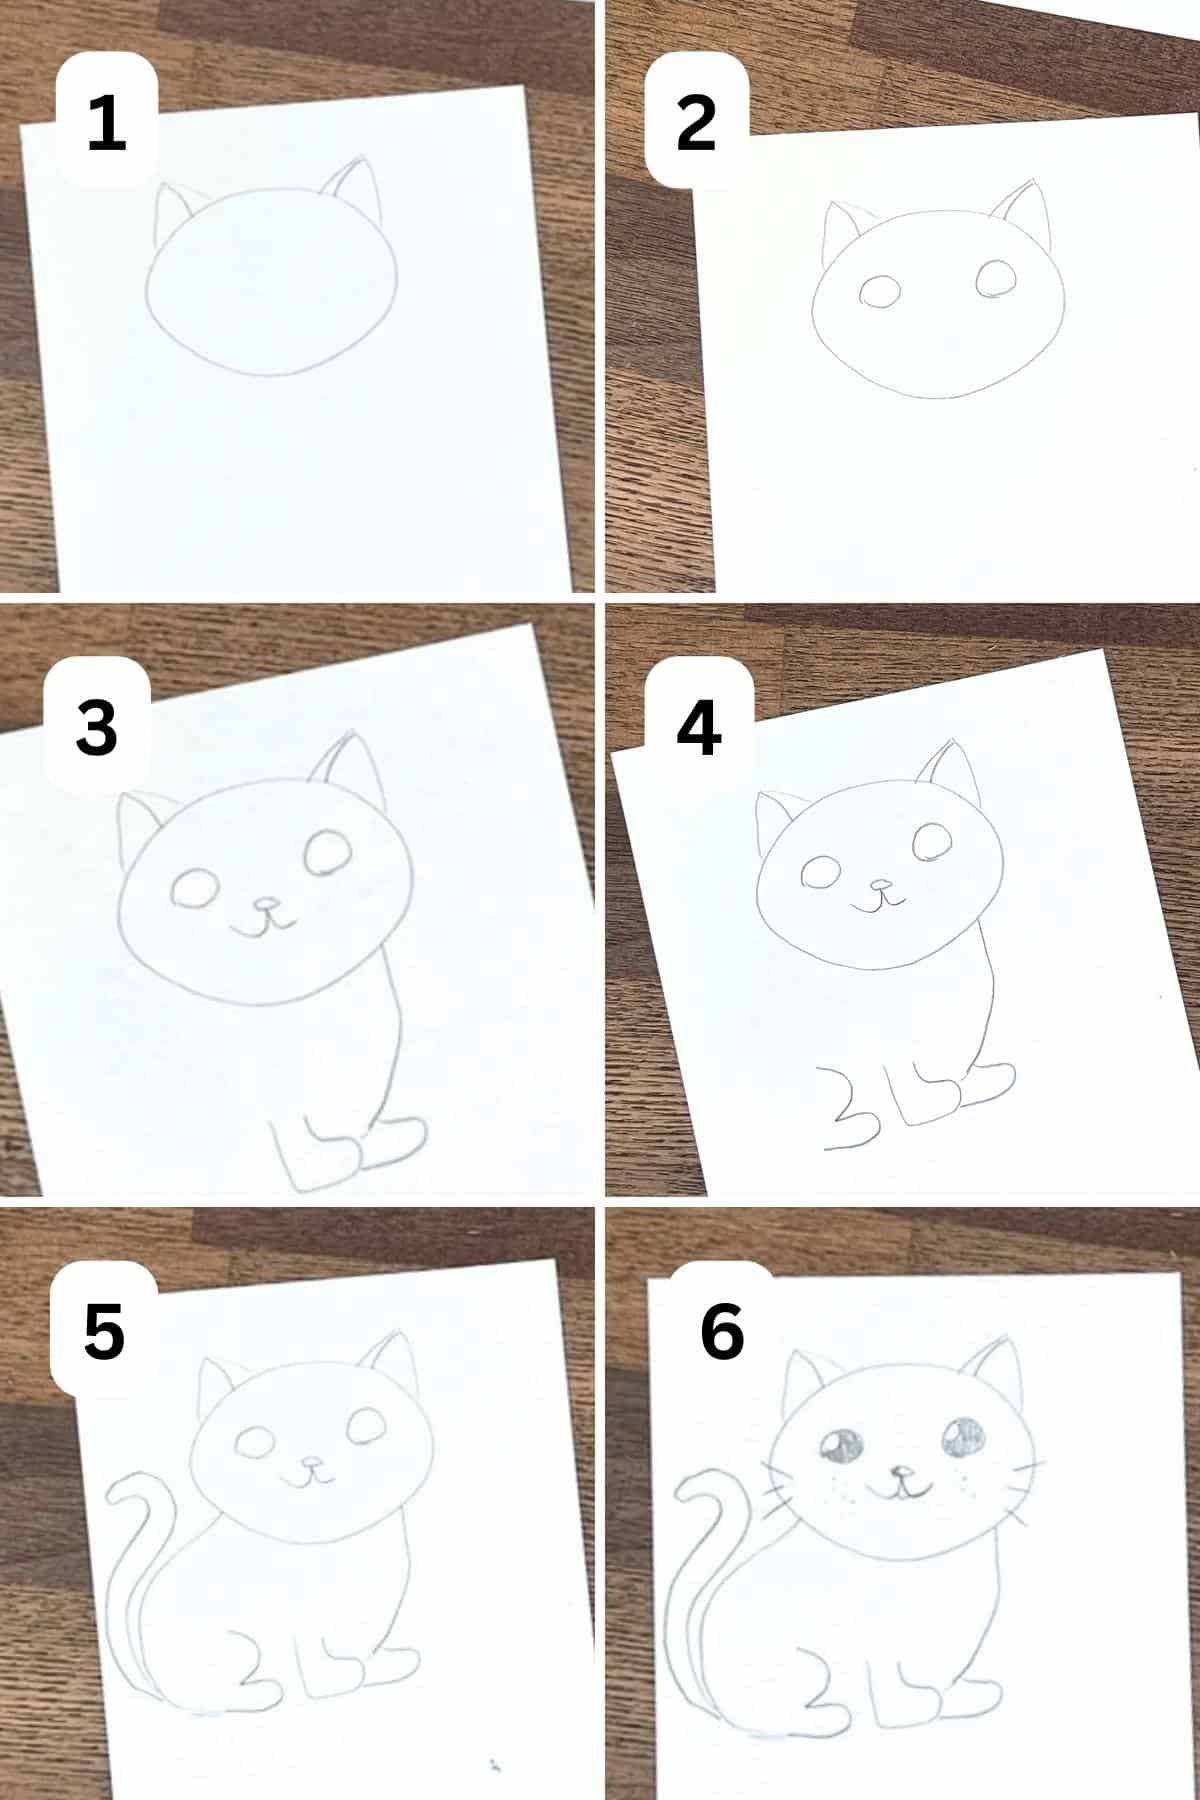
Side View Sitting Cat Drawing #4
This cat sketch is super cute and easy to create.
More
Easy Drawings
We can’t wait to see all the cute cat sketches and drawings!