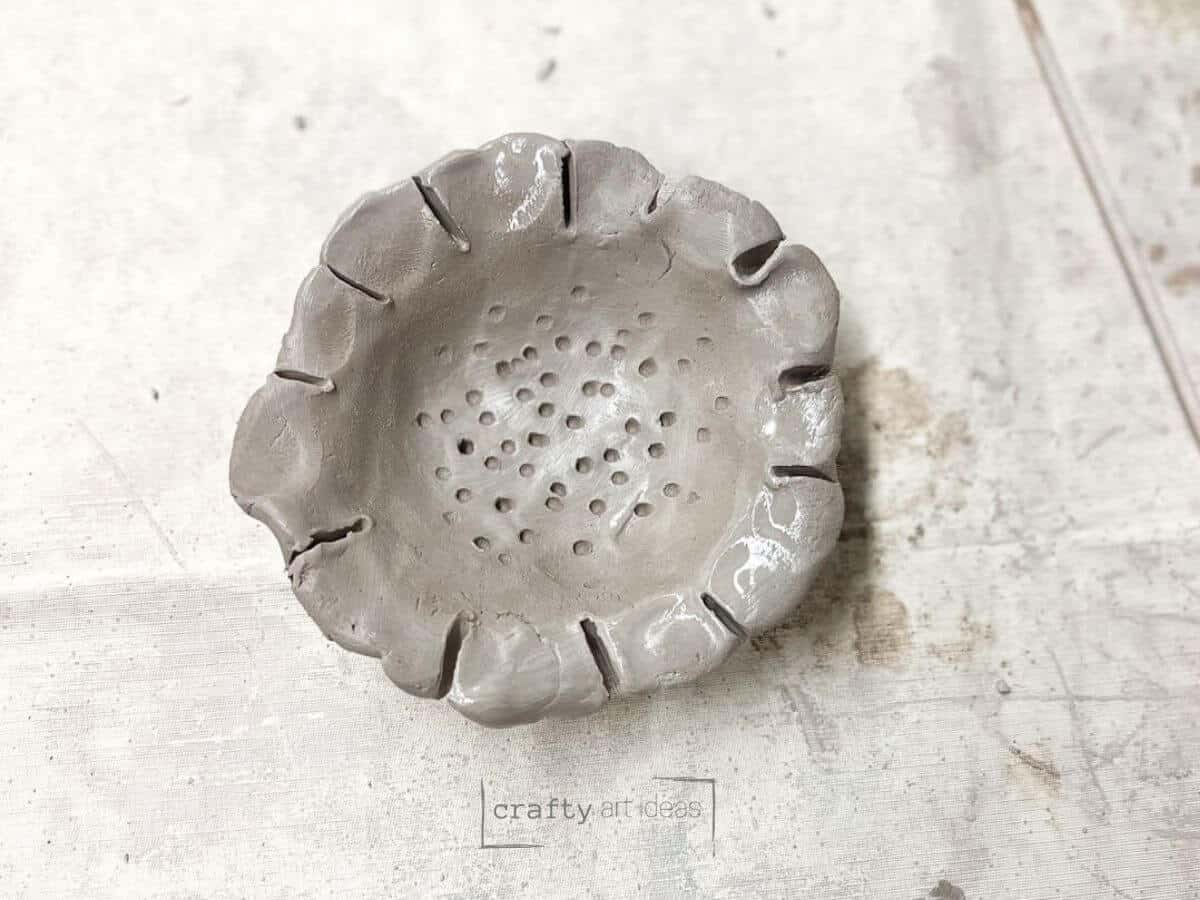
How To Make Easy Flower Pinch Pots

Children will love creating this simple clay flower pinch pot dish. This ceramic art lesson is the perfect first pinch pot project for younger elementary students.
This clay flower art lesson was originally written in 2022 after making 100s pinch pot flower dishes with kids. Erin updated this lesson in March 2025 with precise instructions and key takeaways. Happy creating!
Learning to create with clay and other sculpture materials is excellent for all children. We love creating pinch pots as the first clay building process children learn. Once they have completed this clay flower, you may want to consider building a pinch pot owl or pinch pot turtle with them.
Why You Will Love This Art Idea
Does a child have to have experience making a pinch pot?
Breaking down each step will allow all young artists to create this easy kid’s ceramic art project. Sometimes, this is the first clay project we introduce to our students.
Notes On Supplies You’ll Need
Disclosure: This post may contain affiliate links when clicked, we may earn a small commission at no additional cost to you. Read our full privacy policy.
You can get the full list of supplies in the printable how-to card at the end of the post.
Pinch Pot Flower Tutorial
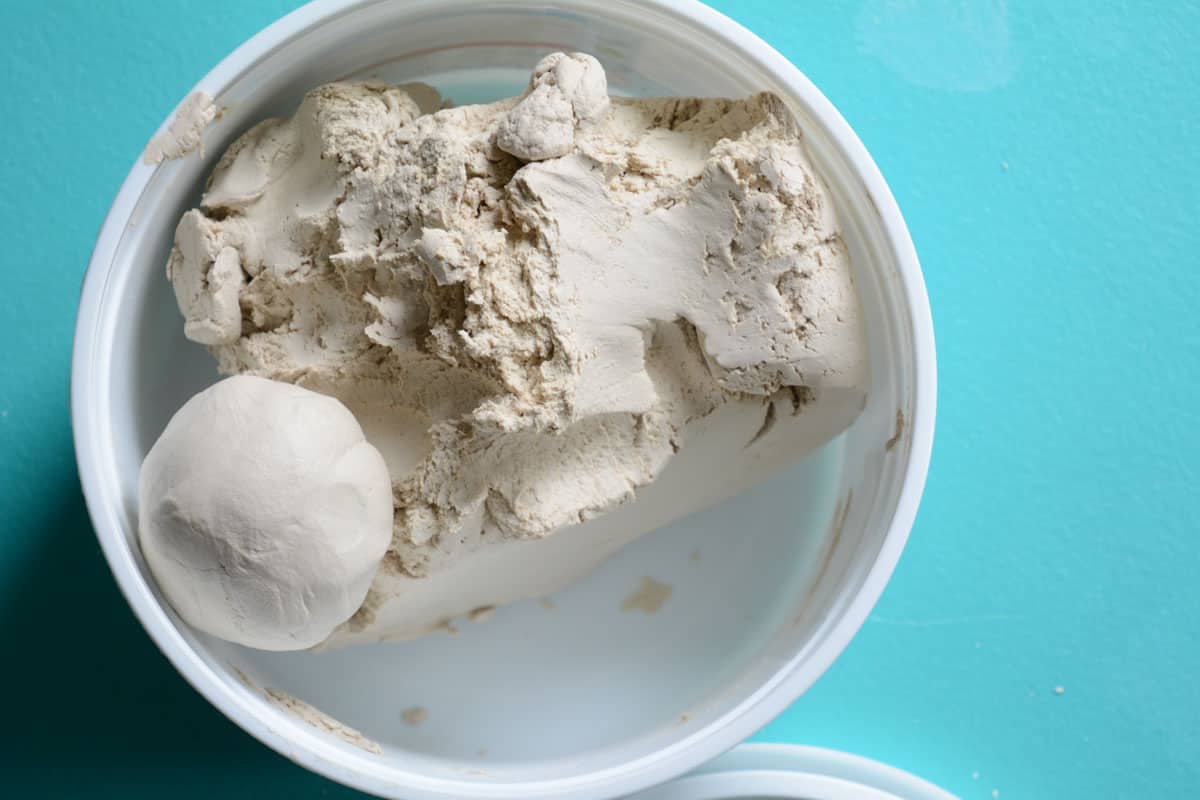
BEFORE YOU BEGIN – Pre-cut white art clay. Each pinch pot will need clay to fit in the palm of the child’s hand. You can have students wedge the clay a little before starting to build.
ART TEACHER TIP – Don’t let kids overtouch the clay. It can start to dry out or get crumbly.

Step 1: Roll A Sphere
Roll a ball of clay.

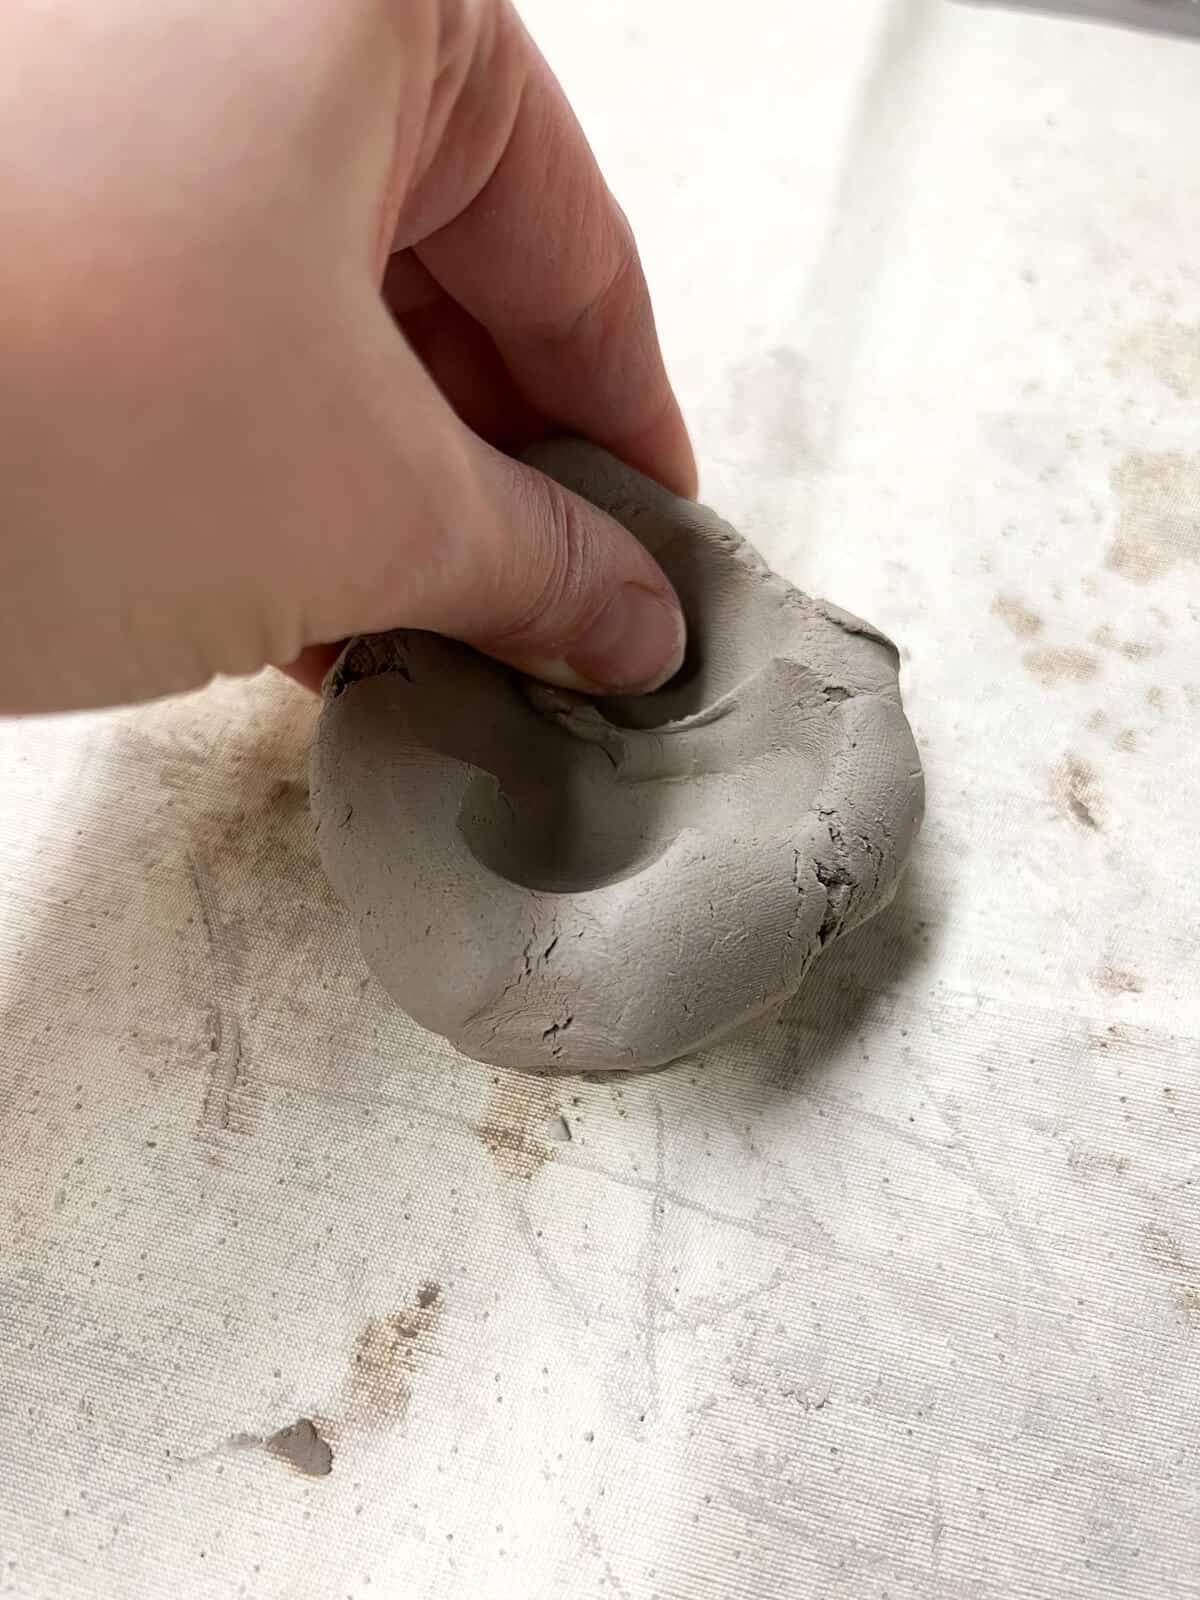
Step 2: Push Thumbs In The Middle
Have kids push two holes close together with their thumbs as far as they can go without going through the clay ball.

Step 3: Add Two More Thumbprints
Turn the clay ball so that they put two more thumbprints. You can tell them it kind of looks like a four-leaf clover. This helps children pinch the wall whole.
Step 4: Pinch The Edge Of The Cup
Use your hands to pinch around the edge and make sure not to make walls too thin.

Step 5: Smooth Out Clay
Kids can use water to smooth out any rough areas. We always instruct them that a little goes a long way and to not make “mud pie”.
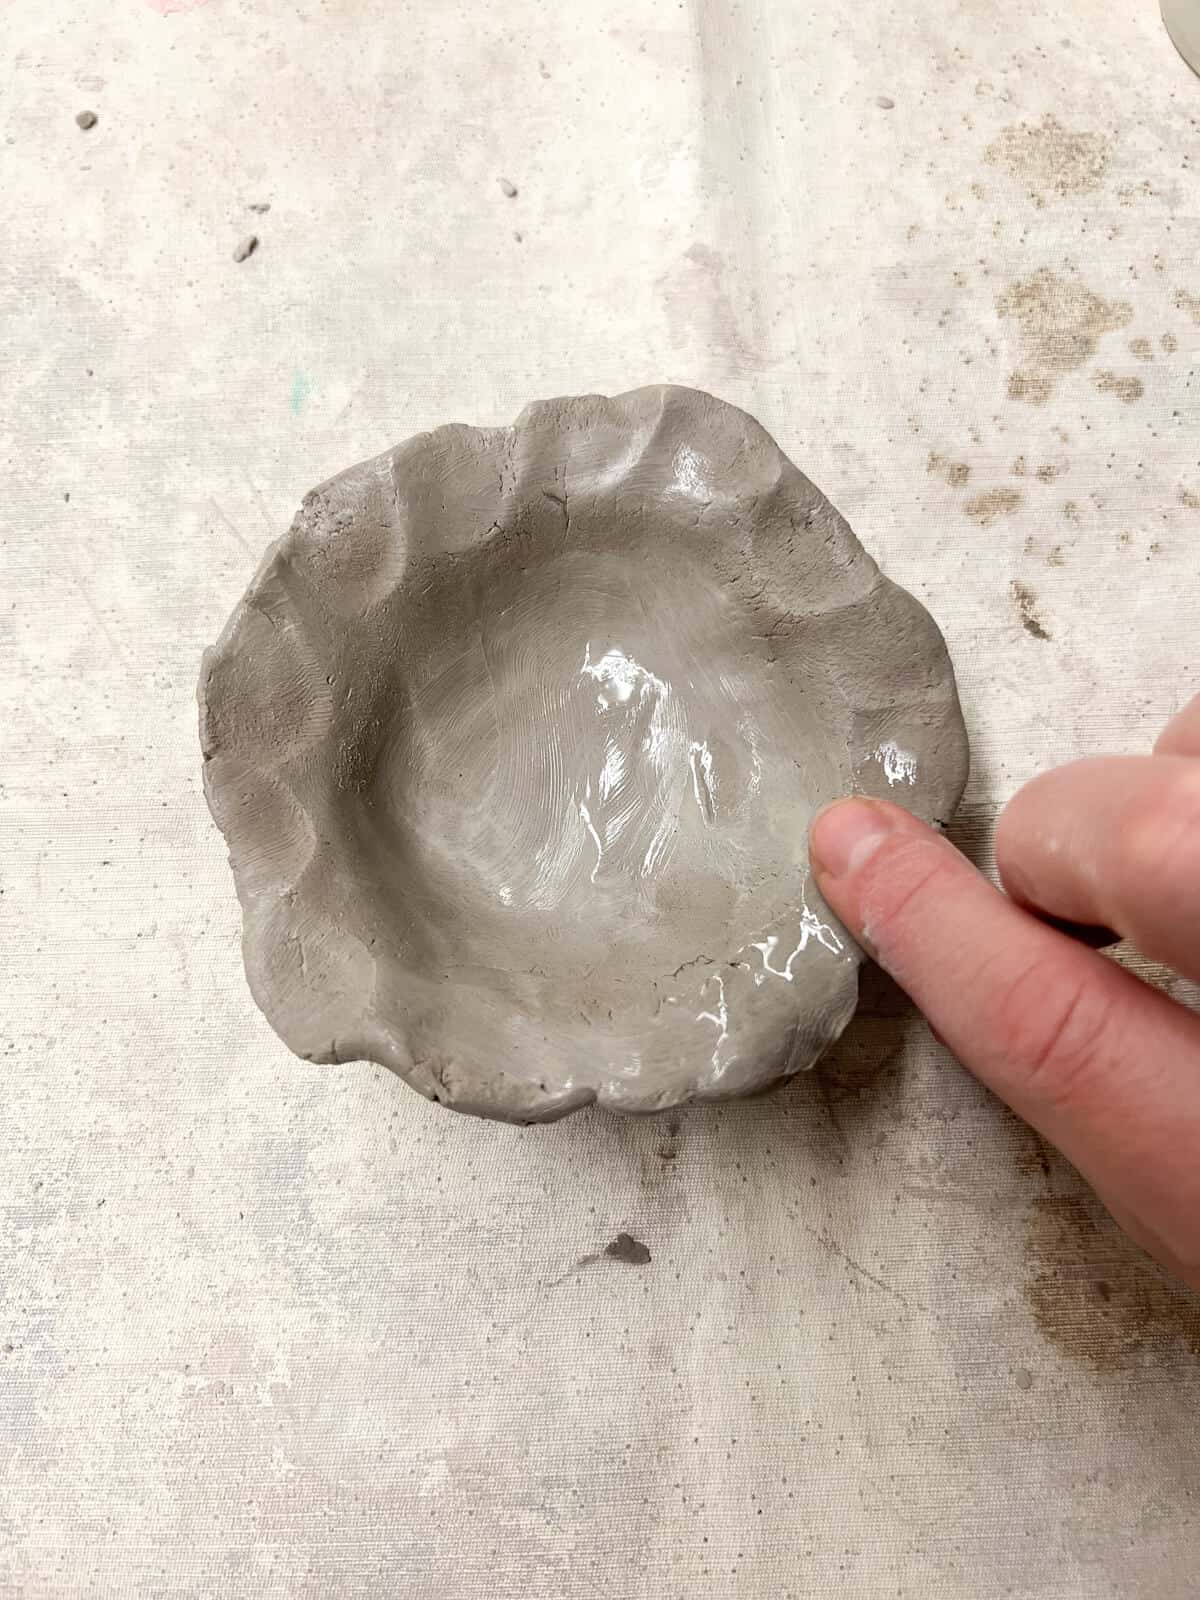
Step 6: Pinch Clay To Make Flower Petals
Use your fingers to pinch in small petals around the edge of the bowl.

Step 7: Add The Flower Details
Use a clay skewer to cut in the flower petals.
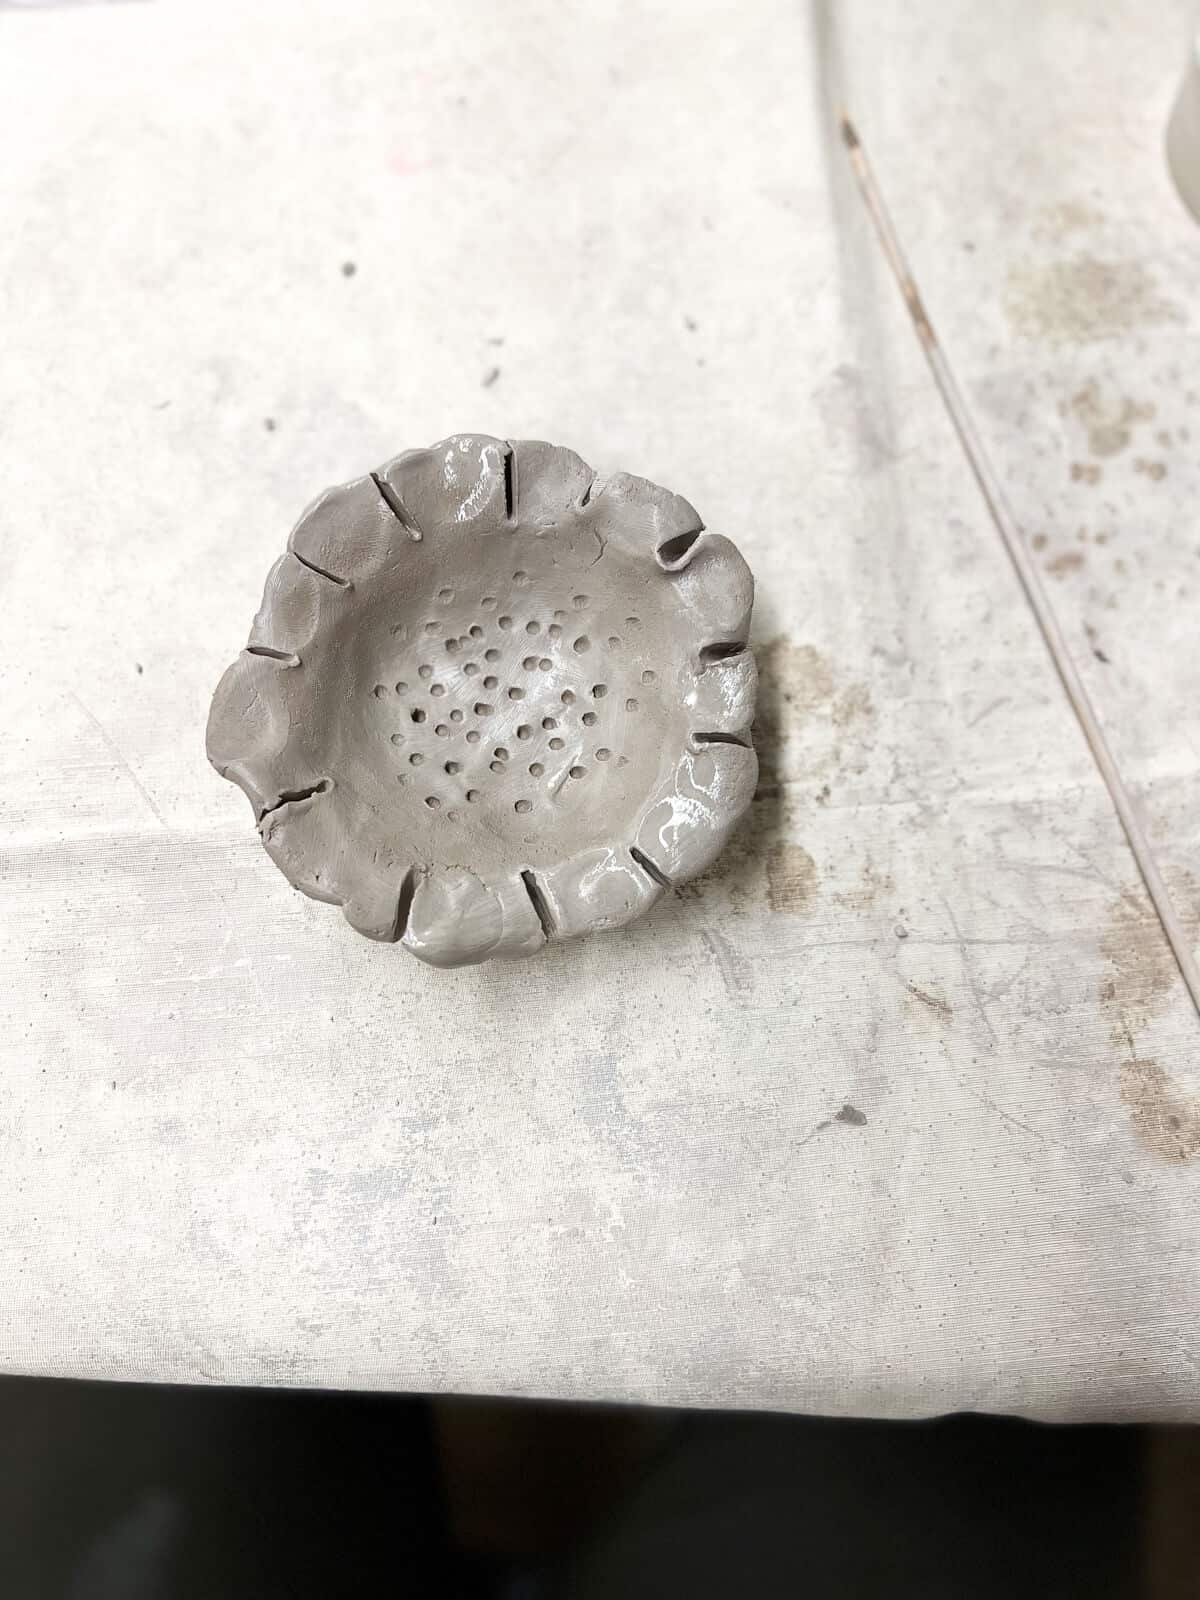
Step 8: Add Extra Textures
Use the end of the skewer to lightly poke holes for the seeds in the inner part of their flower. Make sure kids lightly stamp the seeds.
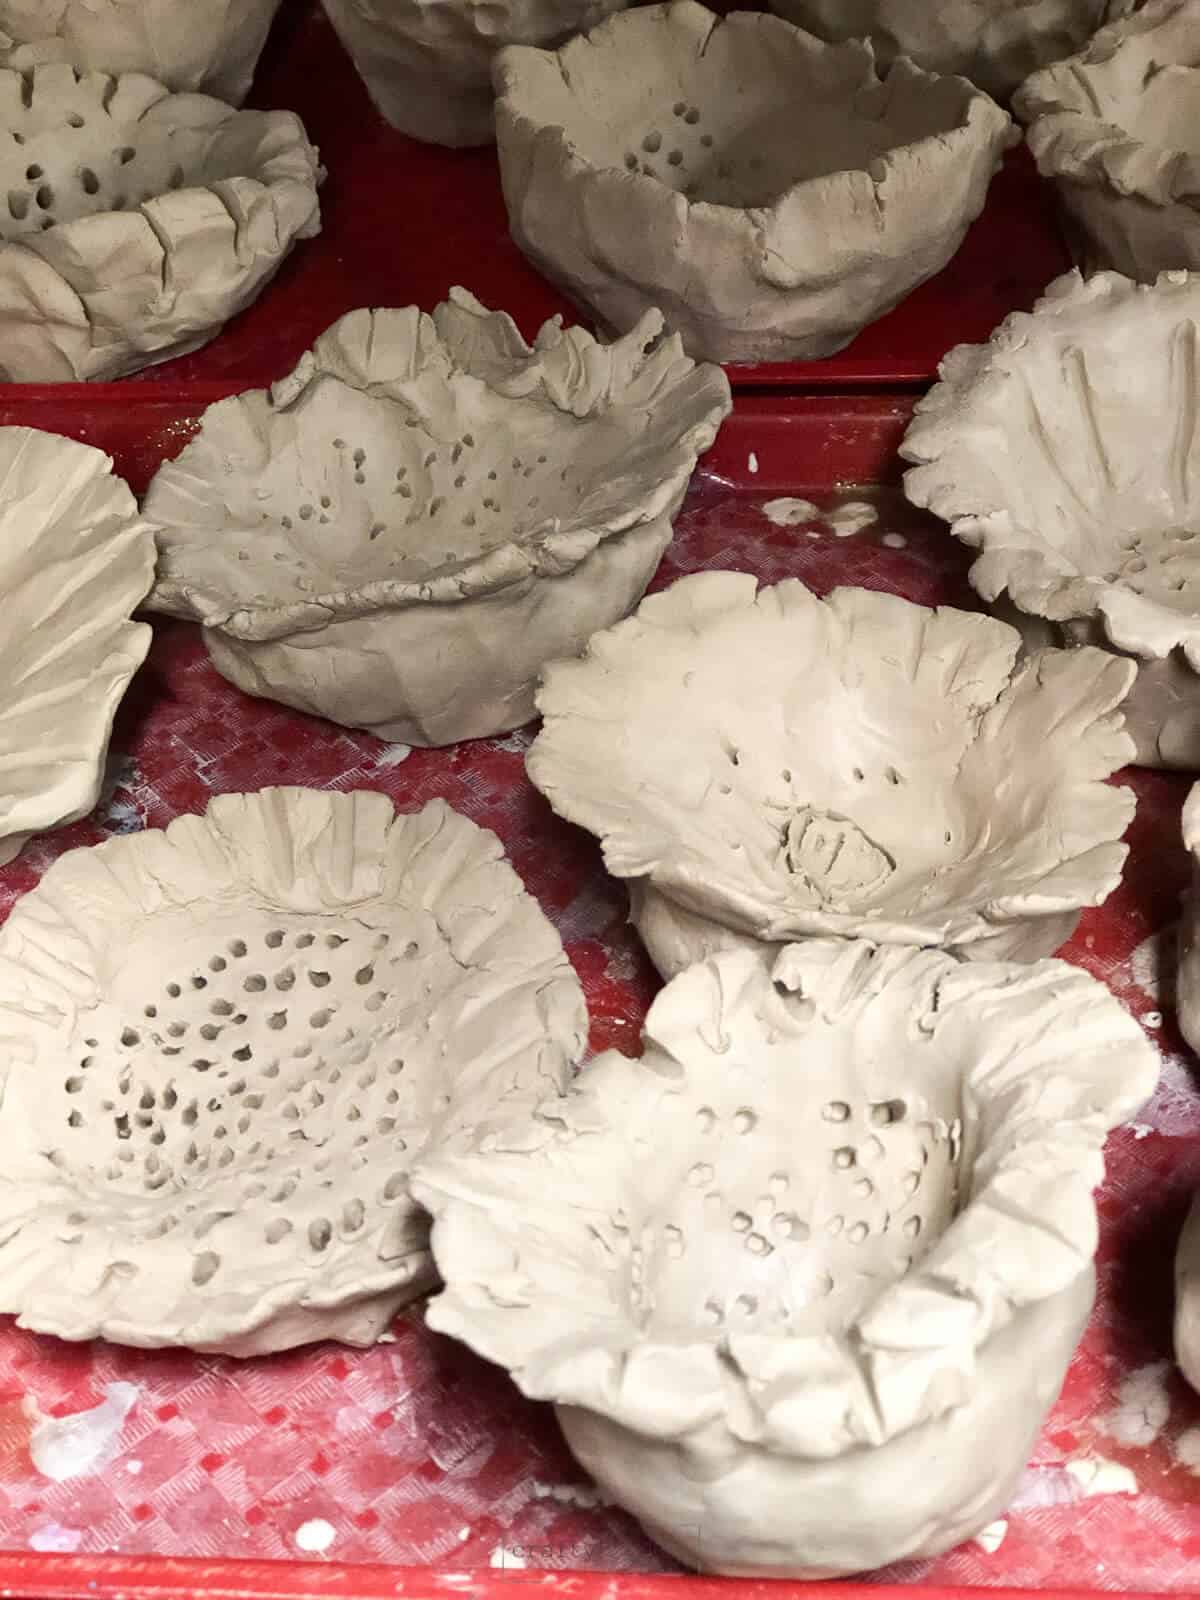
ART TEACHER TIP – Make sure clay projects dry for a whole week before running a bisque fire. If you are using air dry clay, I still advise you to let them fully dry before painting and adding a clear coat.
Building Tips
- They do not want to poke all the way through, but it isn’t the end of the world if they do in some areas.
- An adult should write the kid’s name on the bottom of the pinch pot with a sharp sewer or needle tool.
- Make sure the thumbs push enough down. You may need to “check” each child before they move on. You do not want a lot of extra clay in the bottom of their pinch pots.
- Show children how to use one finger to smooth the pot. If they use too much water, they will have “mudpie”.
- Play a game to get kids used to clay before and during this pinch pot project. Ask students to hold up their hands when they complete each game step. This will help them stop playing with the clay when not building.
Adding Color To Your Clay Flowers
I love using ceramic glaze on these flowers. Most of the time, this is the first “glaze experience” for young children. It’s so fun to see how excited they get when you show them their finished project.
Read more>>>9 Tips For Using Clay Glazes With Children
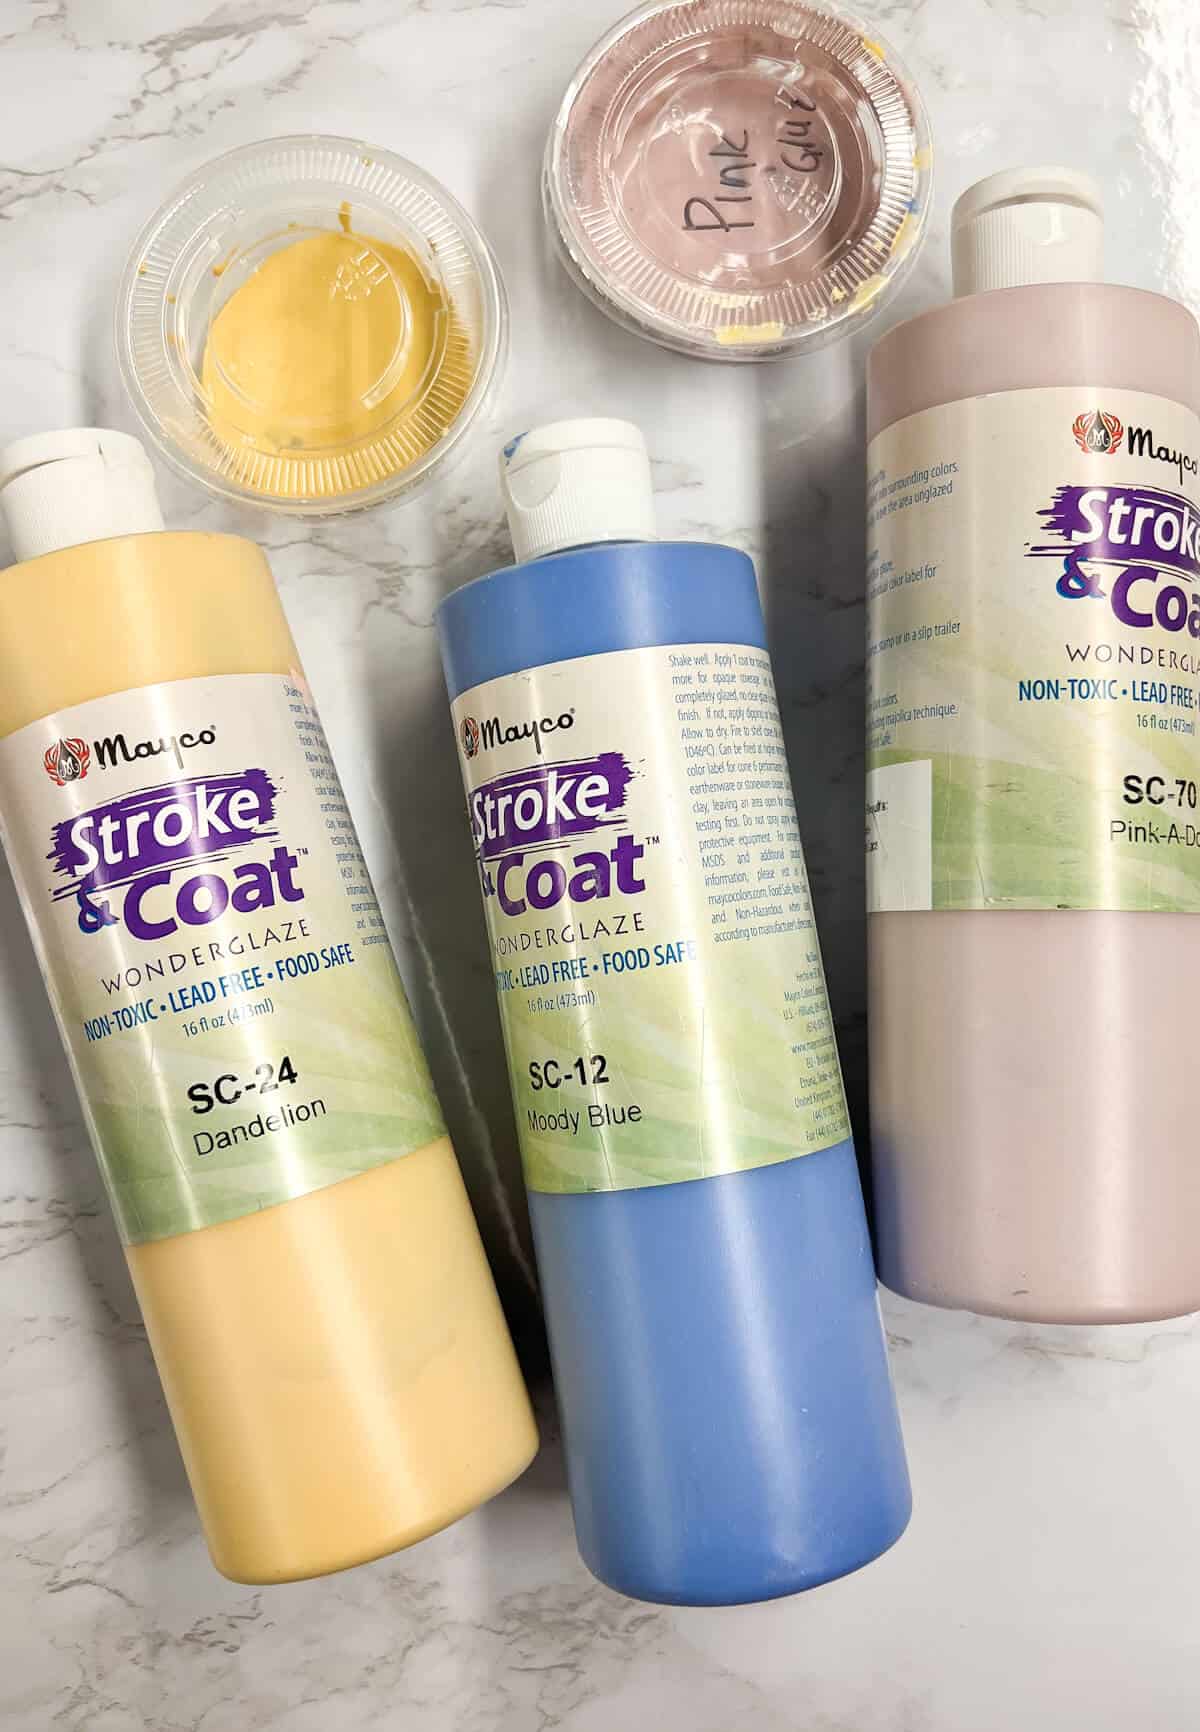
We love using these glazes with young children. They can get rich color and are easy to fire in the kiln.
Tips For Using Glaze
- 3 COLORS – Encourage students to use only three colors of glazes: one for the petals, one for the inside, and one for the outside.
- NO GLAZE ON THE BOTTOM – When firing large quantities of projects, we find it easier to keep the bottoms white or unglazed.
- 3 COATS – Kids should use three layers of glazes.
- CLEAN THE BRUSH – Use water and a paper towel to make sure the colors do not mix when changing them.
Clay Project FAQs
Yes, you can follow similar steps to create an air-dry clay art project. Instead of clay glaze, use acrylic or watercolor paint to add color, with an optional clear gloss for extra protection.
For this project, it is best if the walls are around 1/4 inch thick.
Children can honestly make a pinch pot in less than 5 minutes. If doing this in a large class setting, one class period is enough time to experiment with the clay, build your pinch pot flower, and clean up.

Follow us on Pinterest, YouTube & Facebook for more free art and craft ideas!
MORE
Easy Clay Ideas
See the joy on a child’s face when they see their completed clay flower art project!
Do you like this art project? Please give us a 5-STAR review below ⭐️⭐️⭐️⭐️⭐️ and have fun being creative with your family.
Flower Pinch Pot Tutorial
Equipment
- Wooden Skewer
- Small container of water
- Placemat or work area
Supplies
- White Art Clay
- Glazes
Instructions
- Roll ball of clay.
- Have kids push two holes close together with their thumbs as far as they can go without going through.
- Turn the clay ball so that they put two more thumbprints. You can tell them it kind of looks like a four-leaf clover.
- Use hands to pinch around the edge and make sure not to make walls too thin.
- Use fingers to pinch in small petals around the edge of the bowl.
- Use a clay skewer to cut in the flower petals.
- Use the end of the skewer to lightly poke holes for the seeds in the inner part of their flower.
- Kids can use water to smooth out any rough areas. We always instruct them that a little goes a long way and to not make “mud pie”.
- Let the clay pinch pots fully dry before running a bisque fire. Follow the instructions on your clay.
- Add color by painting or using clay glaze.
Notes
- An adult should write the kid’s name on the bottom of the pinch pot with a sharp sewer or needle tool.
- When painting or glazing, encourage students to use only three colors – one for the petals, one for the inside, and one for the outside.
Hello
These projects look great. I am a grade 2 art club teacher. Would I be able to use the forget the glaze technique (pastels and paint rinse) on unfired/air-dryed clay?
Hi Tamara. As always I would test it first yourself before trying. In an art class setting, I rarely used air dry clay because I always had access to a kiln. Therefore, I haven’t ever done that specific technique on air dry clay with a class. There are two things I would concerned about if trying to do oil pastels and a rinse on air dry clay. 1) kids may push too hard with any drawing material and break their clay projects 2) wetting air dry clay can weaken it and may cause breaks. Now, with that being said every art process depends on the specific materials being used and it may work, but I would just be cautious and test it out first. Let us know what you find out!