
Glue and Watercolor Resist Art: Pumpkin Project

This art project combines a few of our favorite art processes. Explore how to create glue and watercolor resist art for a fun, easy way to make textured art this Fall!

This art tutorial has been a long-time reader favorite since it was published in September 2024. This post was recently updated in August 2026 with more tips and key takeaways.
Why You Will Love Pumpkin Art Project
Famous Artist Connection
- Children can look at and discuss Vincent Van Gogh’s painting, The Starry Night, to get inspiration for their skies.
- Another excellent watercolor painting to look at before starting may be Winslow Homer’s The Pumpkin Patch.

Supplies You’ll Need
Disclosure: This post may contain affiliate links when clicked, we may earn a small commission at no additional cost to you. Read our full privacy policy.
How To Make Black Glue
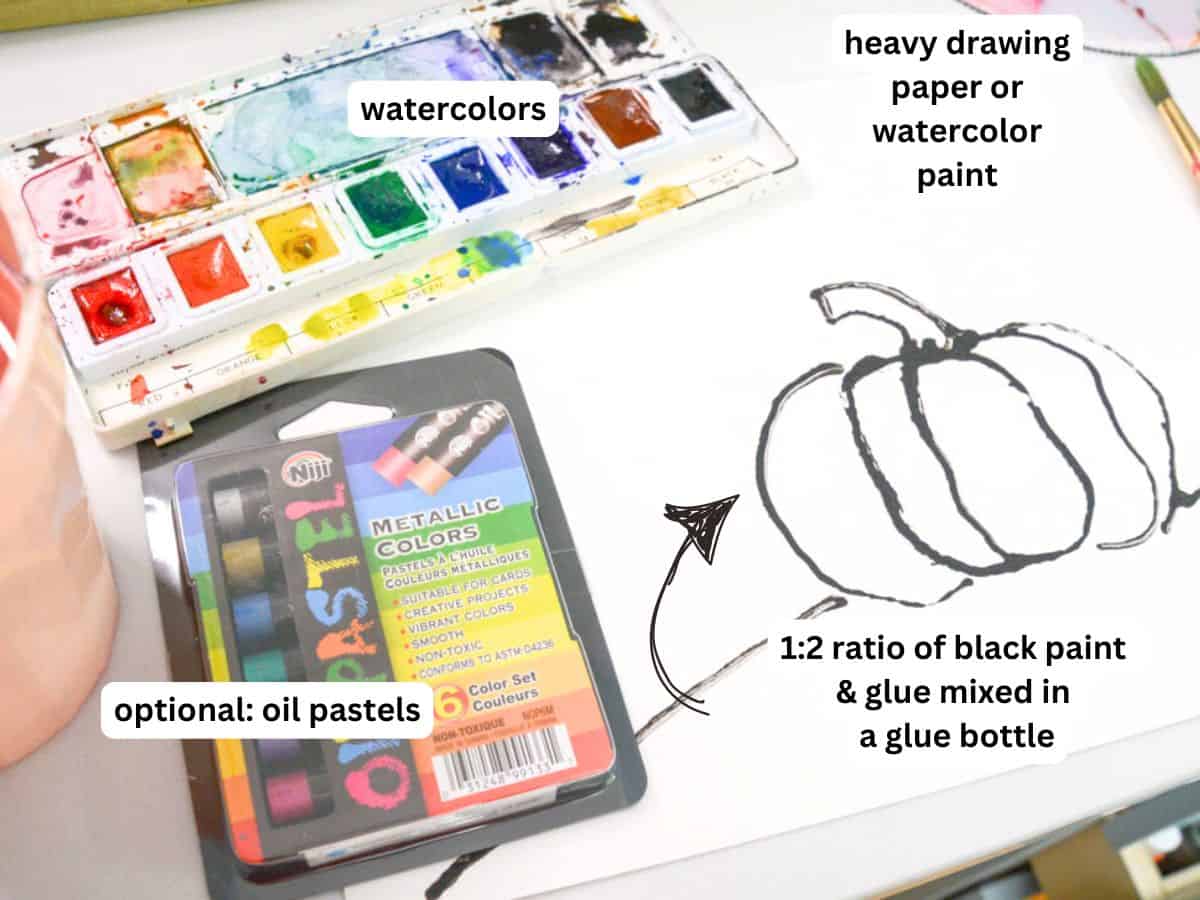
BEFORE YOU BEGIN – Make your DIY black glue. We recommend mixing this in a glue bottle that is less than half empty. Slowly add your black craft paint to the glue. We mixed our glue and paint to about a 1:2 ratio. Test your mixture on a different piece of paper as you mix it.
ART TEACHER TIP – We premake a glass set of these to use all year. Use older glue bottles that are halfway empty to make this mixture.
Black Glue and Watercolor Resist Painting Tutorial
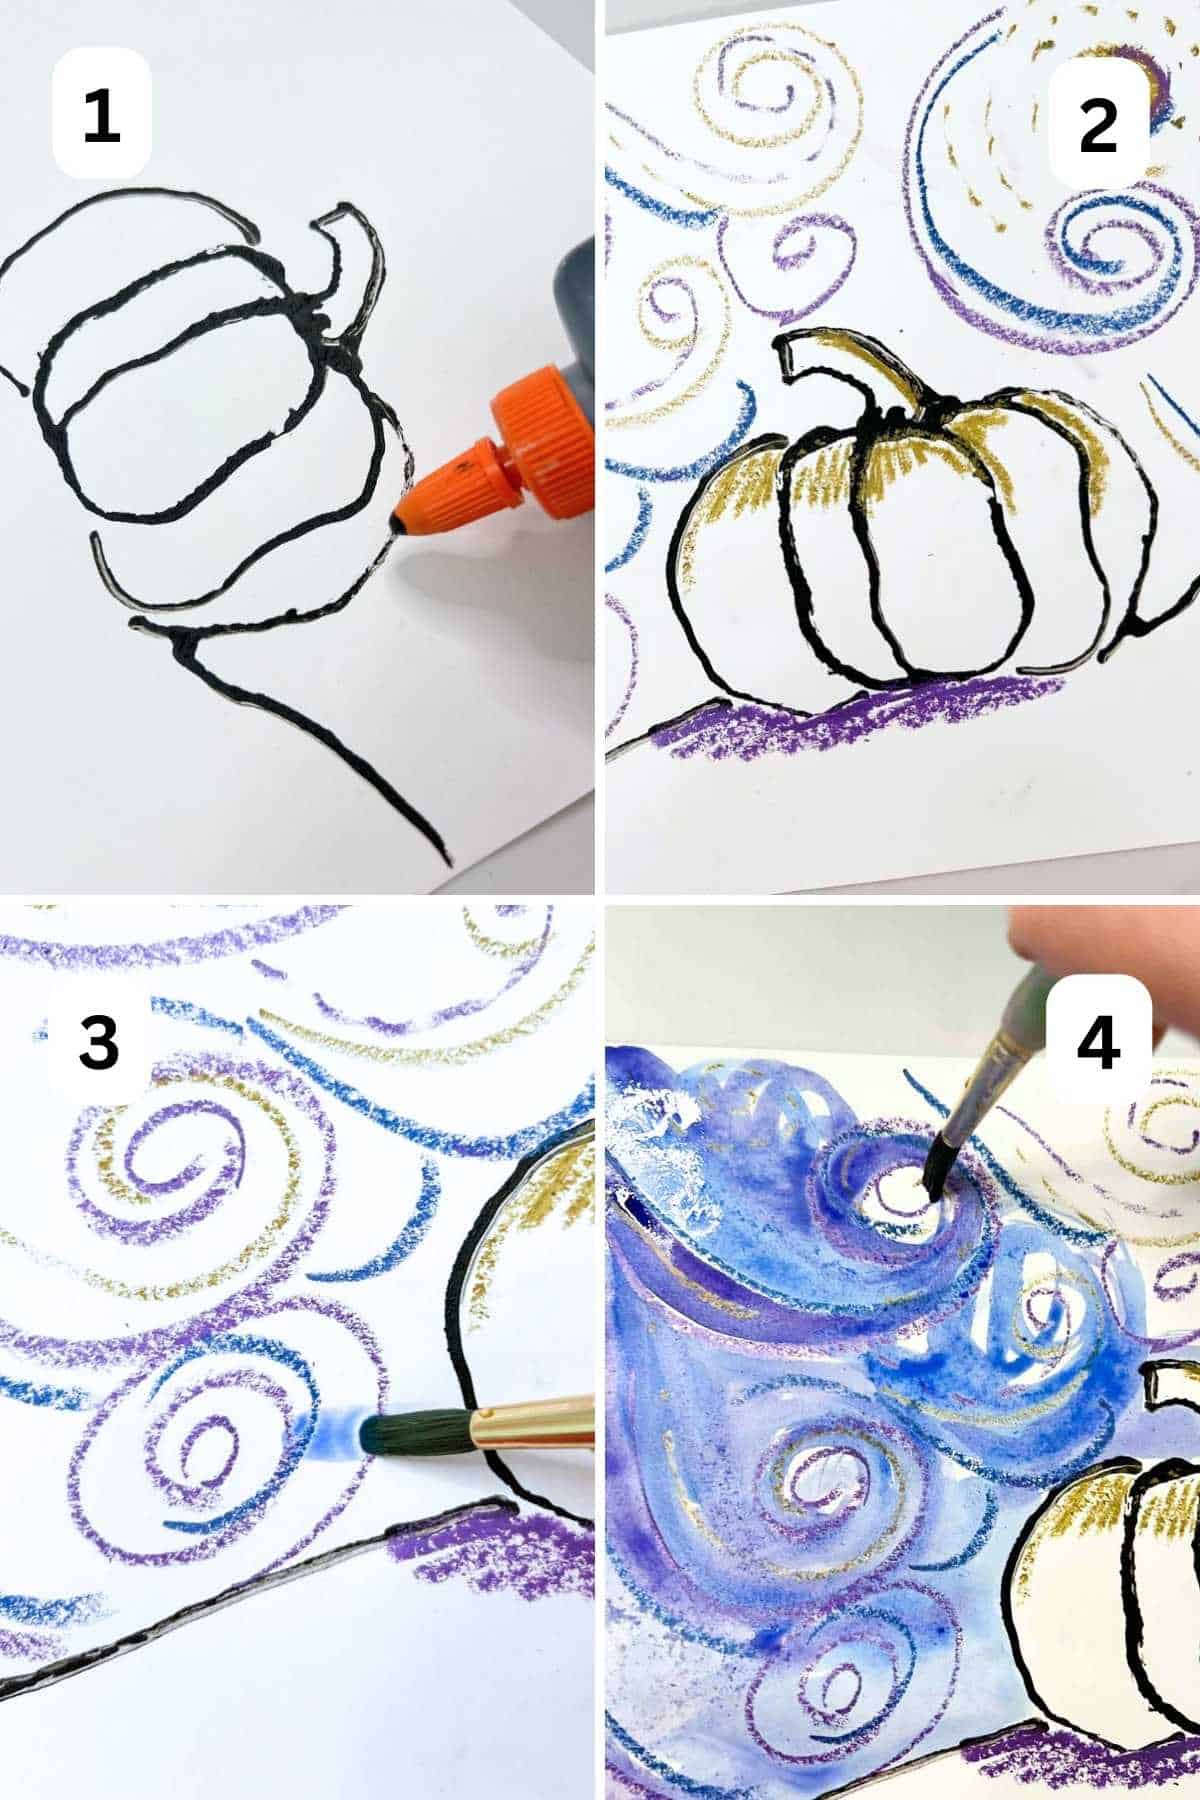
Step 1: Draw Your Pumpkin or Fall Landscape
Here are easy pumpkin drawing ideas. One or two pumpkins will work well. Children should not draw too small.
Step 2: Outline In Black Glue
Carefully use the black glue to trace the main parts of the drawing.
Step 3: Let Your Projects Dry
When drying, make sure that the art is completely flat. Depending on the thickness of the glue lines, your black glue drawing may take up to 24 hours to be ready to paint.
Optional: Add Oil Pastel Lines or Textures
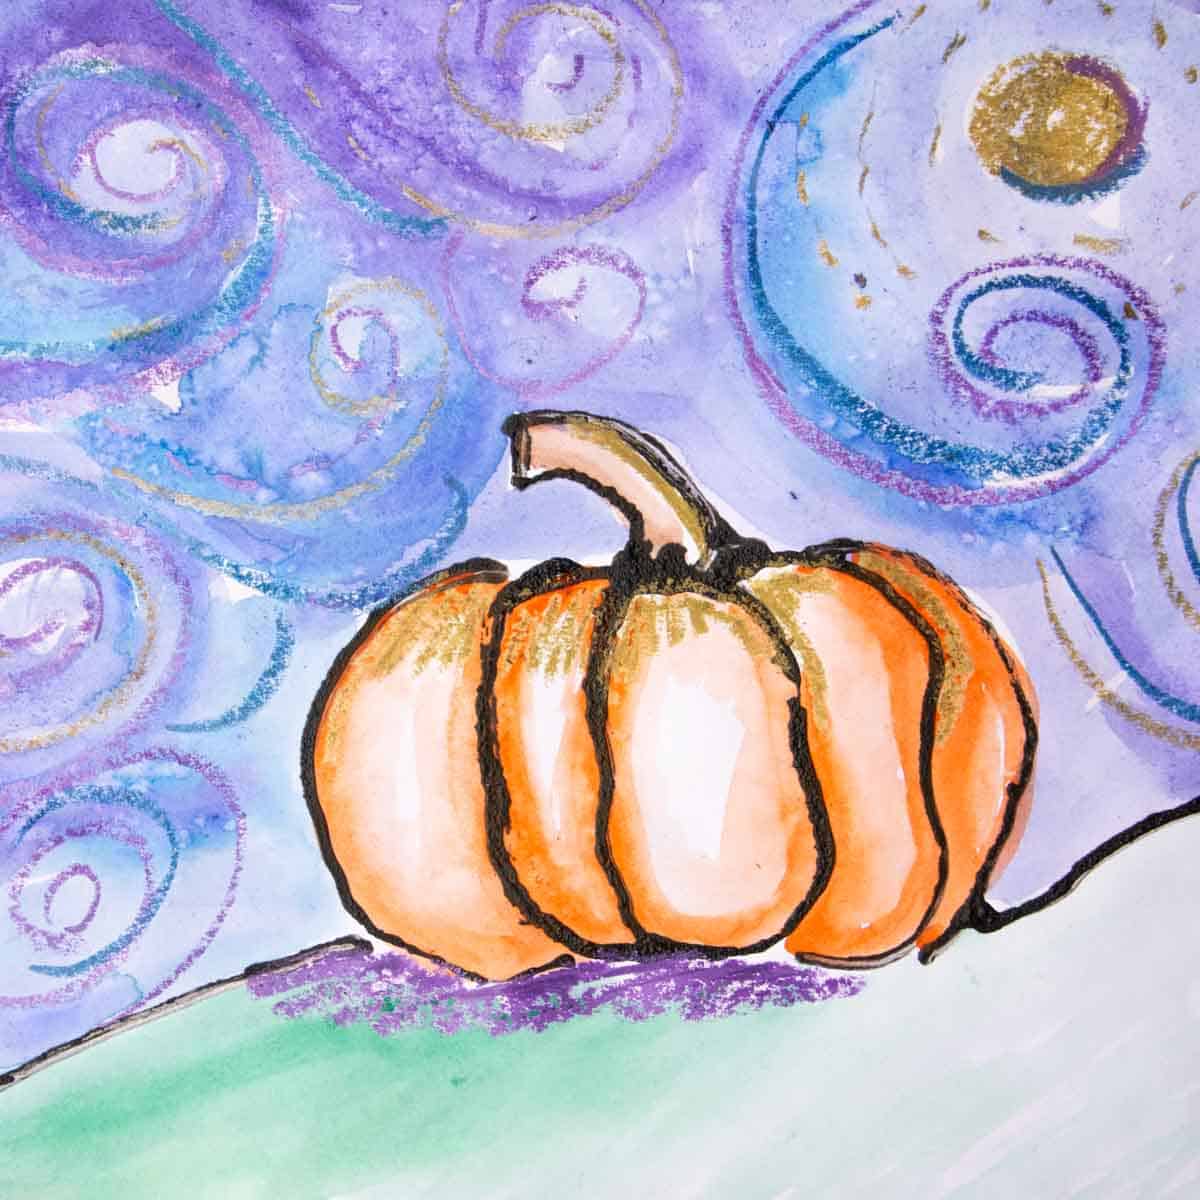
Encourage children to explore lines, textures, and other patterns. For example, you may feel swirls or wind looking at The Starry Night. You can also show children how to add slight highlights on the top of the pumpkin or stem.
Step 4: Add Watercolor Paint
The oil pastels will resist the watercolor paints. We think children should paint the sky, foreground, or grass and then the pumpkin last.

When painting the pumpkin, you can also show that you can dilute watercolor paint to be lighter or darker. Pumpkins are a great place to experiment with this because of the texture and different tones you naturally would see.
Tips
- Your lines do not have to be perfect when outlining with black glue.
- To make drawing with glue easier, have the tip of the glue bottle touch the paper as the children draw.
- When using oil pastels, ensure children know they will paint the leftover white spaces. You can also use white in places for a magical oil pastel-resist effect. Kids love this!
- Kids can even experiment with various watercolor techniques, such as wet-on-wet, dry brushes, or adding plastic wrap to wet paint.
How can I adapt this pumpkin glue resist project for younger preschool and kindergarten students with simpler designs?
I suggest using larger paper for younger students for the best results. You could also have an adult help with hand-over-hand to draw the pumpkins with glue or pre-draw the pumpkins before younger artists add the glue.
What other Fall themes beyond pumpkins work well with the black glue and watercolor resist painting technique?
You can draw anything with black glue. Other Fall art themes include name designs, abstract art, line art, or imagery related to Halloween (such as ghosts, witches, or monsters).
Our Favorite
Related Pumpkin Art Projects
We hope your young children enjoyed exploring fun ways to create texture, color, and more with this Fall watercolor painting idea.
Glue Watercolor Resist Pumpkin Art Project
Equipment
- Paintbrushes
- Water
Supplies
- Heavy drawing paper or watercolor paper
- Bottled school glue
- Black acrylic craft paint
- Watercolor paints
- Metallic Oil pastels
Instructions
Before You Begin
- Make black glue by adding black acrylic craft paint to a partially empty bottle of school glue. We used approximately 1 part black paint to 2 parts glue. Mix well and test the consistency on scrap paper before beginning.
Creating Your Pumpkin Art
- Draw Pumpkin(s) – Create one or two large pumpkins and a simple fall landscape. Avoid drawing small details that will be difficult to outline with glue.
- Outline With Black Glue – Carefully trace the main lines of the drawing with black glue. Keep the glue bottle tip touching the paper to make the lines easier to control.
- Let the Black Glue Dry – Place the artwork flat and let the glue dry completely. Thick glue lines may take up to 24 hours to dry.
- Add Oil Pastel Details – Use oil pastels to add lines, highlights, patterns, swirls, or texture. Leave some areas of the paper uncovered so you can paint them with watercolor.
- Paint The Background – Add watercolor to the sky, grass, and other background areas. Experiment with watercolor techniques and different color values.
- Paint The Pumpkin – Paint the pumpkin with watercolor. Use more or less water to create lighter and darker oranges and emphasize the pumpkin's curved sections.
- Let The Painting Dry – Place the finished artwork flat and allow the watercolor to dry completely.
Notes
- Keep the glue bottle tip in contact with the paper for better control.
- Black glue lines do not need to be perfect. Let the black glue dry completely before painting.
- Use large, simple drawings because tiny details are difficult to outline with glue.
- Try white oil pastel for a fun resist effect that appears when you add watercolor.
- Experiment with wet-on-wet, dry brush, or other watercolor techniques.