4 Ways To Draw Pumpkins Easily For Beginners and Kids
Learn how to draw a pumpkin easily by kids and beginners. These simple pumpkin drawings can be done in minutes and are perfect for those Fall doodles and art projects.

Supplies You’ll Need
You don’t need anything special to draw pumpkins!
Disclosure: This post may contain affiliate links when clicked, we may earn a small commission at no additional cost to you. Read our full privacy policy.
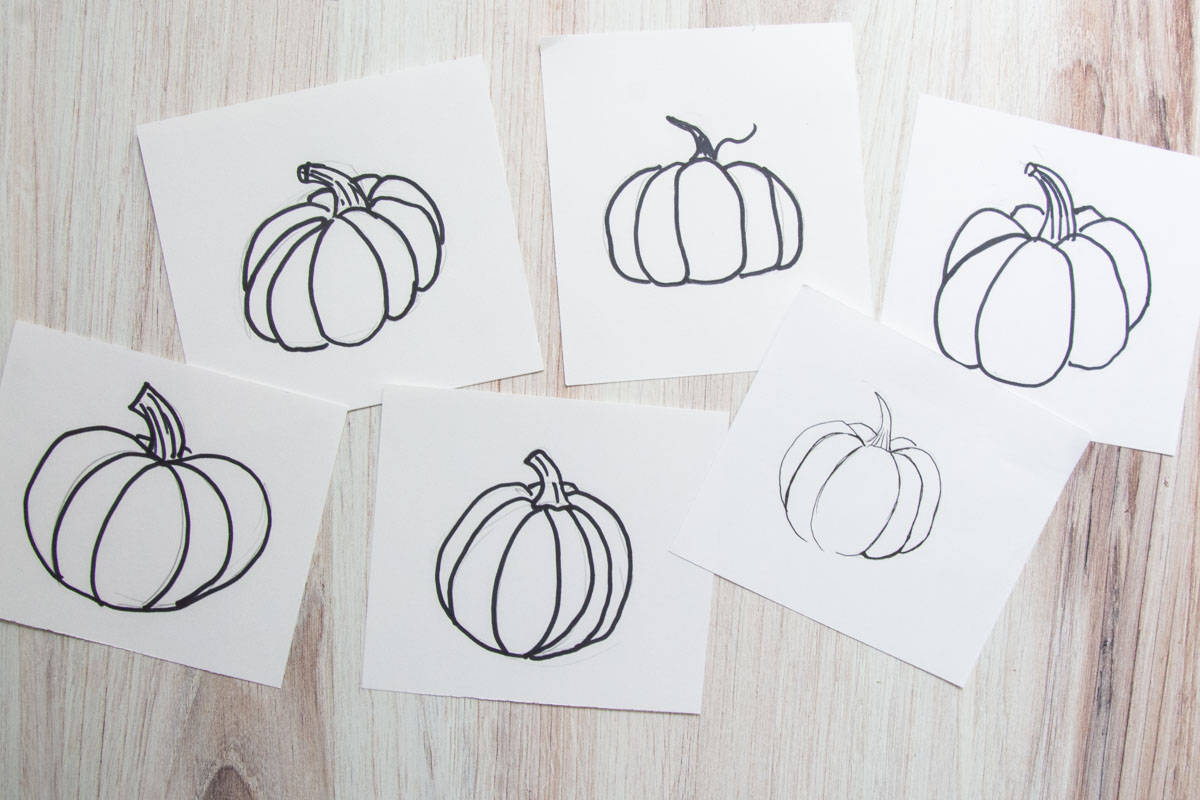
Remember that pumpkins are not perfect, so your drawings don’t have to be either. Here are a few different ways you may consider drawing a pumpkin.
PRO TIP – If you want to draw more realistic pumpkins, we recommend drawing one from observation. Draw what you see, not what you know!
#1 Beginner Pumpkin Drawing
This is perfect for young kids. The hardest part is getting them to align the curved lines correctly. You may describe it as a forward “c” line and a backward “c.”

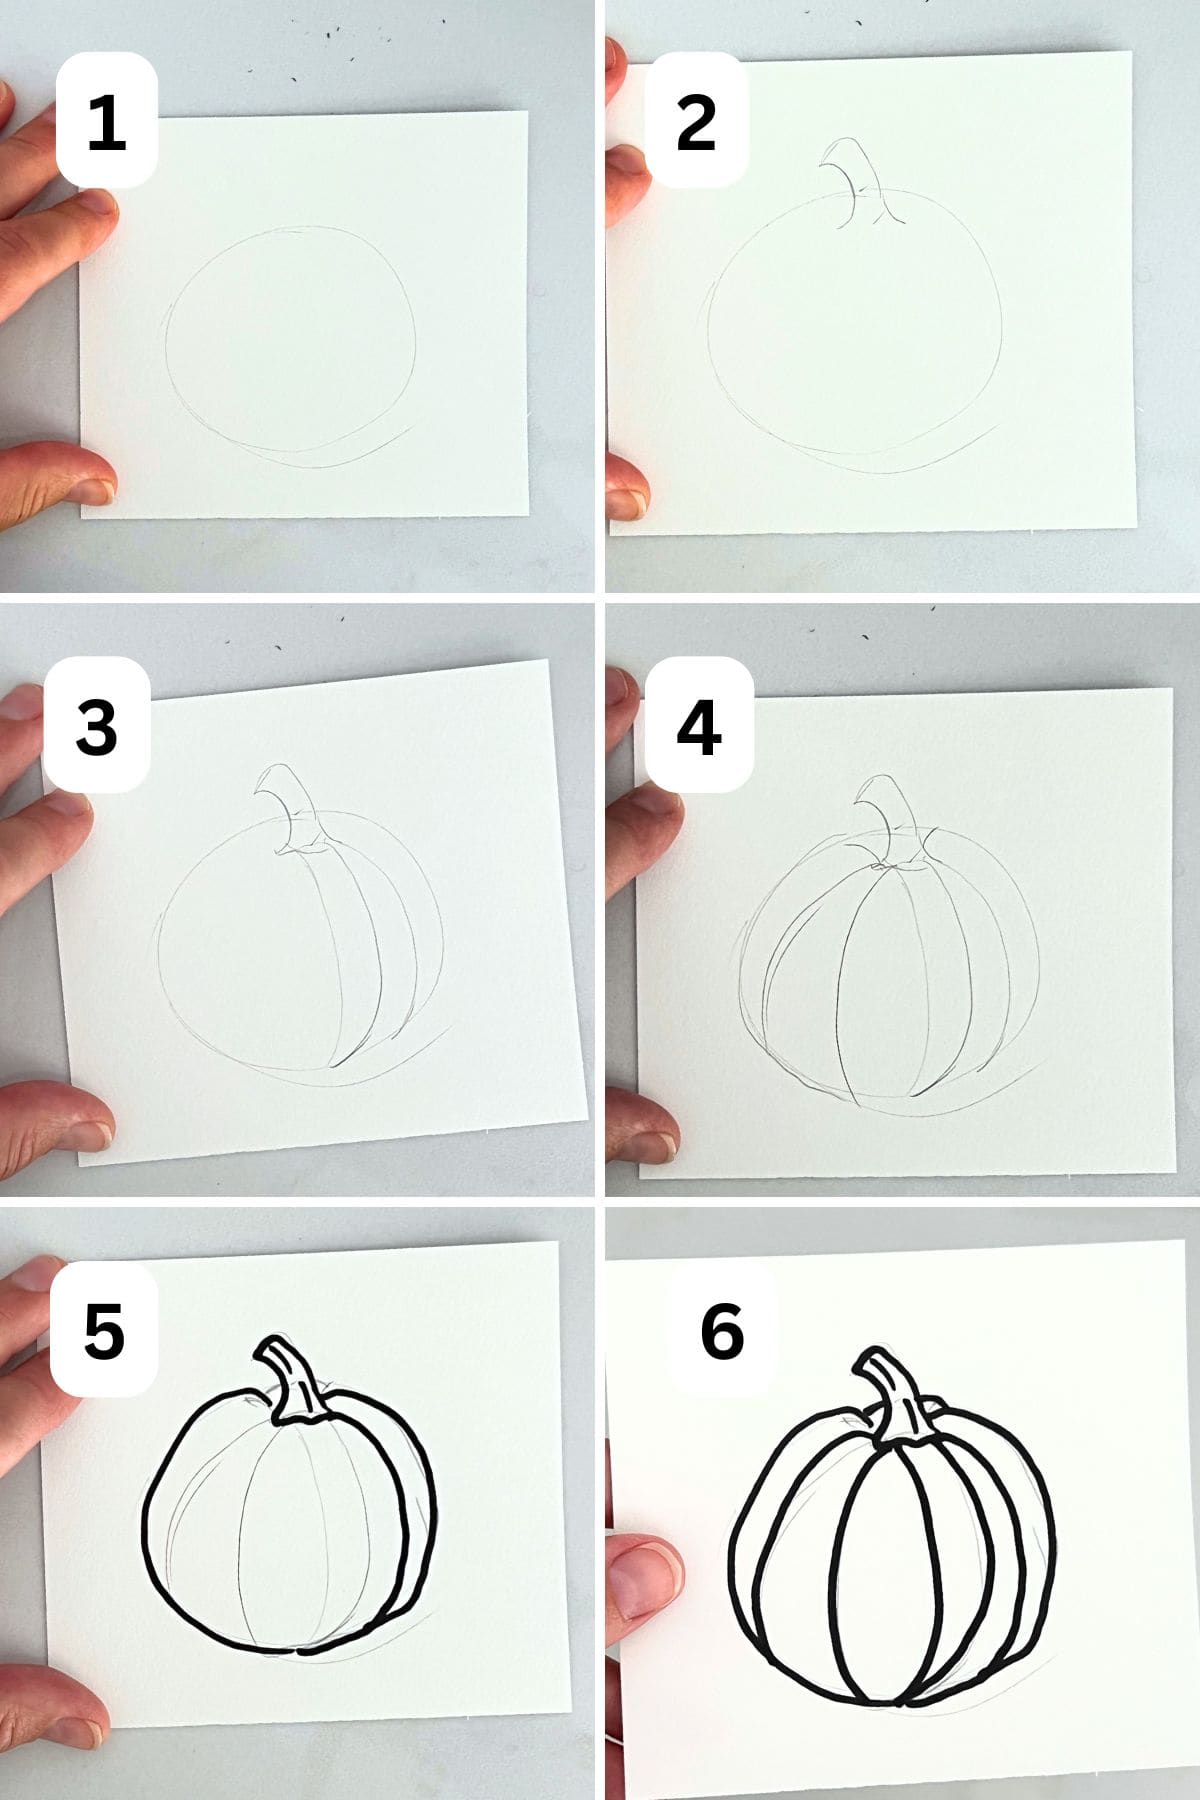
- DRAW LARGE SHAPE: Draw a heart shape without the tip or an apple-type shape.
- ADD STEM: Draw a stem shape that is a little bigger at the bottom and smaller at the top.
- ADD CURVE LINES: Lines need to follow the contour of the pumpkin. You can also draw a straight line in the middle as a starting point for younger children.
- OPTIONAL: Outline and add color.
#2 Intermediate Pumpkin Drawing
In these drawings, the bumps of the pumpkin start to become more pronounced.

- DRAW ONE SIDE OF THE PUMPKIN: Draw a curved line (skinny C).
- CONTINUE TO ADD CURVED LINES: Add another curved line.
- DRAW CENTER SHAPE: Create the center oval shape.
- REPEAT: Draw two more backward “c” lines.
- ADD DETAILS: Draw a stem and other details you want to include.
#3 Intermediate Pumpkin Drawing Steps

- LIGHTLY SKETCH AN OVAL: Draw a smooshed oval or circular shape.
- ADD A STEM: Draw a stem inside the oval or circle (not directly at the top).
- ADD CURVED LINES: As the lines get closer to the center, they should become less curved.
- OUTLINE DRAWING
#4 Advanced Pumpkin Drawing
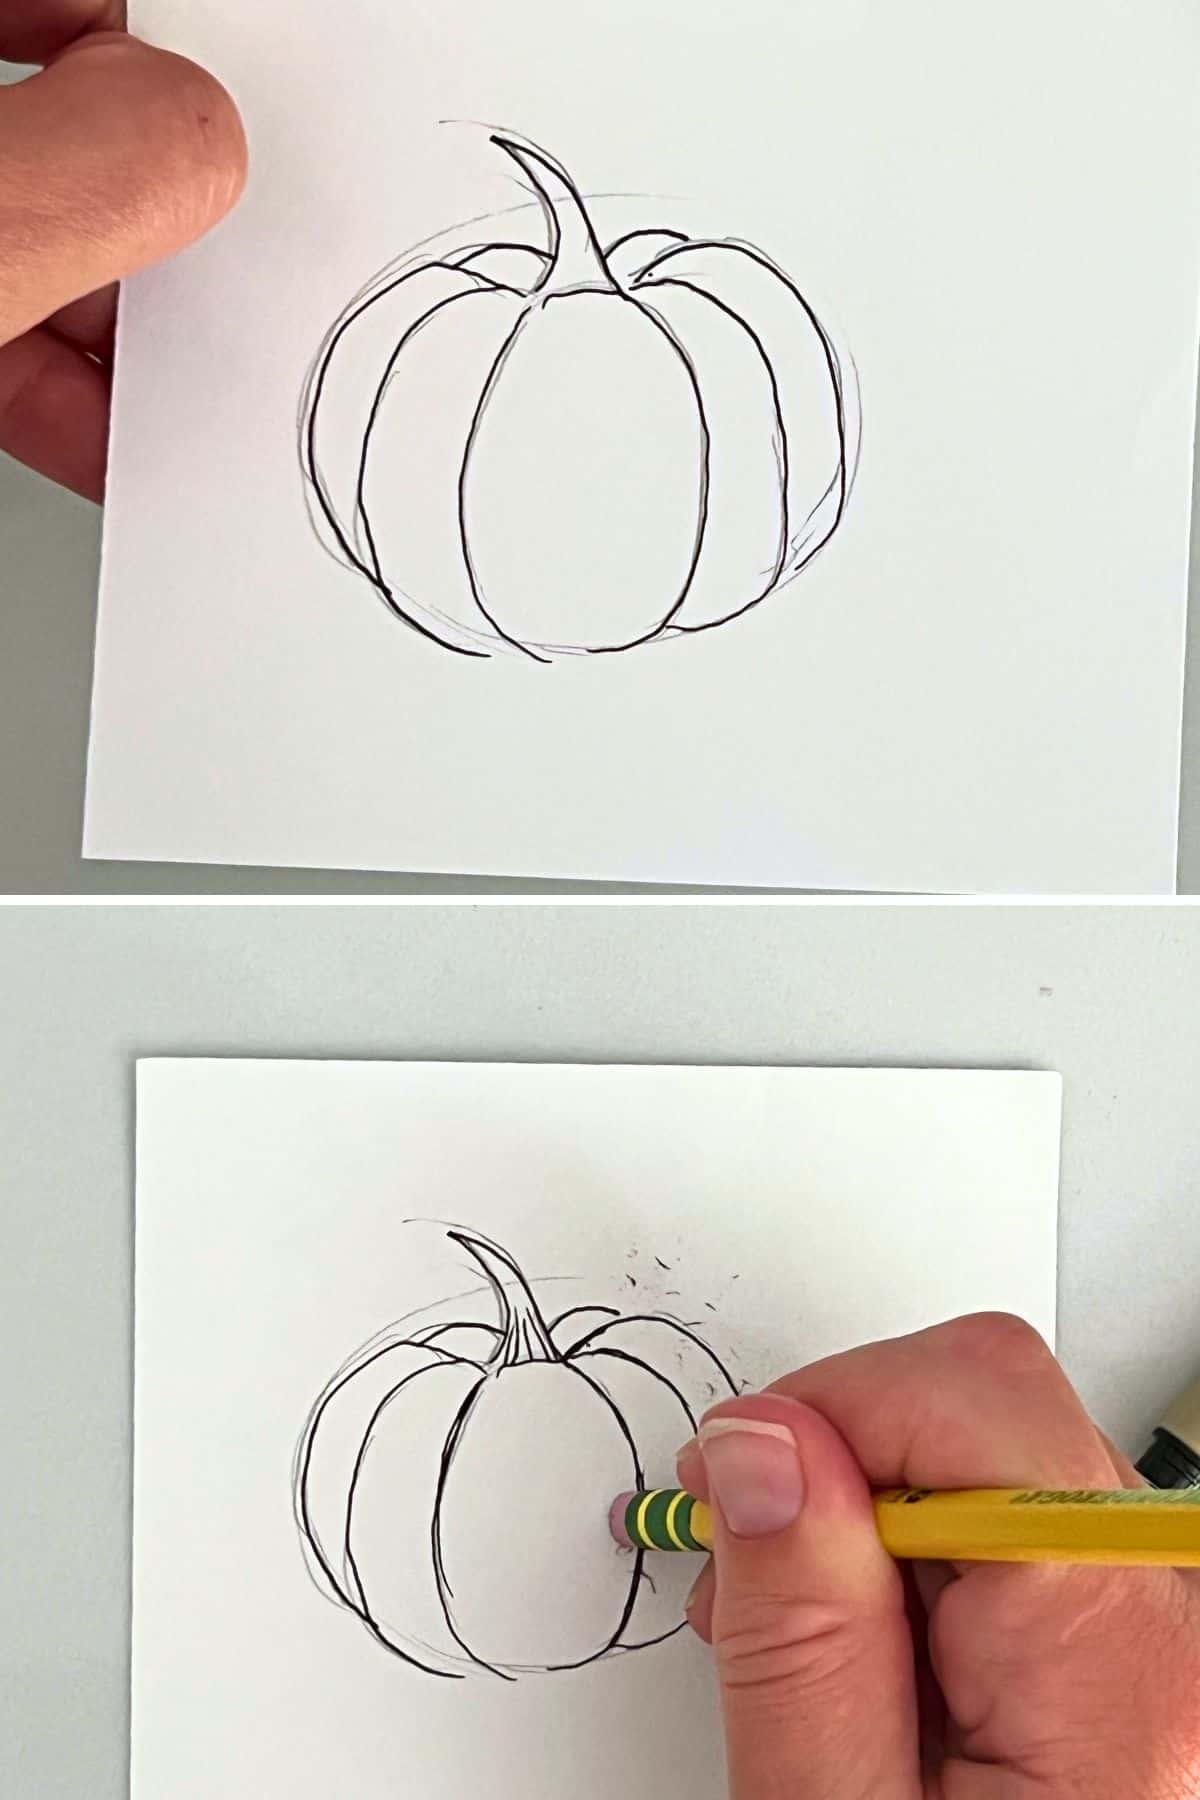
In this drawing, the pumpkin’s bumps are more pronounced, and you also see the added curves in the back of the pumpkin to make it appear more dimensional.

- DRAW OVAL SHAPE
- ADD CENTER SHAPE: This middle section should not touch the top of the oval.
- ADD CURVED LINES ON BOTH SIDES: Follow the light oval sketch to add bumps in your pumpkin.
- ADD STEM
- ADD CURVED LINES BEHIND THE STEM
- FINISHING TOUCHES: You can outline, erase pencil lines or add extra lines and shadows to your pumpkin drawing.

Tips
No matter what type of pumpkin you are sketching, here are a few things to consider.
- The stem should be larger at the bottom and smaller at the end.
- Sketch lightly so you can erase extra lines.
- No matter what style you are picking, remember that pumpkins are not perfect circles.

Follow us on Pinterest, YouTube, Facebook & Flipboard for more free art and craft ideas!
Our Favorite
Fall Art Ideas
No matter which way you choose to draw a pumpkin, have fun creating fun Fall sketches and art projects.

