
Easy Fall Pumpkin Chalk Art: Step-By-Step Drawing For Kids

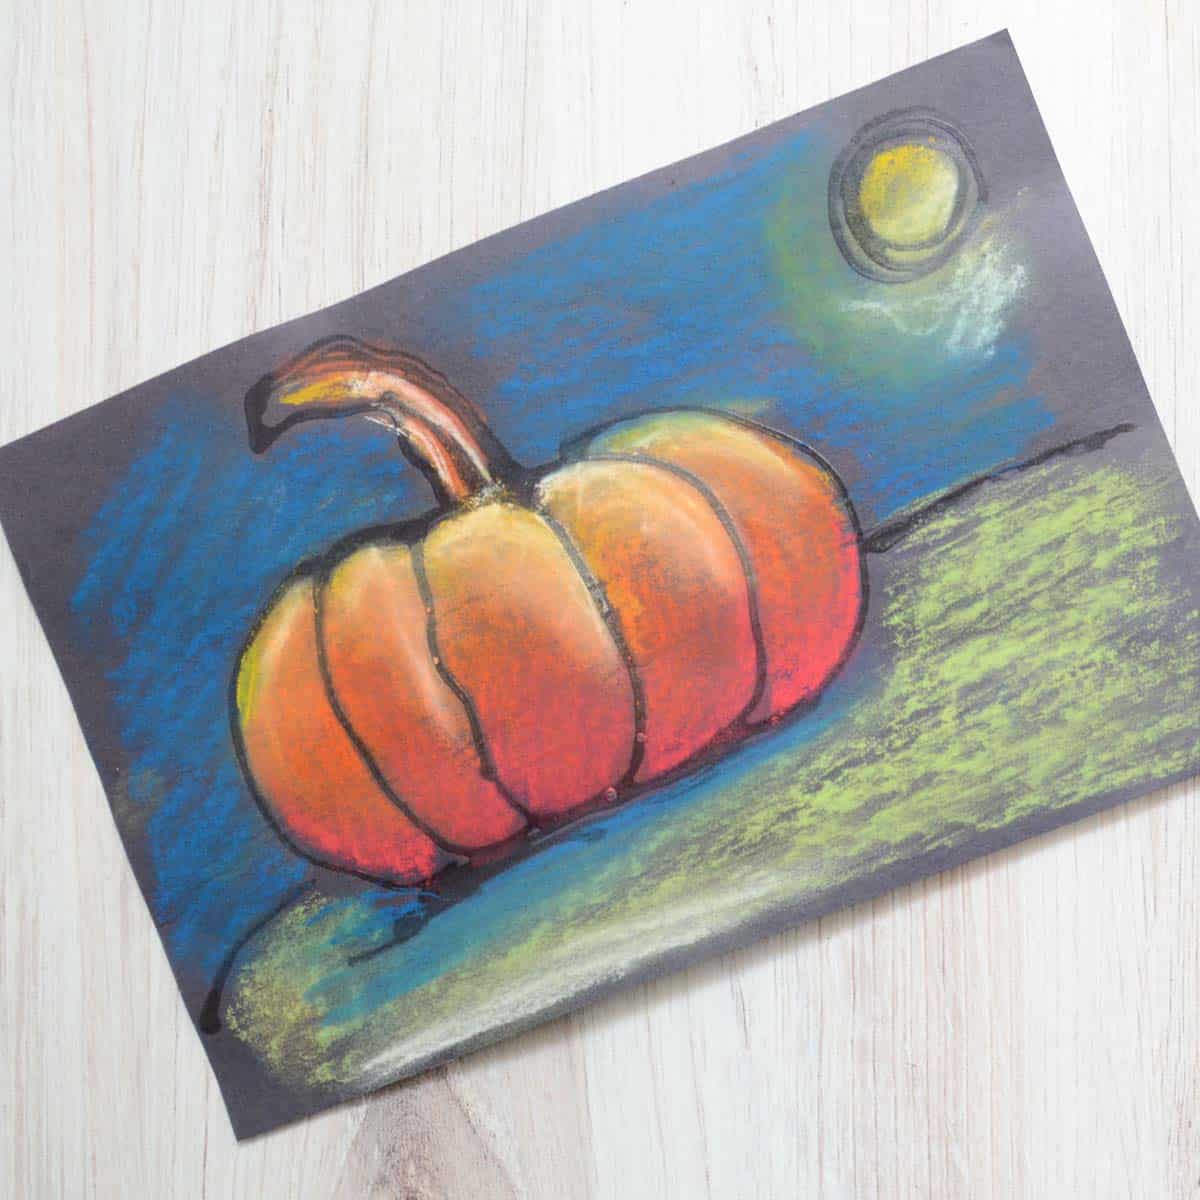
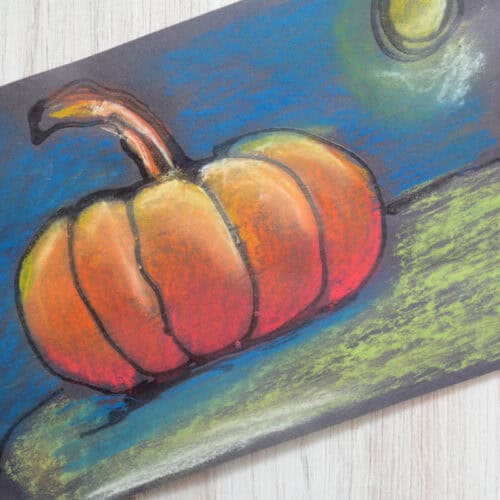
Do you love drawings that are simple to make but still deliver stunning, vibrant results every time? This easy pumpkin chalk art project for kids is one of those ideas. Such a great one to add to your Fall art project list!
This drawing tutorial was originally published in September 2024. I recently updated this tutorial in August 2026 with my key takeaways, extra FAQs, and a quick how-to video.
I love creating seasonal art with kids that lets them change the design or scene. Whether they want to create a Fall leaf chalk art on black paper or different pumpkin doodles, this Autumn art lesson works for any aged child who can draw with a glue bottle.
Why You Will Love This Art Idea
Supplies you’ll need
Disclosure: This post may contain affiliate links. When clicked, we may earn a small commission at no additional cost to you. Read our full privacy policy.

*After years of experience with all sorts of black construction papers, this brand is my favorite to use.
Pumpkin Chalk and Glue Drawing Tutorial
You can also do this project with any size of paper. Some examples in this lesson are 6″ x 9″ and 9″x 12″. For younger children (1st graders and younger), 12″ x 18″ paper might work best.
Step 1: Sketch With A Pencil
This is an optional step. Sometimes, it is better to draw with glue, as this forces children to avoid adding too much detail. Here are a few easy ways to draw a pumpkin.
Step 2: Outline The Drawing With Glue
Carefully use a glue bottle to outline the drawings and main lines with glue. The large details are the most important.
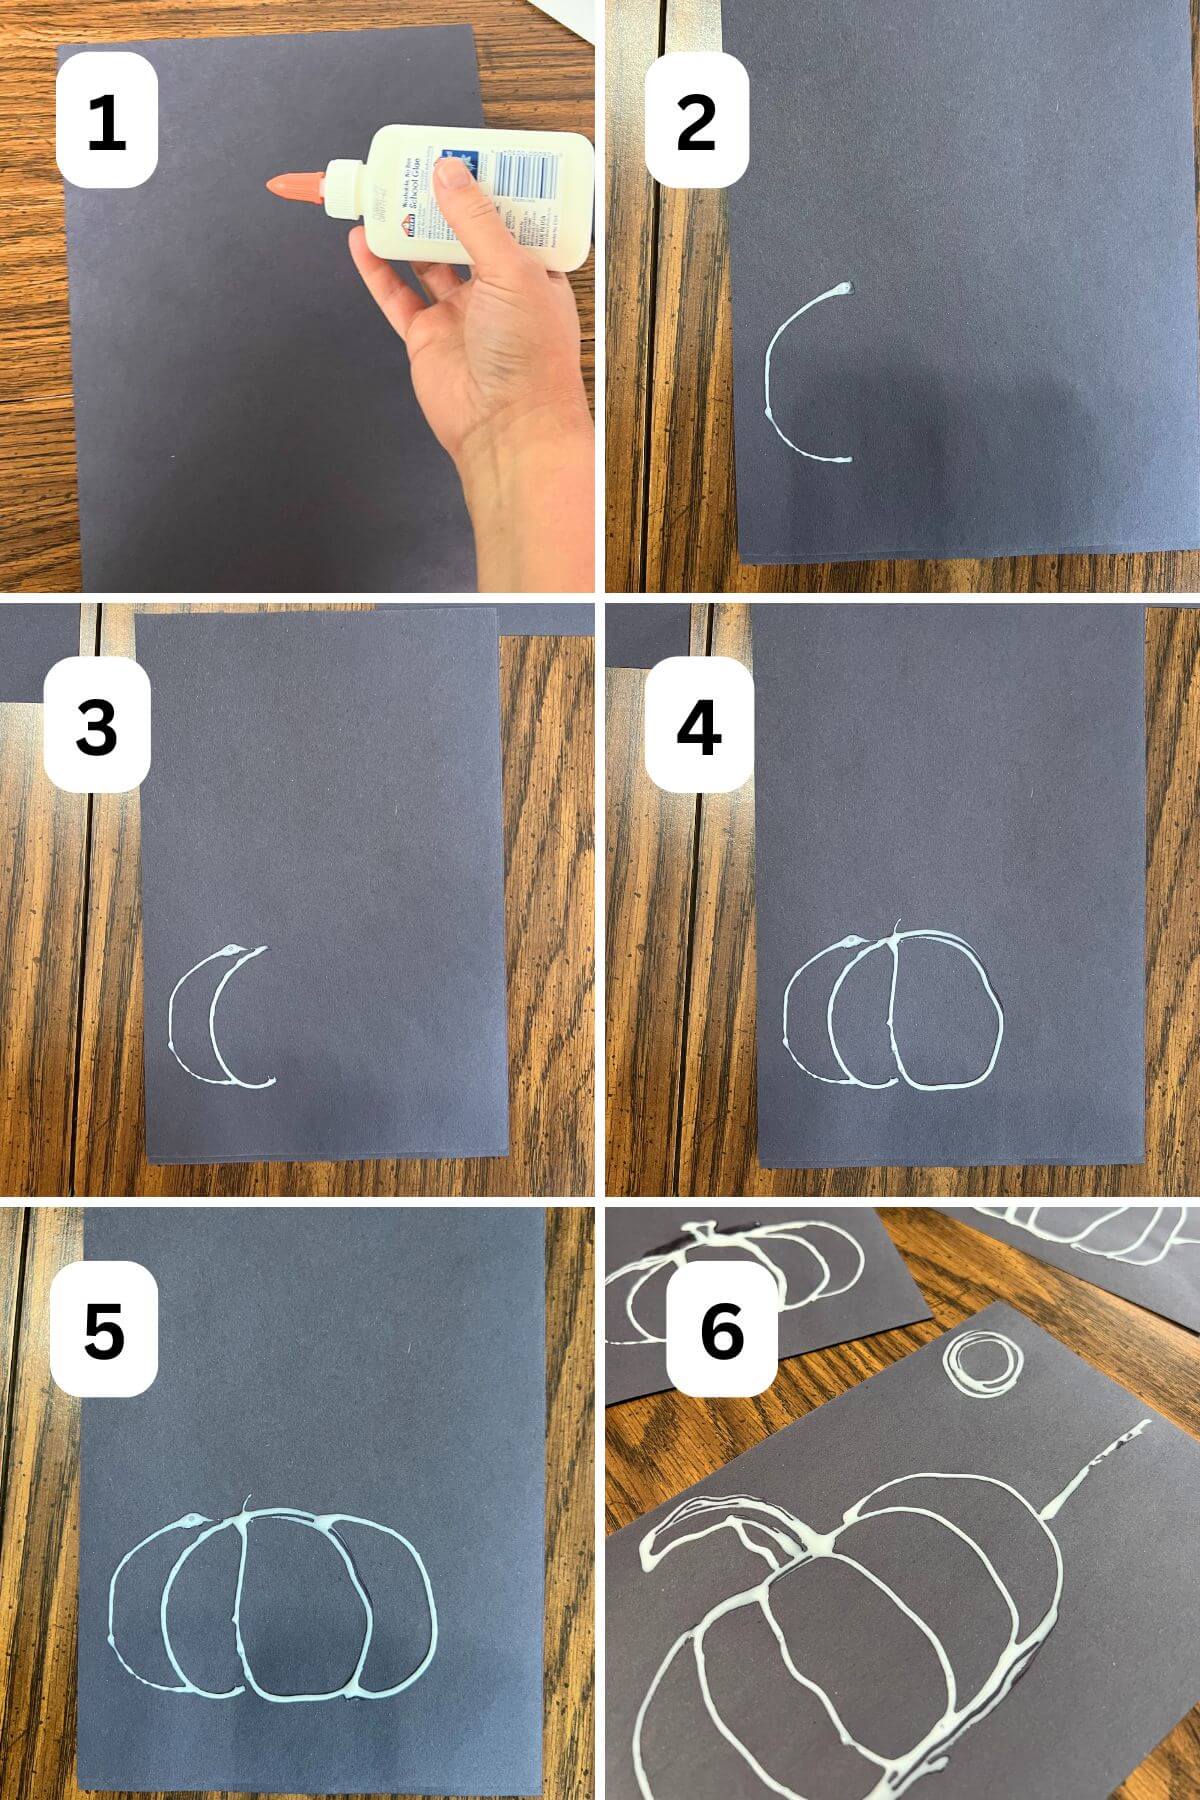
Step 3: Let Dry
Depending on the thickness of the glue line, it may take a few hours to completely dry.
Step 4: Add Color
Our favorite way to add color to glue drawings on black paper is with chalk pastels. The glue resists the chalk and acts like an outline.
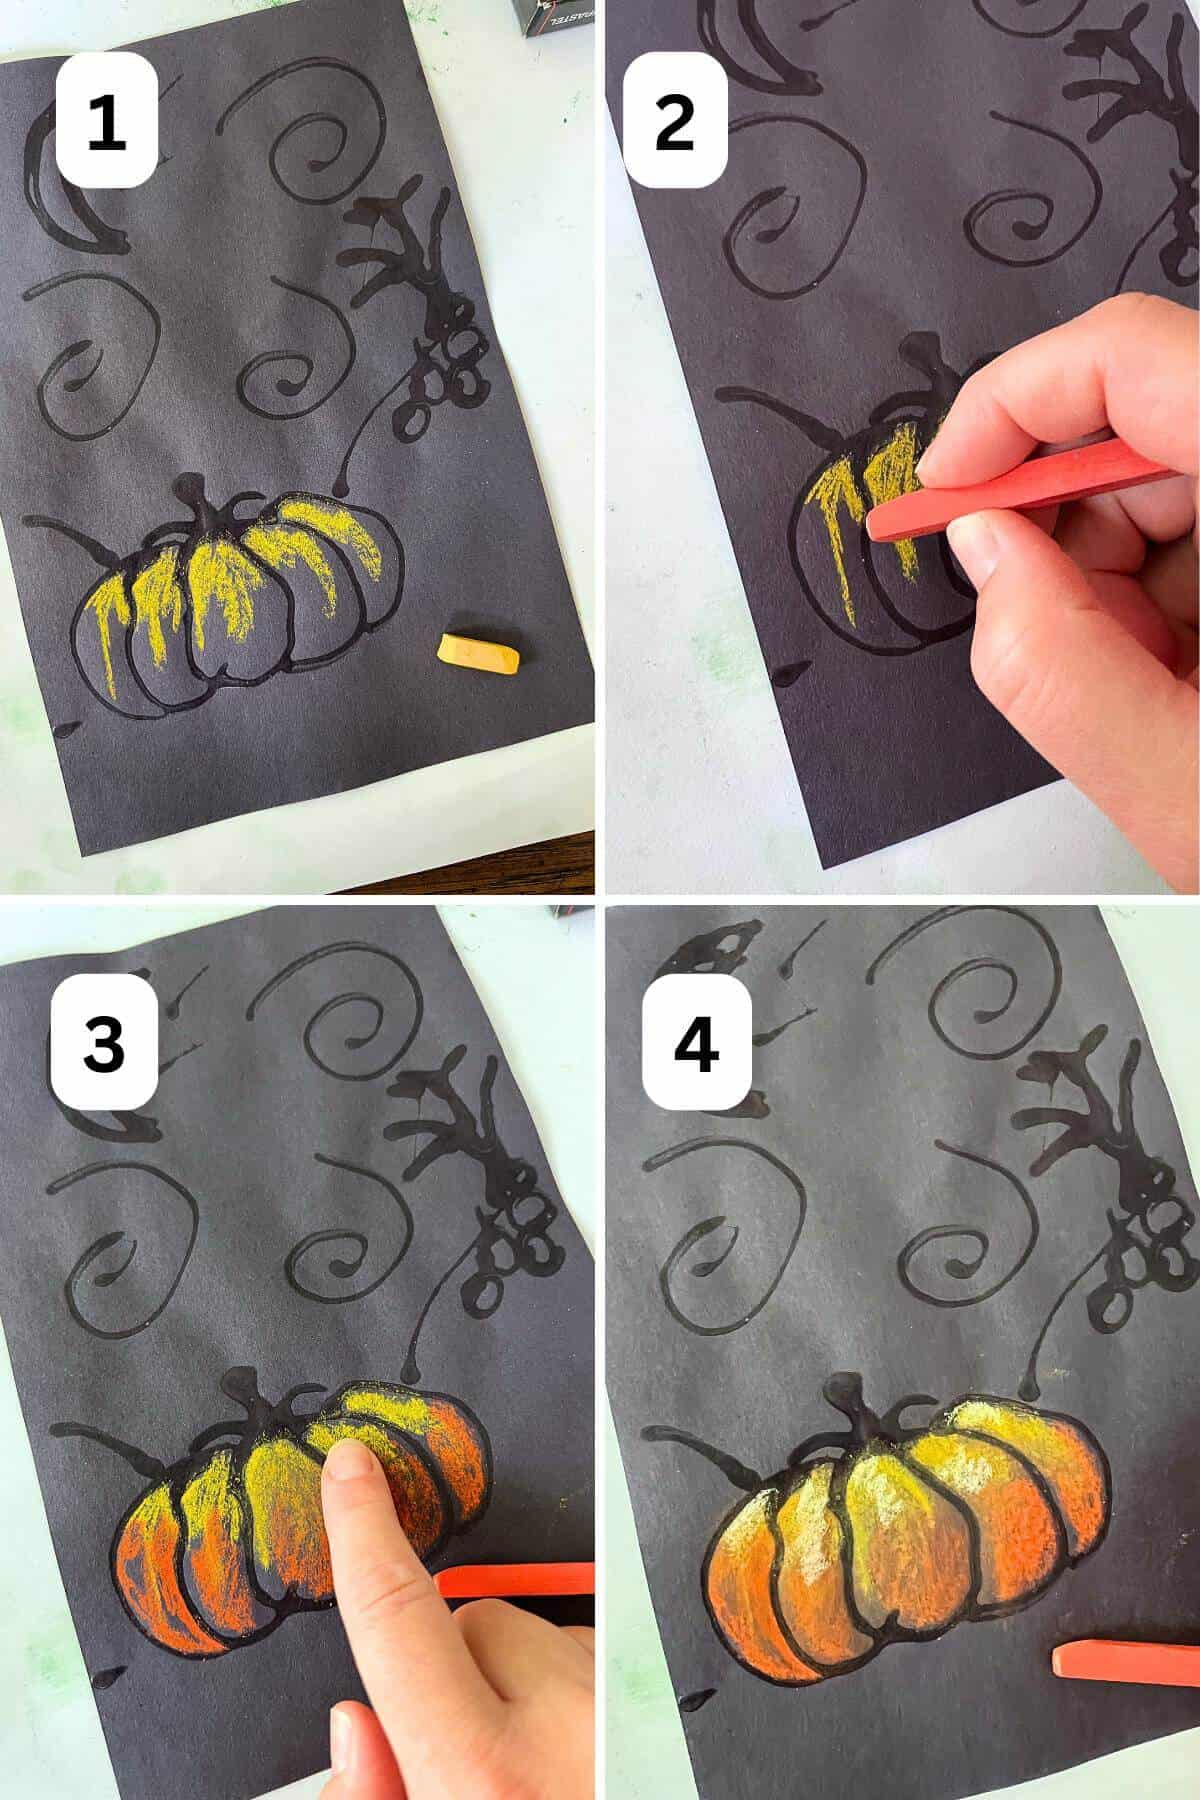
To make your pumpkin feel more 3-dimensional:
- Watch our quick video on Youtube or in this post.
- Use warm colors (yellow at the top, orange in the middle, and red at the bottom)
- Blend the colors with your fingers.
- Add highlights with white chalk to the top of your pumpkin.
- Add a cast shadow with a blue or purple piece of chalk.
Step 5: Spray Drawings
When using chalk pastels, it is best to spray them with a workable fixative.
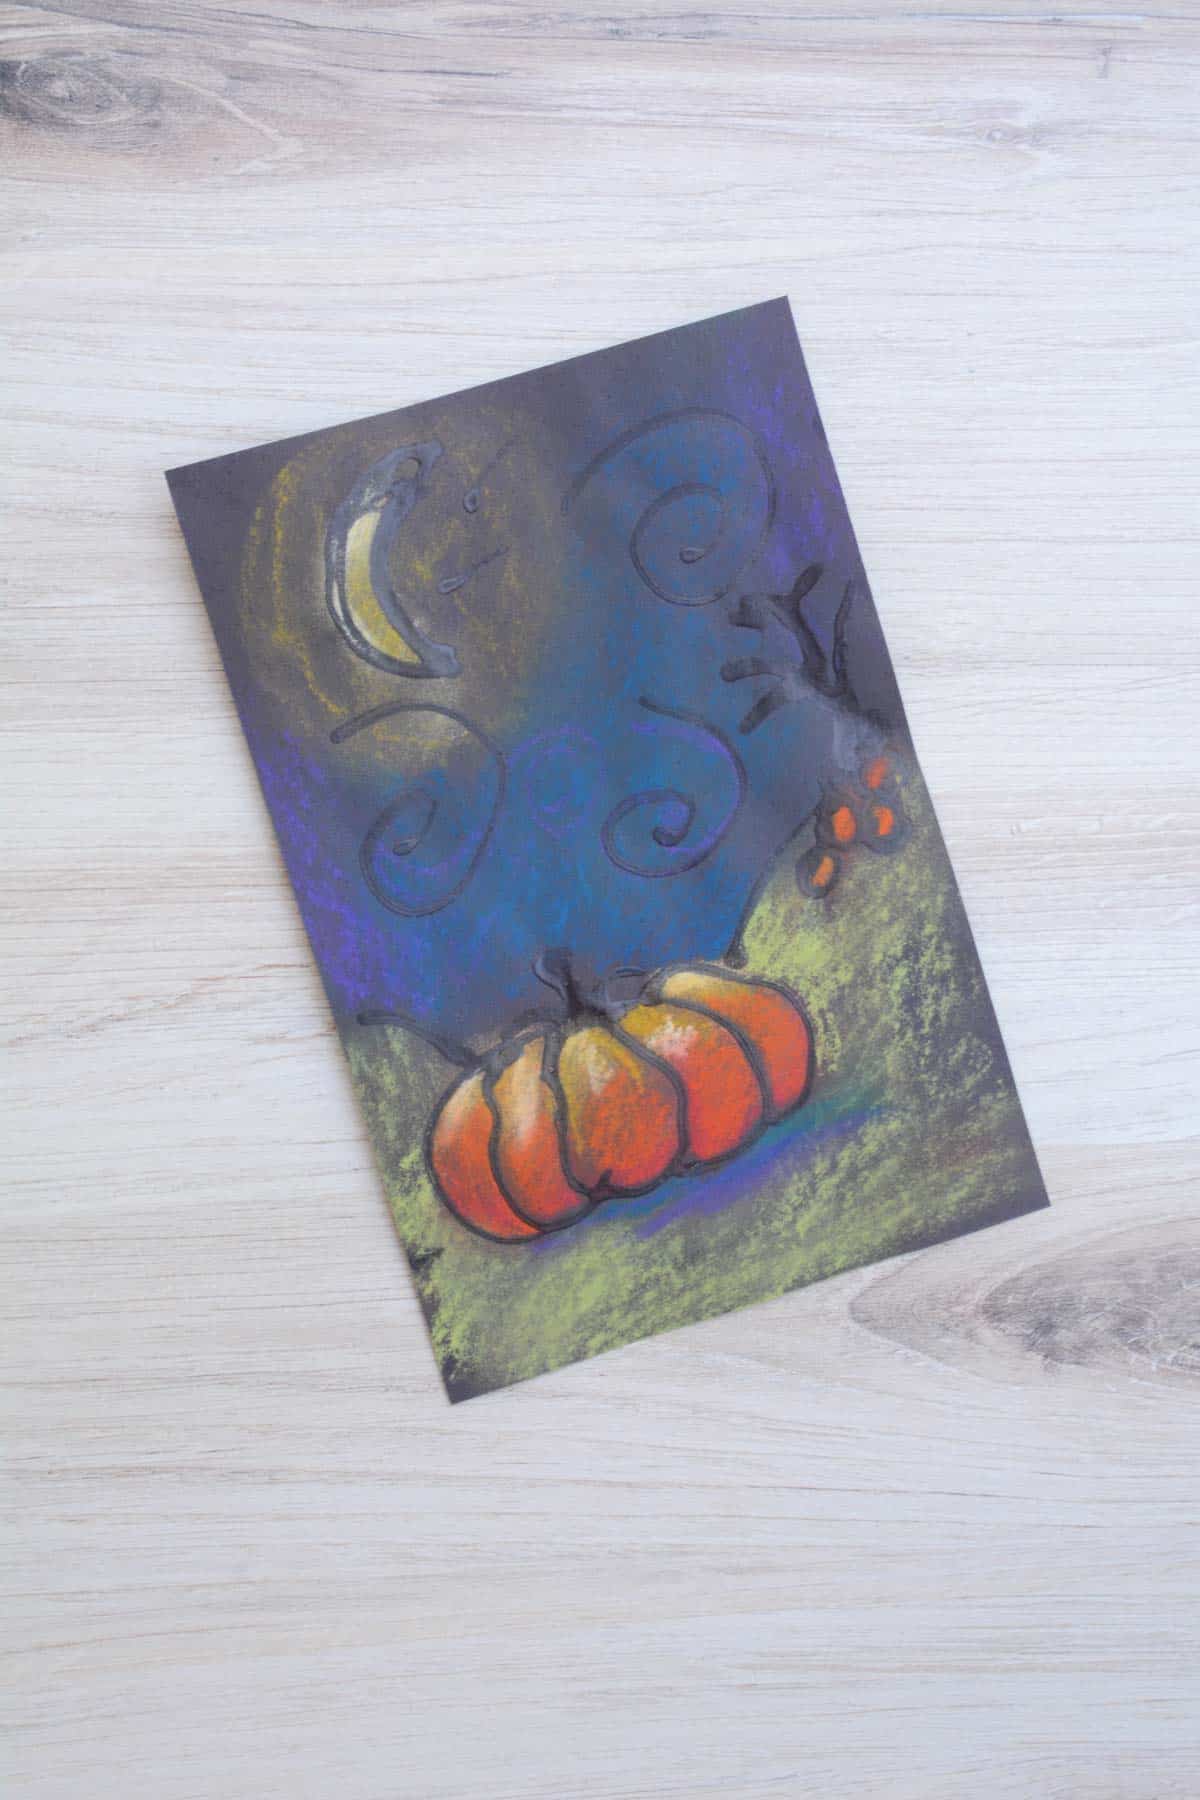
Tips
- School glue works well but may not have as much relief once it dries.
- Glue-All is a thicker glue that doesn’t spread out as much. This is an excellent option for older kids because it is not as washable.
- Make sure to lay your glue drawings completely flat to dry. Most drying racks have a tilt, and the drawings will drip or smear.
- Practice using oil pastels or chalk pastels before working on the project.
Art Project FAQs
This project is great for 3rd graders and up in a large setting. The hardest part is placing the glue drawings on a flat surface to dry and giving the glue enough time to dry completely.
If the mistake is from glue, you may be able to carefully wipe it away. However, sometimes it’s best to leave it and work with the more organic glue line. For mistakes made with chalk pastels, you can try to remove them with a small eraser before adding a protective spray.
This technique works for all sorts of designs and drawings. You can see how we used the same method in this abstract chalk art and easy Christmas chalk art (that was easy enough for a 6-year-old to complete).
Our Favorite
Related Chalk Drawing Ideas
Follow us on Pinterest, YouTube & Facebook for more free art and craft ideas!
The best part about this creative pumpkin chalk pastel art is that it is simple enough for any beginner to create. We can’t wait to see what you create this Fall.
Pumpkin Chalk Art For Beginners
Equipment
- Pencil
Supplies
- Black Construction Paper 6" x 9" or bigger
- Chalk Pastels
- Bottled Glue we recommend using Glue-All and not regular School Glue
- Workable Fixative
Instructions
- Draw A Pumpkin – Lightly sketch a simple pumpkin and any background details with a pencil. You can also skip the pencil and draw directly with glue.
- Trace With Glue – Carefully trace the pumpkin and main details with bottled glue. Avoid adding tiny details that may be difficult to outline.
- Let The Glue Dry – Lay the artwork flat and allow the glue to dry completely. This may take a few hours, depending on the thickness of the glue.
- Add Chalk Pastels – Color inside the dried glue lines with chalk pastels. Use yellow, orange and red to add dimension. Blend the colors with your fingers and add white highlights. Add a blue or purple cast shadow underneath the pumpkin.
- Spray With Fixative – In a well-ventilated area, lightly spray the finished chalk drawing with workable fixative to help prevent smudging.
Video
Notes
- Younger artists may find larger 12″ x 18″ paper easier to work with.
- Lay your glue drawings completely flat to dry. Most drying racks have a tilt, and the drawings will drip or smear.
- We recommend showing children how to use one finger to blend chalk pastels.
- Clean up extra smudges with an eraser before spraying them.