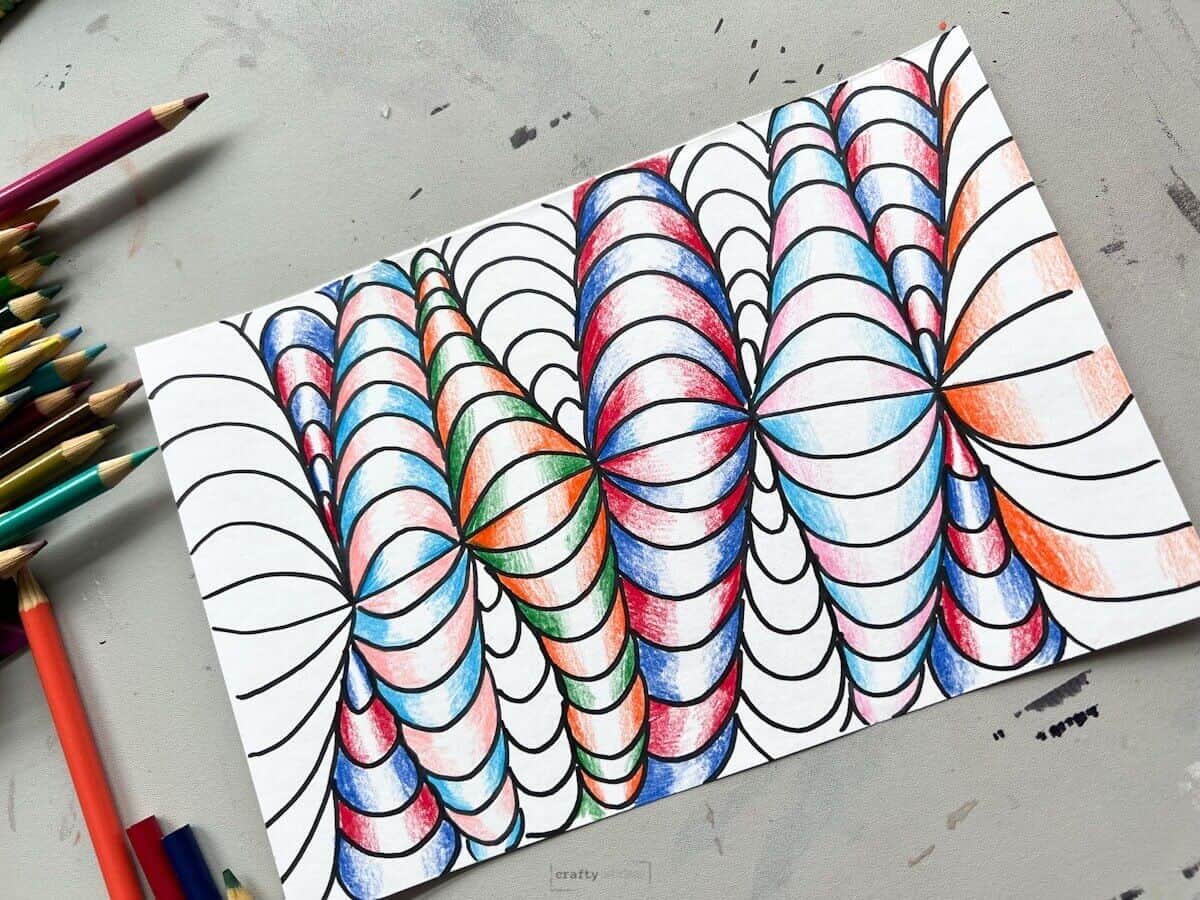
Easy Op Art For Kids: Create Cool Optical Drawings

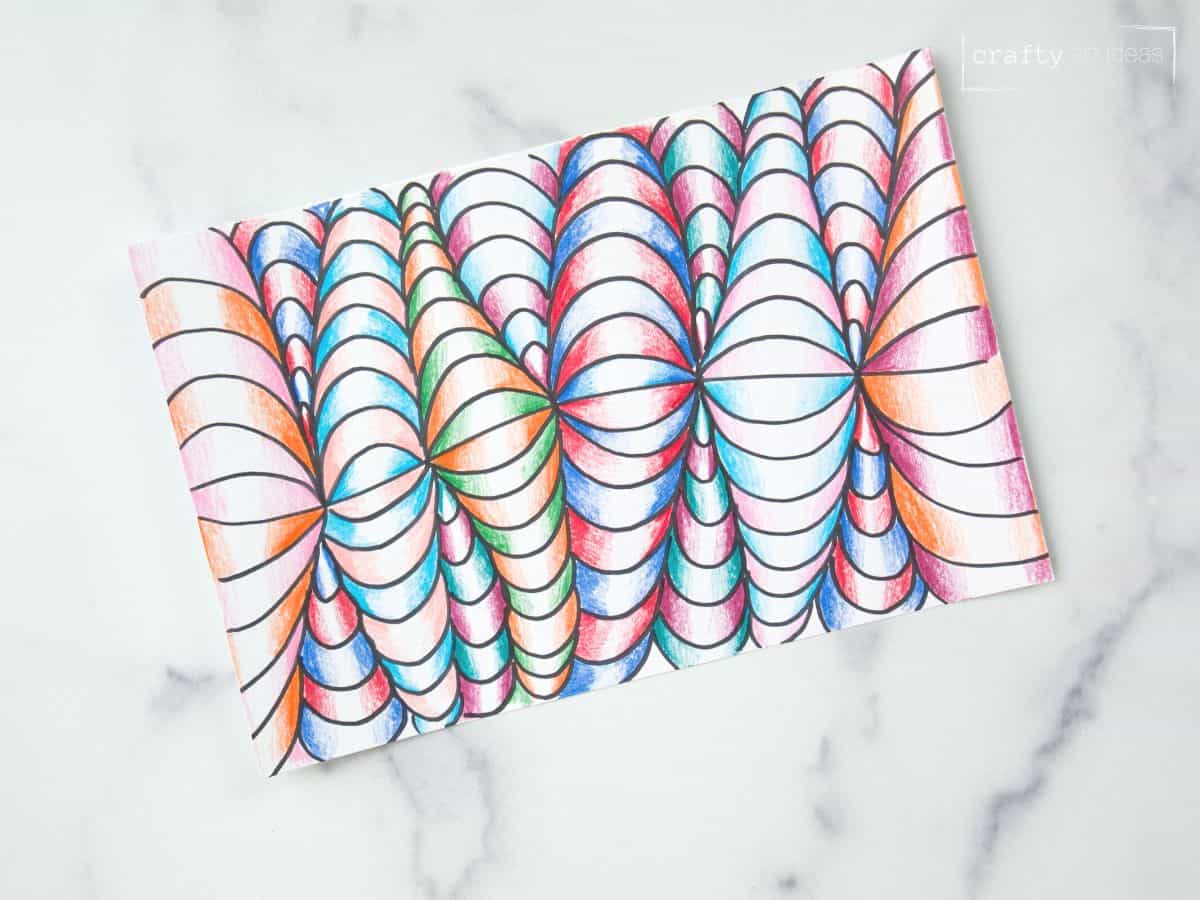
Children love learning about the Op Art movement and creating unique optical designs. Follow our step-by-step Op Art lesson for kids to create fun, shaded colored-pencil drawings.
This step-by-step Op Art drawing has been a favorite on our site since it was published in January 2023. Erin updated this art lesson in July 2026 with more precise instructions, a printable PDF, new key takeaways, and a how-to video. Happy drawing!
Why You Will Love This Op Art Idea
*We usually complete this with 3rd graders. You will be amazed at some of the results you can get. However, some students of that age can lack the abilities or fine motor skills, so for better success, complete with 4th grade and up!
OP Art = OPTICAL ART
Have them guess what they think “Op” stands for. They know about optical illusions and understand that artists have used this concept in their art.Op Art is short for optical art. Artists use shapes, colors, and patterns to make it look like things are moving or blurring.
This is also a great time to help explain what an art movement is. We like to explain to kids that it would be like 4 of them realized they were all making art with the same style and ideas in the 1960s.
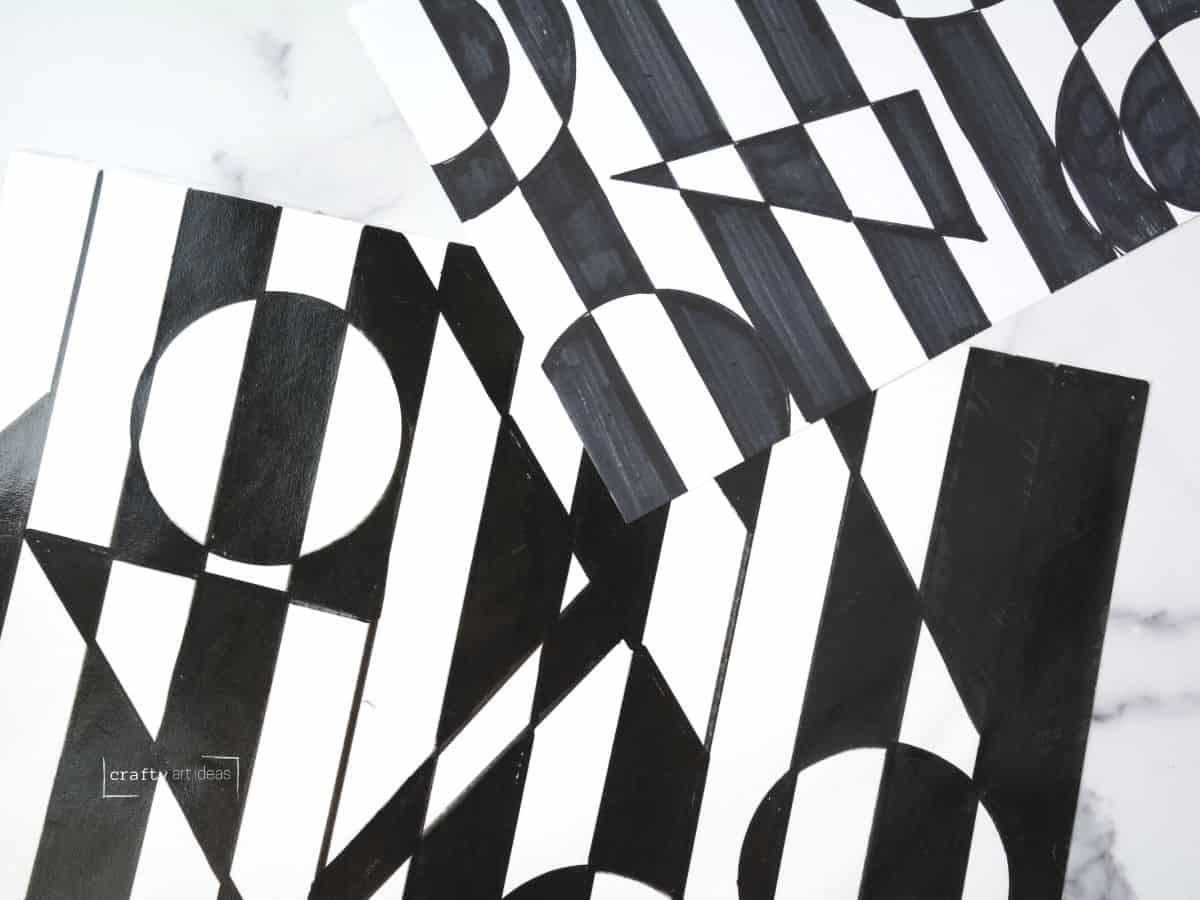
Check out this other simple black and white marker Op Art tutorial for another Op Art lesson.
Artist Inspiration
- BRIDGET RILEY: best known for her black-and-white images that appear to move or blur together. Our favorite artwork of Riley’s is Cataract 3, painted in 1967.
- VICTOR VASARELY: is known to be the father of the Op Art movement. He uses more geometric shapes and color in his work to create great confusion with depth. Vega 222, painted 1969-1970, and his other sphere artworks are some of our favorites.
Note: You can also use similar questions and prompts when looking at other abstract artists like Kandinsky or Mondrian with children.
Analyzing and Discussing OP Art With Kids
Look at a variety of artworks from the Op art movement. Use some of the following questions to get a discussion going with children.
- What colors do you see? Why do you think some are only black and white?
- How does the artist challenge your eye?
- If something is repeated, what happens to the shapes or sizes?
- Why would they use patterns?
- How does this artwork make you feel?
Supplies You’ll Need
Disclosure: This post may contain affiliate links when clicked, we may earn a small commission at no additional cost to you. Read our full privacy policy.

Op Art Line Drawing Tutorial
ART TEACHER TIP – These drawings work best when the paper is horizontal, but we have had a few in which the child does well with vertical paper.

Step 1: Draw A Line and Add 5-7 Dots
This line can be straight or slightly wavy. It is important not to make it too wavy. Try to make the dots evenly spaced. To do this, start in the middle and add them out to the edge.
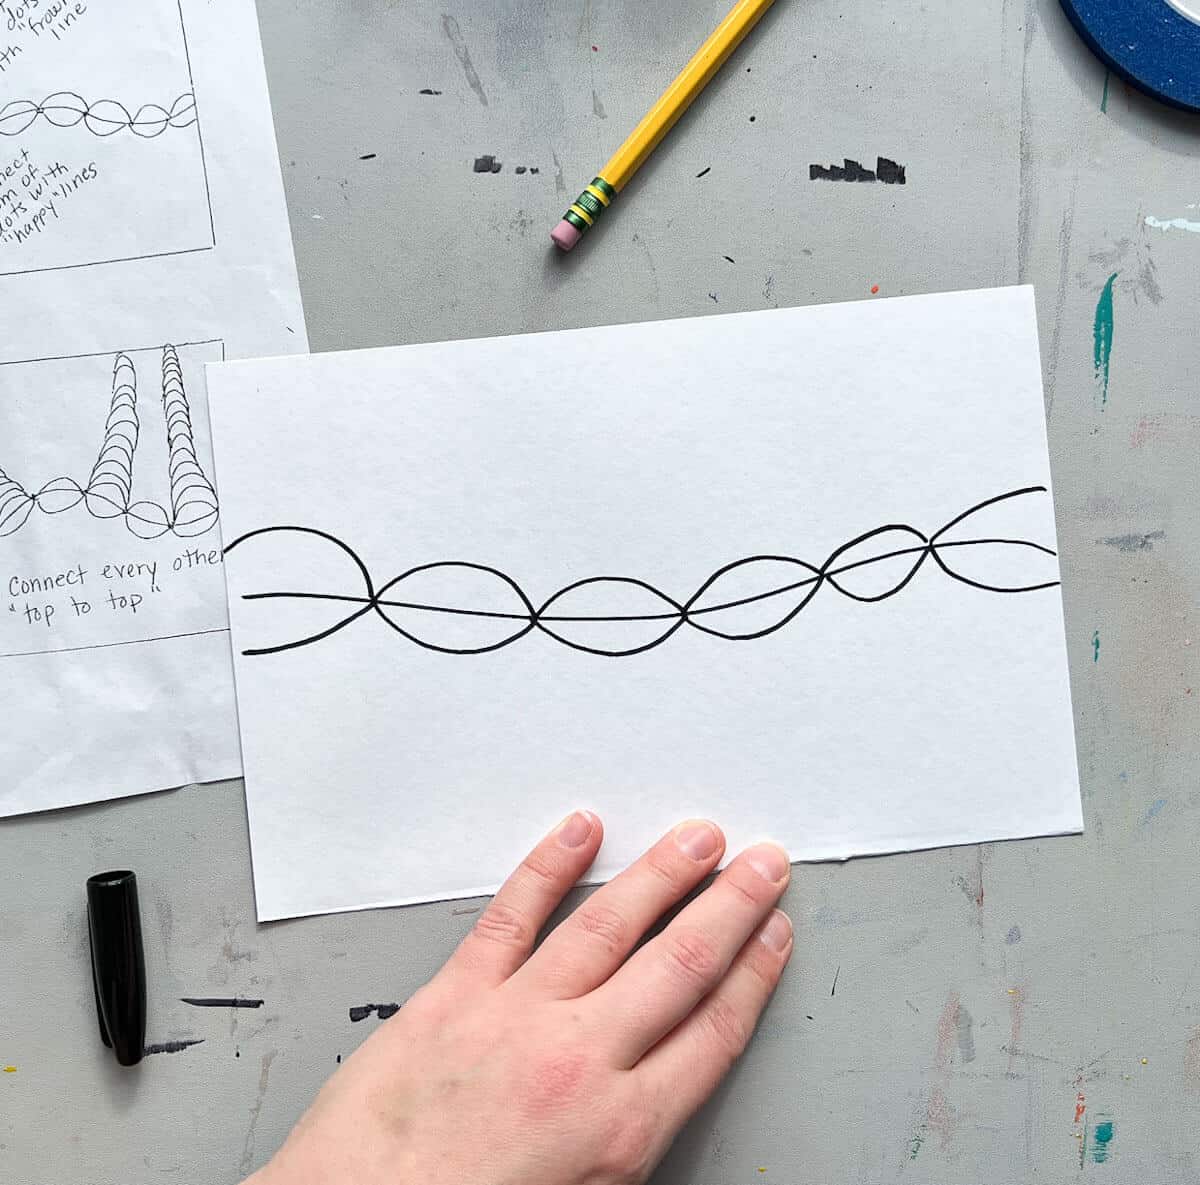
Step 2: Connect The Dots Curved Lines
We also refer to this as a frown or smile line depending on which way you are holding the paper. Your drawing will look like a shell necklace going across the page.
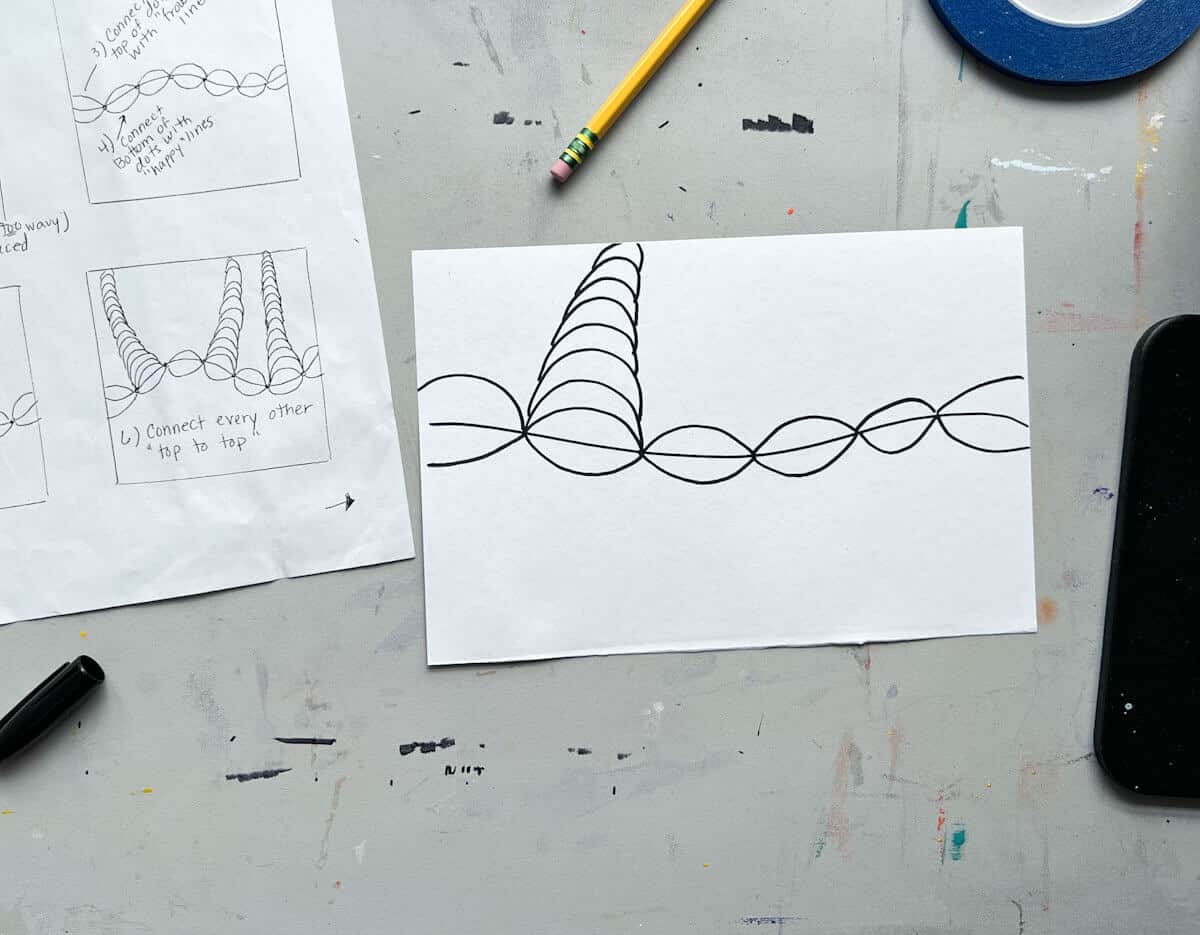
Step 3: Add Repeated Curved Lines To One Section
Working “top to top,” draw curved lines until that row goes off the page. The lines will continue to get smaller and smaller.

Step 4: Skip A “Shell” and Draw Repeat Drawing The Row
Repeat drawing top to top until you go off the page.

Step 5: Repeat
Repeat drawing curved lines. Some of your rows or “worms” may collide with the other drawings and lines. That is natural and part of the drawing.

Step 6: Flip The Paper Over And Repeat Steps 5-7
Work on adding curved lines every other shell until you go off the page.

Step 7: Add Tear Drops In Empty Spaces If Needed
If you have an empty white space between wiggly lines, draw a teardrop shape and then curved lines until you go off the page.

Step 8: Add Finishing Touches
If you drew in pencil (like we recommend) outline with a black marker when finished. Erase extra pencil lines before moving on to colored pencils. This drawing is best if you outline it with a regular fine-tip sharpie. If lines are too small, then use an ultra-fine tip marker.

Step 9: Add Color
You will use the same color across the band. On the edges, you want a darker value. Press harder and fade so that the middle is very light or white. Repeat on the other corner.

Step 10: Repeat Color Pattern Up The Whole Curved Line Shape
Repeat the darker corners with the same color in every other band. Use shading to create darker values in the corners with a different color.
Step 11: Continue To Color All Rows
Color each row with different patterns. You can use the same two colors or switch your pattern design.

Step 12: Work Until All Lines Are Colored
Read More: If you like this simple drawing tutorial, you will also love how to create an easy mandala kid art lesson.

Drawing Tips
- CREATE A PATTERN WITH COLOR – Each row should be the same pattern. Using two colors is the easiest for kids, but you can use more than that as long as you color in a pattern.
- CREATE BALANCE – You can use the same 2 or 3 colors for all the worms. Or switch for each row.
- LESS IS MORE – Don’t draw more than 5-7 dots across your page. Your design will become too complex for a 6″ x 9″ sheet of paper.
- BE CREATIVE – It is fun if the “worms or wiggly lines” turn and twist. Encourage kids to have a variety. Just ensure they overlap correctly and don’t draw through each line.
- LIGHTLY SKETCH – Draw with a pencil first, trace with a black marker, and then use a large eraser to remove pencil lines before coloring.
- EXPERIMENT – When shading with colored pencils, some beginners find it easier to shade vertically, while others prefer to shade horizontally. Pick the one that works best for you.
Follow us on Pinterest, YouTube & Facebook for more free art and craft ideas!
Drawing FAQs
These drawings will take several class periods to complete. If you make them too large, children may become discouraged before they finish.
Yes, art lessons don’t just come out of a creative vacuum. Over the years, the directions above have been the best way to get 3rd graders and above to complete their own unique designs. This is a lesson my father (a high school art teacher from the 80s) has been doing forever.
We show a few unique steps in the drawing process to help kids easily create wiggly lines or worms.
It is best to avoid lines in the drawings getting too close together. You may need to use a combination of markers depending on the shapes you end up with.
Related Drawing Ideas
- How To Draw Radial Symmetry For Beginners
- 9+ Mandala Art Ideas For Beginners
- Fun Laurel Burch Cat Art Lesson
- How To Draw A Simple Snowflake
Making Op Art designs with school-aged children can be a lot of fun, and they will love the end result. Get creative and make your own optical drawing today.
Do you like this art project? Please give us a 5-STAR review below ⭐️⭐️⭐️⭐️⭐️ and have fun being creative with your family.
Easy Op Art Drawing For Kids
Equipment
- 1 Pencil
Supplies
- 1 Regular Fine Tip Black Permanent Marker
- 1 piece 6" x 9" White Drawing Paper
- Colored Pencils
Instructions
- Draw one straight or slightly wavy line across the page.
- Lightly draw 5-7 dots across your line. Try to make them evenly spaced.
- Connect the dots with curved lines on both sides. It will look like a shell necklace going across your page.
- In one section, repeatedly draw curved lines connecting top to top. Working "top to top," draw curved lines until that row goes off the page. The lines will continue to get smaller and smaller.
- Repeat drawing curved lines on top of each section. Some of your rows or "worms" may collide with the other drawings and lines. That is natural and part of the drawing.
- Flip the paper over and repeat the previous three steps.
- If you have an empty white space between wiggly lines, draw a teardrop shape and then curved lines until you go off the page.
- If you drew in pencil (like we recommend) outline with a black marker when finished. Erase extra pencil lines before moving on to colored pencils.
Adding Colored Pencils
- Use the same color across the band. On the edges, you want a darker value. Press harder and fade so that the middle is very light or white. Repeat on the other corner.
- Inside each long wiggly line, alternate two different colors and continue shading each shape.
- Use the same colors or different color combinations in each "wiggly line" to complete the project.
Video
Notes
- Each row should be the same pattern. 2 colors work best, but you can use more than that as long you color in a pattern.
- You can use the same 2 or 3 colors for all the worms/wiggly lines. Or switch for each row.
- Don’t draw more than 5-7 dots across your page. Your design will become too complicated for a 6″ x 9″ paper.
- It is fun if the “worms or wiggly lines” turn and twist. Encourage kids to have a variety. Just make sure that they overlap properly and don’t draw through each line.
- Draw with a pencil first, trace with a marker and then use a large eraser to get rid of pencil lines before coloring.