Can You Decoupage Tissue Paper On Clay?
Are you looking for a glaze alternative for adding color to clay projects? We will show you a simple way you can glue or decoupage tissue paper on clay for a fun effect with less hassle than pottery glaze.
Why try this method?
Are you sick of loading your kiln for another glaze firing? Yes, we totally love using clay glazes for our projects and with children. However, sometimes you just don’t have time to glaze. Get those clay pots, bowls and ceramic sculptures finished sooner with our non-glaze alternatives.
What is decoupage?
Honestly just a fancy word for gluing items such as paper cutouts or tissue paper onto a surface. This can be done in so many different ways. You can get more professional-looking pieces without any wrinkles, but also young children will be able to do this process on their clay pieces.
Since this tissue paper on clay technique is geared more towards children we simply used Elmer’s Glue-All mixed with water to apply the tissue paper.
If you are trying to get a more advanced appearance you may want to consider Mod Podge for this. My friend, Amy talks all about this on her blog, Mod Podge Rocks.
Can you use bleeding tissue paper?
Yes, we love painting with bleeding tissue paper. The only difference is that you will not take the tissue paper off when it dries. You probably could for a fun effect if you do not want to use a glue water mixture.
What can you use to seal your final clay project?
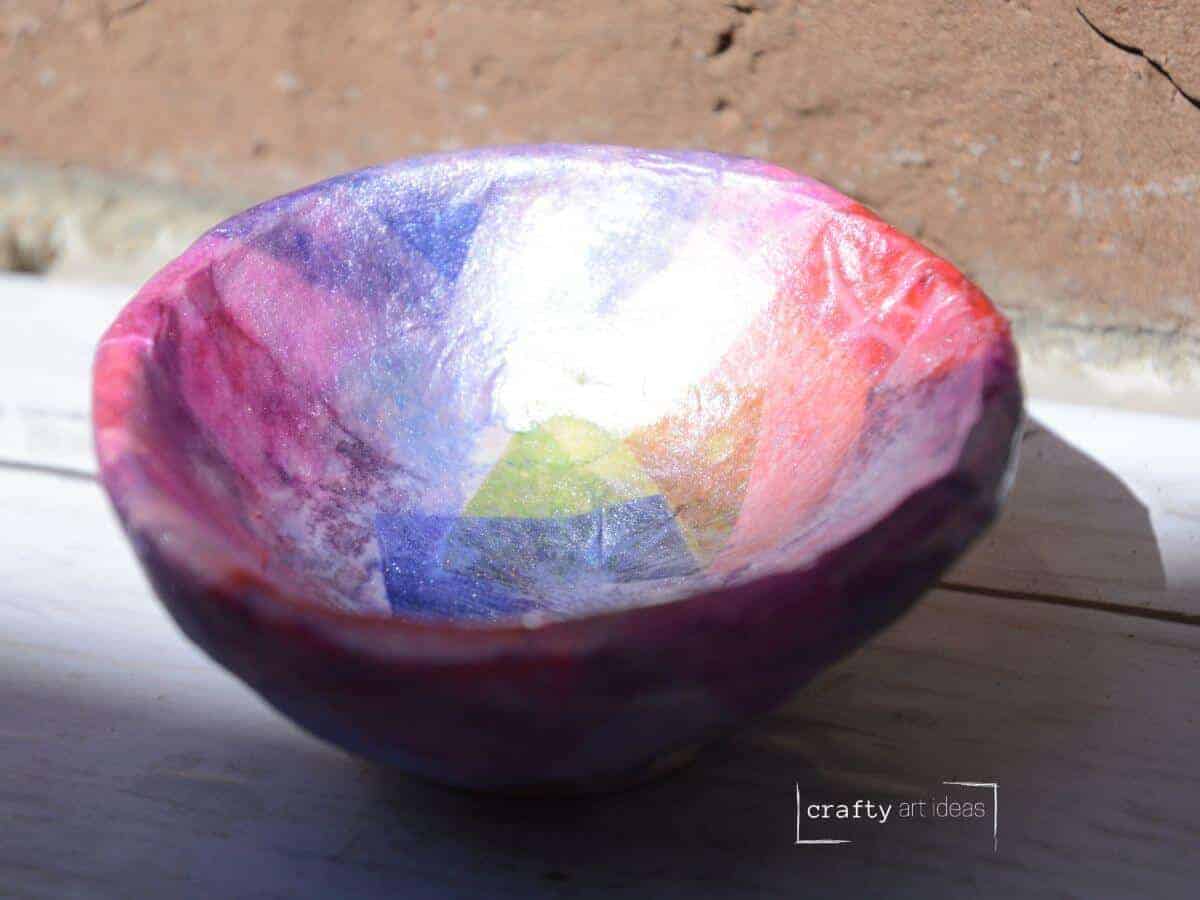
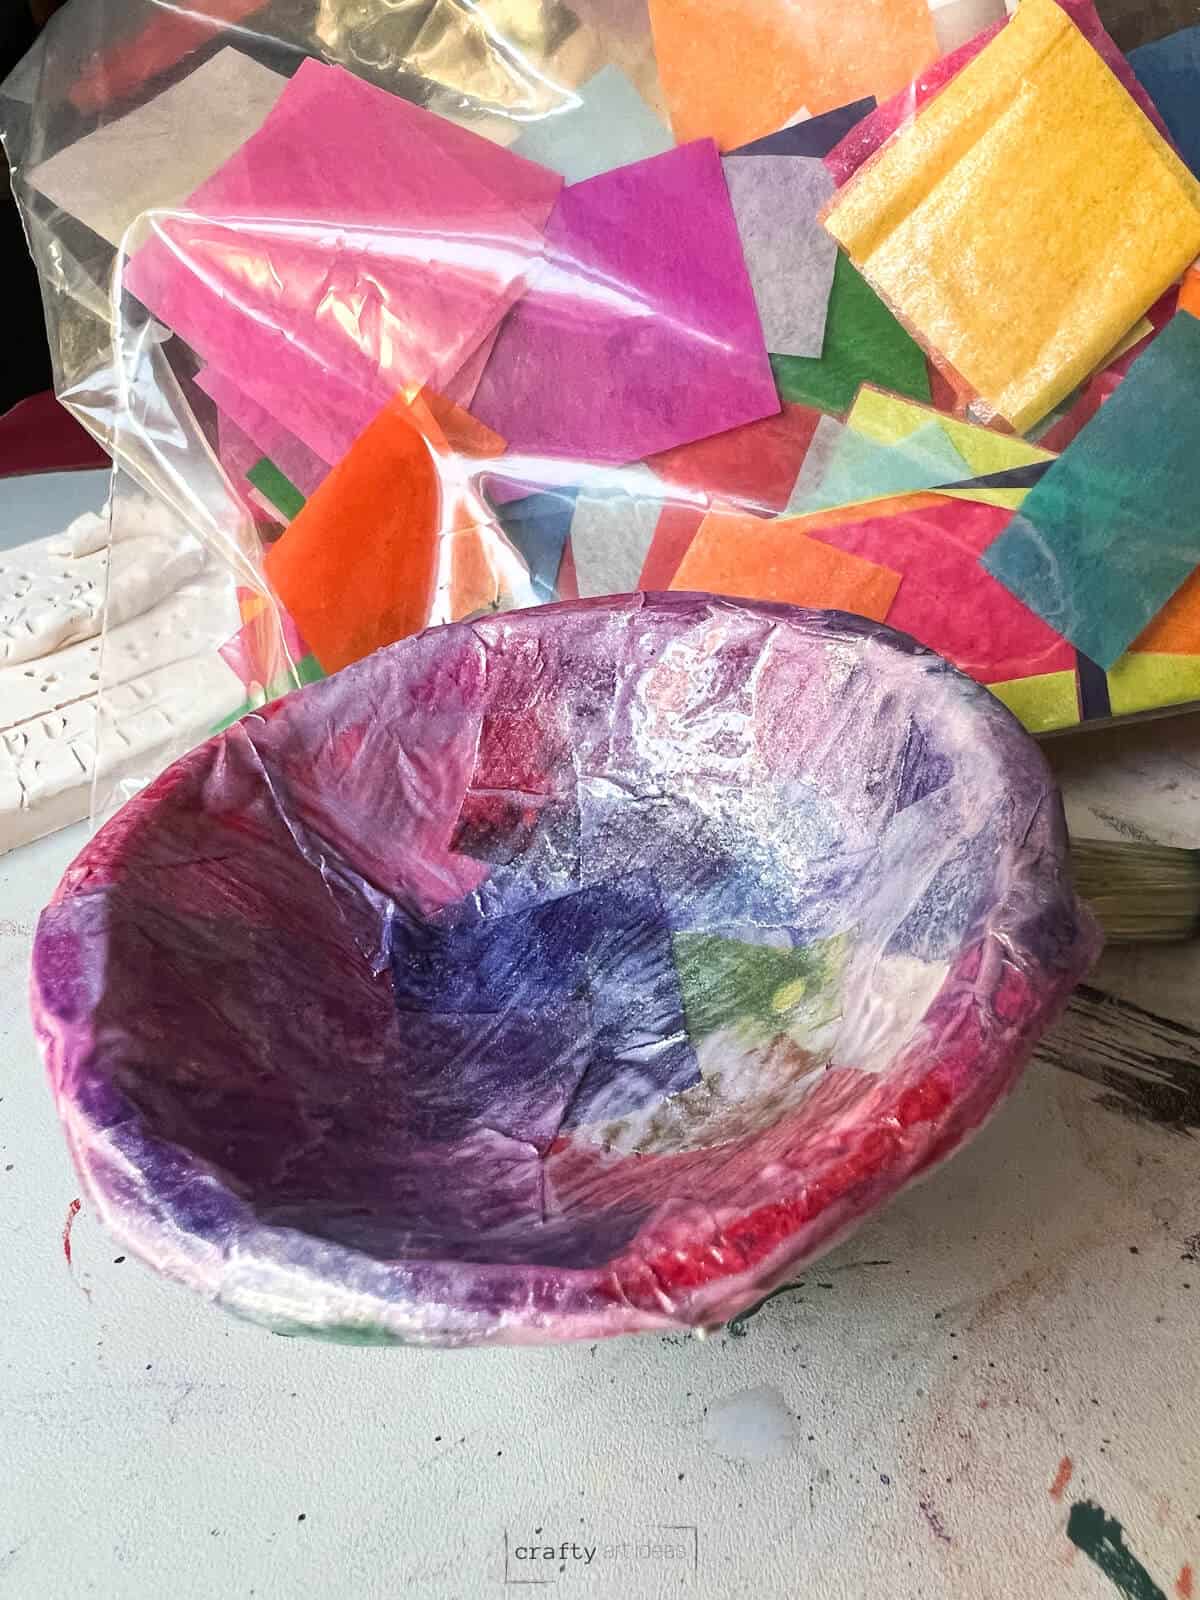
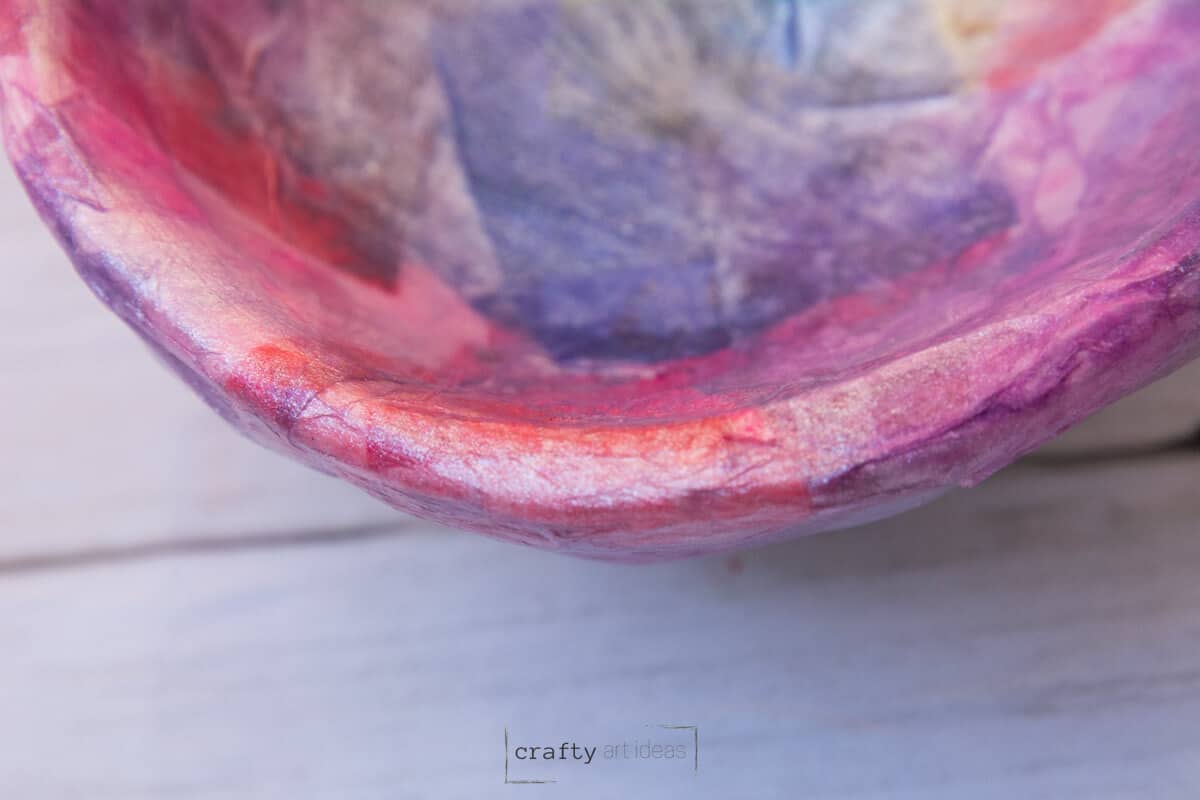
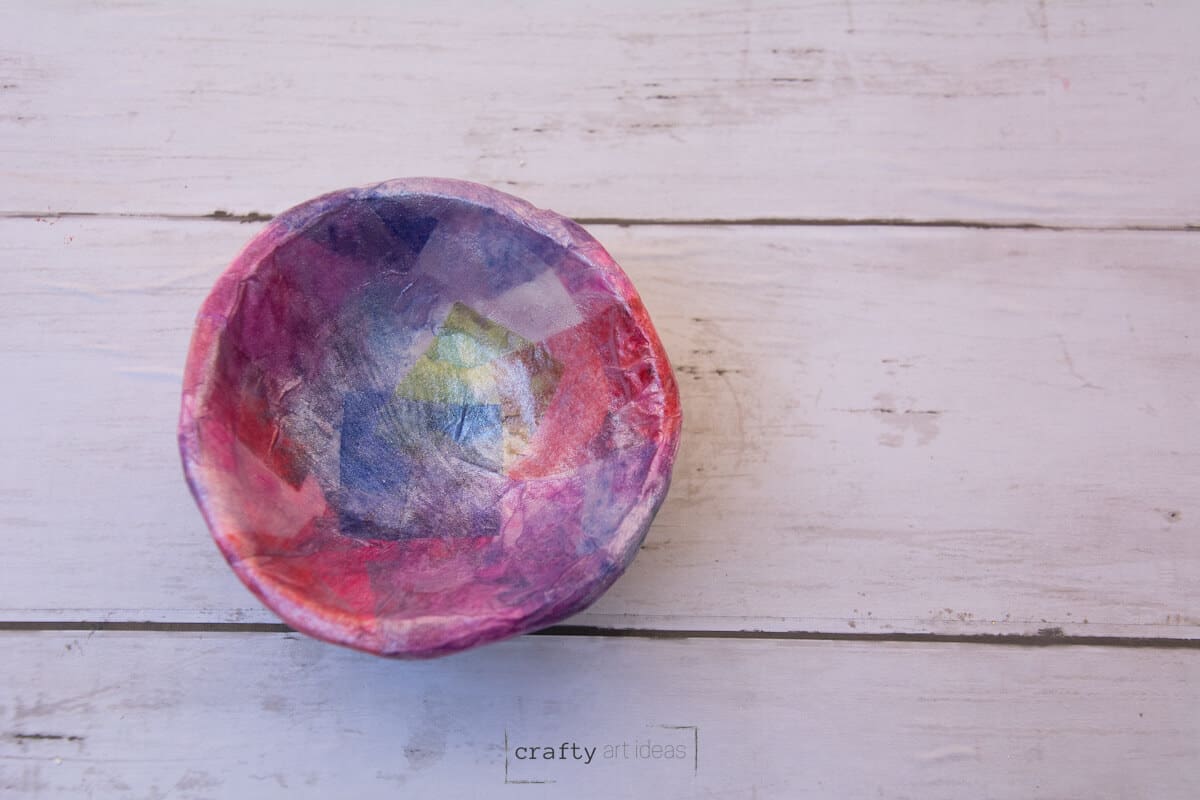
This simple pinch pot bowl was sealed with this Acrylic Gloss Medium. Seriously we love how much it just gives a little extra shimmer to the ceramic pinch pot lesson.
Read More>>>We talk all about how to seal clay projects in this post.
Other Ways to Seal Clay Projects
- Mod Podge (All sorts of varieties)
- Spray Mod Podge is also great for sealing a whole class of projects
- Acrylic Spray
How To Prep
You will want to figure out the design you want with your tissue paper. For young children, having precut shapes can work out well. They can also rip smaller pieces to create a more organic feel. You could even cut out fun shapes as well.
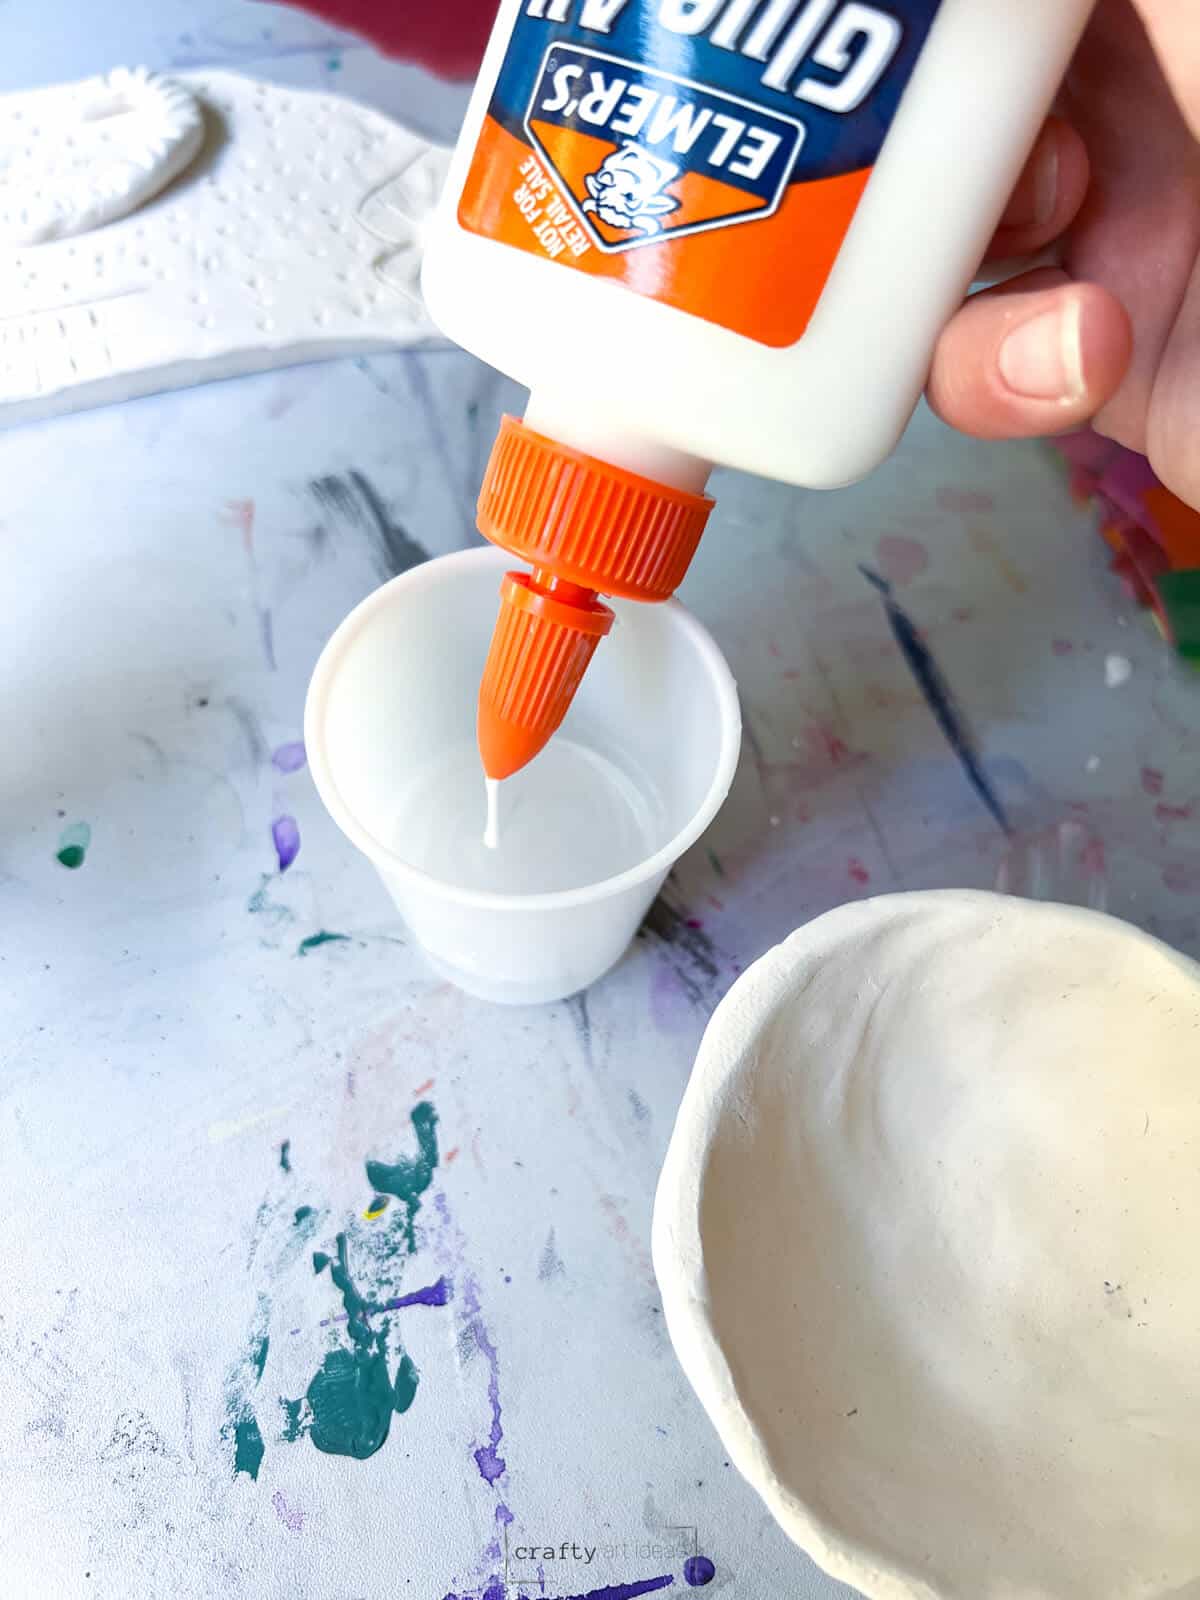
How to make cheap decoupage glue?
You will also want to premake the glue water mixture. You will only need a small amount. 2/3 part water to 1/3 part glue should do the trick.
Recommended Supplies
- Tissue paper (bleeding or regular)
- Cheaper paint brush
- Small container of glue/water mixture
- Optional: Sealer like Mod Podge

How To Decoupage Clay With Tissue Paper
Step 1: Clean Clay Dust
Clean the surface first. Make sure your clay project is free of excess dust.
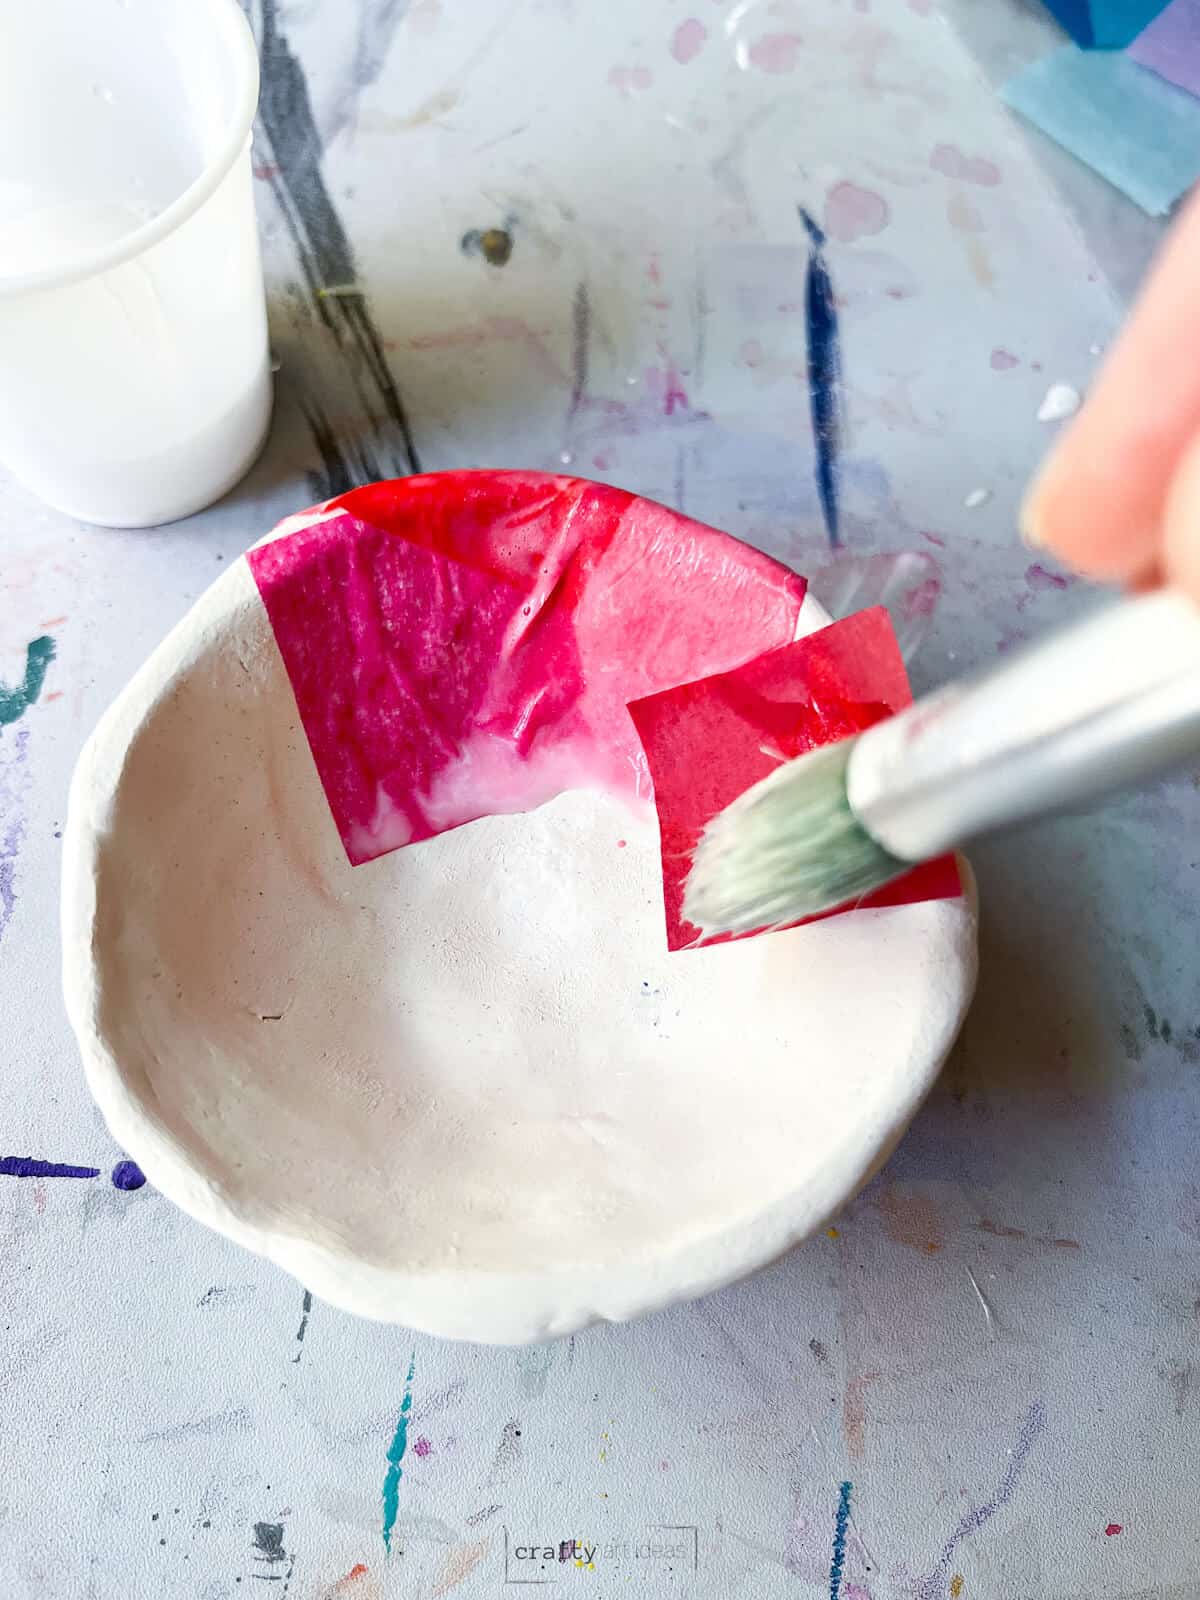
Step 2: Paint A Little Glue Mixture
Paint glue water mixture on some of the clay to start.

Step 3: Start To Add Tissue Paper
Add a square of tissue paper. Notice if you want to be picky we should have smoothed out the tissue paper bubbles more. You will see how this still gives a great finish, but perfectionists should definitely take a little more time smoothing out the colored squares.
Step 4: Paint Extra Glue Water
Paint glue water on top of tissue paper. If you want to see a project that uses this technique on paper, check out our Monet water lilies art lesson.
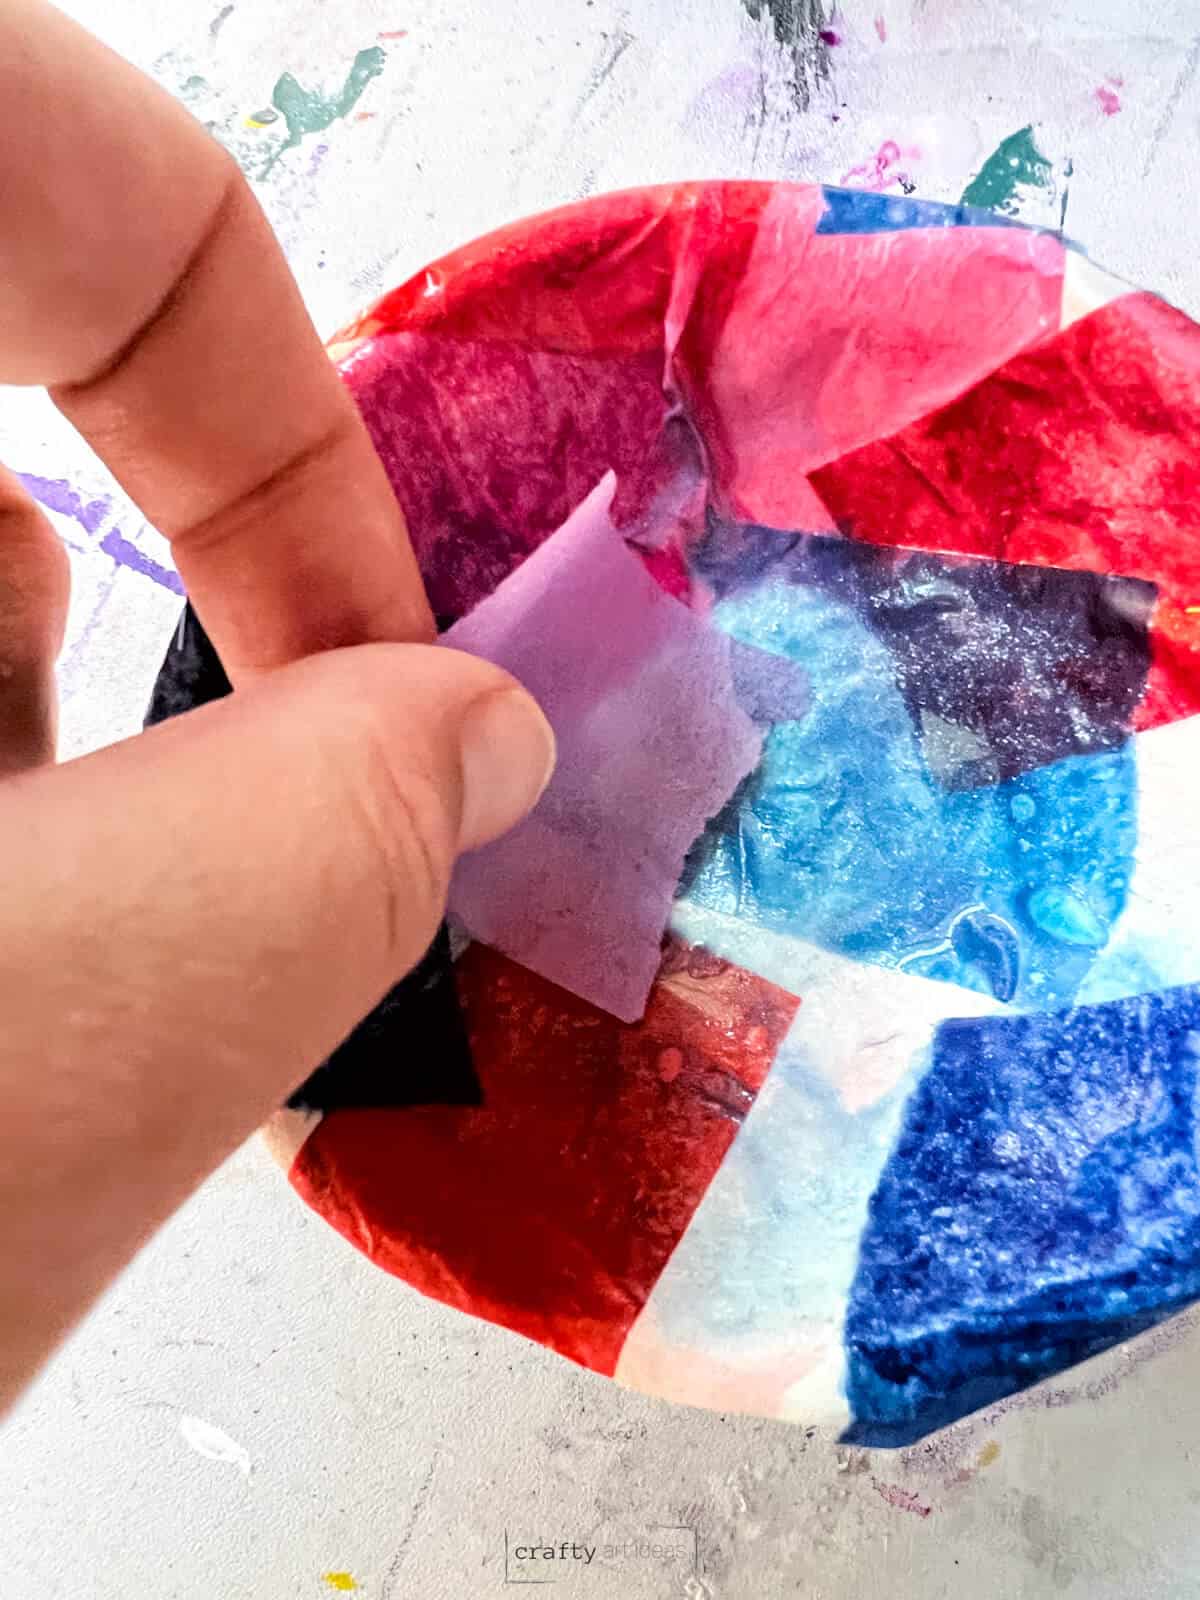
Step 5: Overlap Colors
Continue layering tissue paper until you are satisfied.

Optional: Add A Clear Coat
Paint a layer of clear coat. First, we added an Irdiscent gloss medium and then a layer of Mod Podge on top to seal it.
Step 6: Let dry and enjoy.
Tips For Decoupaging With Children
- When doing this with children, the goal should be to try to get the tissue paper as flat as possible. We know this is hard for some kiddos.
- Try to encourage them to smooth out air bubbles without over-touching.
- Some wrinkles will still look okay as long as they don’t have pieces sticking up.
- A final coat or two of Mod Podge can help hide imperfections.
- You can use your finger to help carefully smooth out parts that have the tissue paper wrapped around them.
Follow us on Pinterest, YouTube & Facebook for more free art and craft ideas!
Your ceramic artists will love using tissue paper on their clay pieces and you will love this glaze alternative!
Do you like this art project? Please give us a 5-STAR review below ⭐️⭐️⭐️⭐️⭐️ and have fun being creative with your family.
How To Decoupage Tissue Paper On Clay

Equipment
- Paint Brush
- Small Container
- Scissors
Supplies
- Tissue Paper
- Clay Project
- Glue/Water Mixture
- Sealer Mod Podge
Instructions
- Clean the surface first. Make sure your clay project is free of excess dust.
- Paint glue water mixture on some of the clay to start.
- Add a square of tissue paper.
- Paint glue water on top of tissue paper.
- Continue layering tissue paper until you are satisfied.
- Optional: Paint a layer of clear coat. We used a layer of Mod Podge on top of the gloss medium to seal it.
- Let dry and enjoy.
Notes
- When doing this with children, the goal should be to try to get the tissue paper as flat as possible. We know this is hard for some kiddos.
- Try to encourage them to smooth out air bubbles without over-touching.
- Some wrinkles will still look okay as long as they don’t have pieces sticking up.
- A final coat or two of mod podge can help hide imperfections.
- You can use your finger to help carefully smooth out parts that have the tissue paper wrapped around them.