Cool Christmas Tree Chalk Art Project For Kids

Are you looking for a fun, simple chalk pastel drawing idea for Winter? With our foolproof chalk pastel lesson, kids will love creating fun chalk pastel Christmas tree drawings!
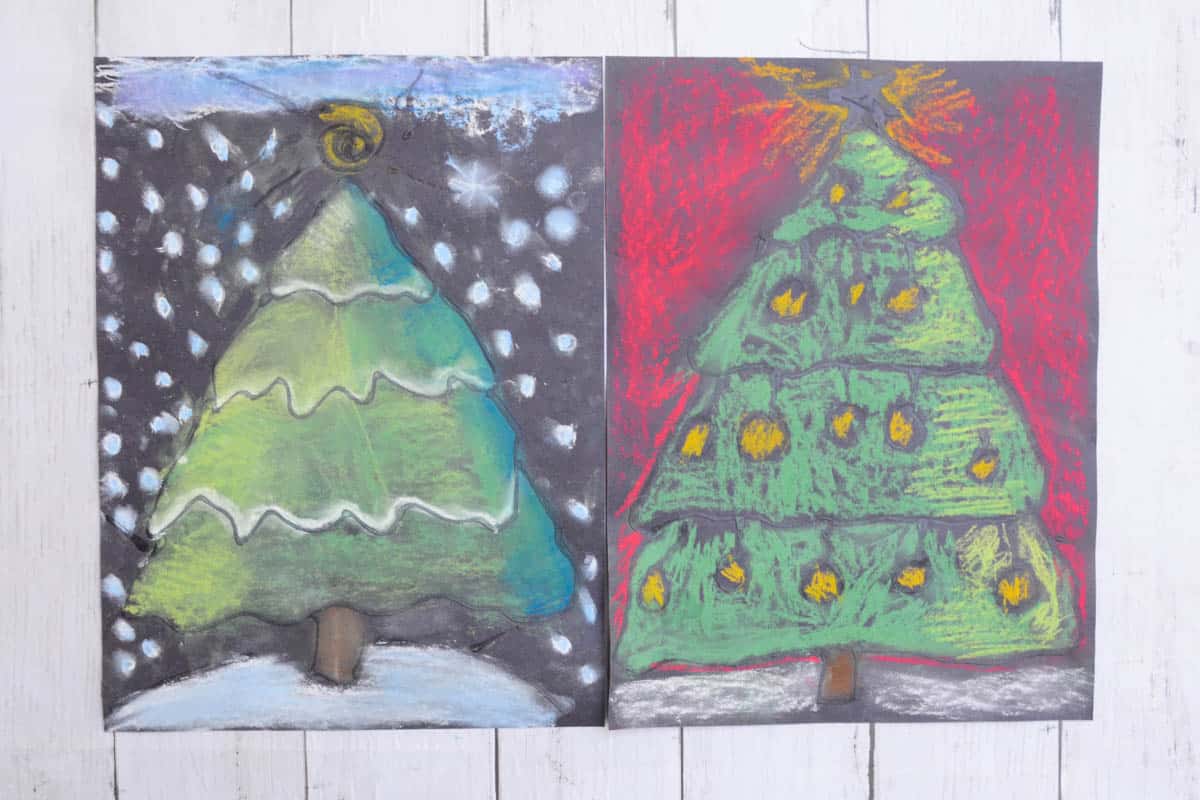
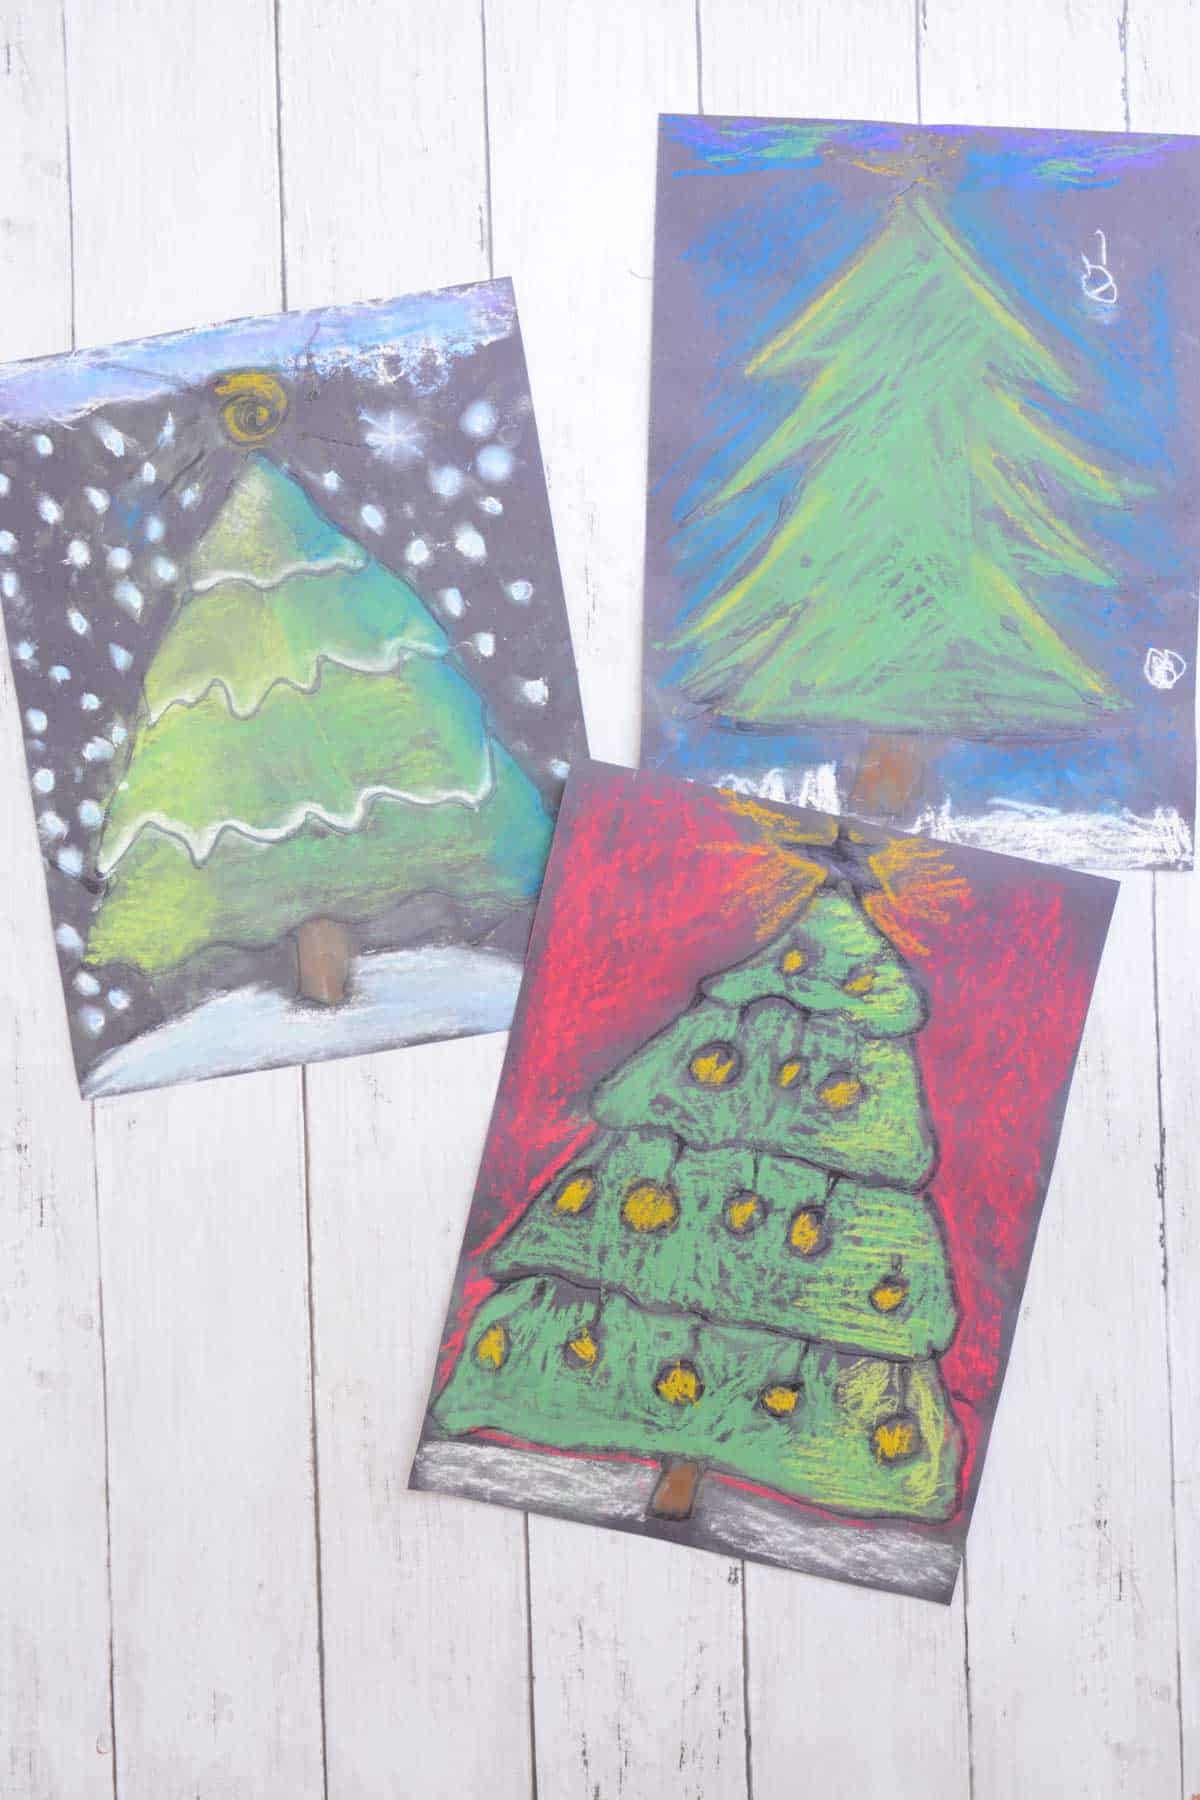
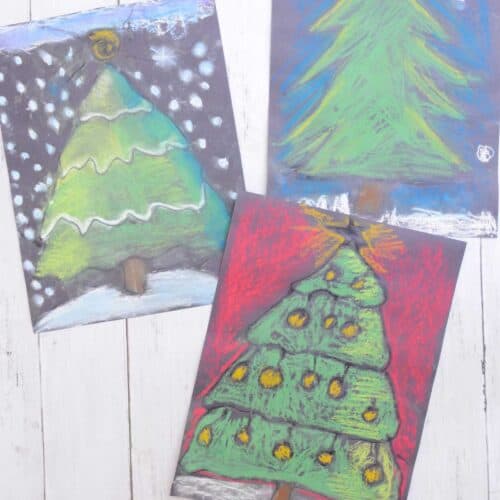
Whether you want to draw a simple Christmas tree or add your ornaments, this drawing idea is suitable for children of all ages. Simple drawings are the perfect starting point for different projects, like this doodle Christmas tree and foil tree art lesson. And if you are looking for a non-Christmas themed drawing, check out this snowman at night chalk art project (great for grades 2 and up)!
Why You Will Love This Art Idea
Supplies you’ll need
Disclosure: We only recommend products we would use ourselves and all opinions expressed are our own. This post may contain affiliate links when clicked, we may earn a small commission at no additional cost to you. Read our full privacy policy.

*After years of experience with all sorts of black construction papers, this brand is a must. You can do this project with any size. Some examples in this lesson are 6″ x 9″ and 9″x 12″. For younger children (1st graders and younger might even do best on 12″ x 18″ paper).
Christmas Tree Chalk Drawing Tutorial
Step 1: Sketch With A Pencil
This is an optional step. Sometimes, it is better to draw with glue, as this forces children to avoid adding too much detail.
- Keep your tree drawing simple. A triangular shape or three tiers of triangles will work well.
Step 2: Outline The Drawing With Glue
Carefully use a glue bottle to outline the drawings and main lines with glue. Keep the tip of the glue bottle touching the paper and draw quickly.

Step 3: Let Dry
Depending on the thickness of the glue line, it may take a few hours to completely dry.
Step 4: Add Chalk Pastels
Our favorite way to add color to glue drawings on black paper is with chalk pastels. The glue resists the chalk and acts like an outline. This easy heart chalk drawing for Valentine’s Day uses a similar technique.
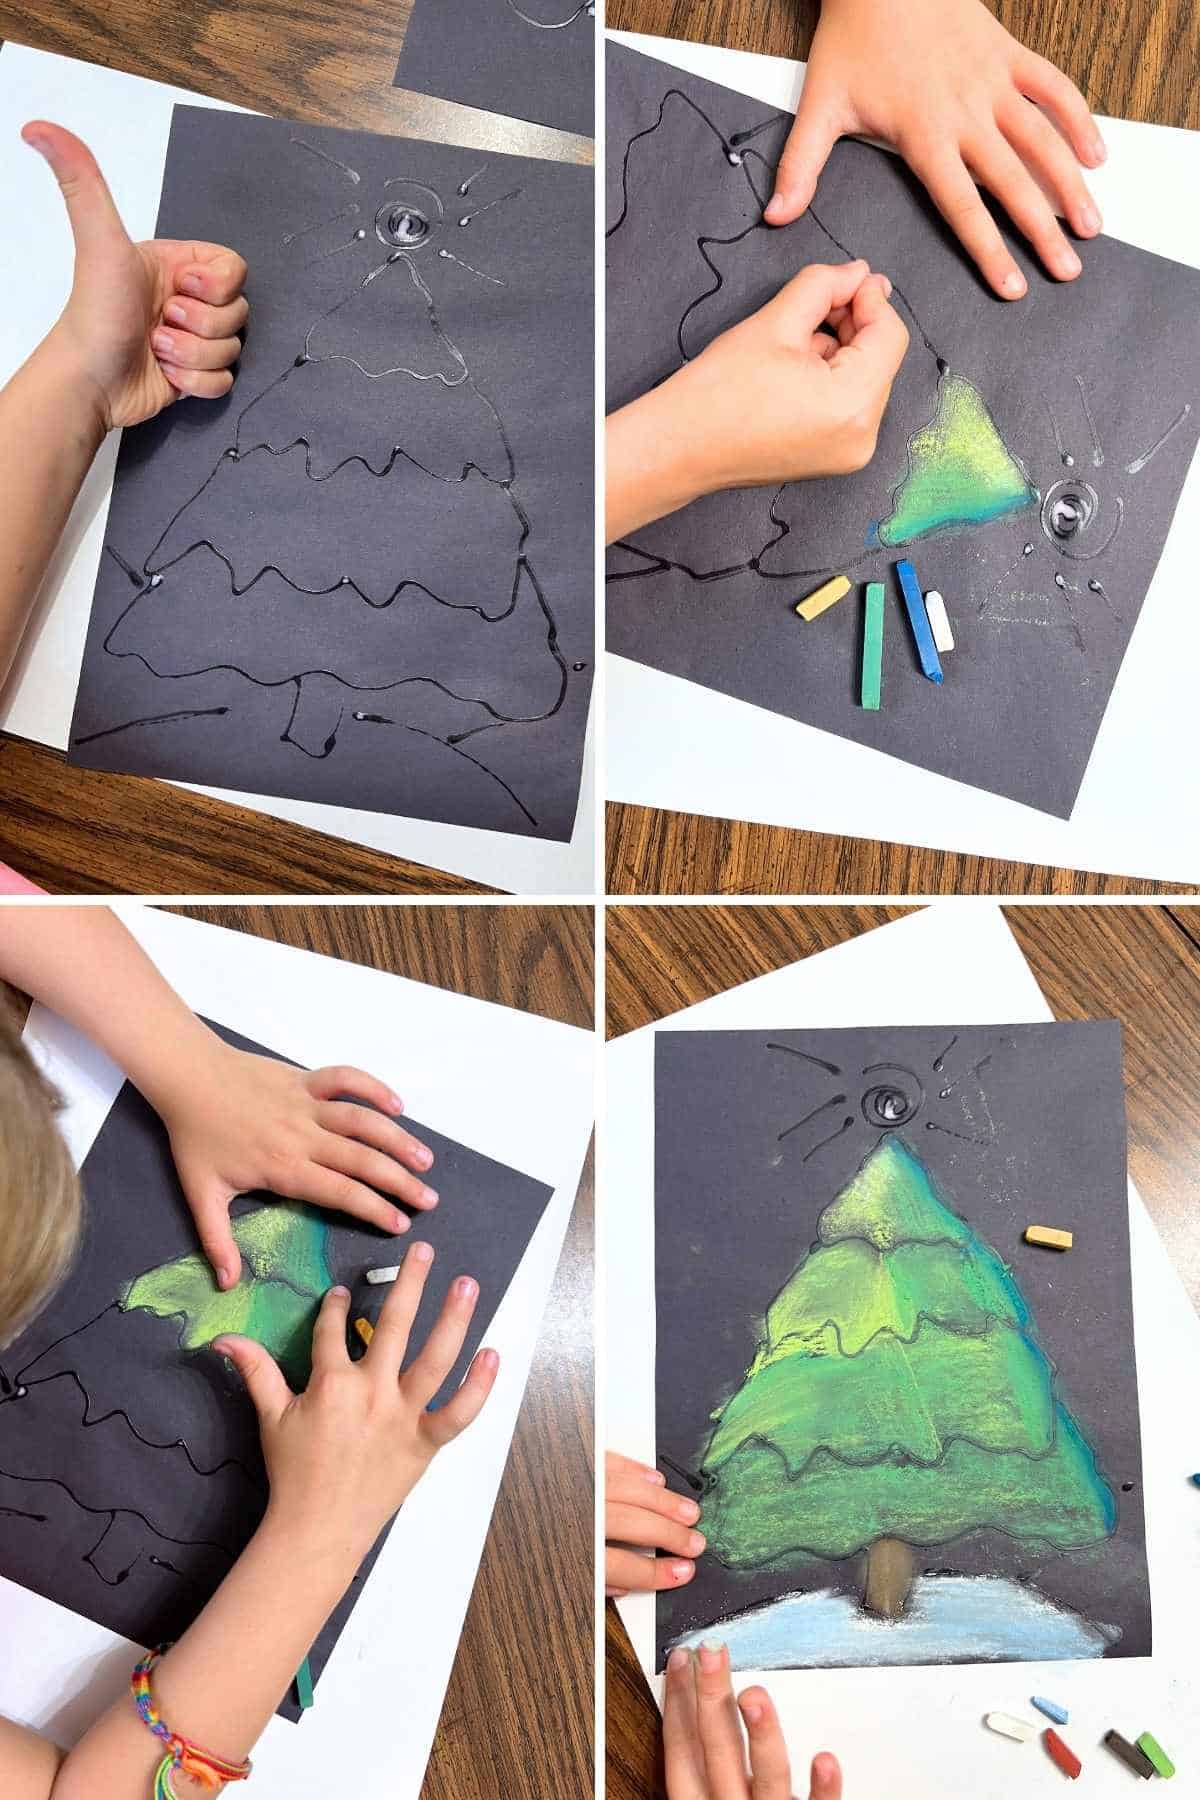
You can show children how to blend different green colors and add shadows or let them design their Christmas tree drawings without much guidance. Let them be creative!
RELATED ART IDEA – Chalk Pastel Fall Leaf Drawing
Step 5: Spray Drawings
If you are using chalk pastels, it is best to spray them with a workable fixative.
Tips
- School glue works well but may not have as much relief as you would like.
- Glue-All is a thicker glue that doesn’t spread out as much. This is an excellent option for older kids because it is not as washable.
- Make sure to lay your glue drawings completely flat to dry. Most drying racks have a tilt, and the drawings will drip or smear.
- Practice blending green chalk pastels to get new colors before beginning.
- Add finishing touches by using an eraser to clean up extra smudges before spraying your drawings.
Follow us on Pinterest, YouTube & Facebook for more free art and craft ideas!


More Fun Related Art Projects
- EASY FOR ALL: Easy Abstract Line Drawing Idea
- GET INSPIRED: 25+ Easy Drawing Ideas For Beginners
- WINTER PAINTING IDEA: Fun Birch Tree Watercolor Art Project
- WINTER MARKER DRAWING: Cool Snowflake Art Lesson
The best part about this Christmas tree chalk art project is that it is simple enough for any beginner to create this Winter.
Do you like this art project? Please give us a 5-STAR review below ⭐️⭐️⭐️⭐️⭐️ and have fun being creative with your family.
Christmas Tree Chalk Drawing For Kids
Equipment
- Pencil
Supplies
- Black Construction Paper
- Chalk Pastels
- Bottled Glue we recommend uses Glue-All and not regular School Glue
- Workable Fixative
Instructions
- Draw your tree. If kids are able, just draw with glue, as this forces children to avoid adding too much detail. If needed you could sketch with a pencil first.
- Finish drawing with glue by keeping the tip of the glue bottle touching the black paper and draw quickly.
- Let the glue completely dry.
- Use chalk pastels to add color and designs to the Christmas tree chalk art.
- Kids can use their fingers to blend colors, draw backgrounds and more.
- Spray with workable fixative when done and let it dry.
Notes
- Keep your tree drawing simple. A triangular shape or three tiers of triangles will work well.
- Make sure to lay your glue drawings completely flat to dry. Most drying racks have a tilt, and the drawings will drip or smear.
- We recommend showing children to use one finger to blend chalk pastels.
- Extra smudges, can be cleaned with an eraser before spraying.