Creative & Easy Christmas Santa Punch Game

Are you looking for a fun and easy Christmas game kids love? Look no further than this Santa prize punch board you can make for under $10 in less than 30 minutes. Kids always love hearing that tissue paper pop to reveal their prize!

Do you know that we have reused this same punch game for every holiday. From a poke-a-pumpkin game, simple Christmas Tree punch board design, to our fun turkey punch board, I love coming up with different designs for each season.
This year, one of my children wanted a Santa punch board design, so I knew I had to try.
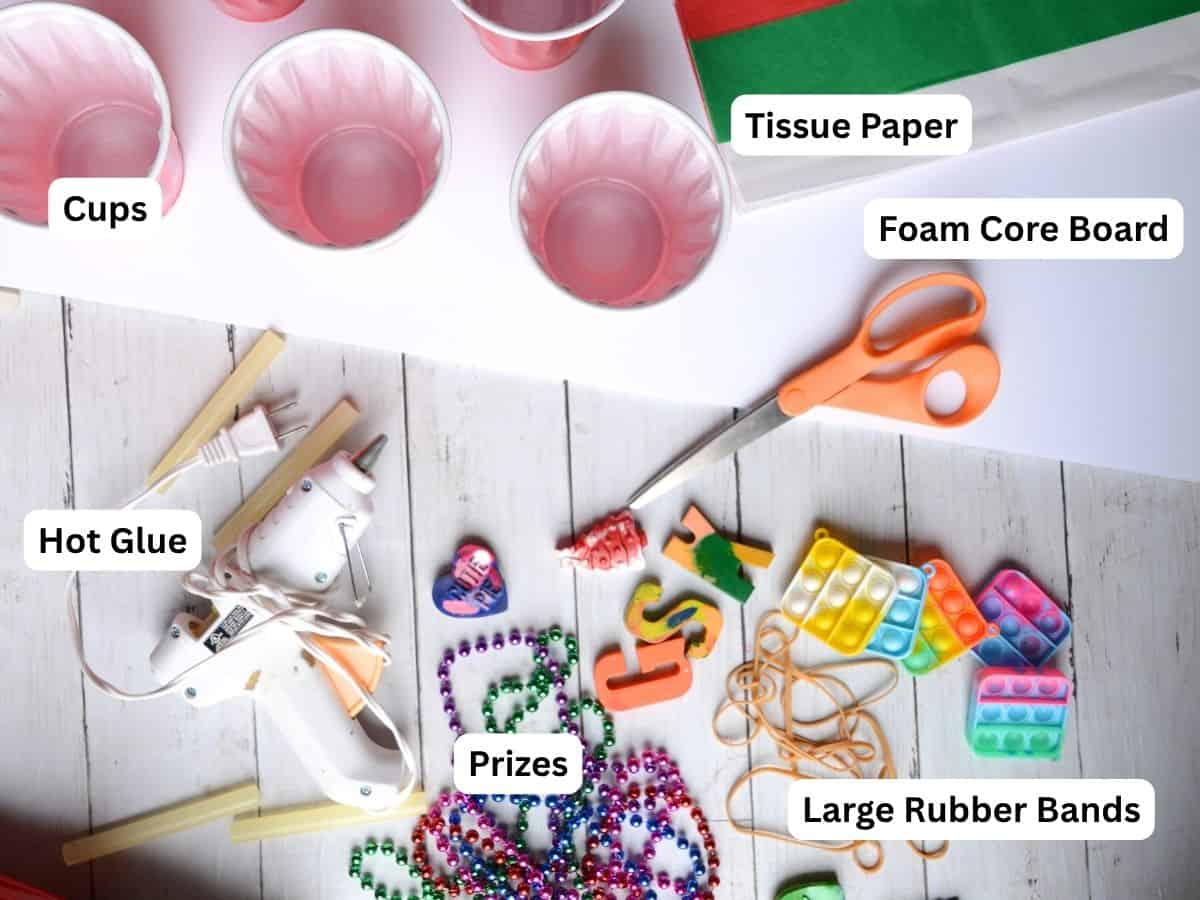
Supplies You’ll Need
Disclosure: This post may contain affiliate links when clicked, we may earn a small commission at no additional cost to you. Read our full privacy policy.
Notes On Materials
- TISSUE PAPER – We put two layers on top of our cups. We found it was easiest to work with larger squares (larger than 7” x 7” squares)
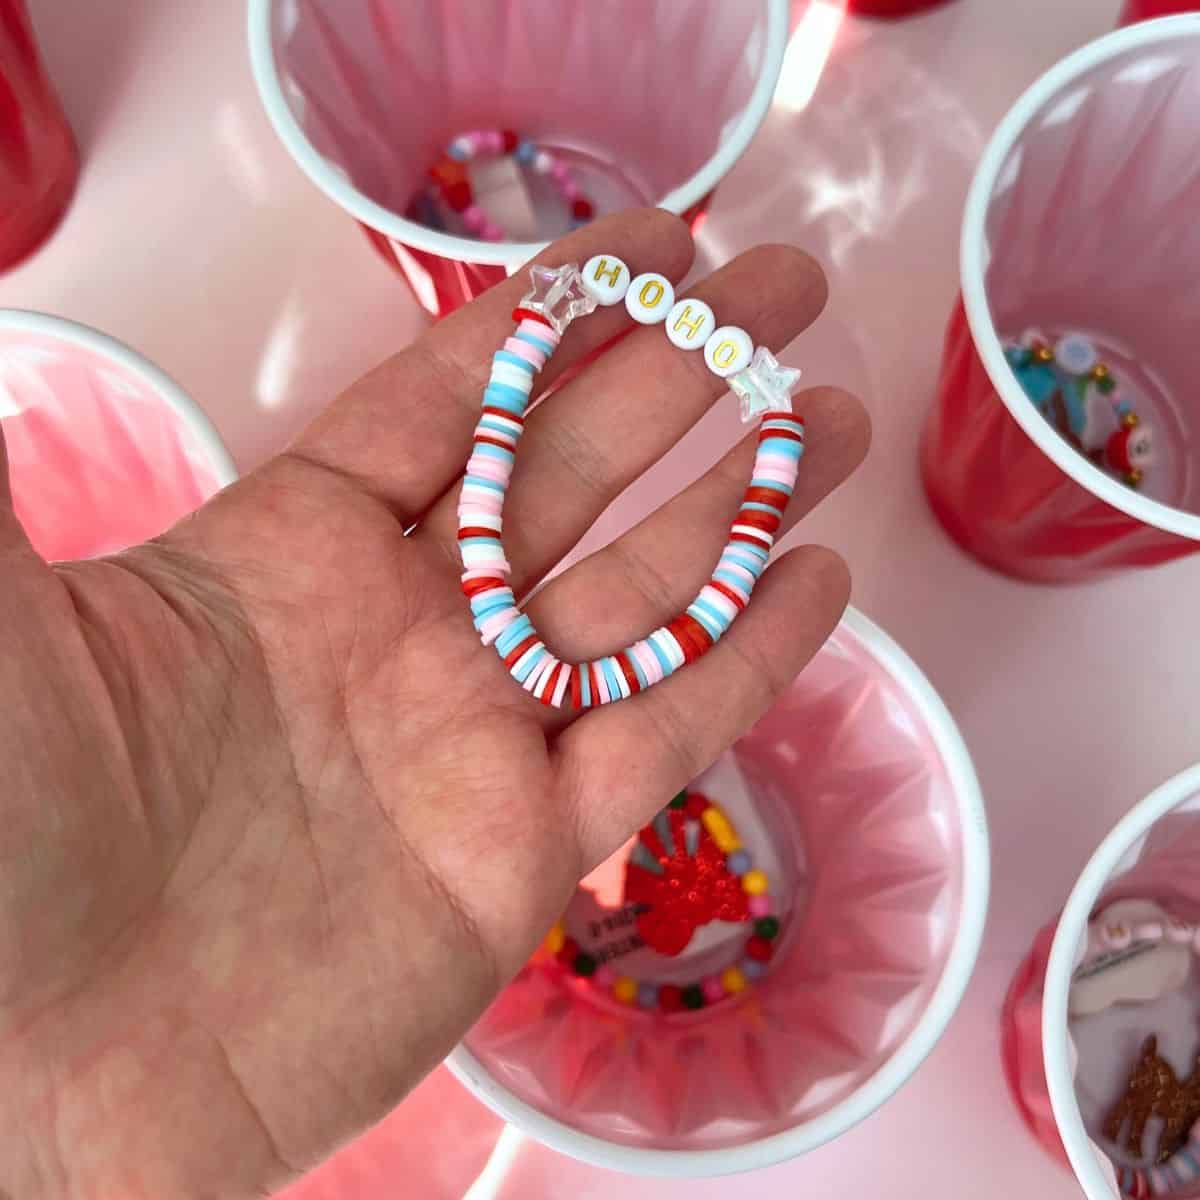
- PRIZES – Need to be light-weight like small pop-its, small erasers (kids love), bouncy balls, or even our homemade Christmas tree crayons
- CUPS – Name-brand cups tend to be sturdier
How To Build A Grinch Punch Game
Step 1: Cut Tissue Paper & Place Prizes In
Pre-cut green & white tissue paper into 7” x 7” squares. For a neater look cut the tissue paper into circles.
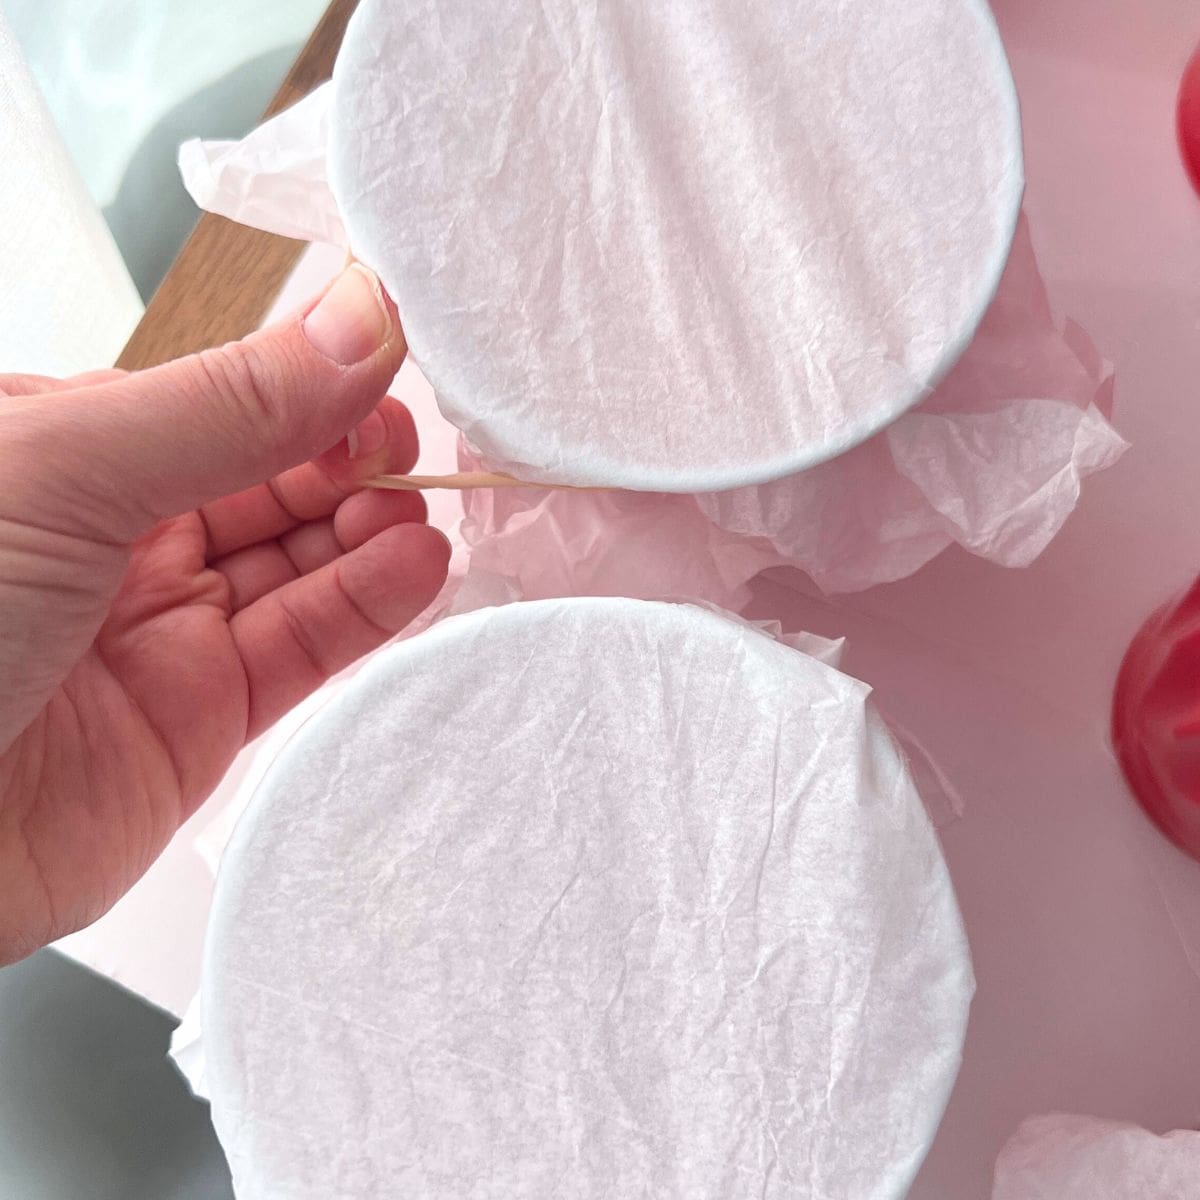
Step 2: Cover The Cups
Use two rubberbands or double one band per cup to ensure the paper is tight enough. We also recommend using two layers of tissue paper for each cup.
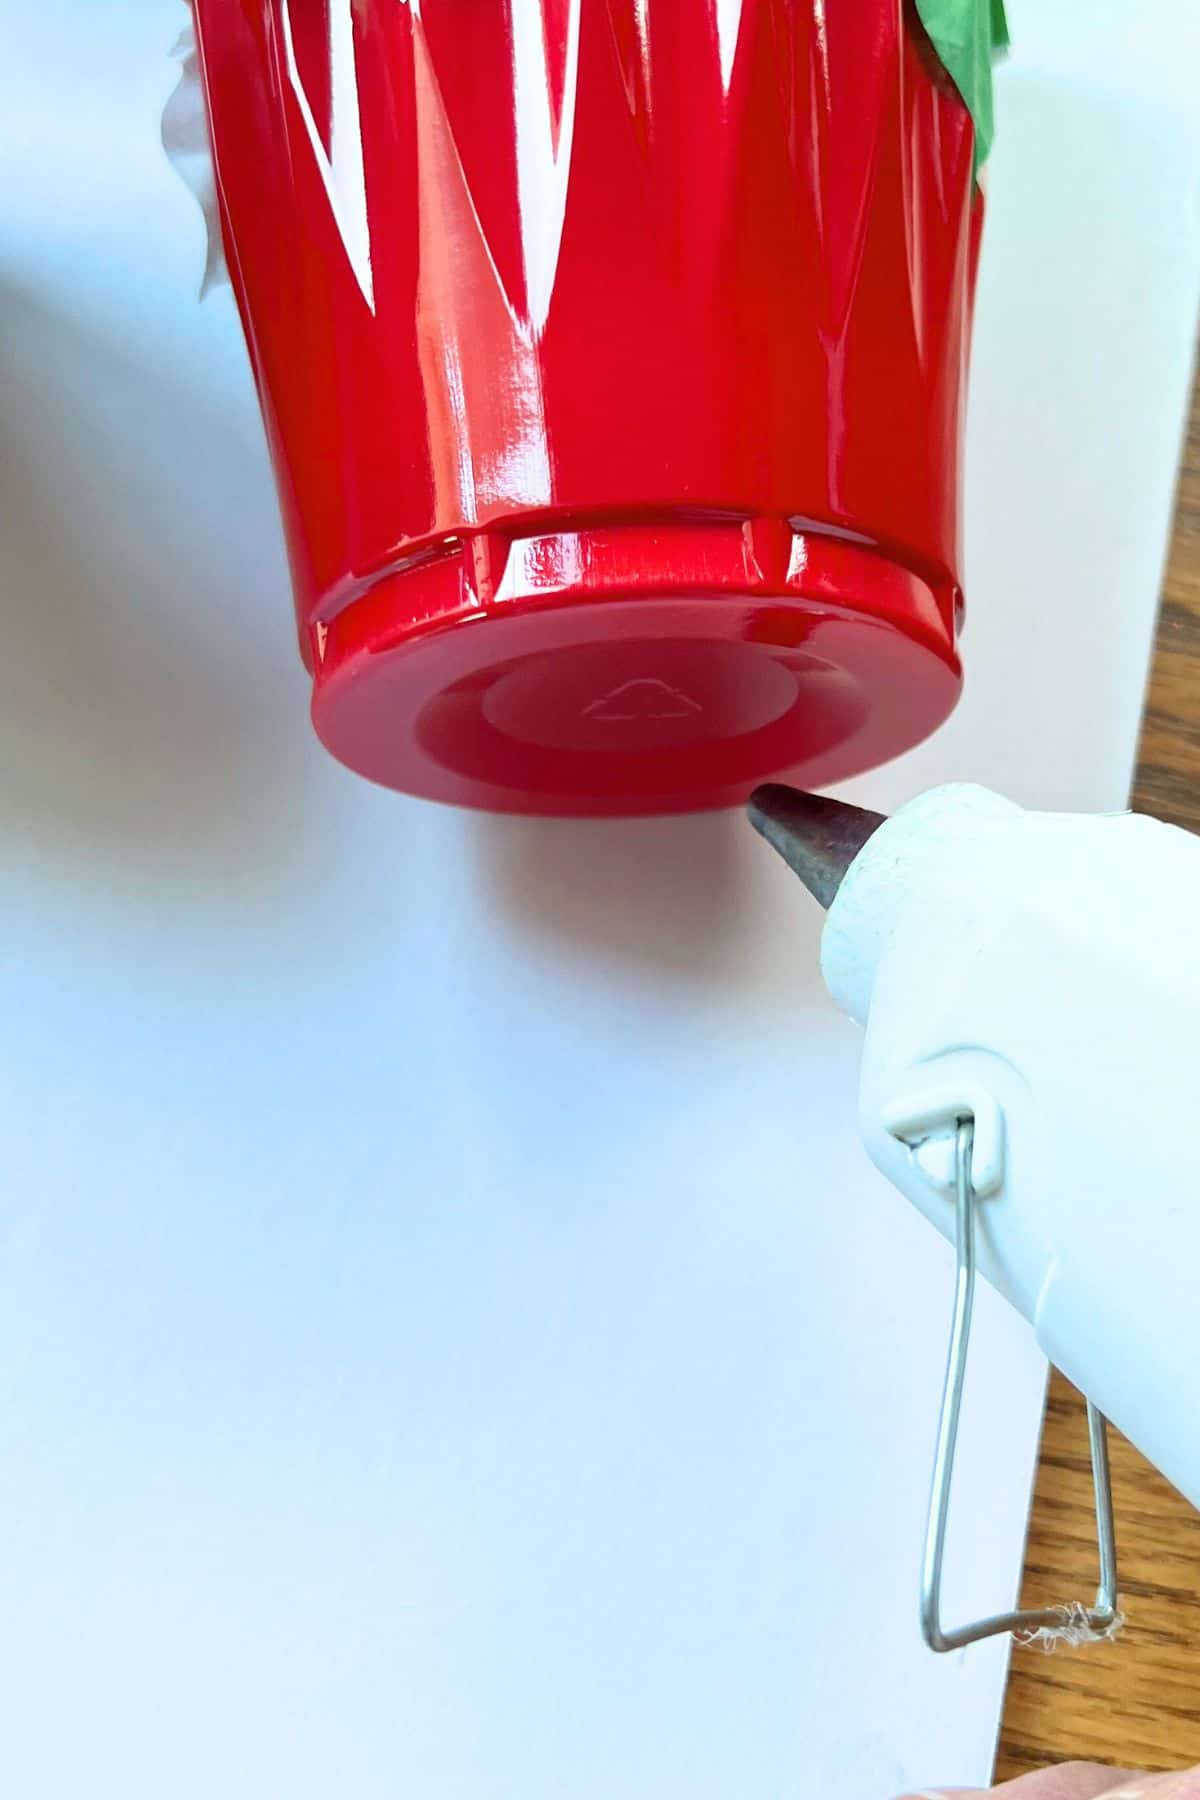
Step 3: Glue Cups To Board
Once you have planned out the cup layout, add a generous amount of hot glue to each cup and add to the foam core. Hold each cup for a few seconds to let the glue set.

Step 4: Finish Cup Design
For this design, the top row and 3 bottom rows were covered with white tissue paper and the middle two rows where covered with light pink.
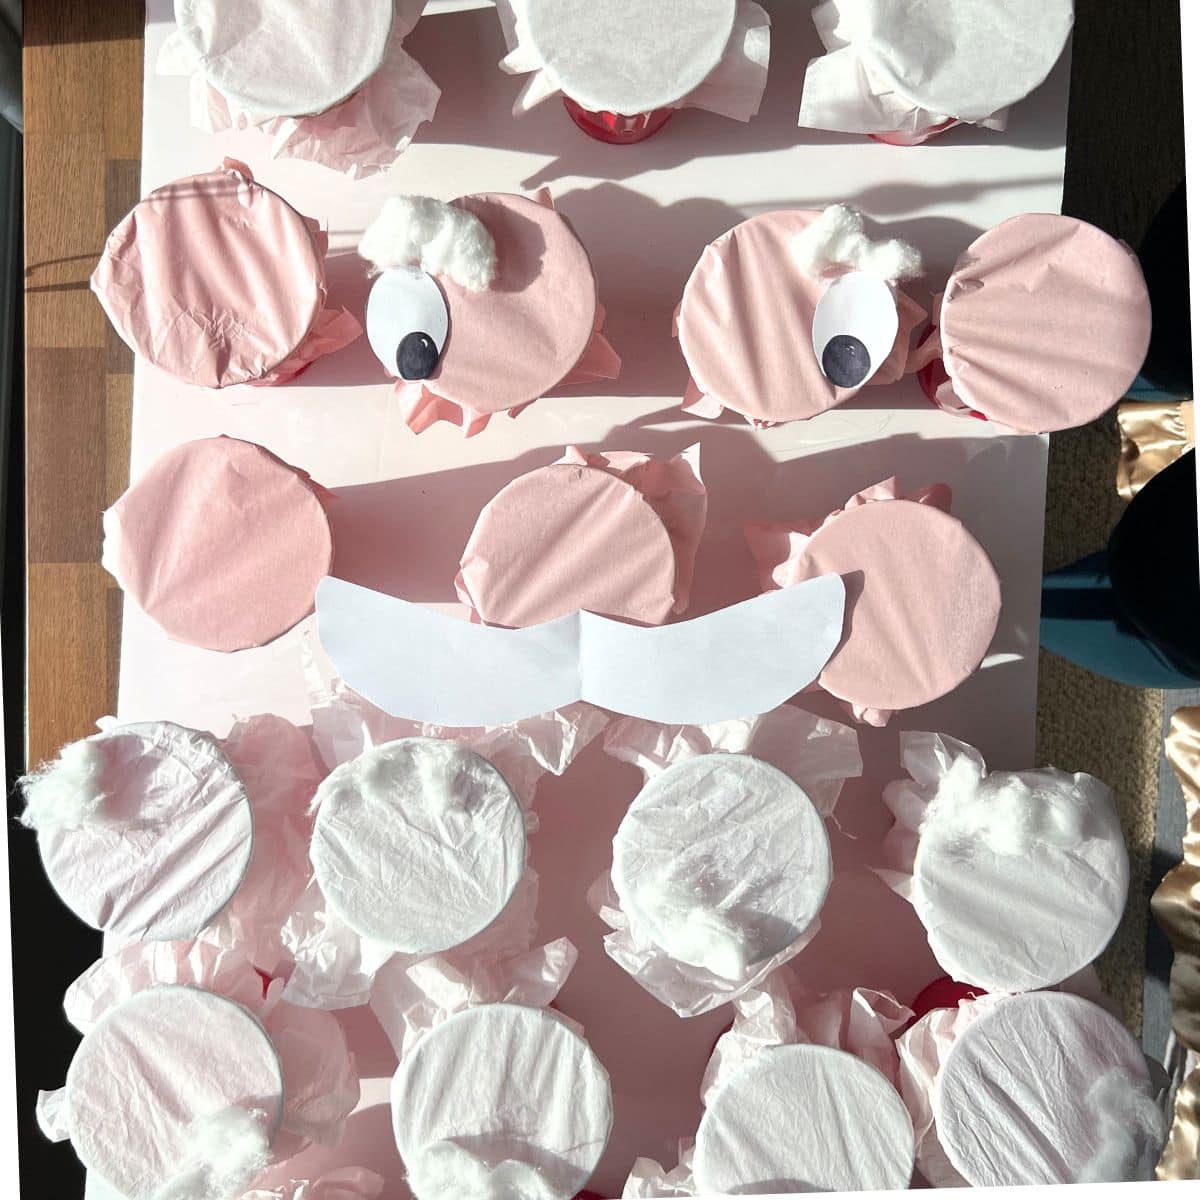
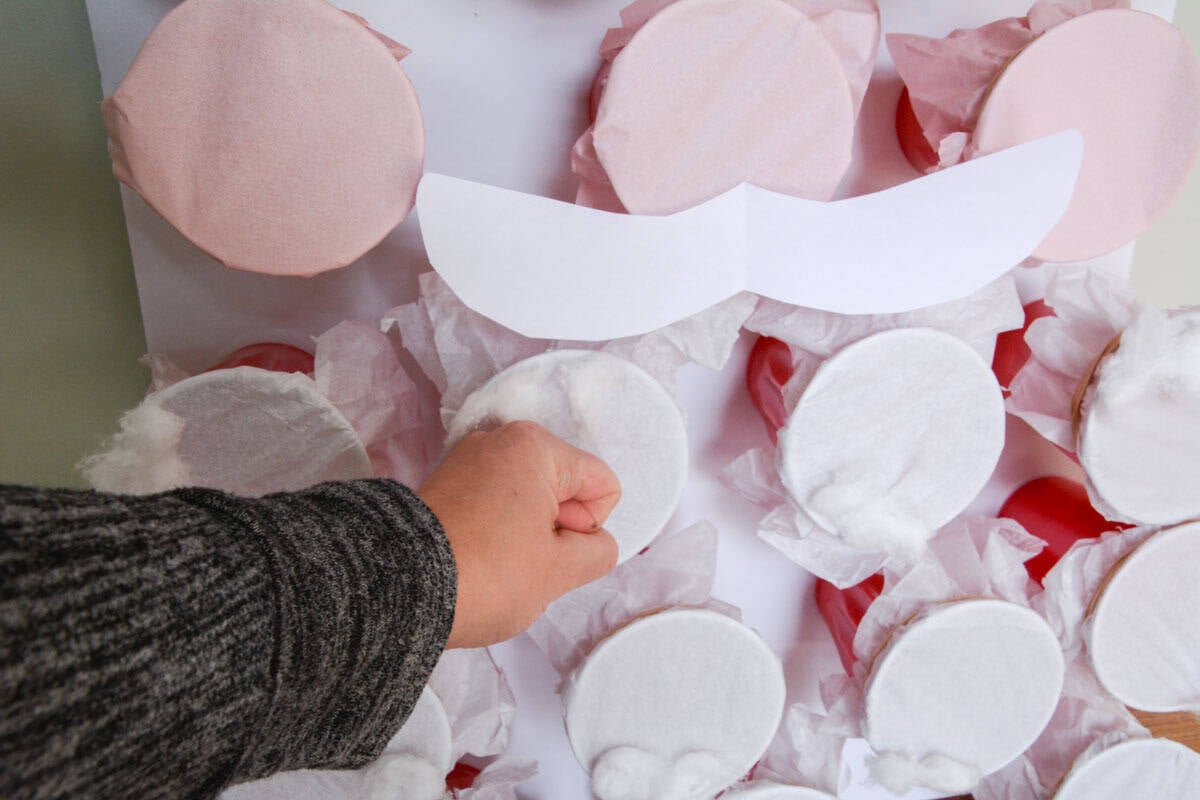
Step 5: Create Santa’s Eyes and Facial Details
Use white paper and a black marker for the eyes, and add extra cotton balls for eyebrows and to his beard. Attach them with tape or a glue.
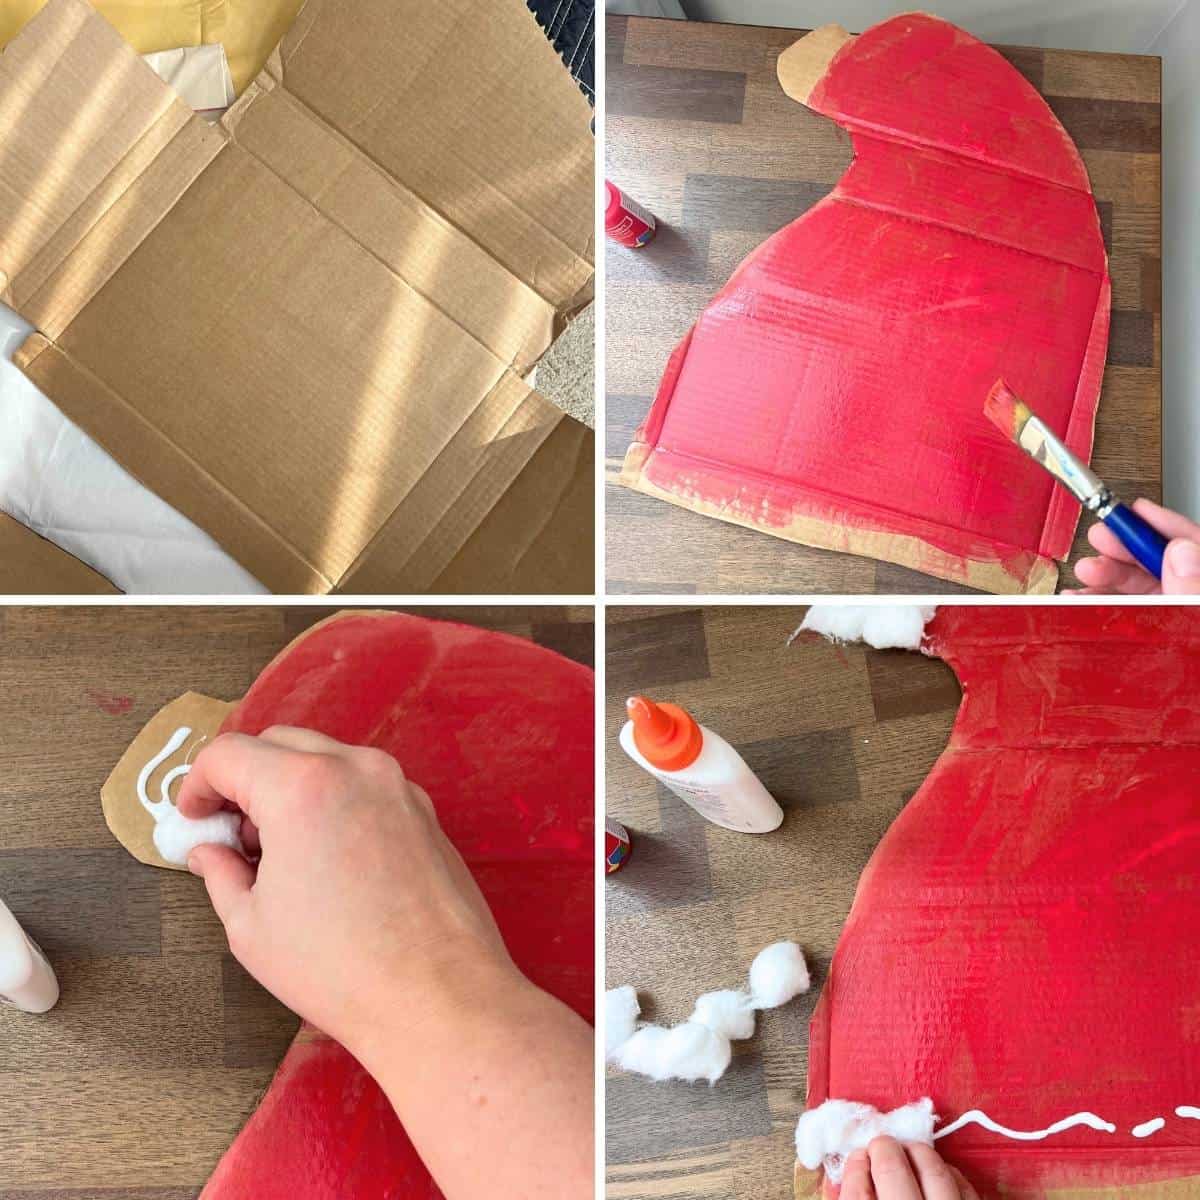
Step 6: Make A Santa Hat
Cut out a cardboard hat, painted it red with acrylic craft paint, and added extra cotton ball details. Attach the hat to the cups or tape to your board.

Tips
- LEAVE SPACE – You can easily reuse the board, so make sure your hands can fit around each cup.
- DECORATE THE CUPS – Don’t glue anything directly to the board if you plan to reuse it for other holidays.
- PRIZES FOR ADULTS – scratch-off lottery tickets or place money in the cups for a fun idea.
- OTHER IDEAS FOR CHILDREN – create coupons that might equal a bigger present or reward.
How To Play A Punch Cup Game
Because this game goes rather quickly, for class parties or house holiday parties, we like to have another DIY Christmas game. Try our Christmas candy stack or jingle bell tower game before anyone can punch the board.
Follow us on Pinterest, YouTube & Facebook for more free art and craft ideas!
Our Favorite
Related Crafty Winter Ideas
Whether you are making this DIY Santa punch cup board for a classroom Christmas party or just for family fun, we know everyone will be impressed by your creativity.
Do you like this art project? Please give us a 5-STAR review below ⭐️⭐️⭐️⭐️⭐️ and have fun being creative with your family.
Christmas Santa Punch Cup Game

Equipment
- Pair Of Scissors
- Glue Gun
Supplies
- Foam Core or Cardboard
- Large Plastic Cups
- Tissue Paper
- Rubber Bans
- Prizes need to be light enough so that the cup won't fall off the board.
- Paper
- Permanent Black Marker
- Cardboard for Santa's hat
- Red Craft Paint
- Cotton Balls
Instructions
- Place your prizes into the cups.
- Pre-cut tissue paper into 7” x 7” squares. For a neater look cut the tissue paper into circles.
- Add 2 layers of tissue paper to each cup. This will help get the "pop" feel.
- Wrap rubberbands around cups and tissue paper. Either use two rubberbands or double one band per cup to ensure the paper is tight enough.
- Cover all of the cups. This design has mainly white covered cups with the middle two rows being light pink.
- Once you have planned out the cup layout, add a generous amount of hot glue to each cup and add to the foam core. Hold each cup for a few seconds to let the glue set.
- Decorate your board by cutting and adding Santa's eyes and an extra paper mustache.
- Create a cardboard Santa hat and attach it to the board or the top layer of cups. You can tape or hot glue the hat on.
Notes
- Cotton balls can add extra decorations to your board.
- Leave spaces in between cups so that you can easily reuse the board.
- Use tape or school glue to lightly attach decorations.
- Don’t glue anything directly to the board if you plan to reuse it for other holidays.