How To Easily Draw People With This Basic Portrait Sketch Technique

Have you or your students struggled to create portraits or self-portrait drawings? We get it! It can be hard. Follow this easy drawing tutorial to create a basic portrait drawing in no time!
People are arguably one of the hardest things to learn to draw. Sometimes a simple technique is nice to help you get started with your portrait or self-portrait project.
Why You Will Love This Drawing Technique
While we agree that beginners should practice sketching and drawing from observation, sometimes you need a break and just want a fun line drawing. As an Art teacher, I used a mix of techniques to build confidence to help students feel successful.
Supplies You’ll Need
Disclosure: This post may contain affiliate links when clicked, we may earn a small commission at no additional cost to you. Read our full privacy policy.

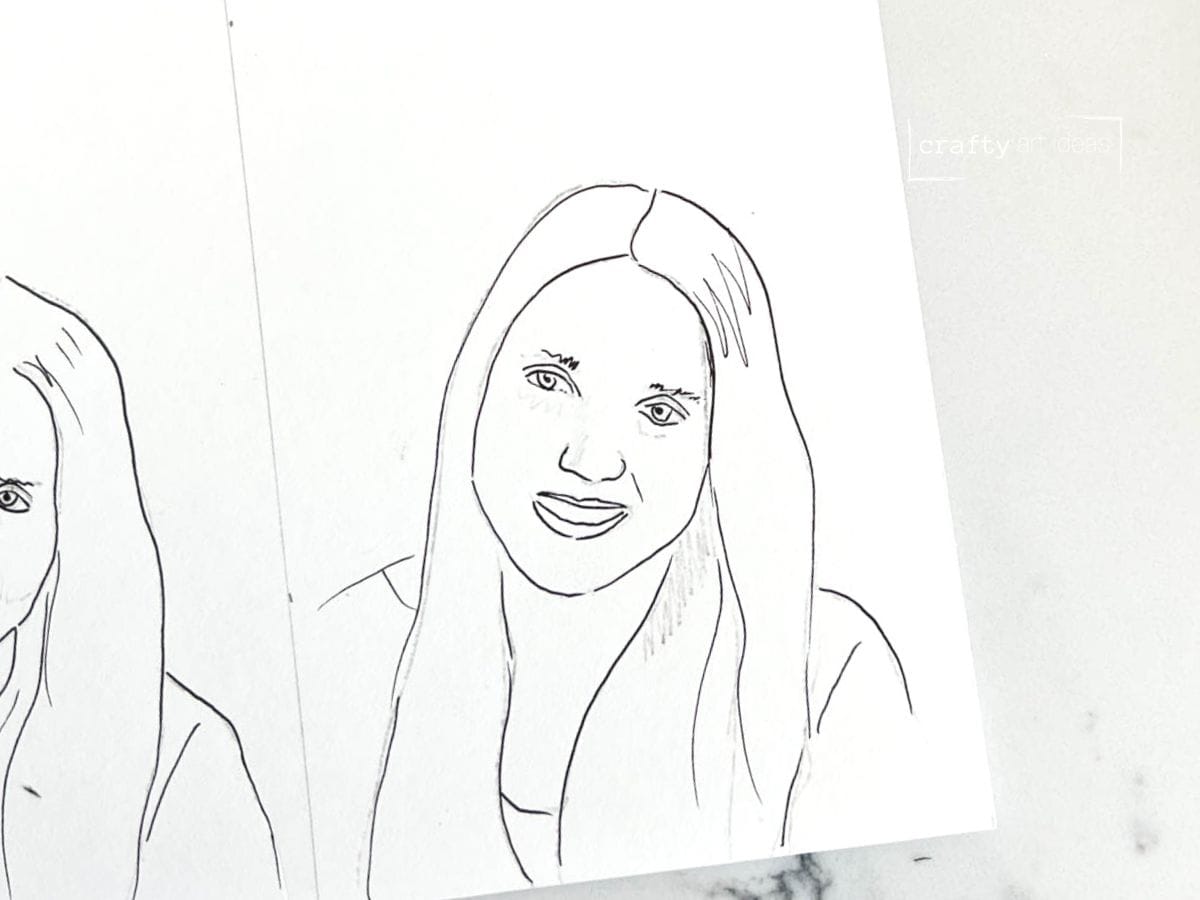
Basic Portrait Drawing Technique
It is pretty simple. The most important thing is to draw what you see when tracing. Don’t try to make something up.
Before You Begin: Find Images
First, you have to decide on the image you want to use. Print your image to size on regular computer paper. This technique will not work on a regular glossy 4 x 6 printed photo.
Step 1: Add Graphite To The Back Of The Image
Scribble graphite on the back of your printed picture. I have had better success with kids using an Ebony pencil to ensure full coverage. A #2 pencil though will work just fine.

Step 2: Place Your Picture On Top Of The Drawing Paper
Carefully tape the picture on a piece of paper. You do not want it to move while you are working.

Step 3: Draw On Top Of The Picture
Trace all lines and details with a sharp pencil or ballpoint pen. Only do outlines of important features.

Step 4: Lift The Paper
Before lifting the paper, check that you have traced all important details. Once you are satisfied with the basic portrait drawing, remove the image.

Art Teacher Tip: When creating image transfer you want to pay attention to details when tracing the picture. It will help the drawing look more realistic!
Step 5: Add Black Lines
Trace over your pencil lines with a drawing pen or extra-fine tip marker.

Step 6: Clean-Up Drawing
Once you have traced all details use an eraser to get rid of extra pencil lines.
Use your portrait or self-portrait line drawing as a starting point for all sorts of fun art projects involving people.

Tips
- Even though you are tempted to lift the paper, don’t until you are completely done.
- The graphite scribbles need to cover the complete area of the portrait.
- Kids tend to press too hard or too lightly when covering the back of the picture. Showing them examples of how much graphite is needed helps.
- A sharp pencil is a must when tracing details.
Follow us on Pinterest, YouTube & Facebook for more free art and craft ideas!

More Fun Drawing Ideas
- 21+ Easy Drawing Ideas For Beginners
- How To Easily Draw Radial Symmetry For Kids
- Fun Portrait Keychain Idea
Do you like this art project? Please give us a 5-STAR review below ⭐️⭐️⭐️⭐️⭐️ and have fun being creative with your family.
Basic Portrait Drawing For Kids

Equipment
- Pencil
- Tape
- Black Drawing Pen
Supplies
- 1 piece White Drawing Paper
- Printed Image
Instructions
- Find a picture to work from.
- Print your image to size on regular computer paper. This technique will not work on a regular glossy 4 x 6 printed photo.
- Scribble pencil graphite on the back of your printed picture.
- Carefully tape the picture on a piece of paper. You do not want it to move while you are working.
- Trace all lines and details on the picture with a sharp pencil or ballpoint pen. Only do outlines of important features.
- Before lifting the paper, check that you have traced all important details.
- Once you are satisfied with the basic portrait drawing, remove the image.
- Trace over your pencil lines with a drawing pen or extra-fine tip marker.
- Once you have traced all details use an eraser to get rid of extra pencil lines.
Notes
- A sharp pencil is a must when tracing details.
- Try to trace all important details before lifting paper.
- You can reuse the same picture to create multiple line drawings.