Customizable DIY Shrink Plastic Keychains (In Under 10 Minutes)

This is for you if you are looking for a super-cute and easy craft that you can customize. Learn to make these adorable shrink plastic keychains in less than 10 minutes!

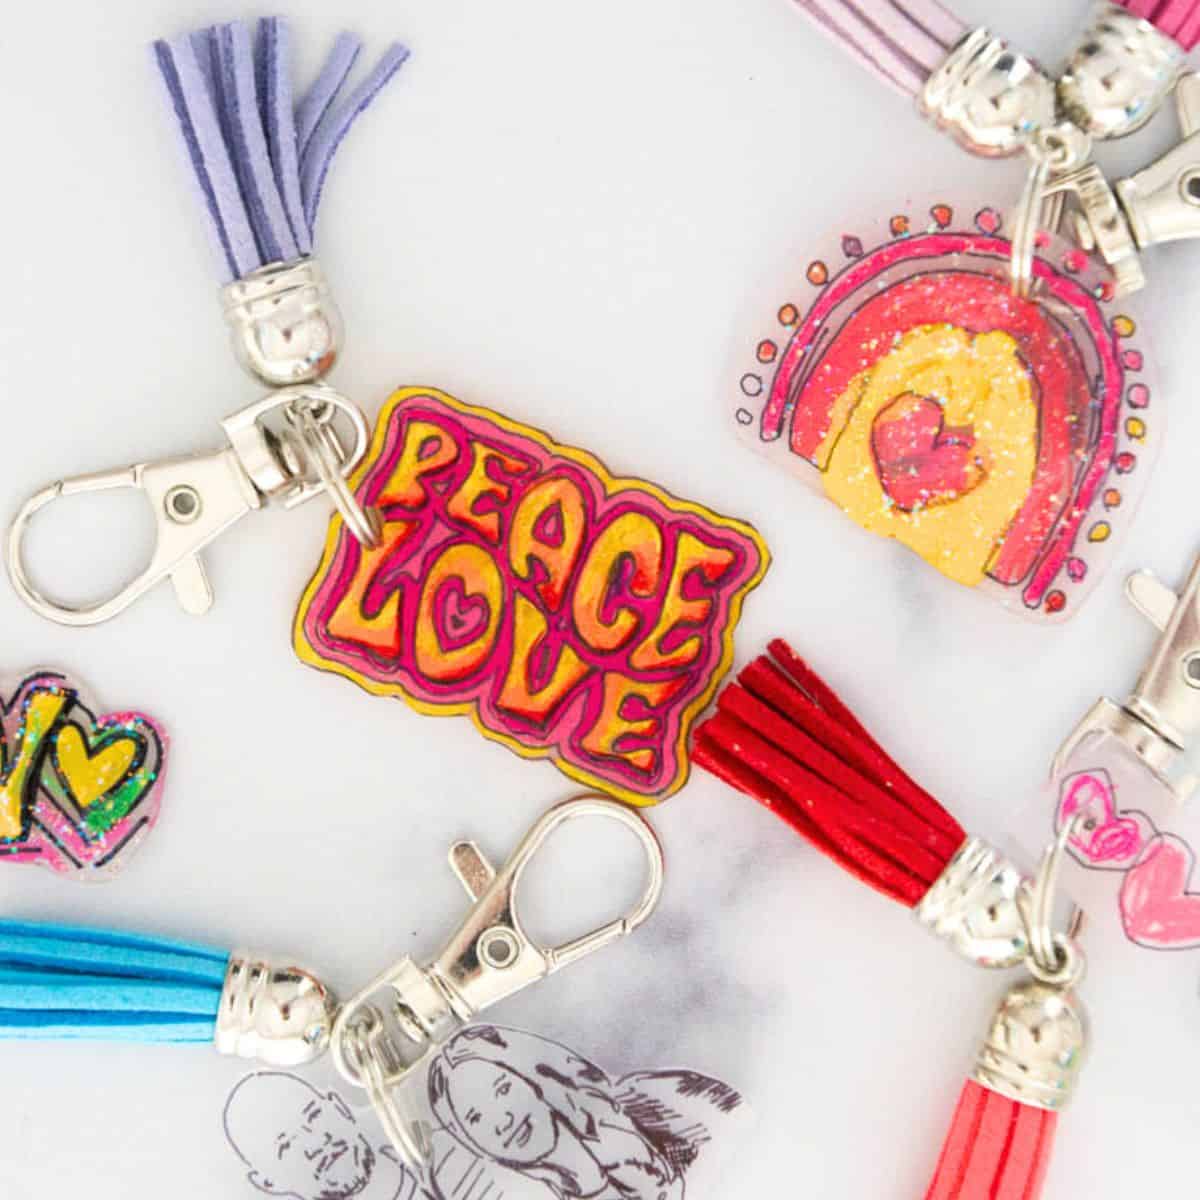
The best part about these handmade keychains is that you can make the doodles as detailed or as simple as possible. Our couple keychain is a cute way to create a custom gift for someone you love.
Supplies You’ll Need
Disclosure: This post may contain affiliate links when clicked, we may earn a small commission at no additional cost to you. Read our full privacy policy.
*Our examples used frosted Shrink plastic.

DIY Plastic Keychain Tutorial
If you use permanent markers, clear Shrink plastic will work well. If you are adding color, we recommend using frosted plastic.
Before You Begin
Preheat your oven to 325 degrees Fahrenheit.

Step 1: Draw Your Design
To add color, you can use permanent markers, acrylic paint or colored pencils on the rougher side of the shrink dink film.
Step 2: Cut it out.
Be as precise as you want when cutting out your shrink plastic. Super skinny or small details may not work well because they can curl and stick when melting.
Step 3: Punch a hole.
Make sure you leave enough space on the edge when punching your hole.
Step 4: Melt Your Shrinky Dink
- Lay your shrink plastic flat on a parchment paper-lined cookie sheet.
- Bake at 325 degrees F for 1 to 3 minutes.
- You will see the plastic curl and twist as it heats up.
- Wait 30 seconds after the last shrink plastic is lying flat.
- Remove the cookie sheet from the oven.
- Let the plastic fully cool.

Step 5: Add Protective Coat
You can use Mod Podge or even craft resin to coat your plastic keychain. We added glitter Mod Podge to the ones where the paint was applied a little too thickly.

Step 6: Put Your Keychain Together
Add your shrinky plastic charm, extra jump rings and a tassel charm to complete the keychain.

Shrink Plastic FAQs
Tips
- Watch your shrinking plastic closely so that you do not overcook it.
- If your shrink plastic curls and gets stuck, carefully use tweezers to pull it apart. You need to do this while the plastic is hot.
- Experiment with adding color by using different materials or supplies. Our favorites are regular permanent markers and this brand of colored pencils.
- If you are using paint, applying it in thin layers will work best.
Follow us on Pinterest, YouTube & Facebook for more free art and craft ideas!
More Fun Craft Ideas
- DIY Crayons-make your recycled crayons in all sorts of different ways.
- Easy Drawing Ideas and Projects For Beginners
- Learn How To Make Cool DIY Fridge Magnets
Do you like this art project? Please give us a 5-STAR review below ⭐️⭐️⭐️⭐️⭐️ and have fun being creative with your family.
DIY Plastic Shrink Keychains

Equipment
- Scissors
- Hole Punch
- Baking Sheet
- Oven or Toaster Oven
Supplies
- Keychain
- Plastic Shrink Film
- Drawing Materials colored pencils, permanent markers
- Tassel Optional
- Parchment Paper
- Clear Coat Mod Podge or Resin
- Picture
Instructions
- Preheat your oven to 325 degrees Fahrenheit.
- Draw your design with permanent markers, acrylic paint or colored pencils on the rougher side of the shrink dink film.
- Cut out your drawing. Be as precise as you want when cutting out your shrink.
- Use a hand held hole puncher to add a hole.
- Lay your shrink plastic flat on a parchment paper lined cookie sheet.
- Bake at 325 degrees F for 1 to 3 minutes.
- You will see the plastic curl and twist as it heats up.
- Wait 30 seconds after the last shrink plastic is lying flat.
- Remove the cookie sheet from the oven.
- Let the plastic fully cool.
- Once plastic is cool, you can add a protective clear coat.
- Let dry.
- Add jump rings, keychains or tassles to your DIY keychain.
Notes
- Super skinny or small details may not work well as they could curl and stick when melting.
- If your shrink plastic curls and gets stuck, carefully use tweezers to pull it apart. You need to do this while the plastic is hot.