How To Reverse Tie-Dye Colored Shirts (Easy DIY Guide)

Do you love the look of traditional tie dye, but don’t want to buy all the colored dyes to work with? Consider ditching the plain white shirts and try this fun reverse tie-dye technique! Our easy guide will show you exactly how.
This popular craft was initially published in May 2023. Erin updated this tutorial in April 2025 to add clearer instructions, new examples, and an instructional YouTube tutorial. Happy creating!
Why You Will Love This Craft
What is reverse tie dye?
Reverse tie-dyeing is a fun and creative way to make cool patterns on fabric. Instead of adding dye to the fabric, you remove the colors using bleach. This creates a different look for t-shirts, tank tops, or even blankets.
Quick Video Tutorial
The latest on Youtube:
Notes On Supplies You’ll Need
Disclosure: This post may contain affiliate links when clicked, we may earn a small commission at no additional cost to you. Read our full privacy policy.

You can get the complete list of supplies in the printable how-to card at the end of the post.
MODIFICATION NOTES: Instead of using squirt bottles as we did, you can put your bleach solution in a spray bottle or create a bath to dip your folded fabric into.
Precautions To Take Before Starting
- Work in a well-ventilated area
- Wear gloves
- Wear old clothes
- Keep bleach out of eyes and off of skin
How To Reverse Tie Dye
BEFORE YOU BEGIN
- Set up your work area. This may include a plastic wrap or a cardboard work surface outside.
- Mix your bleach solution in the bottles of your choice. We chose to do a 1:1 ratio of bleach to water.
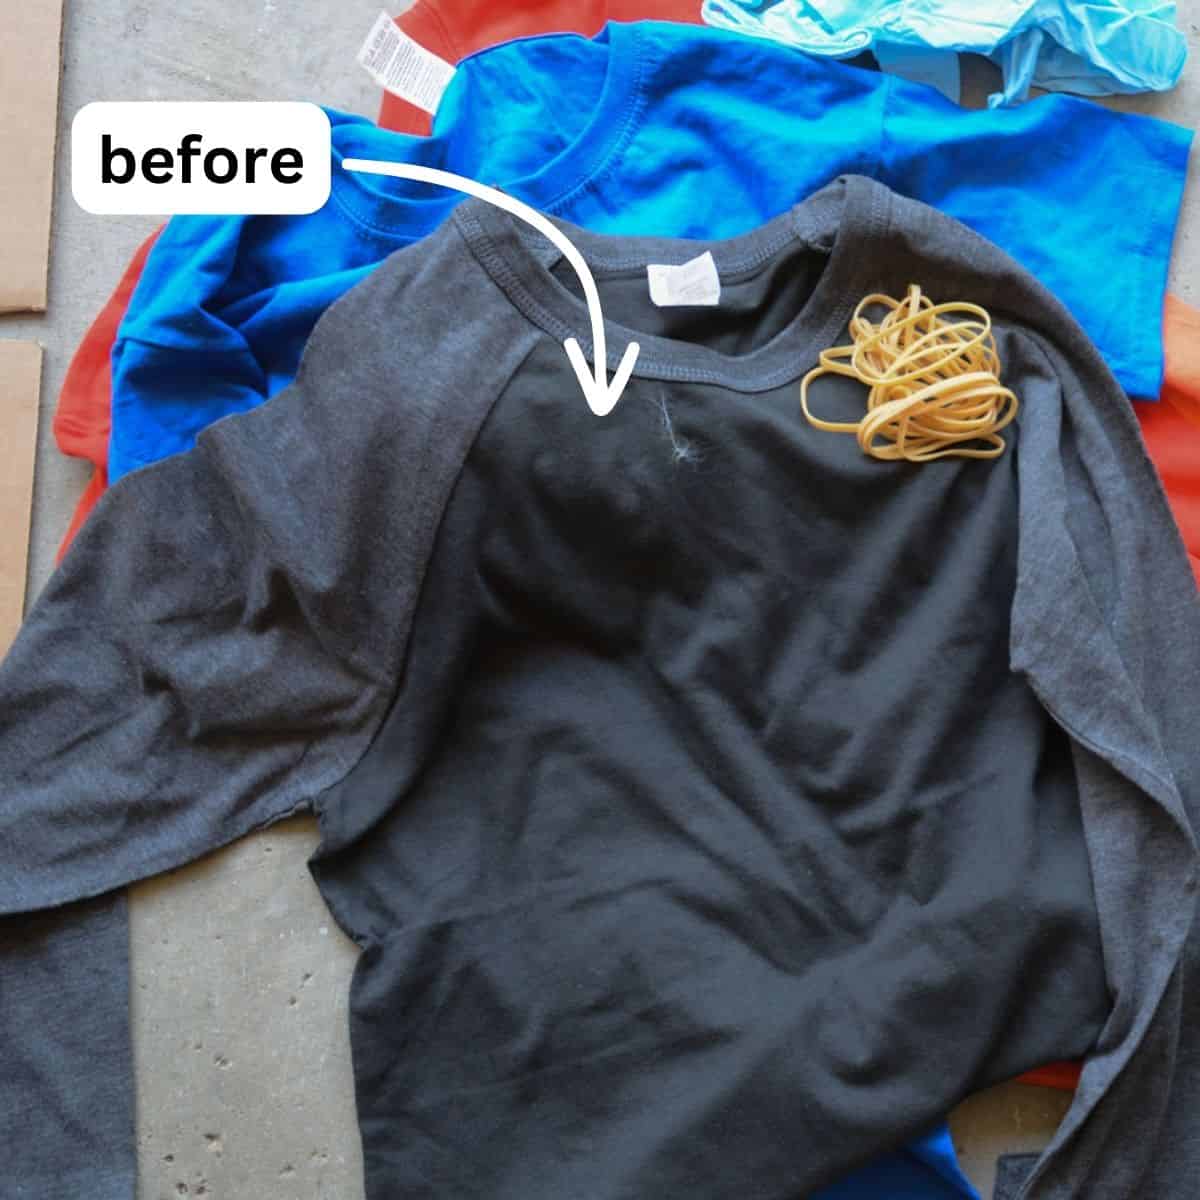
- Choose your design and materials. A Colored Cotton Shirt, Black T-Shirt, Bright Colors or Black Sweatshirt will work well to get different patterns when bleach tie-dyeing.

Step 1: Mix Your Hydrogen Peroxide Bath
Mix 1 cup hydrogen peroxide (3% or higher) with 1 gallon water in a bucket or plastic container. This bath will be used to stop the bleaching and will neutralize the bleaching process when you are satisfied with your design.

Step 2: Create Tie-Dye Folds
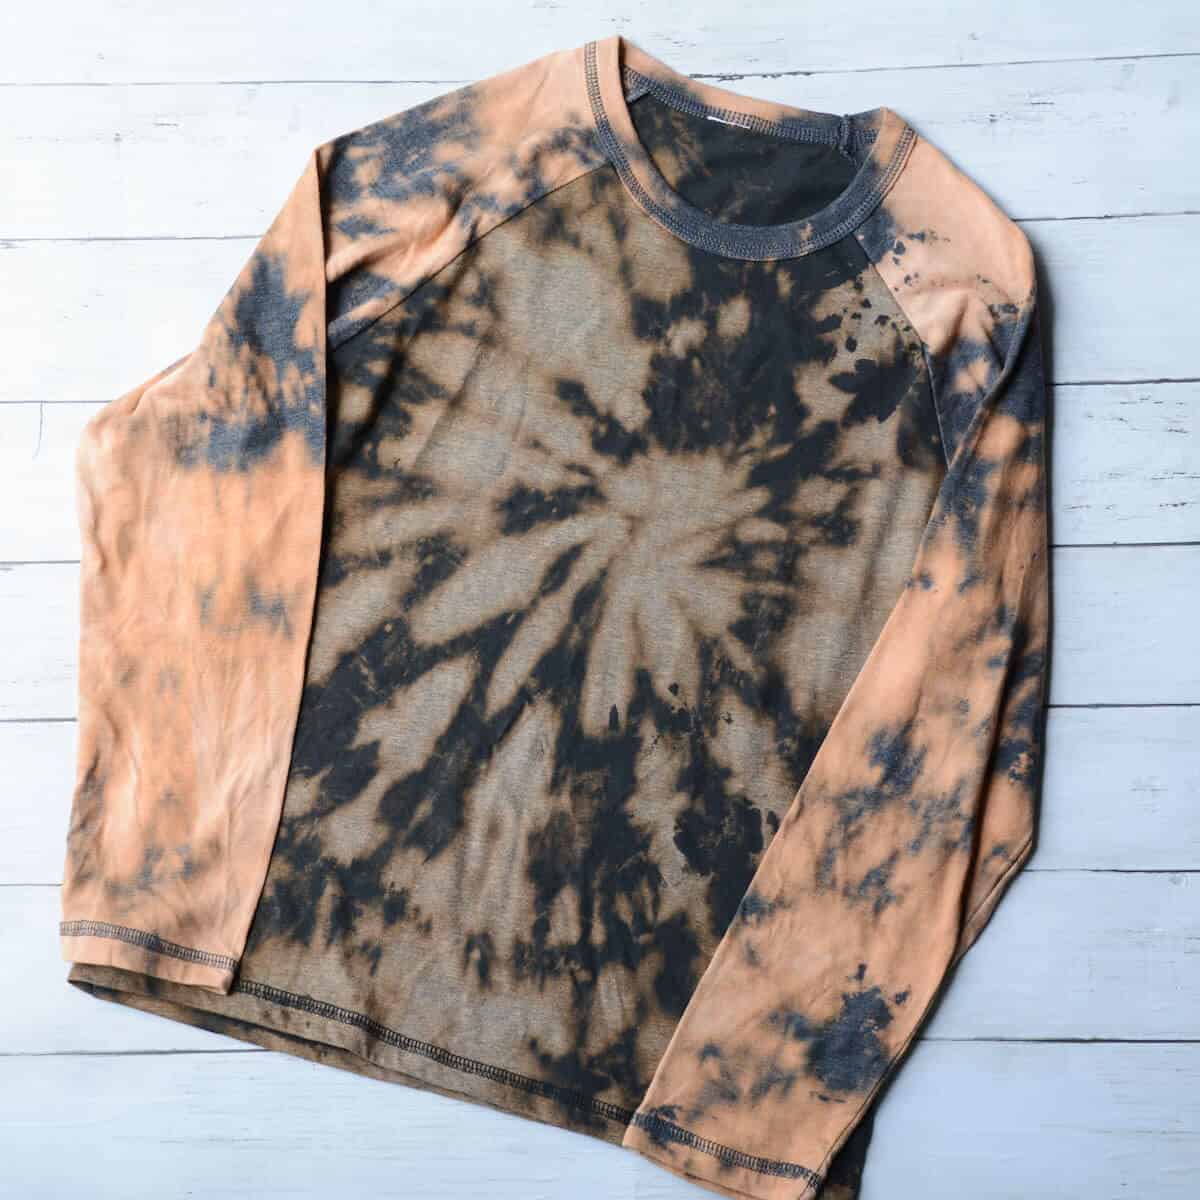
There are a variety of tie dye patterns you can try. You can wet the cotton t-shirt first and ring it out to make it easier to fold. With this black shirt we did the center classic spiral.
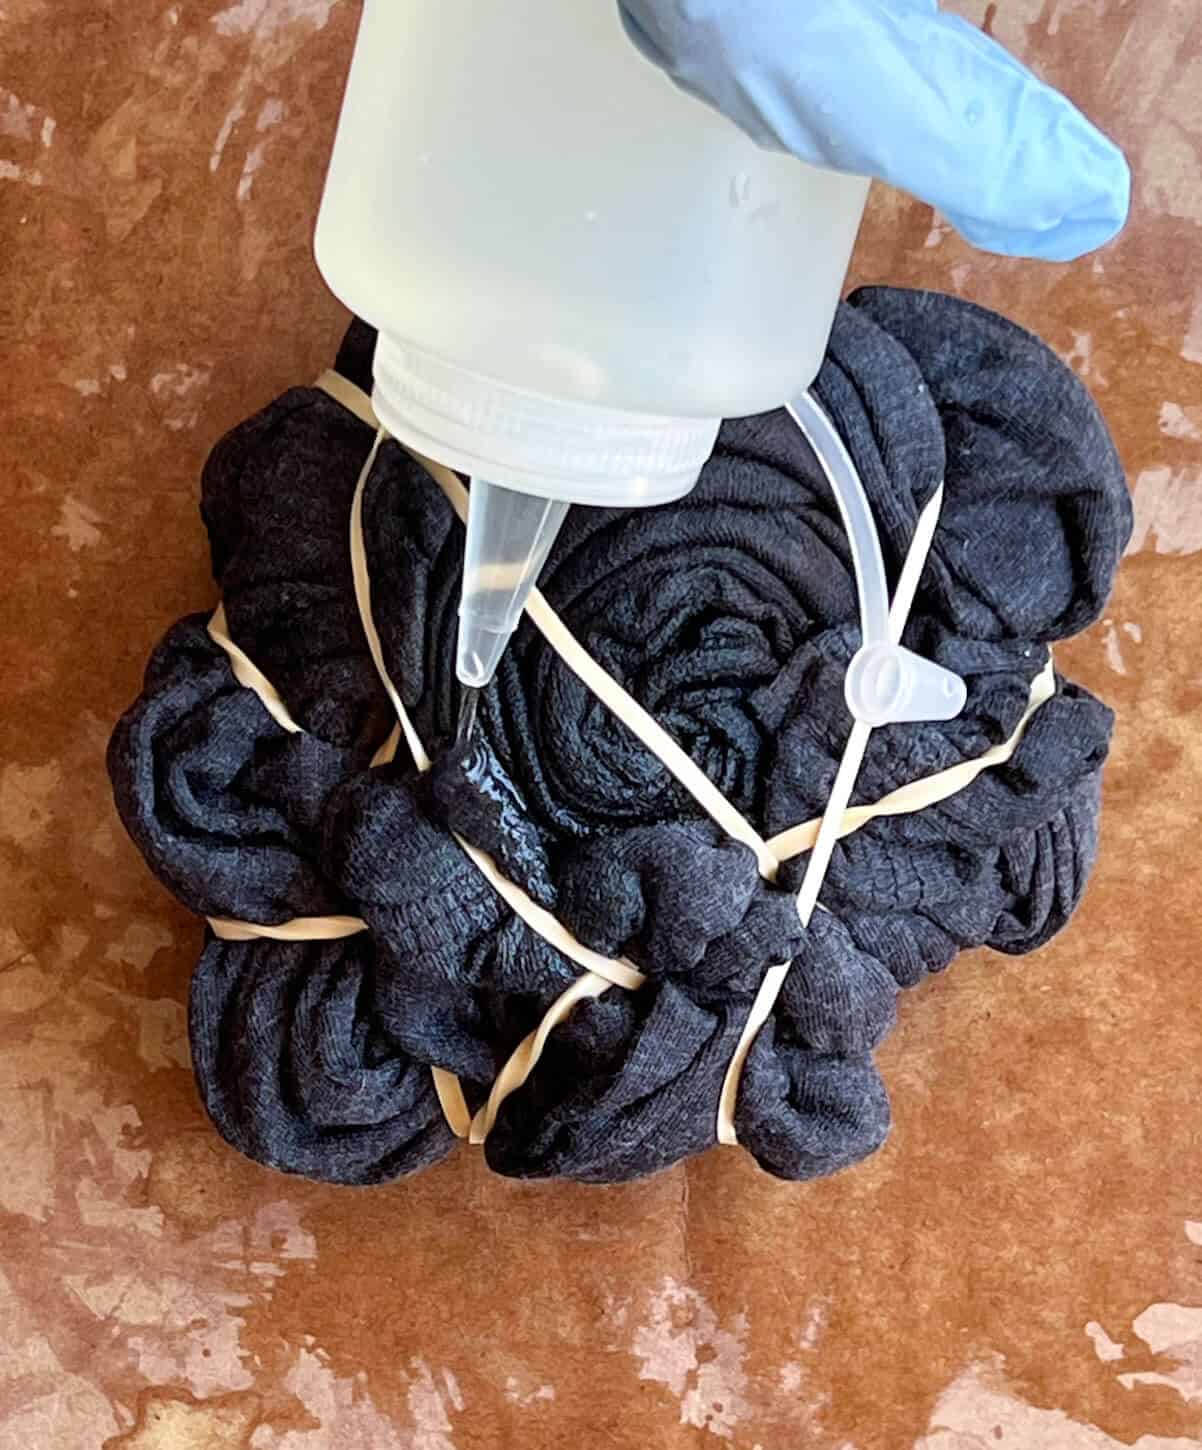
Step 3: Add Bleach Mixture To Your Fabric
Put your gloves on for this step. Generously add diluted bleach & water mixture to your shirt. Use the tip of the squirt bottle to add the bleach solution. You want to get the bleach solution down into the folds and use your hand to massage it into the fabric.

Step 4: Wait For 5-20 Minutes
This is the trickiest part of this whole process is knowing how long to leave the solution on your shirt.

Step 5: Remove The Rubber Bands
You can cut your rubber bands or pull them off. You want to still wear gloves for this.
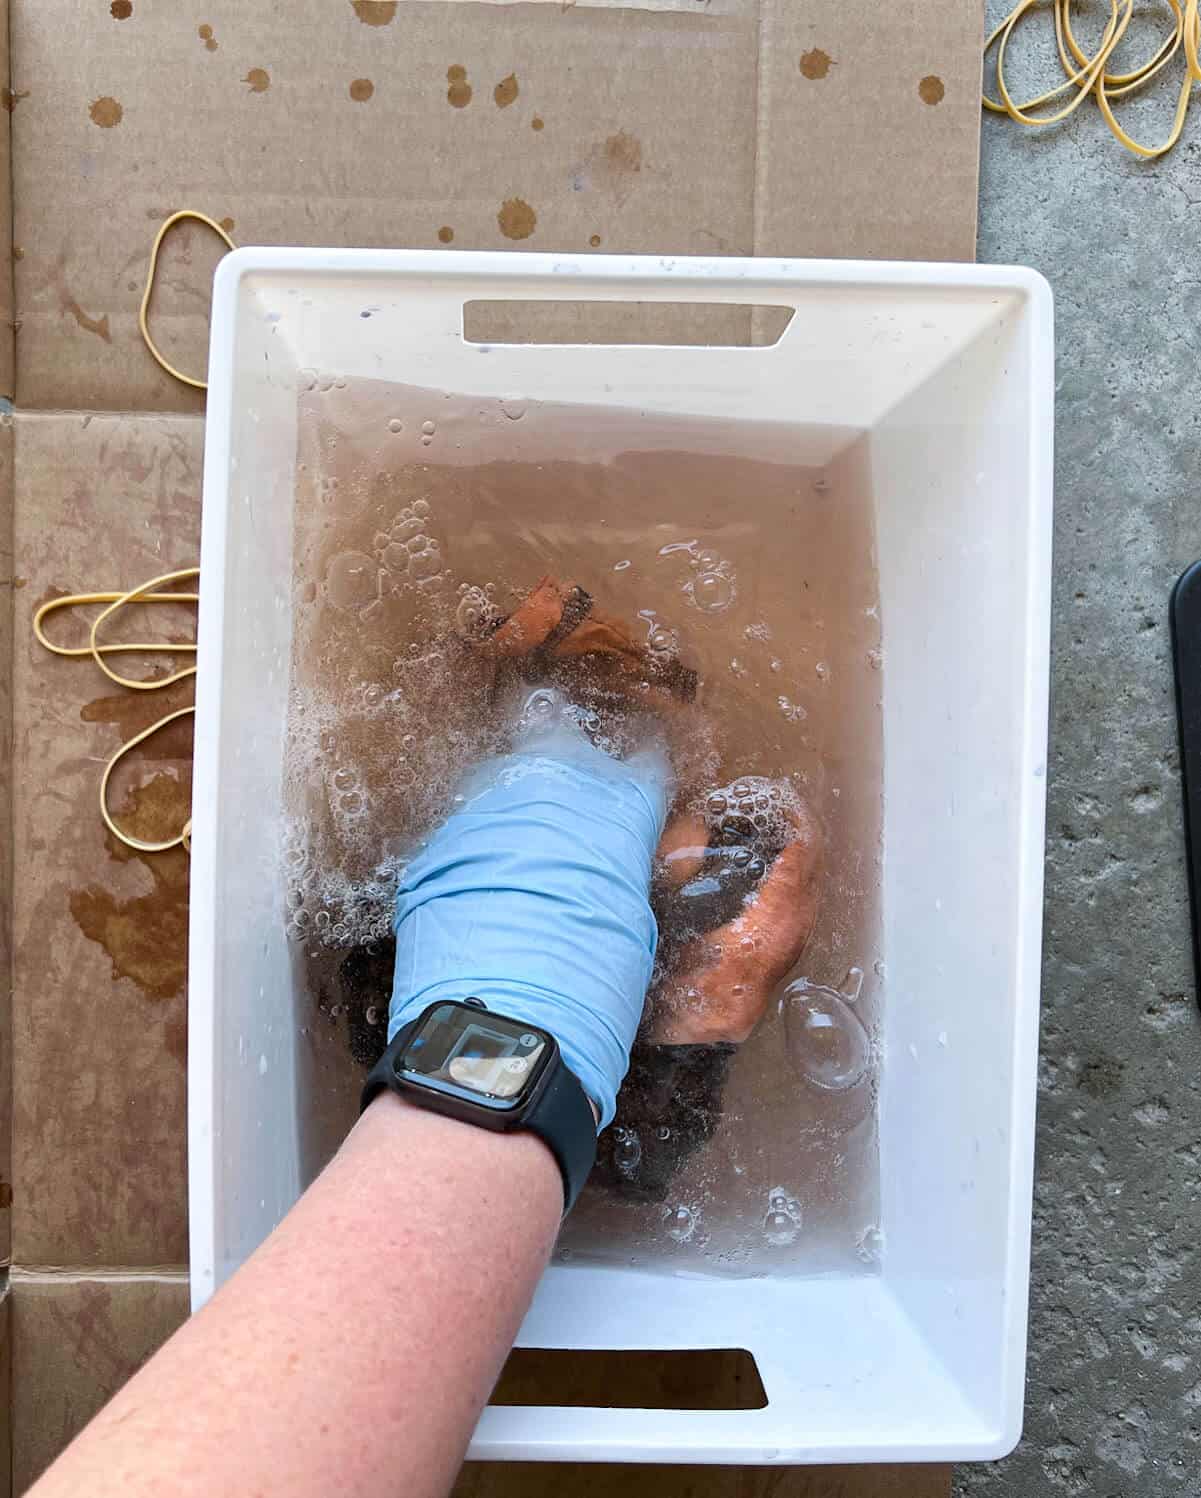
Step 6: Soak Your Shirt In The Peroxide Bath
Place your shirt in the bath to neutralize the bleach. It will fizz. Once it is done fizzing you can remove the shirt and ring it out.
Step 7: Rinse
Before placing a reverse tie dye fabric in your washing machine we recommended thoroughly rinsing it in a bucket or shop sink.
Step 8: Wash Your Shirt
Wash your shirts separately with cold water and air dry or tumble dry on low heat.
OPTIONAL: If you are looking to add color back to your reverse-dyed shirt, you could buy a kit like this one.
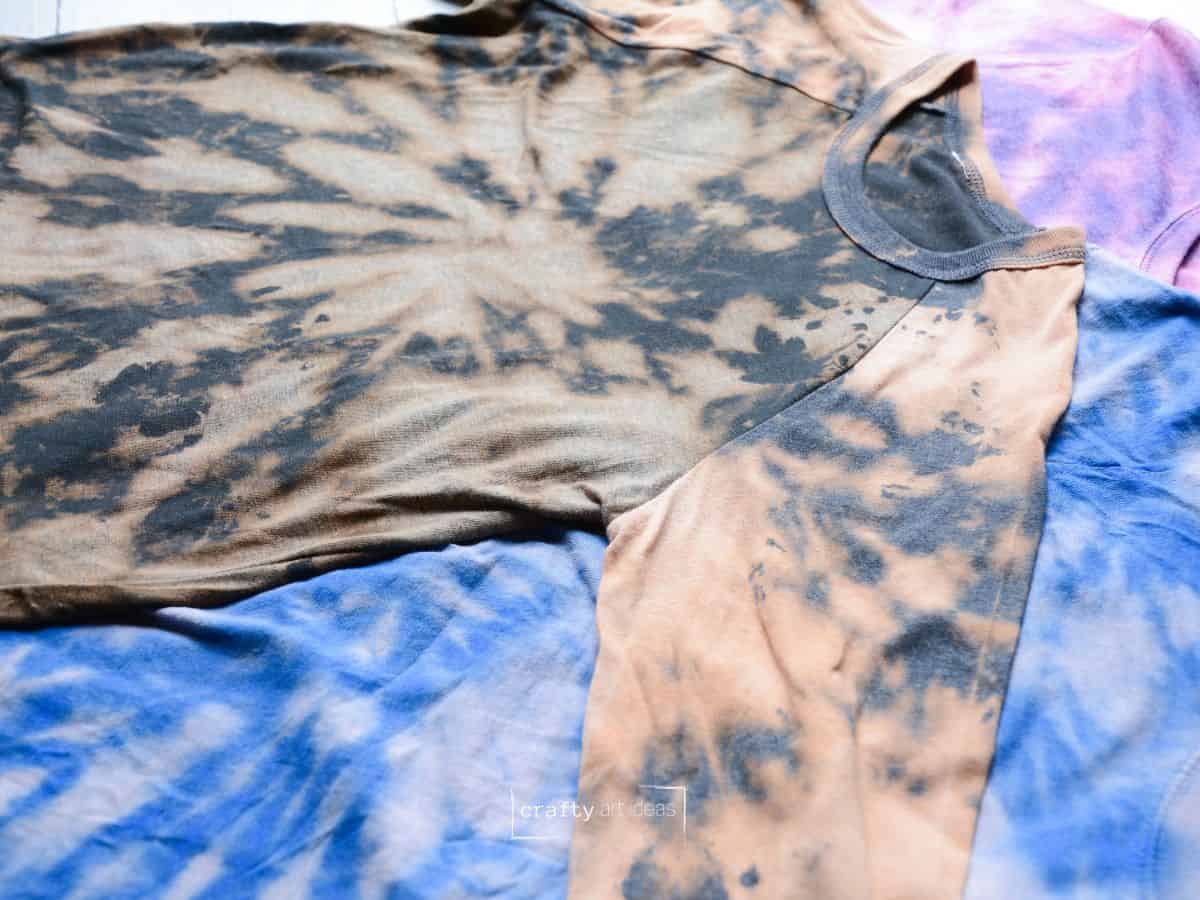
Before and After
This black and gray t-shirt was changed to this design after the bleach solution sat for 5 minutes.

Tips
- PLACE YOUR SHIRT IN THE SUN – If you want your whites or lighter colors to become a little more apparent after you take the rubberbands off, place your shirt in the sun. The bleached areas lighten the tie-dye pattern until you place the shirt in a peroxide fixative bath.
- EXPERIMENT WITH THE TIME – The longer you leave the bleach on the shirt, the lighter it will become in those areas.
- WATCH YOUR SHIRT CLOSELY – Once the bleach is on, remove the rubberbands as soon as you like the colors.
- AIM FOR DARKER FABRICS – Darker-colored fabrics will give you the most variation in color.
- FIRST WASH – Wash it separately from your other clothes to avoid any dye transfer.
- DIFFERENT METHODS – There are other ways to neutralize bleach. You can also consider diluting white vinegar or baking soda mixed with water.
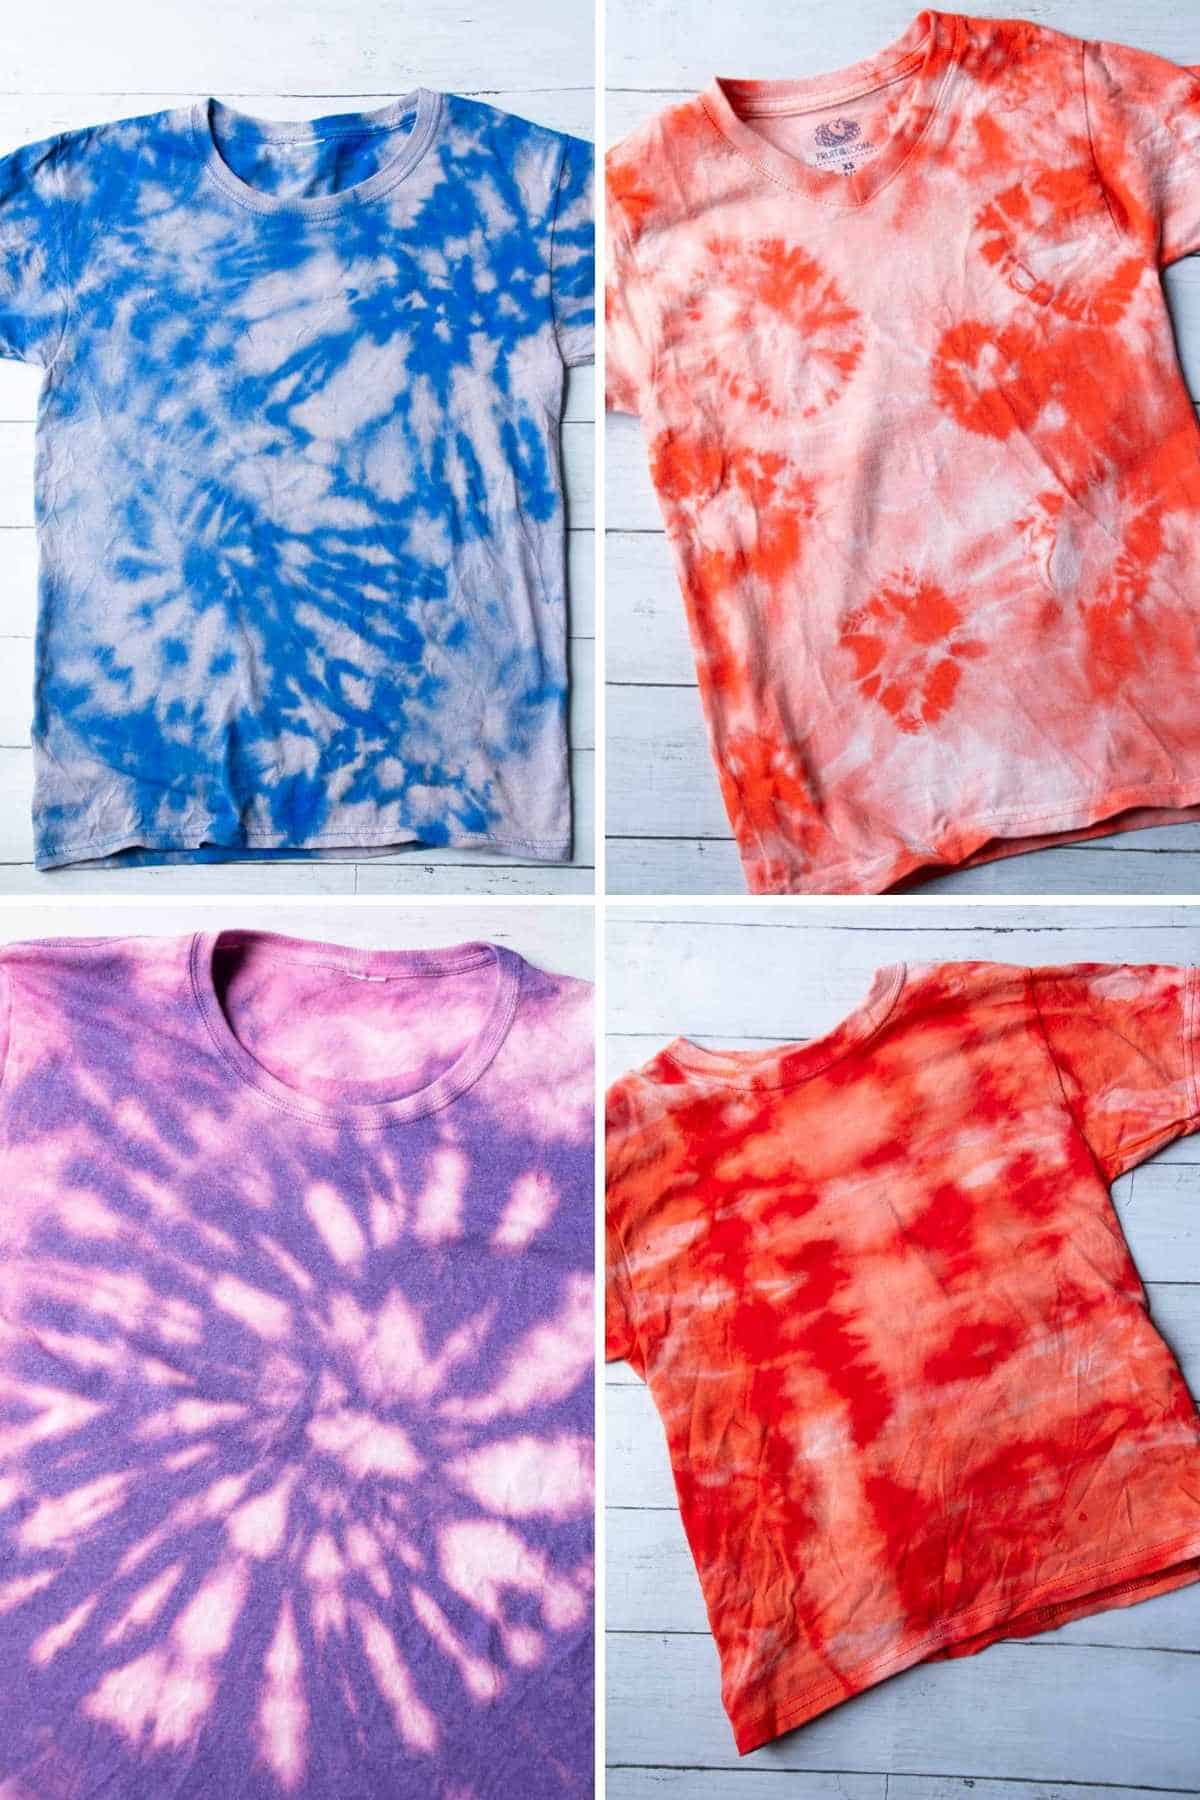
More Examples
Here are a few other bleach-dyed shirts you can see. Each cotton shirt started as a solid color, and different folding techniques were used.
How-To FAQs
You can fold and rubberband a shirt dry or wet, but a damp shirt will give you a softer design and a dry shirt will give you sharper lines and shapes.
It is a personal preference based on your desired look and the colored shirt you are starting with. The maximum time the bleach should be left on the shirt is 20 minutes, so it doesn’t break down the fibers of your shirt.
If you don’t neutralize the bleach in reverse tie dye, it can eat away at your fabric even after you’ve rinsed it. This can cause the fabric to weaken and eventually fall apart. It’s essential to neutralize the bleach with a neutralizing agent to keep your fabric strong and healthy.
Use natural fabrics such as cotton, linen, hemp, bamboo, and rayon for best results because they absorb the bleach. It’s important to note that different fabrics may produce slightly different results, so it’s a good idea to experiment with various materials to find the best one for your project.
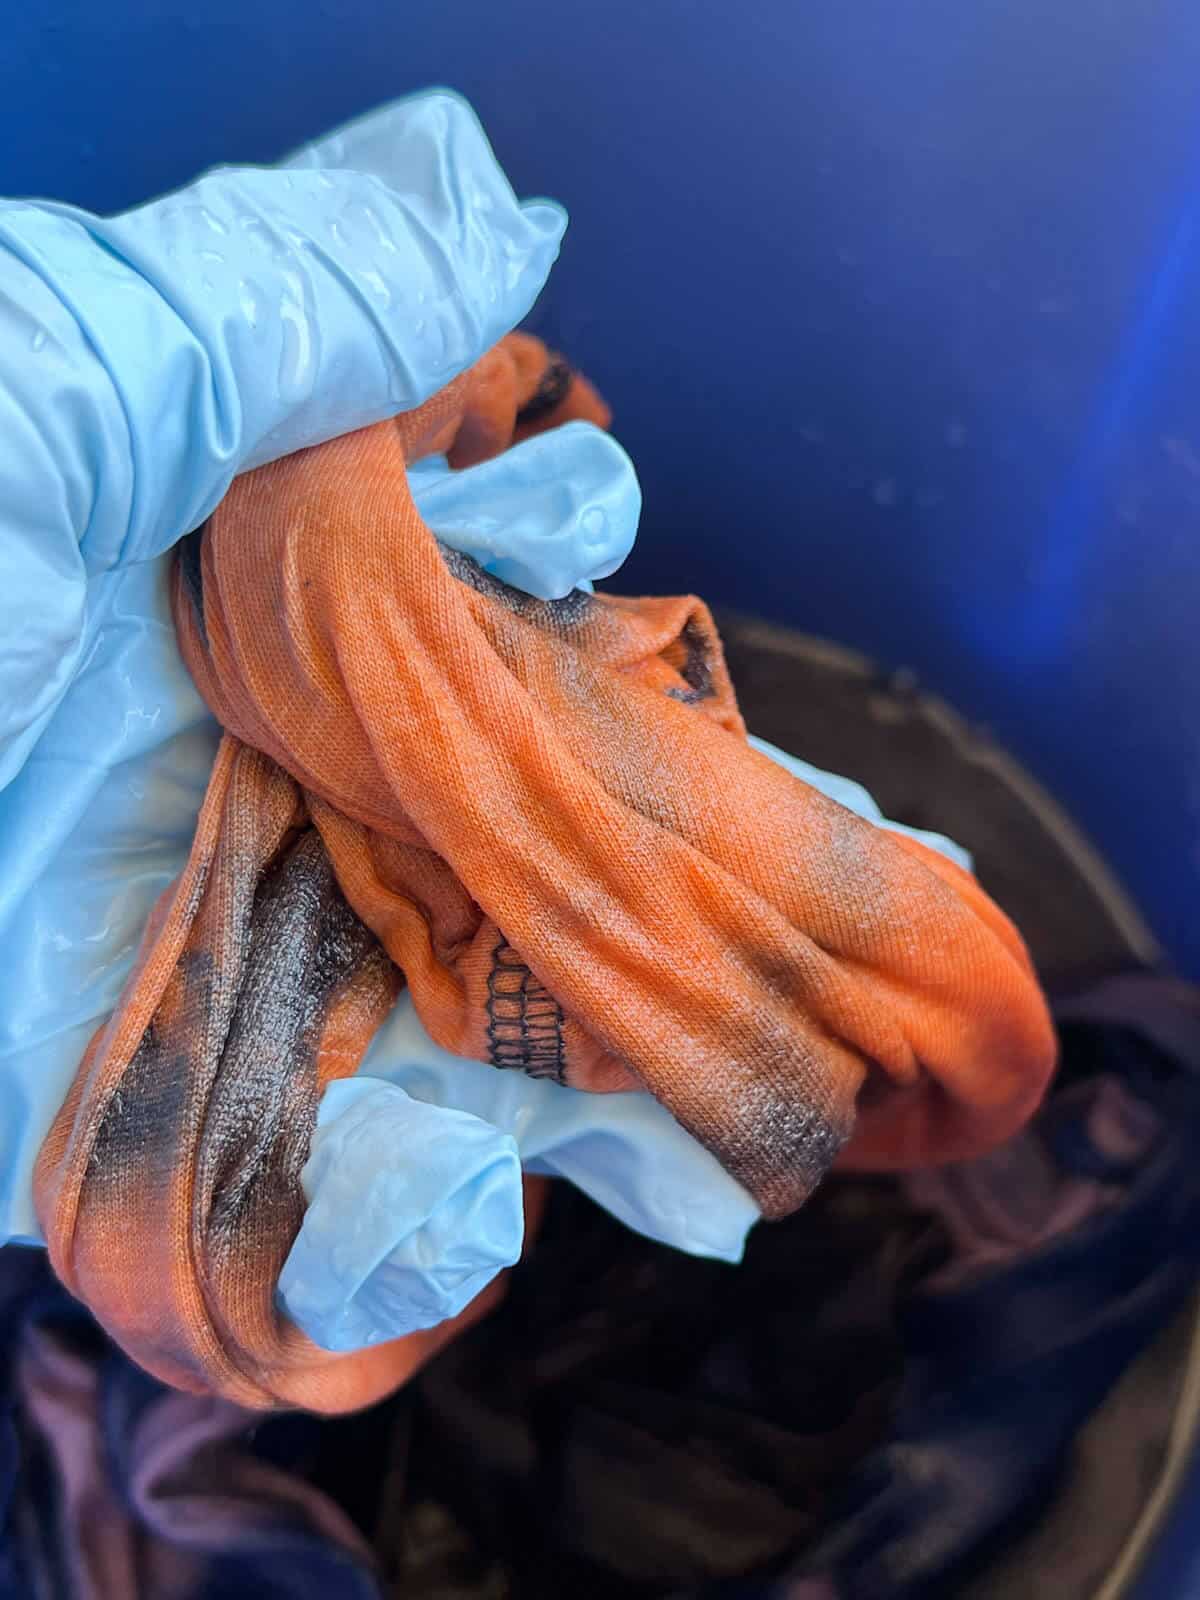
Synthetic fabrics may or may not work well during a reverse tie-dye process. Avoid using polyester, nylon, and acrylic fabrics for reverse tie dye as they are made from materials that don’t absorb the bleach well. We tried a pair of polyblend socks and they did not turn out well.
Follow us on Pinterest, YouTube & Facebook for more free art and craft ideas!
This method will surely get you cool results, whether you are bleach tie-dyeing t-shirts or other items. Breathe life into old clothing today!
Do you like this art project? Please give us a 5-STAR review below ⭐️⭐️⭐️⭐️⭐️ and have fun being creative with your family.
How To Reverse Tie Dye

Equipment
- Bucket With Water
- Surface To Work On
Supplies
- Diluted Bleach we used 1 part household bleach to 1 part water
- Squeeze Bottle
- Rubber Bands
- Latex or Rubber Gloves
- Solid Colored Fabric made from Natural Fibers ex: 100% Cotton Black T-Shirt
- Hydrogen Peroxide
Instructions
- Set up your work area outside with a plastic tarp or cardboard.
- Mix bleach solution (1:1 bleach to water) in bottles of your choice.
- Mix 1 cup hydrogen peroxide with 1 gallon water in a bucket to make a neutralizing bath.
- Choose a design for your shirt and fold it, securing it with rubberbands.
- Apply bleach solution to the shirt, making sure to get it in the folds.
- Leave bleach on for 5-20 minutes and remove rubberbands.
- Soak shirt in peroxide bath until it stops fizzing.
- Rinse the shirt before washing.
- Wash the shirt with cold water and tumble dry on low.
Notes
- Place your shirt in the sun if you want your whites or lighter colors to become a little more apparent after you take the rubberbands off.
- The longer you leave the bleach on the shirt, the lighter it will become in those areas.
- Darker-colored shirts will give you the most variation in color.
- For your first wash, be sure to wash it separately from your other clothes to avoid any dye transfer.
- You can also neutralize bleach with a dilution of white vinegar or baking soda mixed with water.