Teach About Tints and Shades With This Creative Tape Resist Art On Canvas
This resist canvas painting is an easy, no-fail art project for kids of any age. It’s a super fun way to explore tints and shades while creating a tape resist art piece they’ll be proud of.

Why You Will Love This Art Idea
I love using painter’s tape to create resist designs because there is really no wrong way to make this fun painting. Kids are always amazed when they can paint right over their designs and still reveal something cool in the end.
You can see this in action with our Tape Resist Winter Painting, and this easy Watercolor Tape Resist project for preschoolers.
Recommended Supplies
Disclosure: This post may contain affiliate links when clicked, we may earn a small commission at no additional cost to you. Read our full privacy policy.
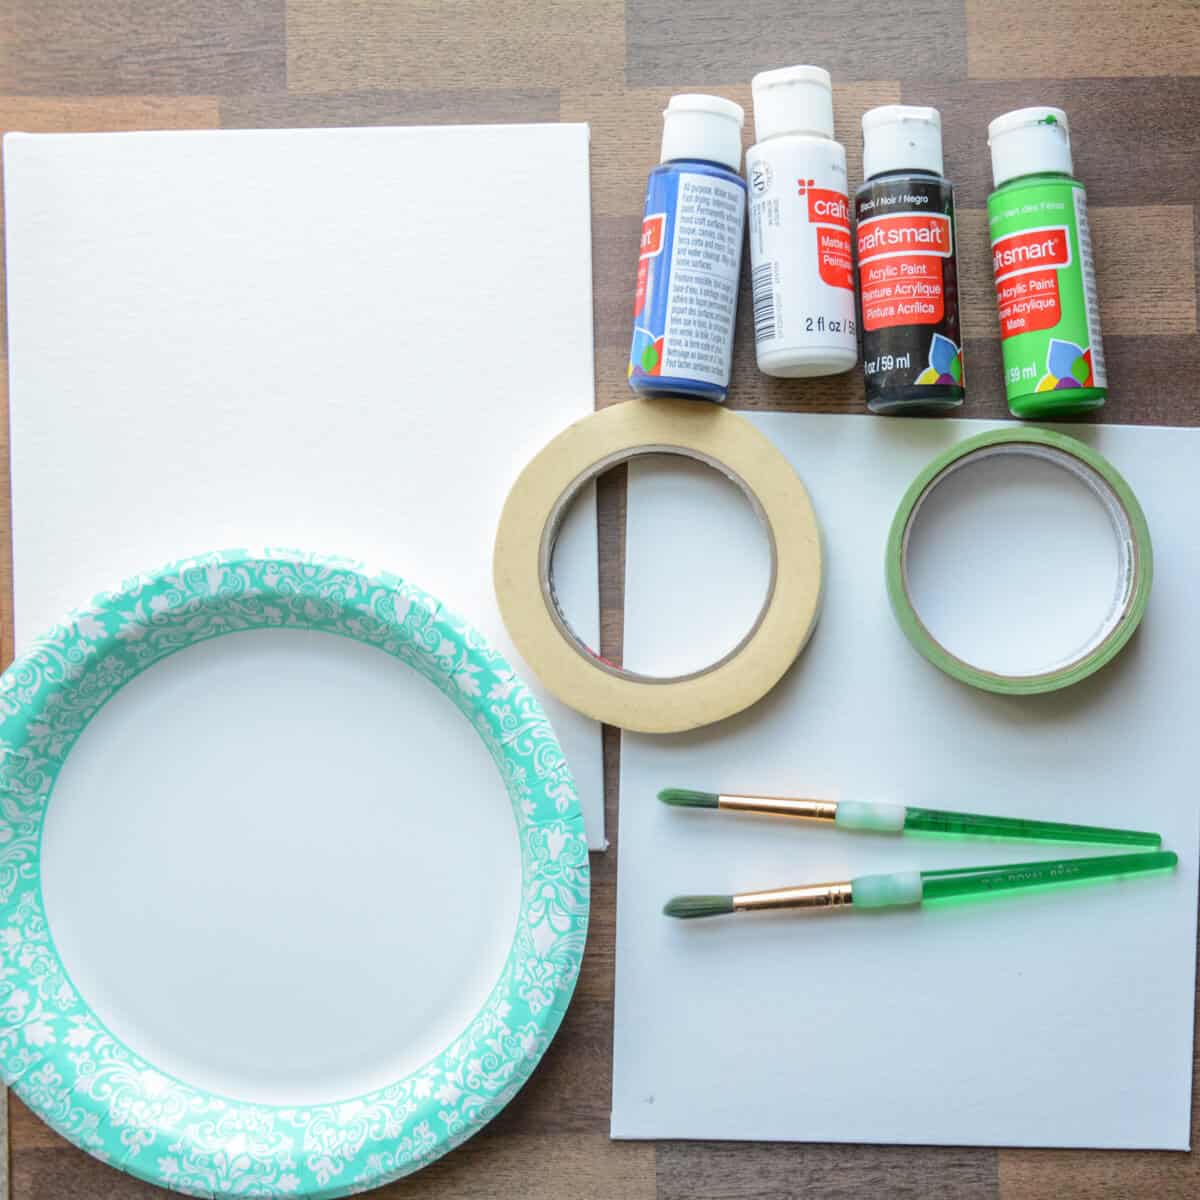
Notes About Supplies
- You can try this with cardboard, painter’s tape, and tempera paint for toddlers or younger kids.
- This skinny painter’s tape works better than skinny masking tape.
- Washi tape should also work on a canvas
- Thick cardstock may work, but test how the tape comes off to make sure it won’t rip the paper.
ART TEACHER TIP – If working with younger children, precut strips of masking tape for an easier time.
How To Make A Tape Resist Canvas Painting
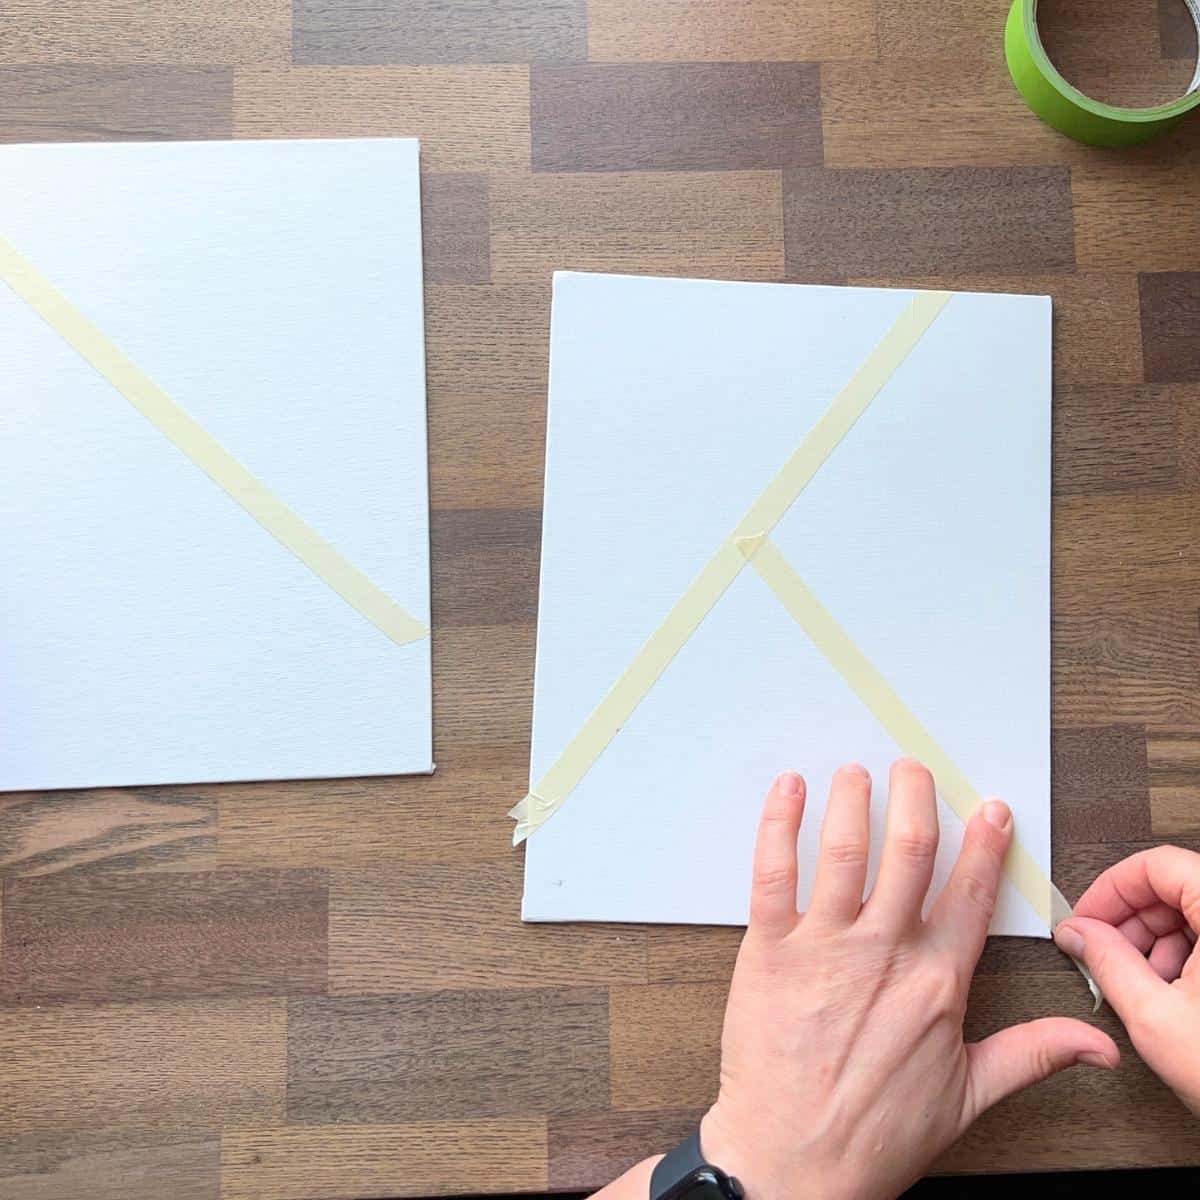
Step 1: Tape Your Design
Place tape lines across your canvas from one edge to another. I like using diagonal lines to create triangle shapes. This helps kids learn how to break up their composition.
Every time a line touches one side, it should go all the way to the other edge.
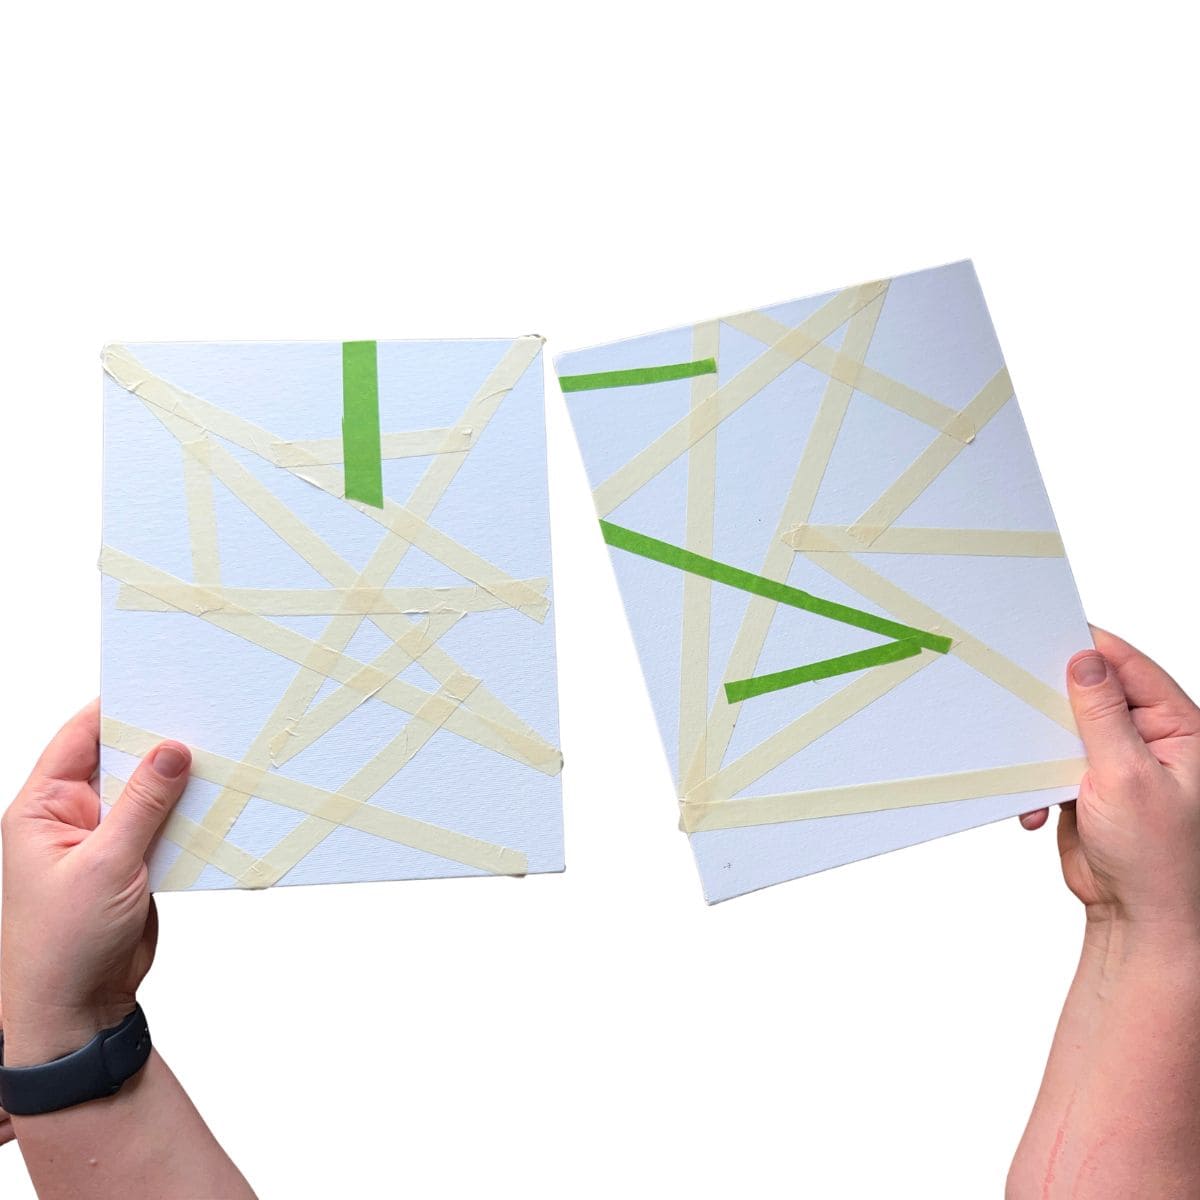
Step 2: Create 12-18 Shapes
Repeat taping shapes. You can even wrap the tape around the canvas.
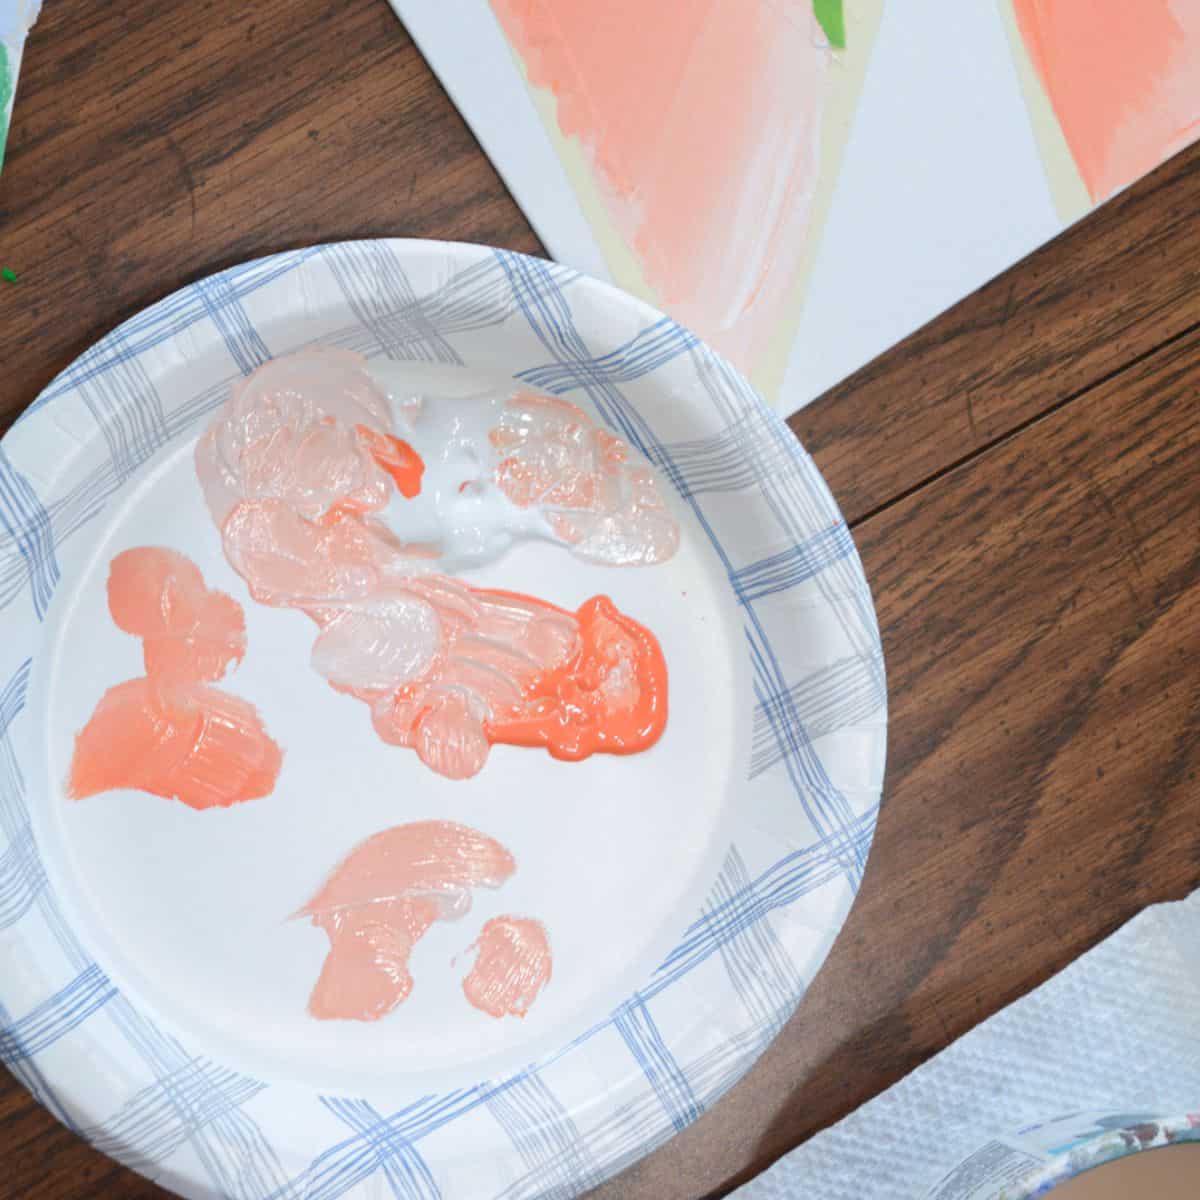
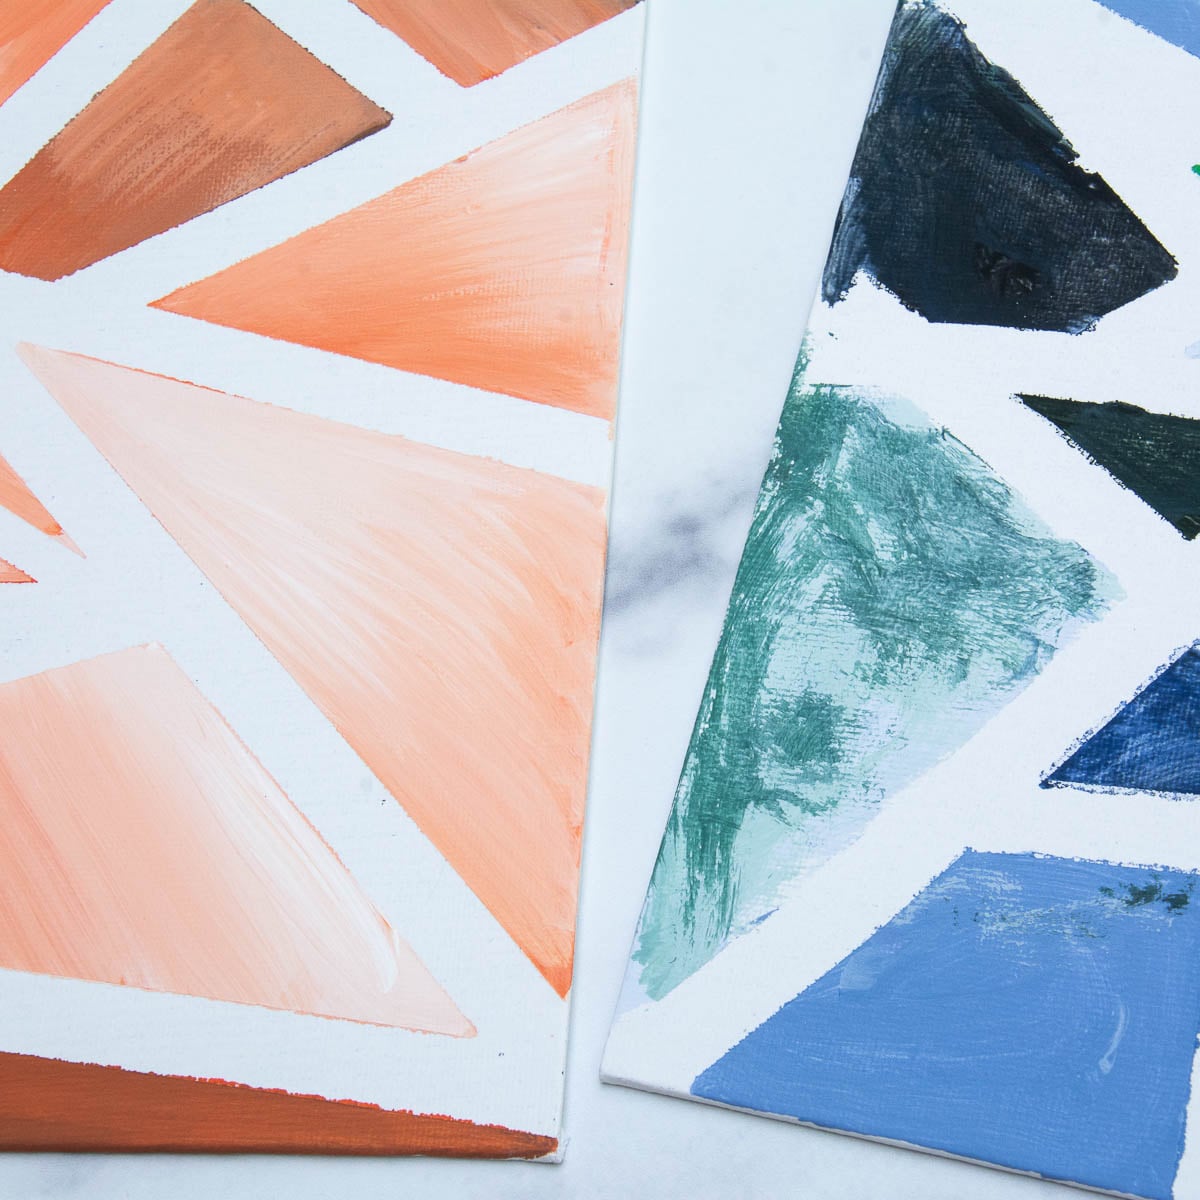
Step 3: Mix Tints
Start with white paint and add a small amount of color. Mix slowly so you can control how dark the tint will become.
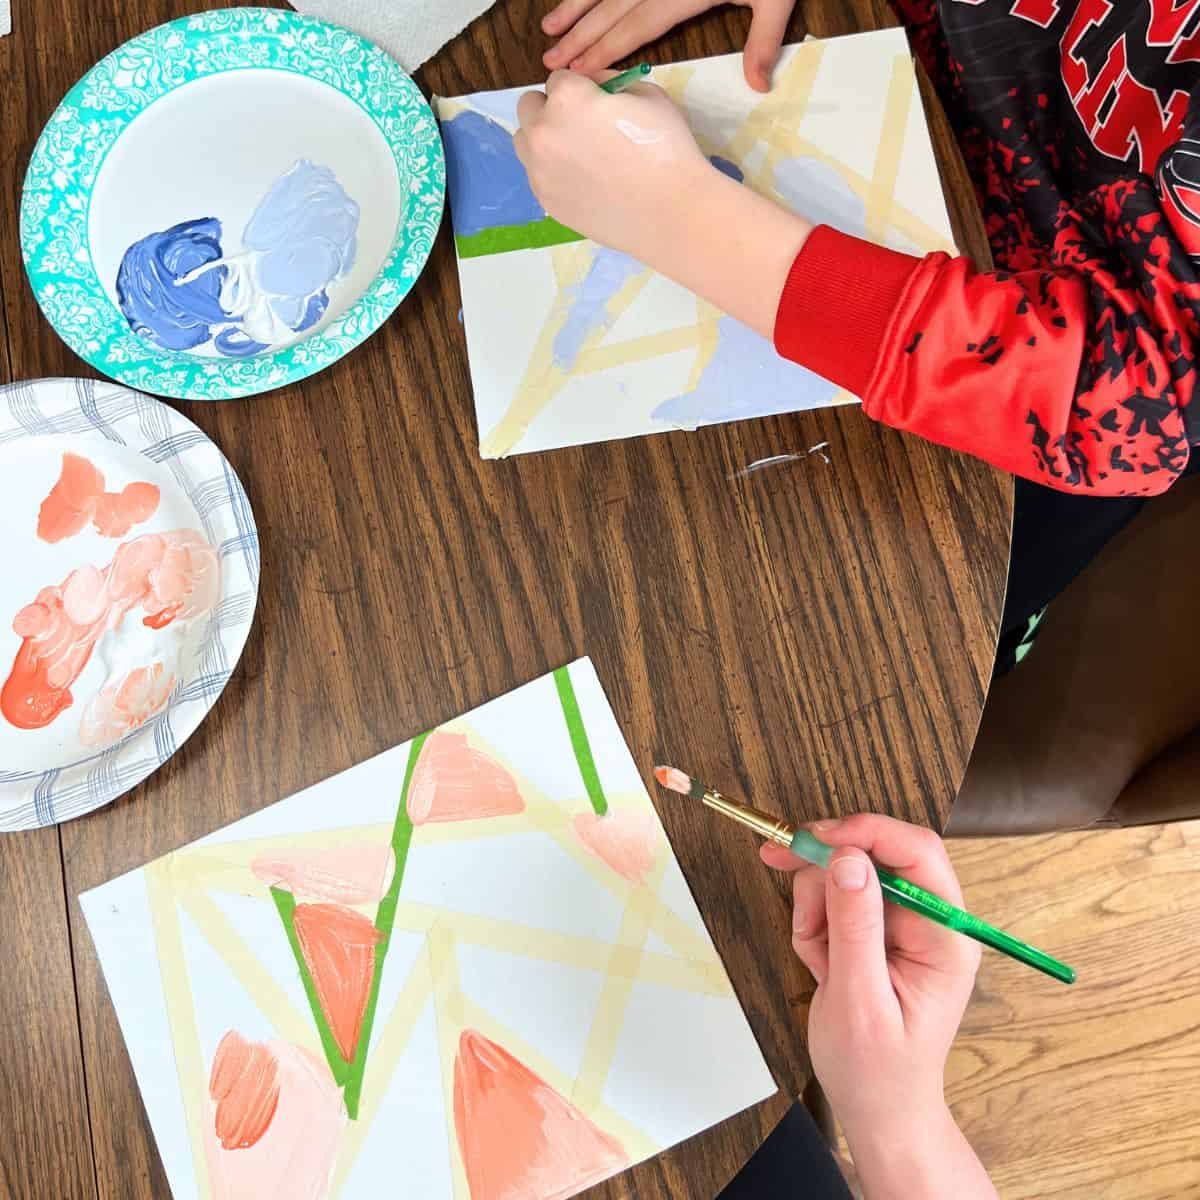
Step 4: Add Tints To The Canvas
Use your tints to paint about half of your shapes.
You may want to do two coats for a more opaque finish.
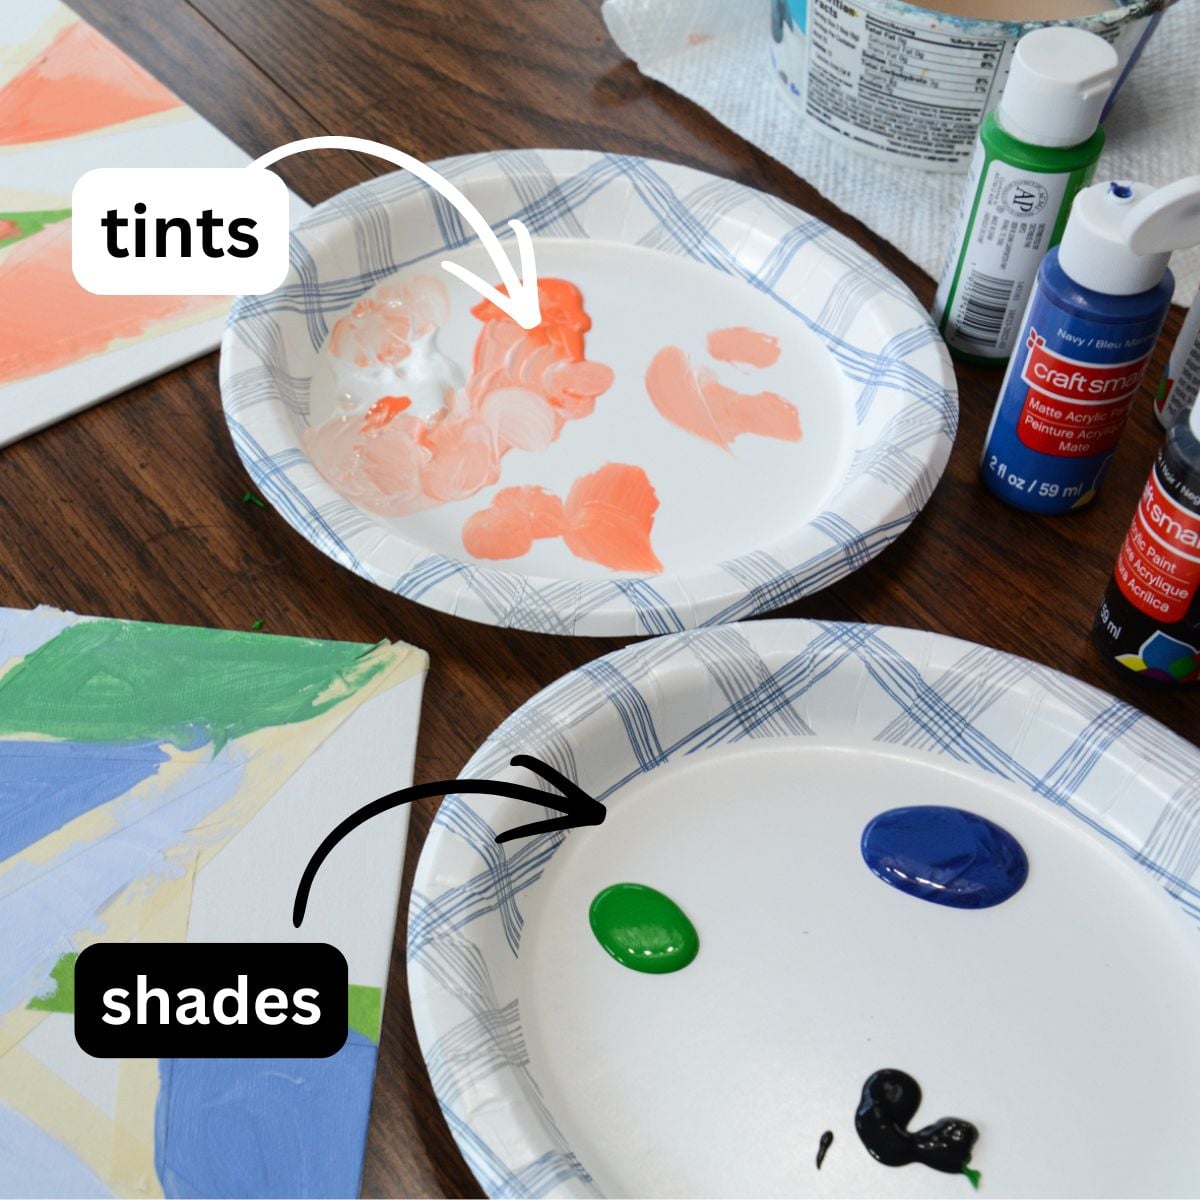
Step 5: Create Shades
Use a fresh plate. Start with your color and add a small amount of black to create shades.
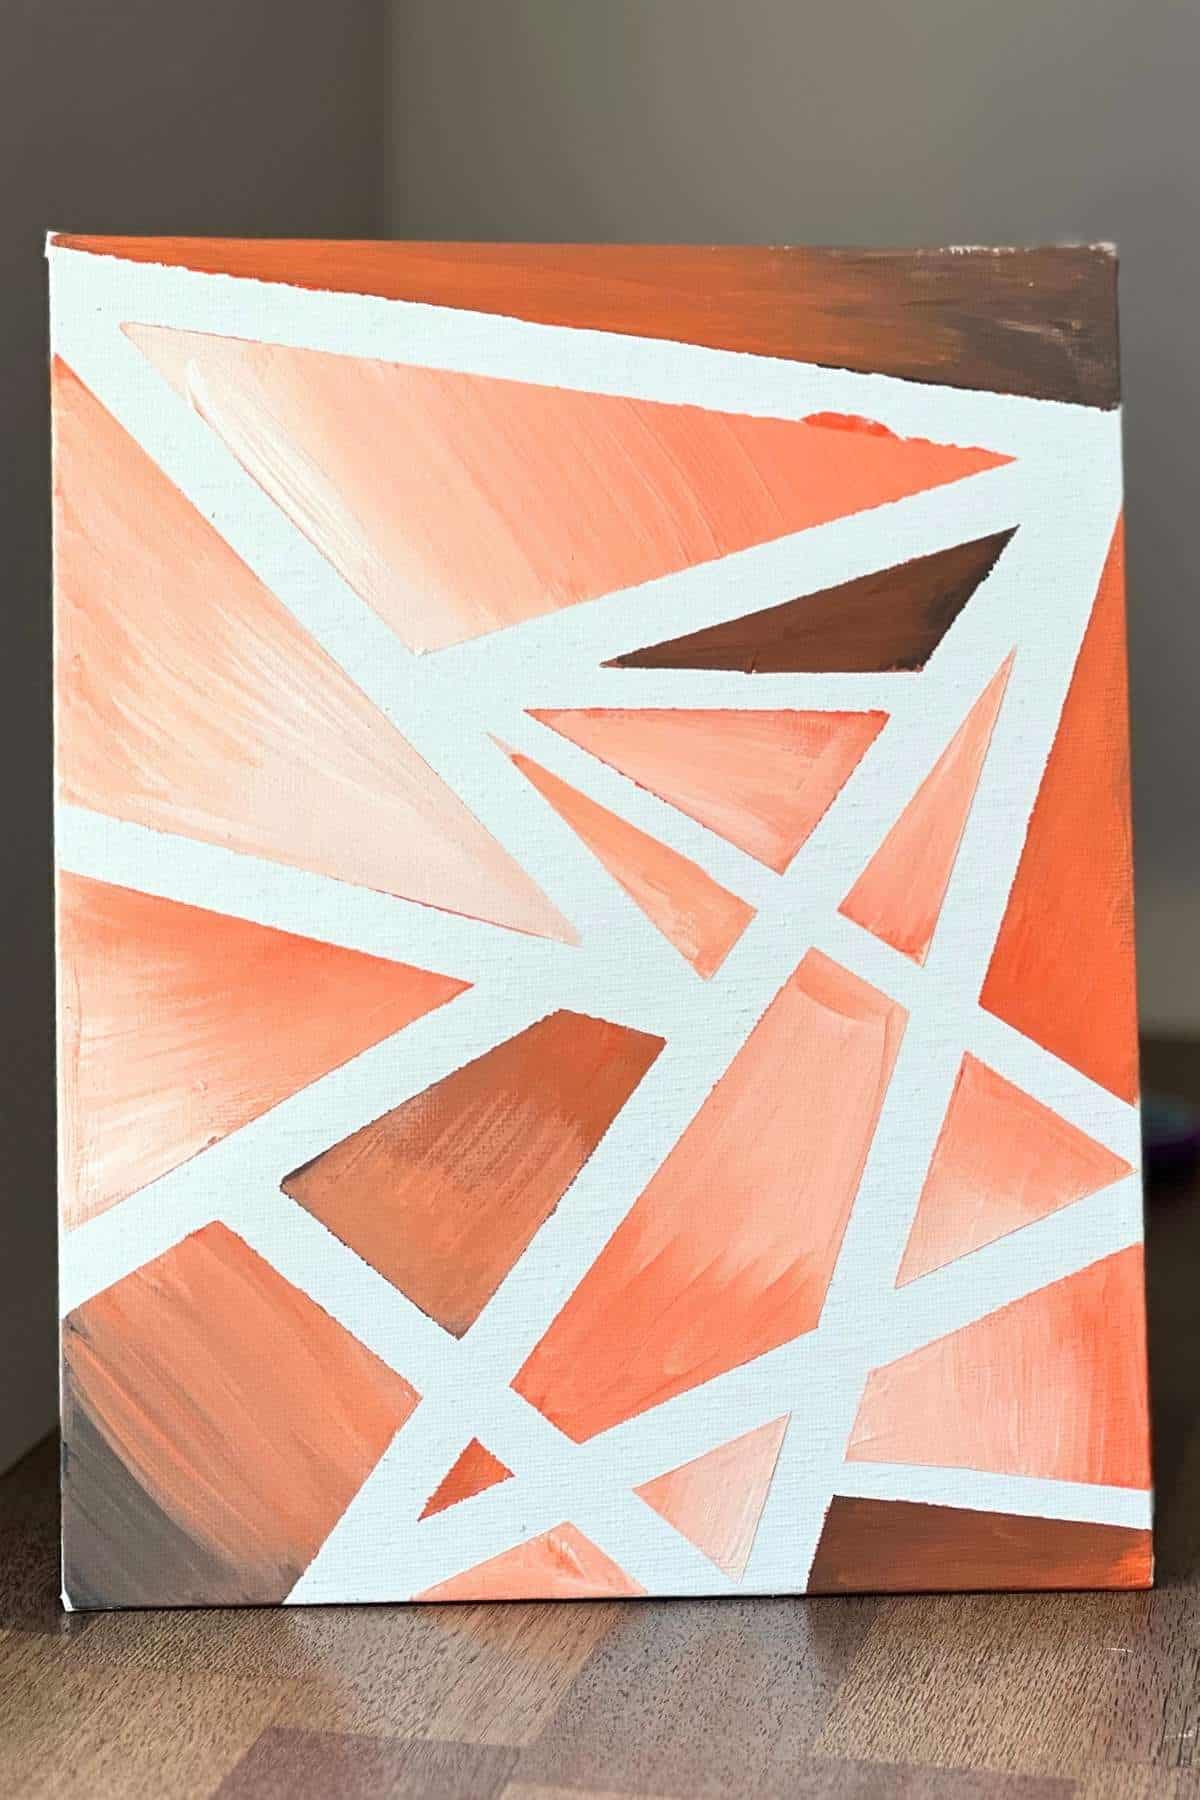
Step 6: Paint Remaining Shapes
Use your shades to fill in the remaining shapes. You can also blend tints and shades in a single section for a more advanced look.
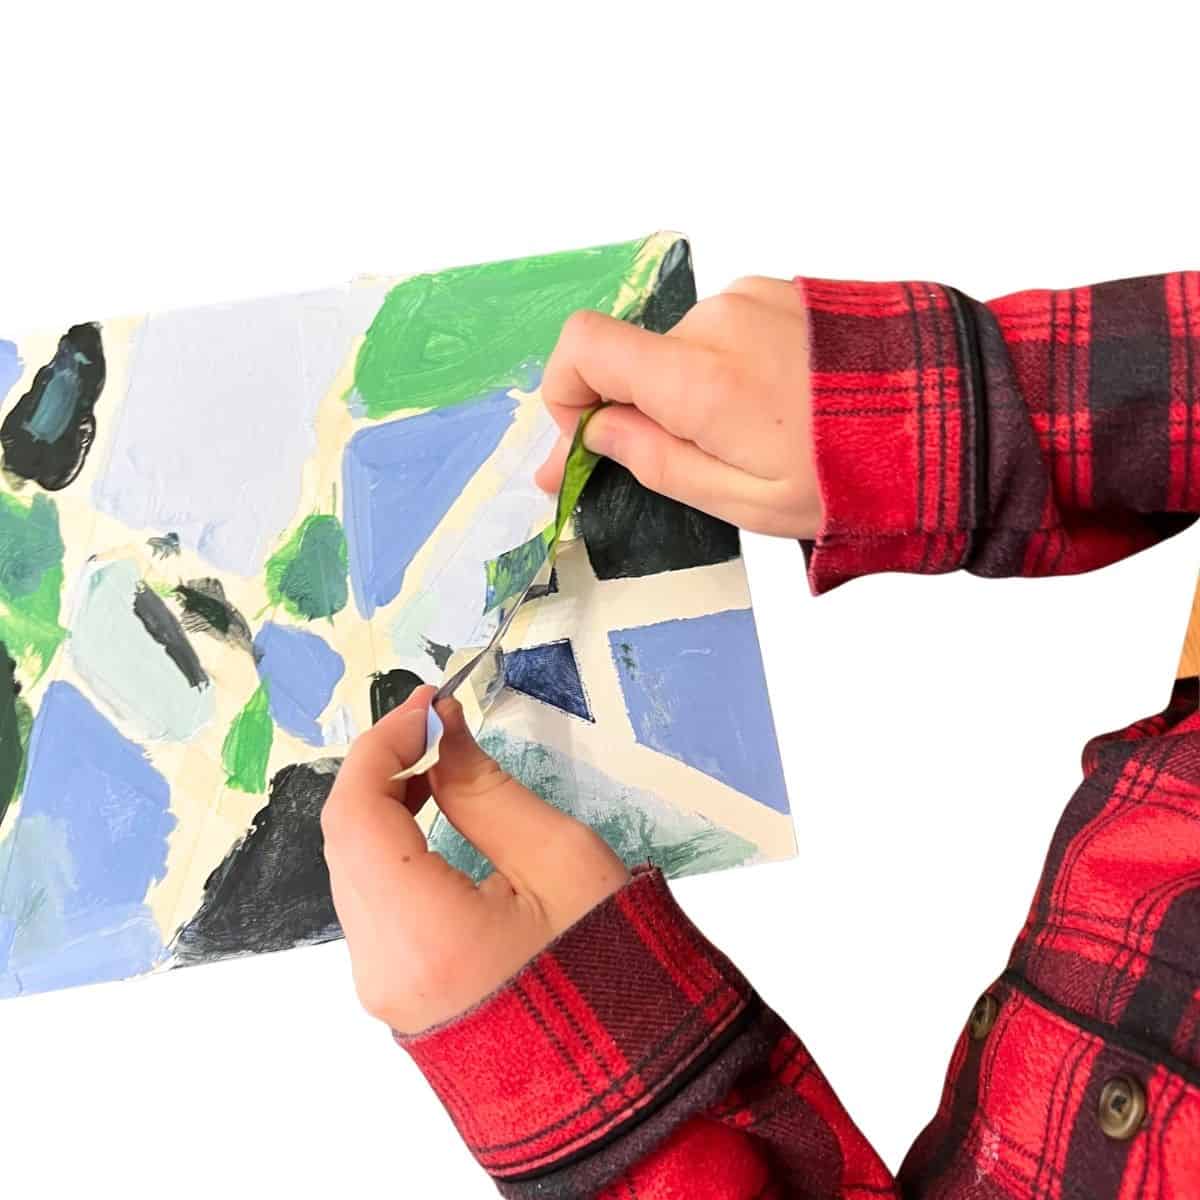
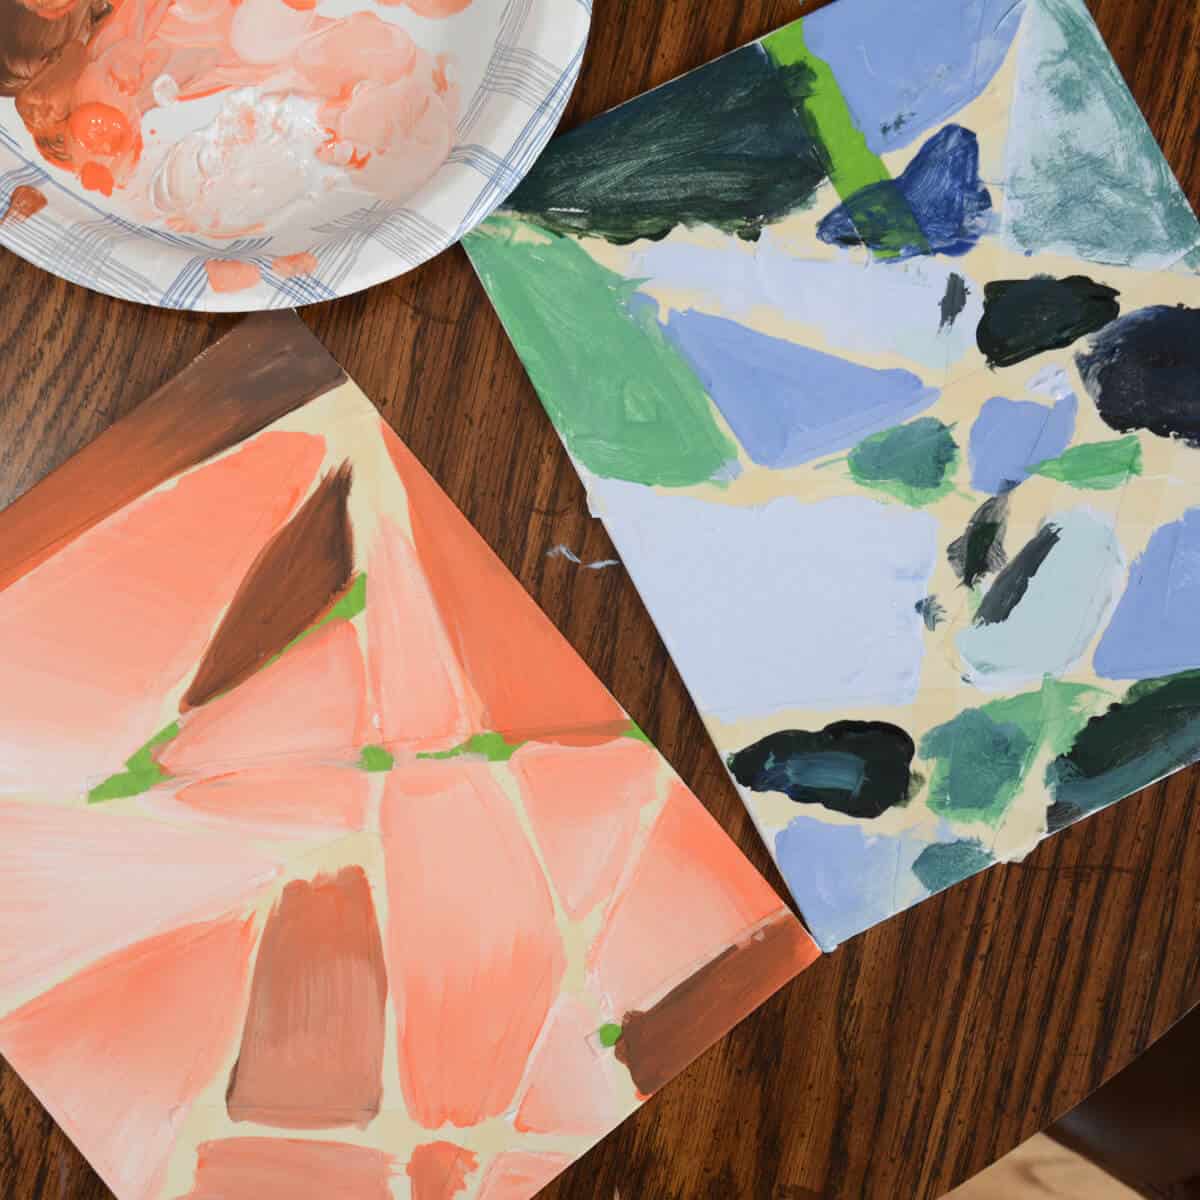
Step 7: Remove Tape
Once your painting is dry (or almost dry), carefully peel off the tape to reveal your design.
Common Mistakes & Solutions
- TAPE NOT STICKING – Make sure the canvas is clean and dry before adding a tape design.
- PAINT BLEEDING UNDER TAPE – Press the tape with your nail before painting. Use painter’s tape and apply thin coats. Avoid pushing paint into the edges.
- TAPE PEELS OFF PAINT – Remove tape when paint is dry but slightly tacky for the cleanest lines.
- MUDDY OR DULL COLORS – Limit to 1–2 colors plus black and white. Rinse brushes between colors.
- UNEVEN COVERAGE – Use two coats, especially for lighter colors, and try a flat brush for smoother results.
- TINTS OR SHADES TOO STRONG – Add white or black slowly. Start light and build up gradually.
For More Advanced Painters
Challenge the students to create values within each shape. They may end up mixing colors straight on the canvas board or canvas. Encourage them to practice blending with their brushes and to work in layers.
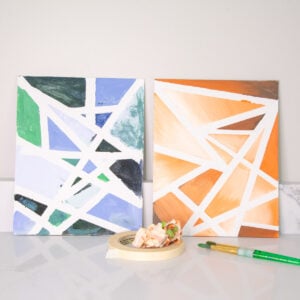
Our Favorite
Related Easy Painting Projects
Grab those brushes and start creating your tape resist painting. I love this project because you can adjust it for any age or ability, and every kid makes something they’re excited to share.
Easy Tape Resist Canvas Painting
Equipment
- Paintbrushes
- Plate or palette
Supplies
- Canvas Board
- Painter’s or Masking Tape skinny works best
- Acrylic paint 1–2 colors
- White paint
- Black paint
Instructions
- Tape lines across your canvas from one edge to another to create shapes. Aim for about 12–15 sections.
- Press all tape edges down firmly to prevent paint from bleeding underneath.
- Mix your tints by starting with white paint and slowly adding a small amount of color.
- Paint about half of your shapes using your tints. Add a second coat if needed for better coverage.
- Use a fresh plate to mix shades by starting with color and adding a small amount of black.
- Paint the remaining shapes with your shades. You can also blend tints and shades together for a more advanced look.
- Let the painting dry, then carefully peel off the tape to reveal your design.
Notes
- Limit kids to 1–2 colors plus black and white for the best results.
- It’s easier to make a color darker than lighter, so start light and build slowly.
- Peel tape when the paint is slightly tacky for the cleanest lines.