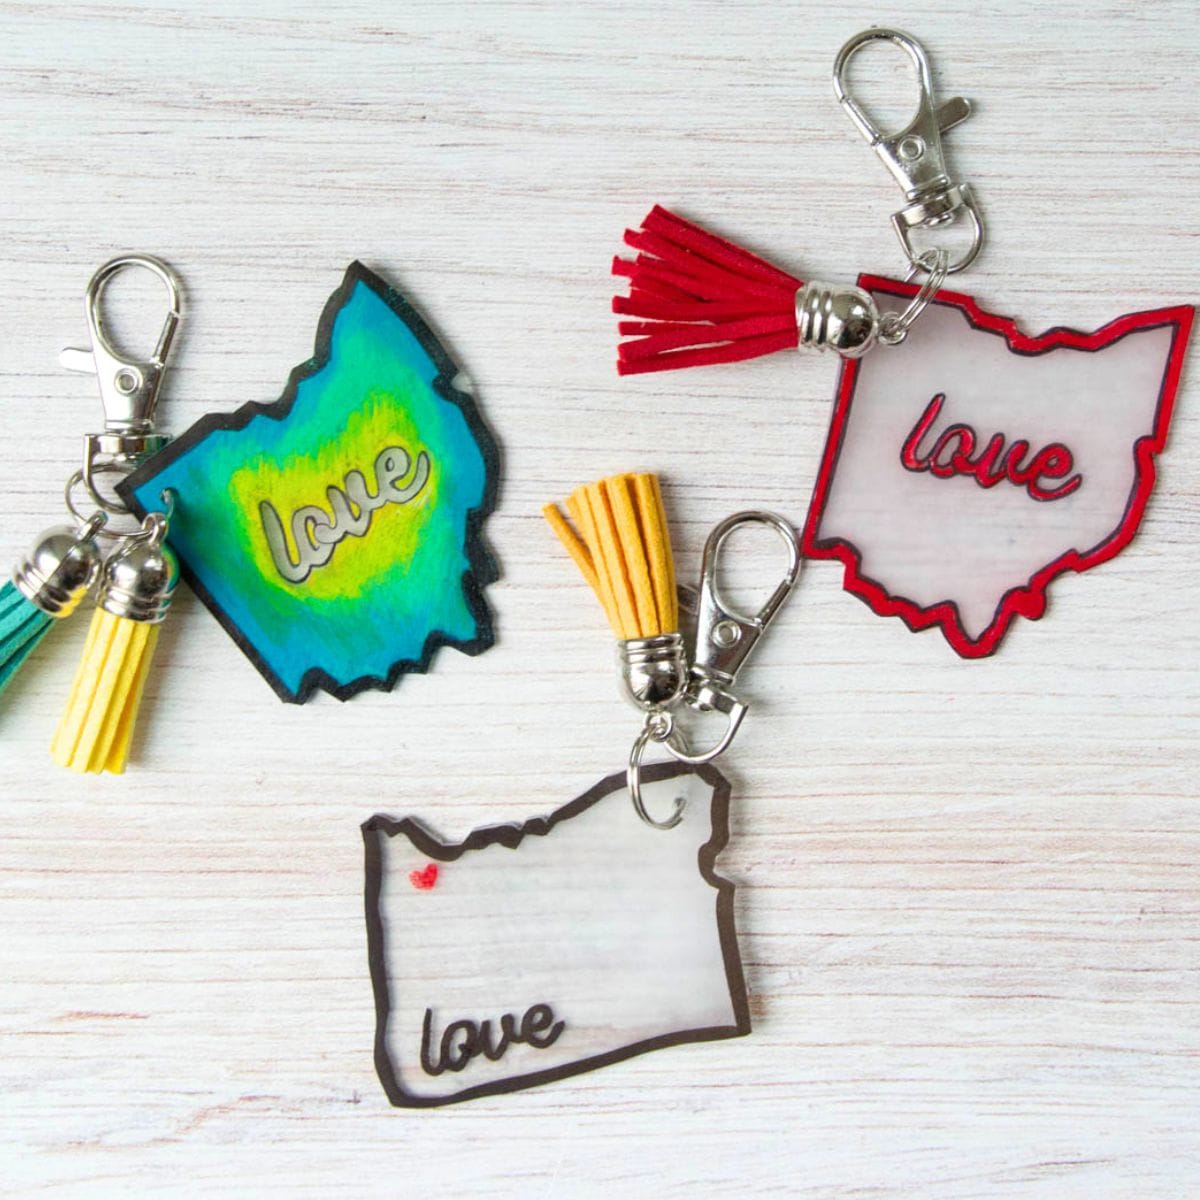
Cool DIY State Keychain Craft Kids and Teens Love!
Home is where the heart is, and this easy DIY plastic keychain is fun for all ages. Use our free template to create a one-of-a-kind magnet or keychain to show your State pride.
Why You Will Love This Art Idea
QUICK TAKE! We found the best temperature to cook plastic shrink film is 325°F for 1-3 minutes. Baking time may vary.
Supplies You’ll Need
Disclosure: This post may contain affiliate links when clicked, we may earn a small commission at no additional cost to you. Read our full privacy policy.
*Notes About Supplies
- Any colored pencil will work on the rough side, but Prismas will give you the brightest colors. These are a more budget-friendly option that also works well!
- If you are making a pin or magnet, you will want to use frosted or bright white shrink plastic.
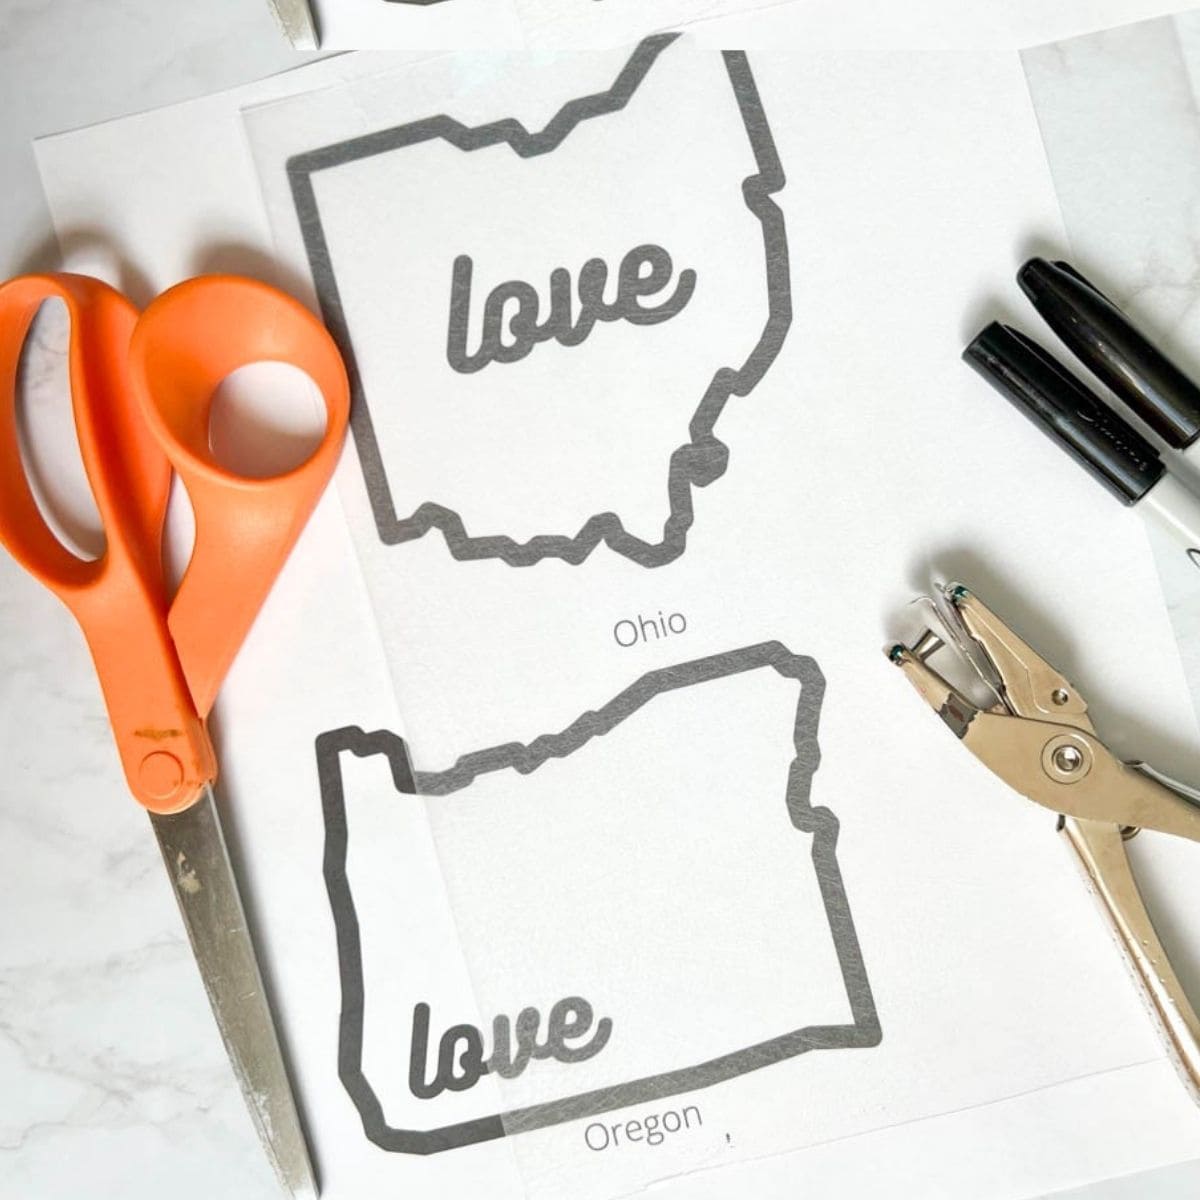
Using Our Free Template
If you would like to change the size, you could adjust your printer settings to scale it differently. We also recommend printing only the page you need, not all the pages (no need to waste ink). Only print all the templates if you are making all 50 states! Get access to the template when you sign up!
Shrinky Dink Instructions
BEFORE YOU BEGIN – Preheat your oven to 325°F and print your state template.
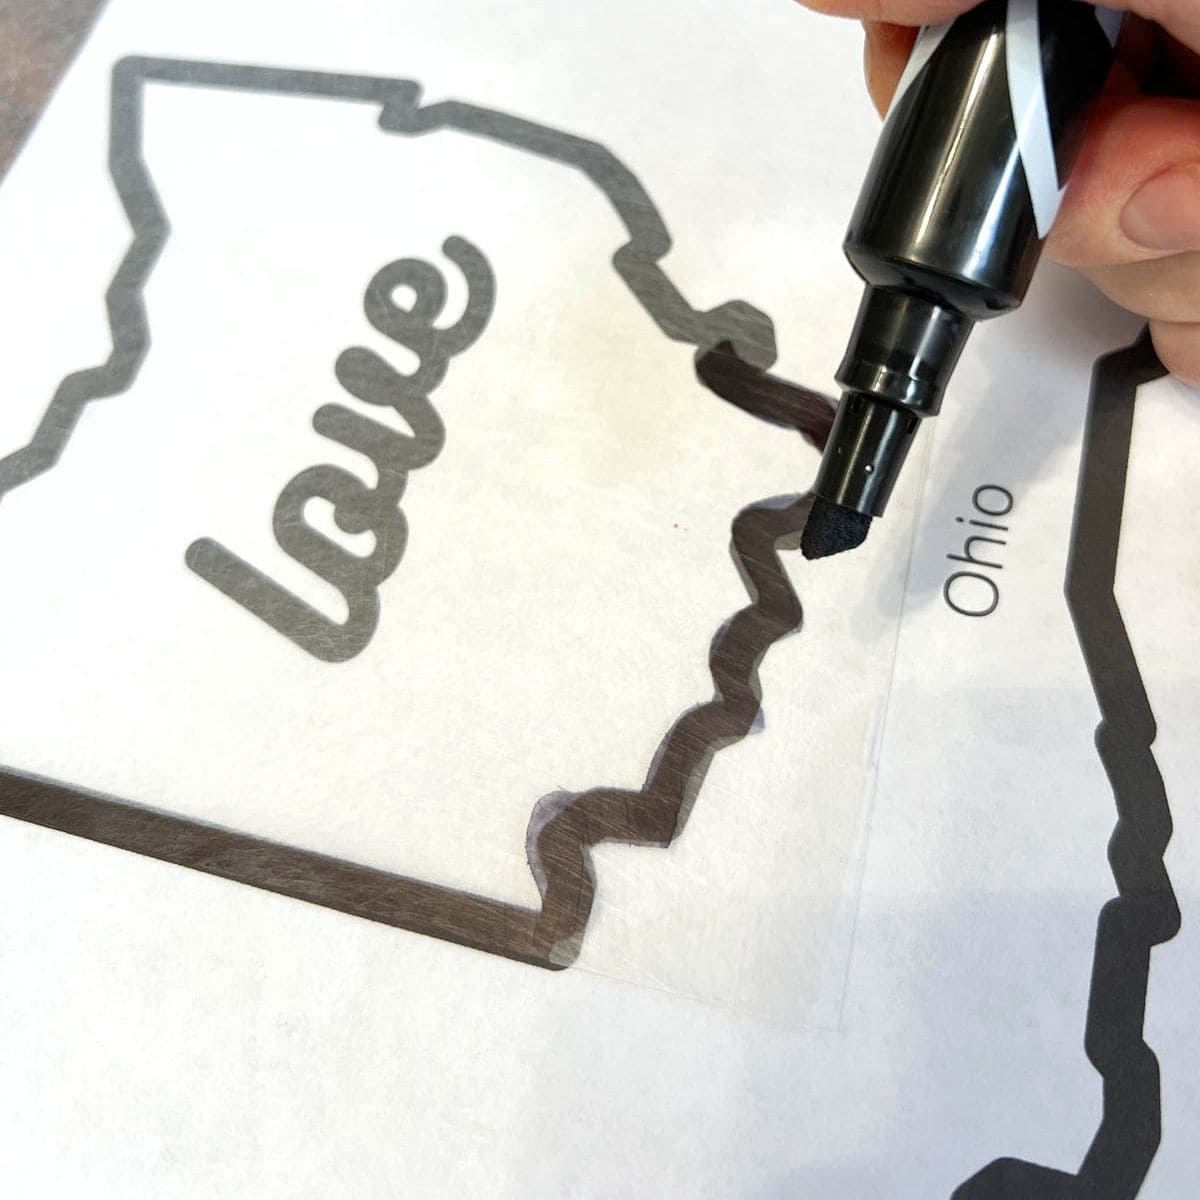
Step 1: Trace Your Design
Line up the shrink film over your template and tape it down so it does not move. Trace your design with a permanent marker.

Step 2: Add Color
Use colored pencils on the rough side of the film. Permanent markers can be used on either side.
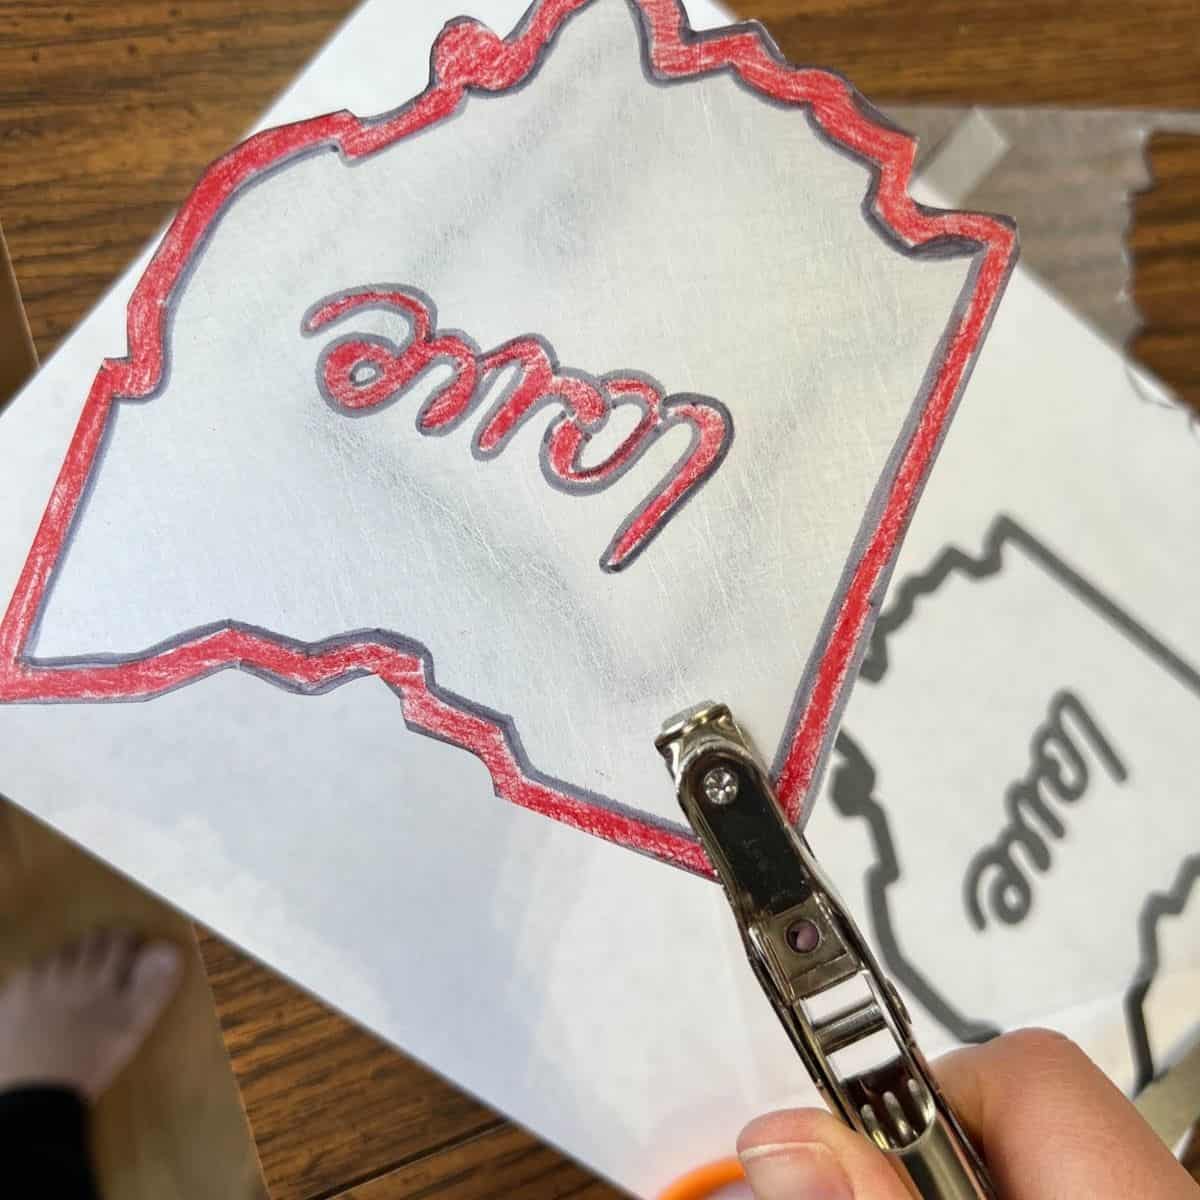
Step 3: Cut Out The Shape and Punch A Hole
Carefully cut out your design. You will not be able to cut the plastic after it has been baked. If you making a keychain or ornament, use a hole punch as well.
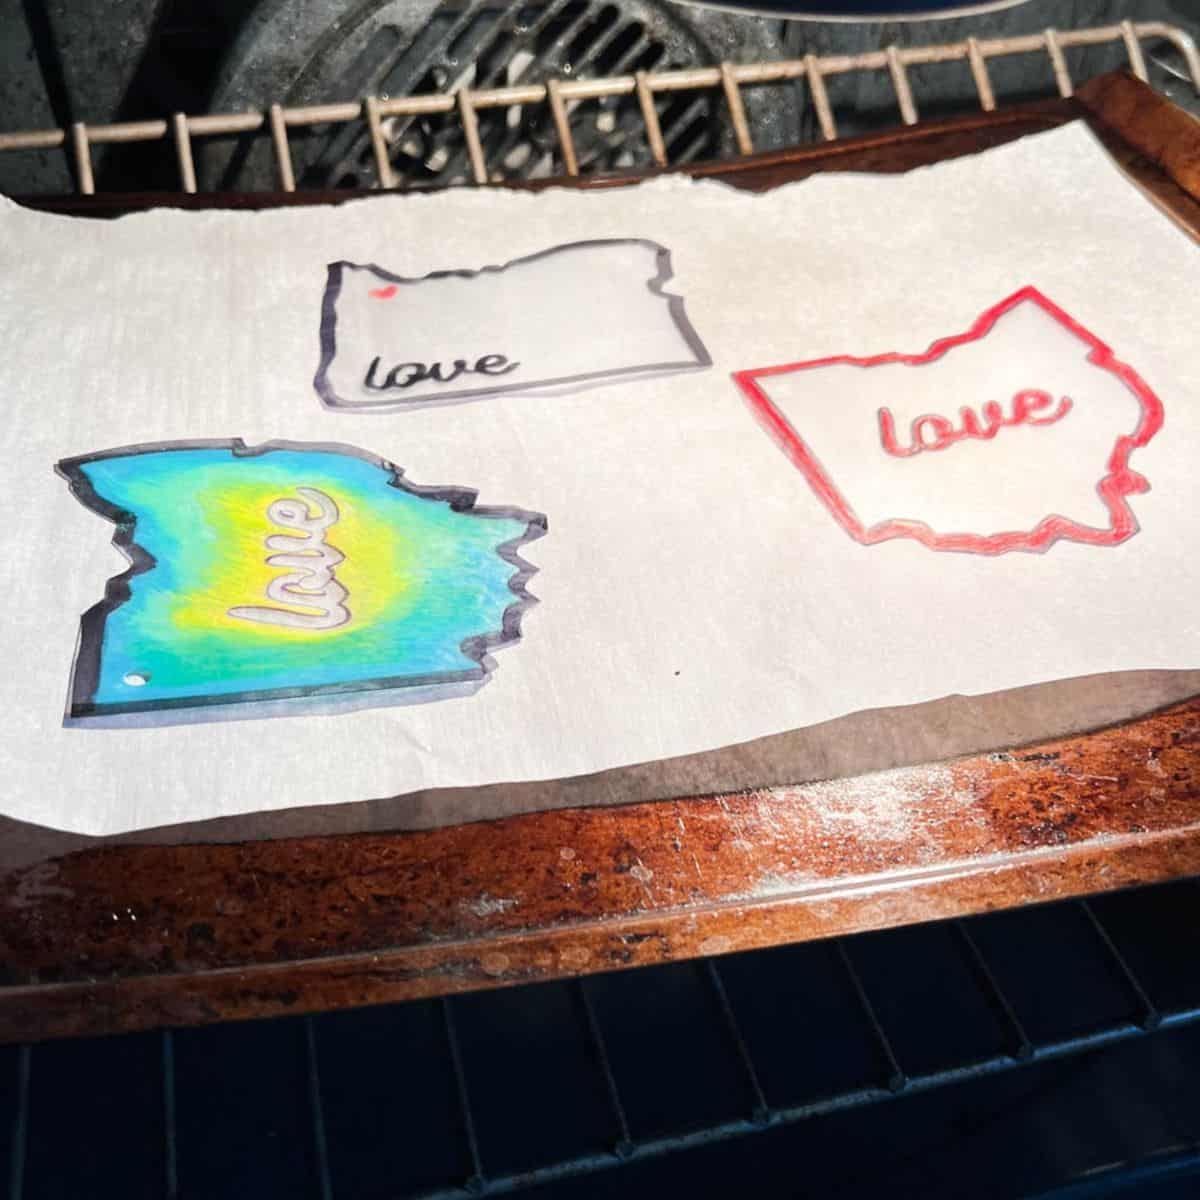
Step 4: Place On Baking Sheet and Bake
Line a cookie sheet with parchment paper and place your designs on top. Bake at 325°F for 1–3 minutes. Watch your project as it shrinks, twists, and then flattens back out.
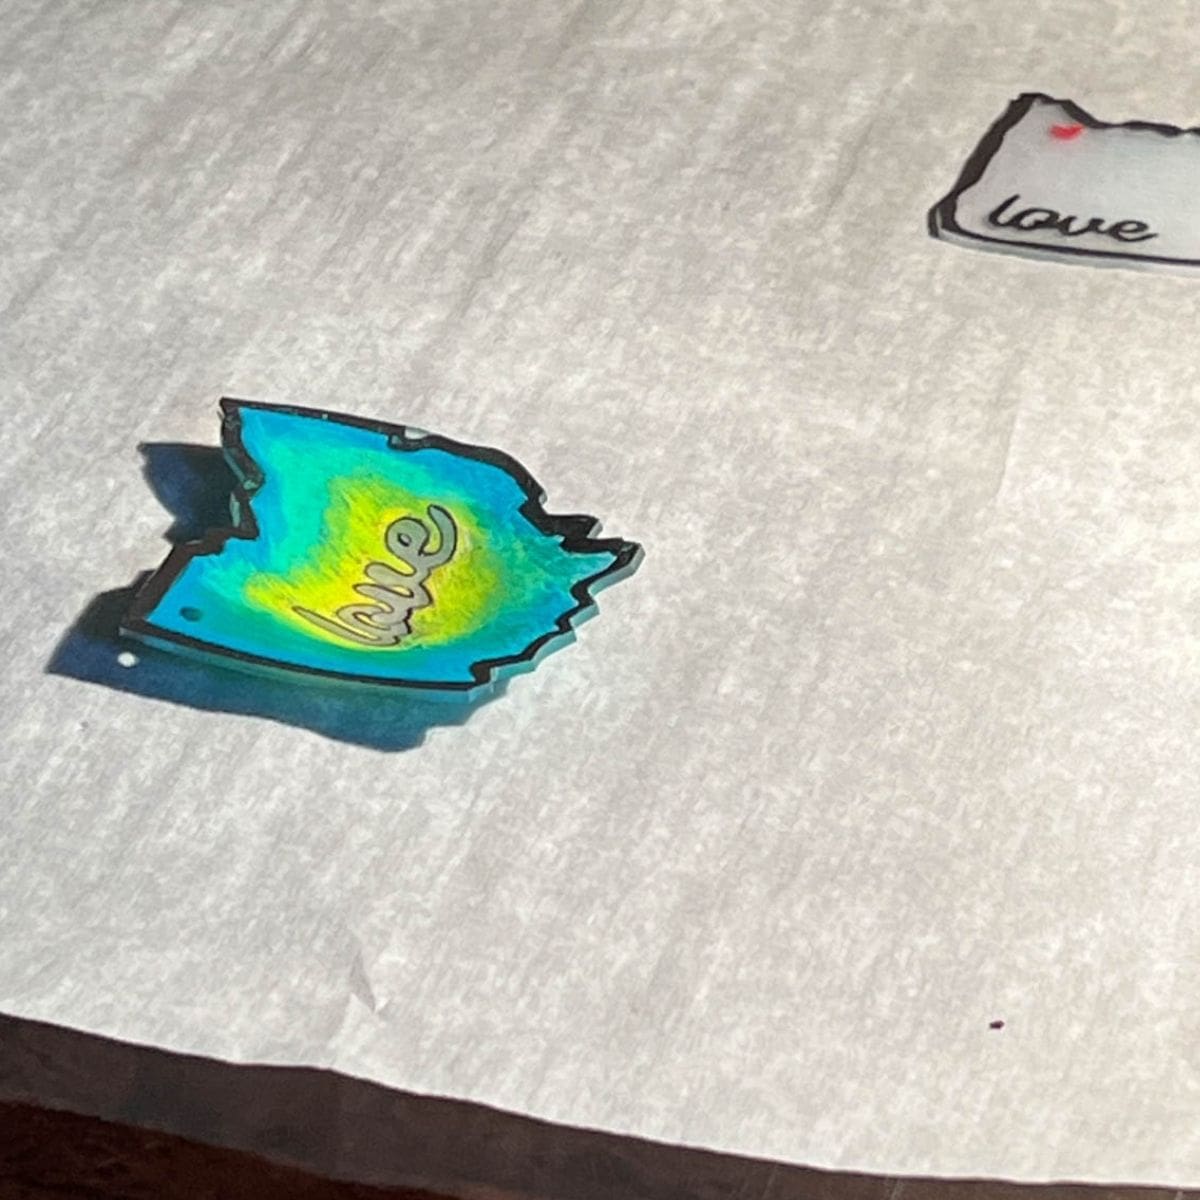
Step 5: Watch Carefully & Remove
Remove from the oven when Shrinky Dink plastic has been laying flat for 30 seconds. Let your Shrinky Dinks cool completely.
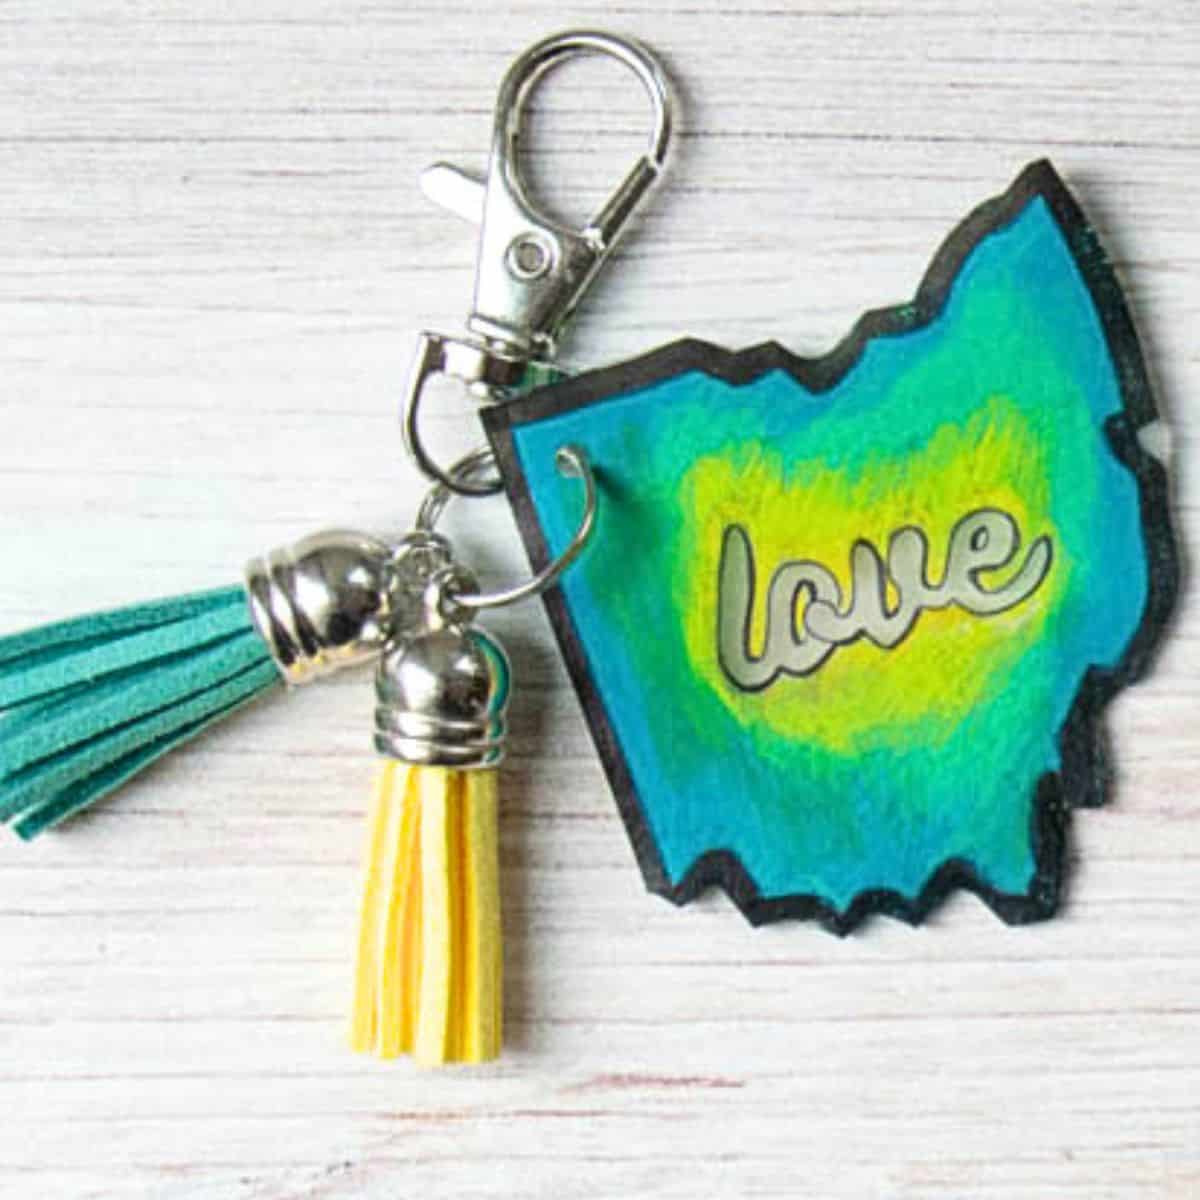
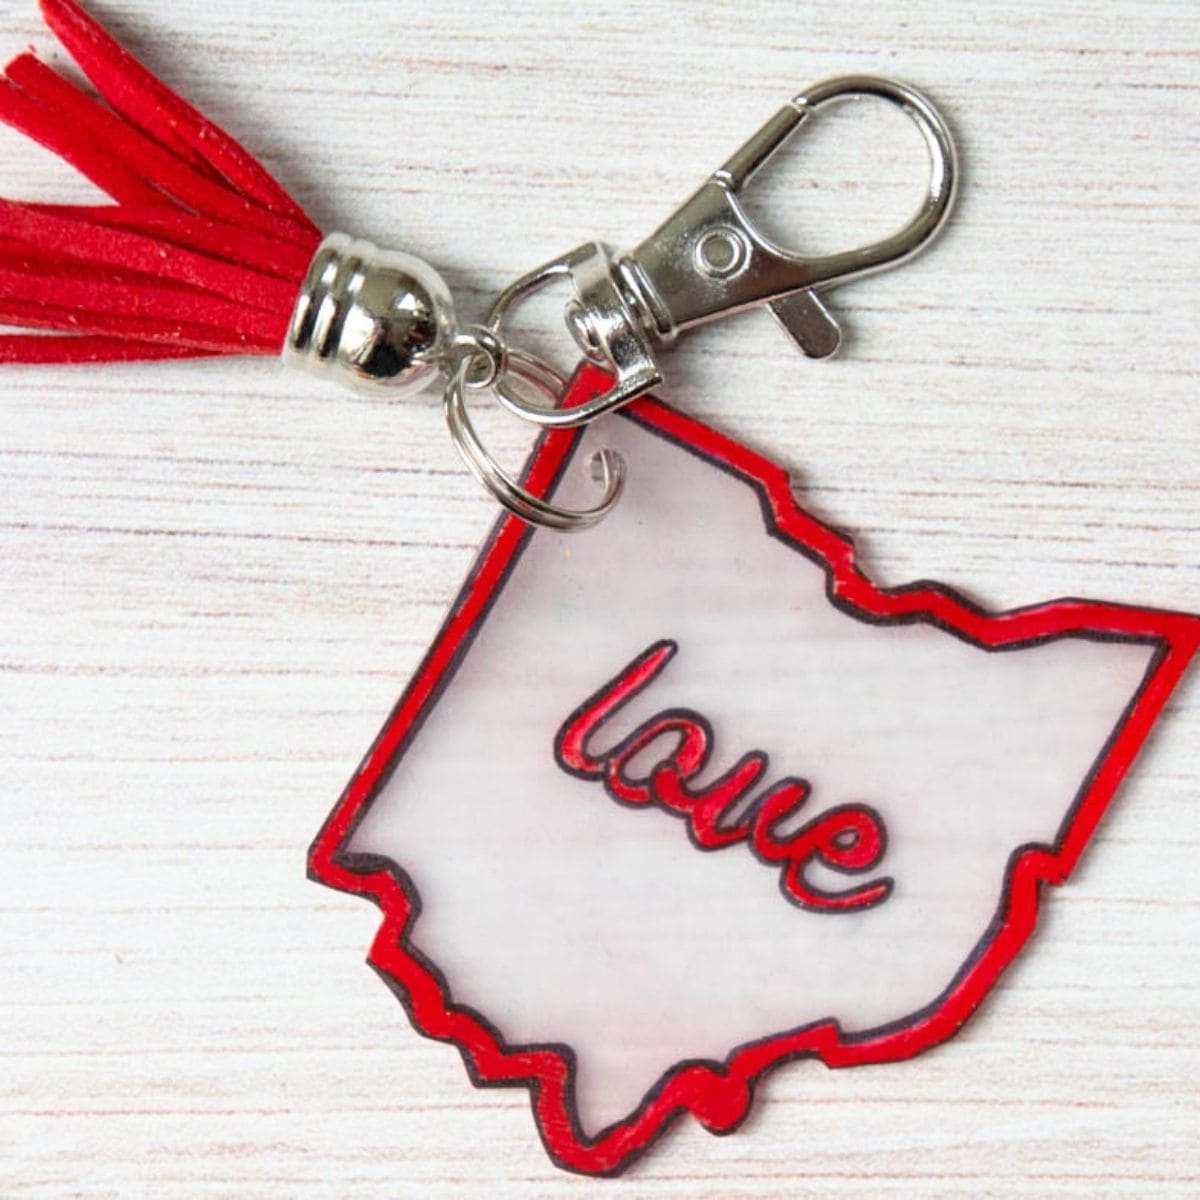
Step 6: Add Accessories
Attach a keychain, magnet, ribbon or tassel to finish your project.
Tips For Making Shrinky Dink Crafts
- TWISTING AND CURLING – do not worry if the plastic twists and turns; this is completely normal, and it will flatten back out
- IF IT STICKS – If pieces touch, carefully use a spatula or tweezers to separate them, then return to the oven until flat
- HEAT SOURCE – Use an oven or toaster oven for best results, but a heat gun or blow dryer can also work.
- ADD A CLEAR COAT – some crafters use a clear craft resin or Mod Podge to protect their project.
Follow us on Pinterest, YouTube & Facebook for more free art and craft ideas!
Art Project FAQs
Our Favorite
Related Crafts
I love it when a simple craft can combine STEAM, geography, and creativity. These Shrinky Dink state keychains are always a hit. Kids will have so much fun watching their designs shrink, and they will love turning them into something they can actually use.
Have fun trying different colors and designs to make each one unique.
Do you like this art project? Please give us a 5-STAR review below ⭐️⭐️⭐️⭐️⭐️ and have fun being creative with your family.
Shrinky Dink State Keychains for Kids

Equipment
- Scissors
- Hole Punch
- Parchment Paper
- Cookie Sheet
Supplies
- Shrinky Dink film
- State template printed from this page!
- Permanent markers
- Keychain or Magnet
- Colored pencils optional
- Tassels optional
Instructions
- Preheat your oven to 325°F and print your template.
- Trace your design by placing the shrink film over the template and taping it down so it does not move, then trace with a permanent marker.
- Add color using colored pencils on the rough side or markers on either side to decorate your design.
- Cut out your shape carefully since you will not be able to cut the plastic after baking.
- Punch a hole near the top if you plan to make a keychain or ornament.
- Place your designs on a parchment-lined cookie sheet.
- Bake at 325°F for 1–3 minutes and watch as the plastic shrinks, curls, and then flattens.
- Let your shrinky dinks cool completely after removing them from the oven.
- Add accessories like a keychain, magnet, or tassel to finish your project.
- Optional: add a thin coat of Mod Podge or clear sealant for extra protection.
Notes
- CURLING IS NORMAL – the plastic will twist and flatten as it bakes
- SIZE CHANGE – designs shrink to about 1/3 of the original size
- BEST RESULTS – Use an oven or toaster oven for even heating
- COLOR TIP – colored pencils work best on the rough side