Easy Shaving Cream Pumpkin Art

Creating a cool marble paint technique is fun for kids of all ages! The best part is you can do this in minutes for a fun Fall afternoon art activity.
Why You Will Love This Art Idea
READ MORE – We also talk about how to create a shaving cream painting on paper using acrylic paint here.
Supplies you’ll need
Disclosure: We only recommend products we would use ourselves and all opinions expressed are our own. This post may contain affiliate links when clicked, we may earn a small commission at no additional cost to you. Read our full privacy policy.
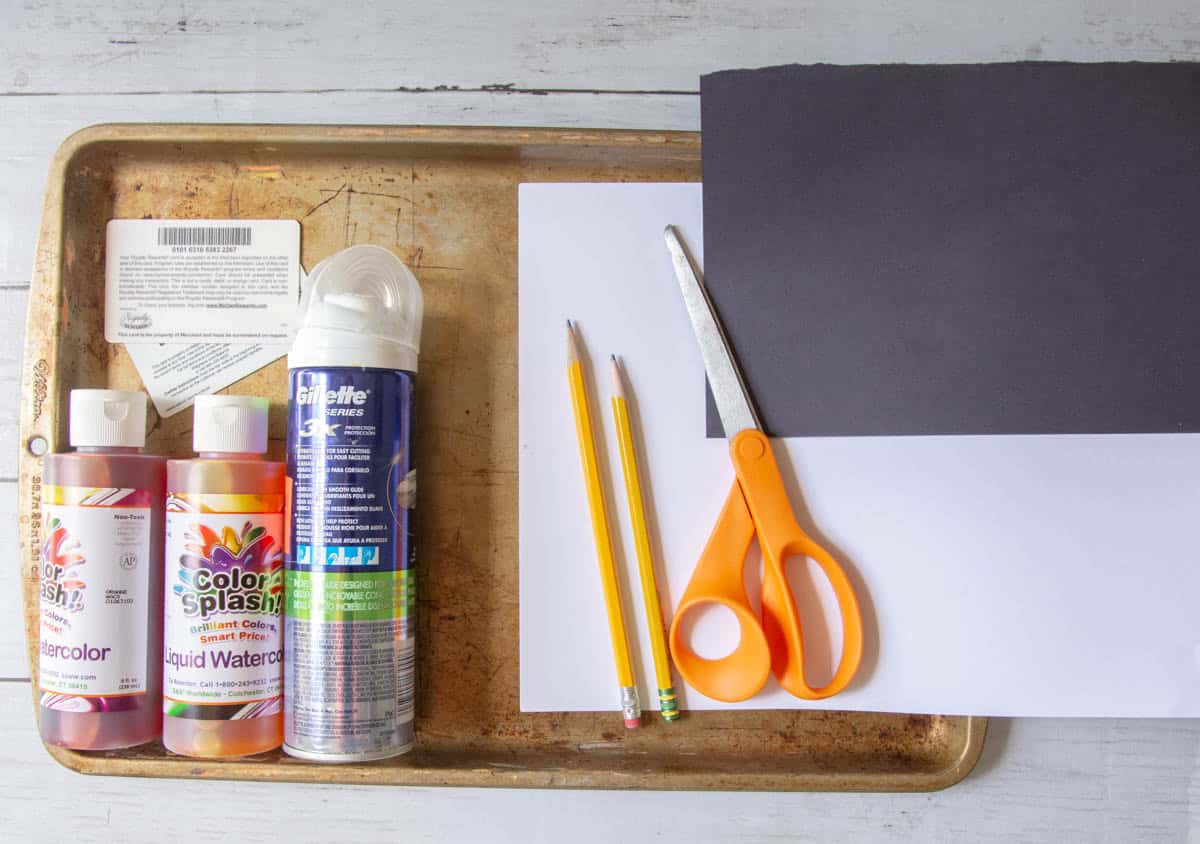
Notes About Supplies
- You can substitute food coloring or acrylic paint when doing marbling.
- A scraper can be a squeegee, a piece of cardboard, or an old credit/gift card.
- Copy paper will be too flimsy.
- Working in an old cookie tray will help with clean-up.
How To Make Shaving Cream Fall Art
BEFORE YOU BEGIN – Set up a work area with extra paper down for easy clean-up.
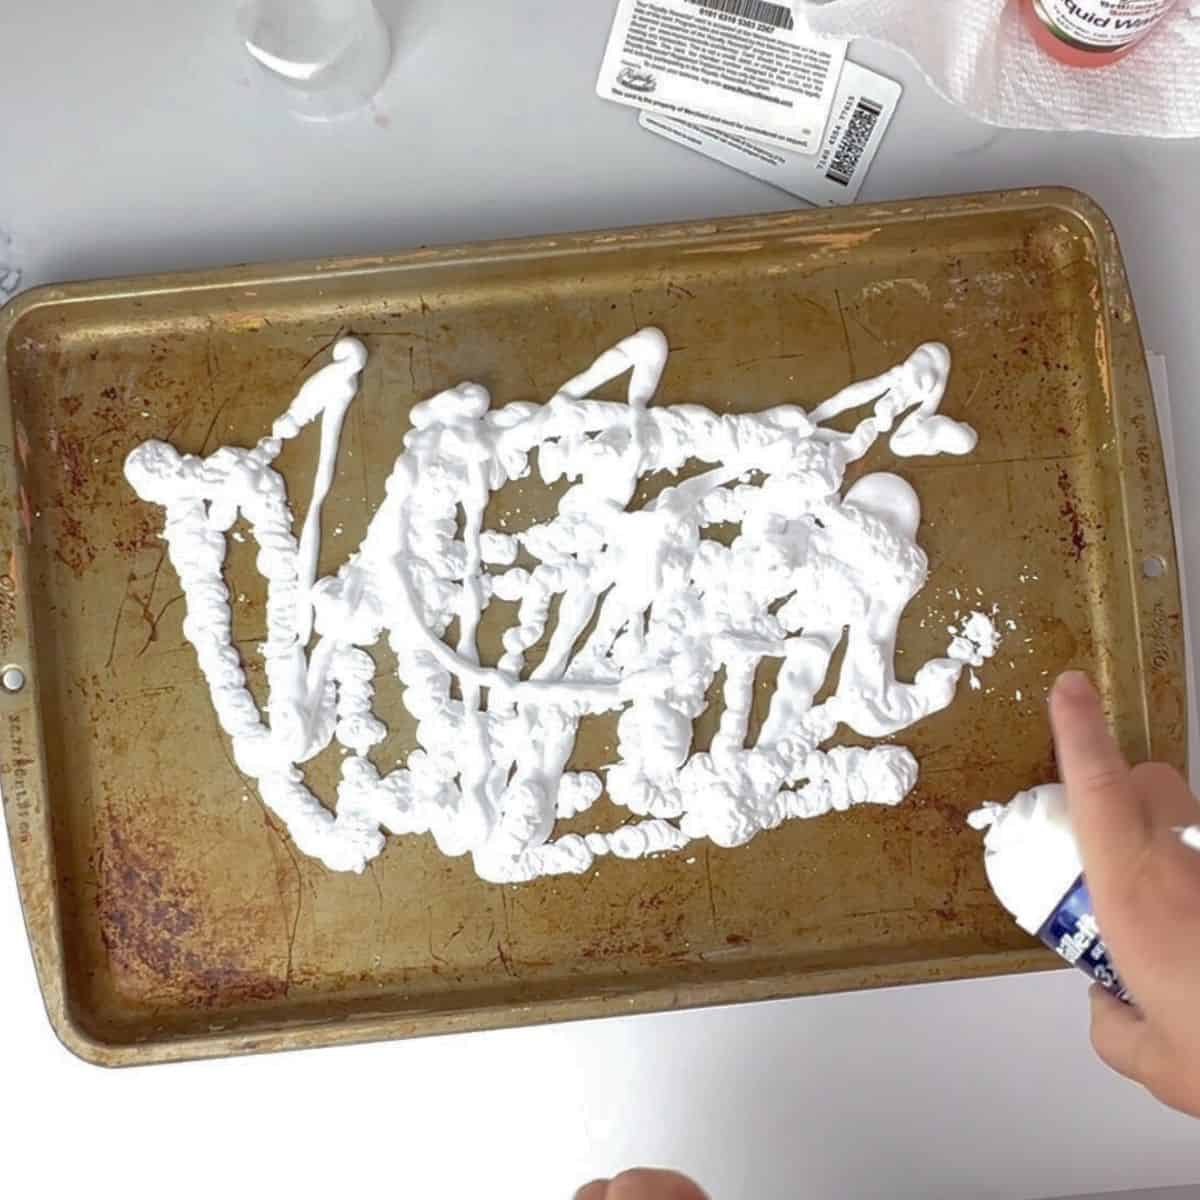
Step 1: Spread Shaving Cream
Add shaving cream a tray or baking sheet that is bigger than the paper you are printing on. You need a thin layer of shaving cream at the bottom before you begin. You can use your scraper or fingers.
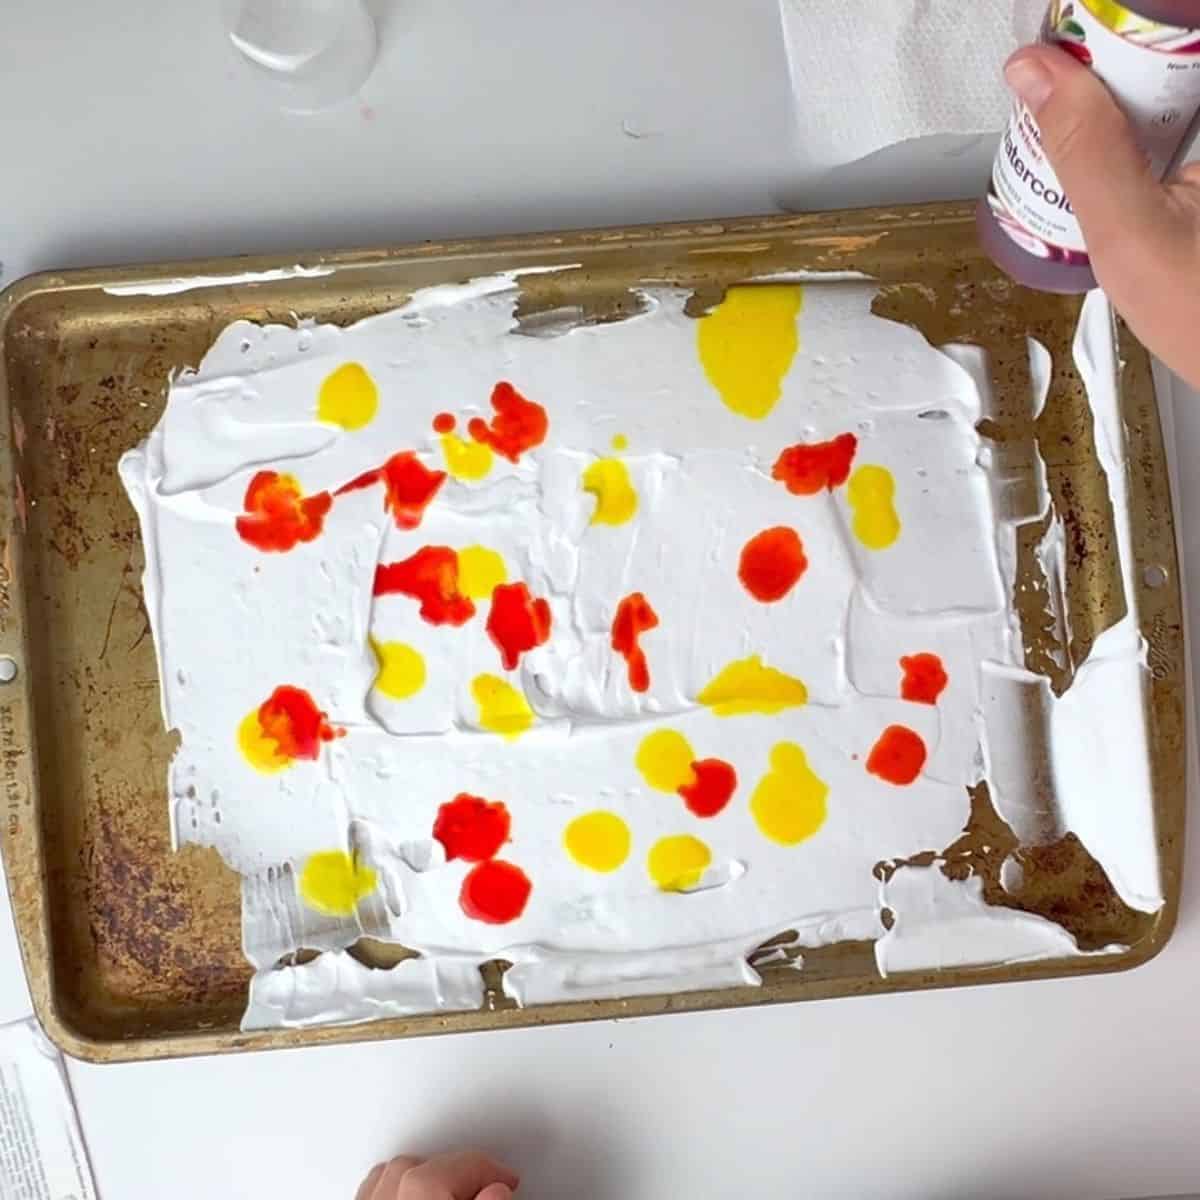
Step 2: Add Yellow and Orange
Add drops of liquid watercolor or food coloring to the shaving cream. For these particular prints, we also experimented with adding black to a few prints.
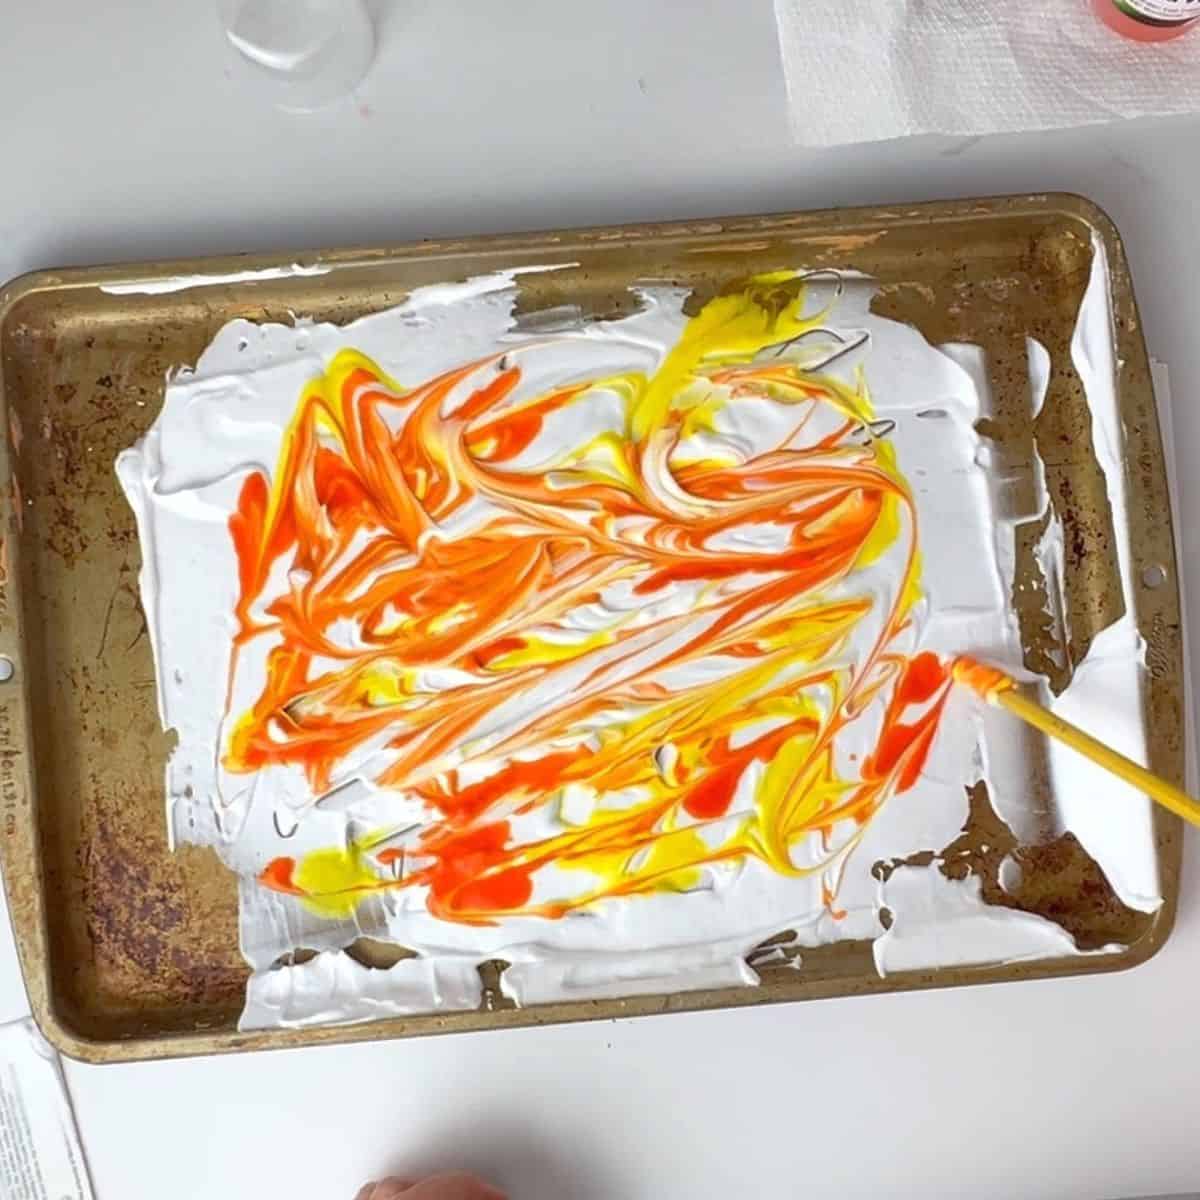
Step 3: Mix The Colors
Use an old pencil to swirl the shaving cream and paint around until you like what it looks like.
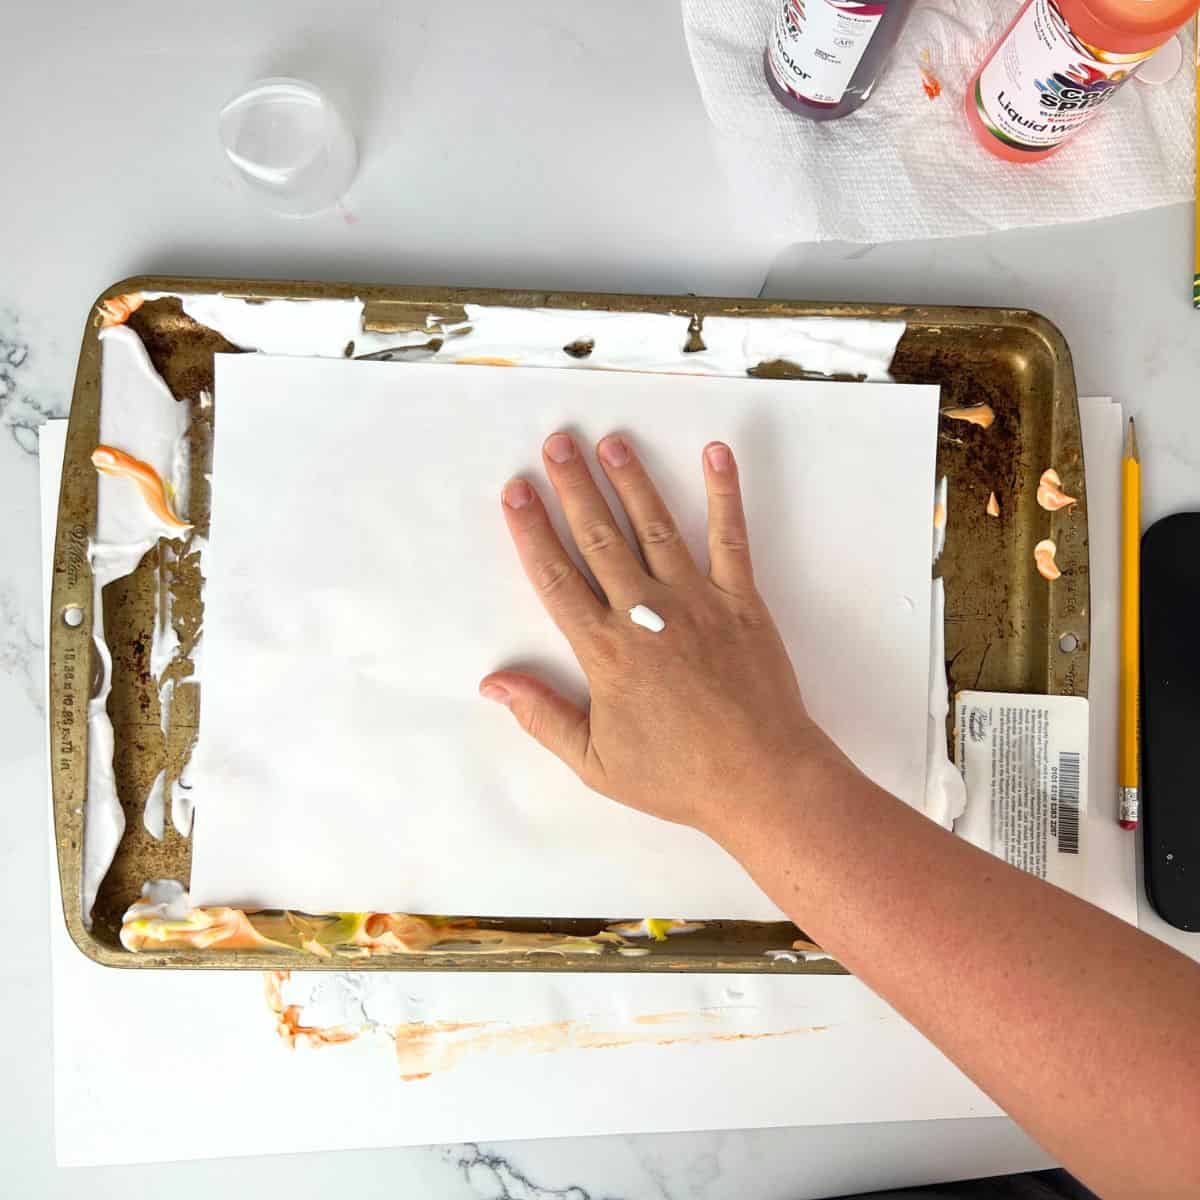
Step 4: Print The Paper
After you have swirled, take your paper and press it down lightly and rub the back of the paper.
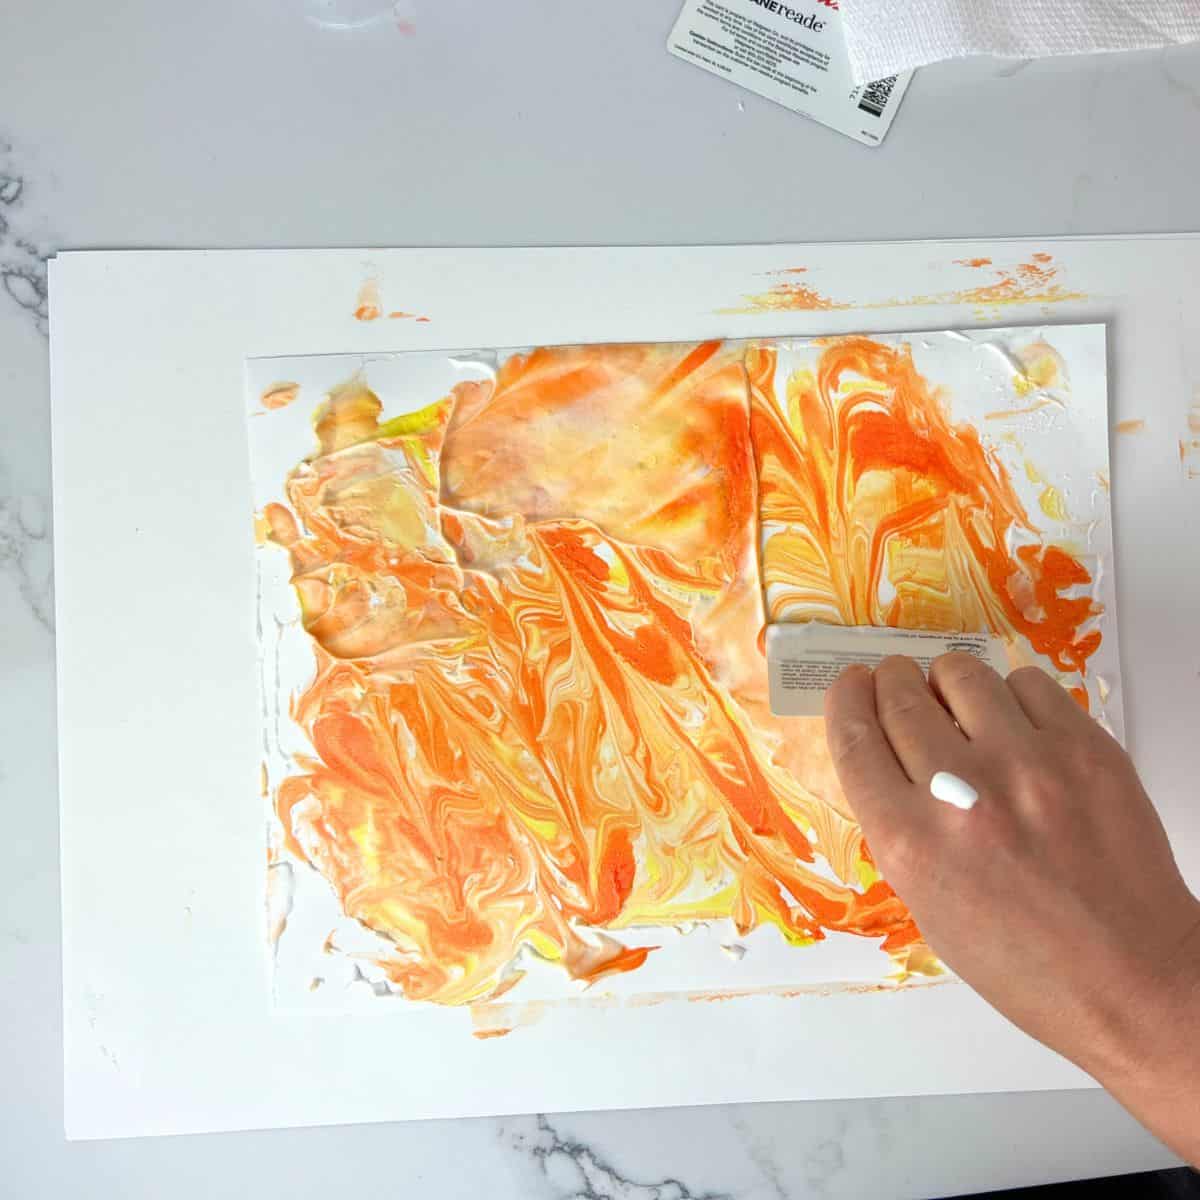
Step 5: Scrape Off Excess Shaving Cream
Using a scraper such as an old credit card or piece of cardboard to lightly take off excess shaving cream to reveal the awesome shaving cream art.
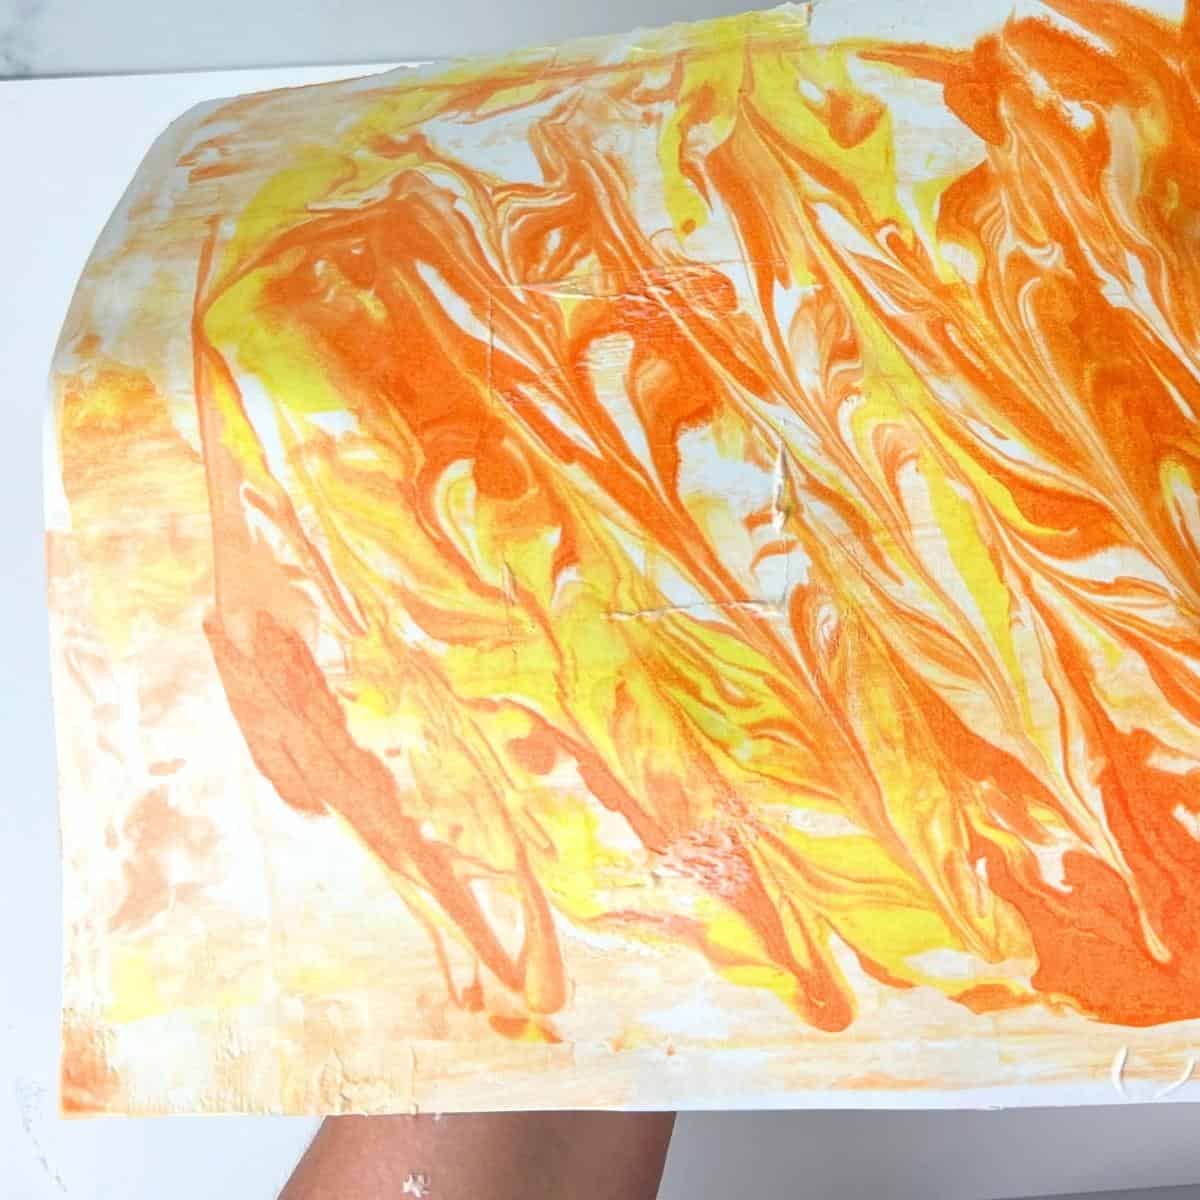
Step 6: Let Dry
This paper will dry relatively quickly.

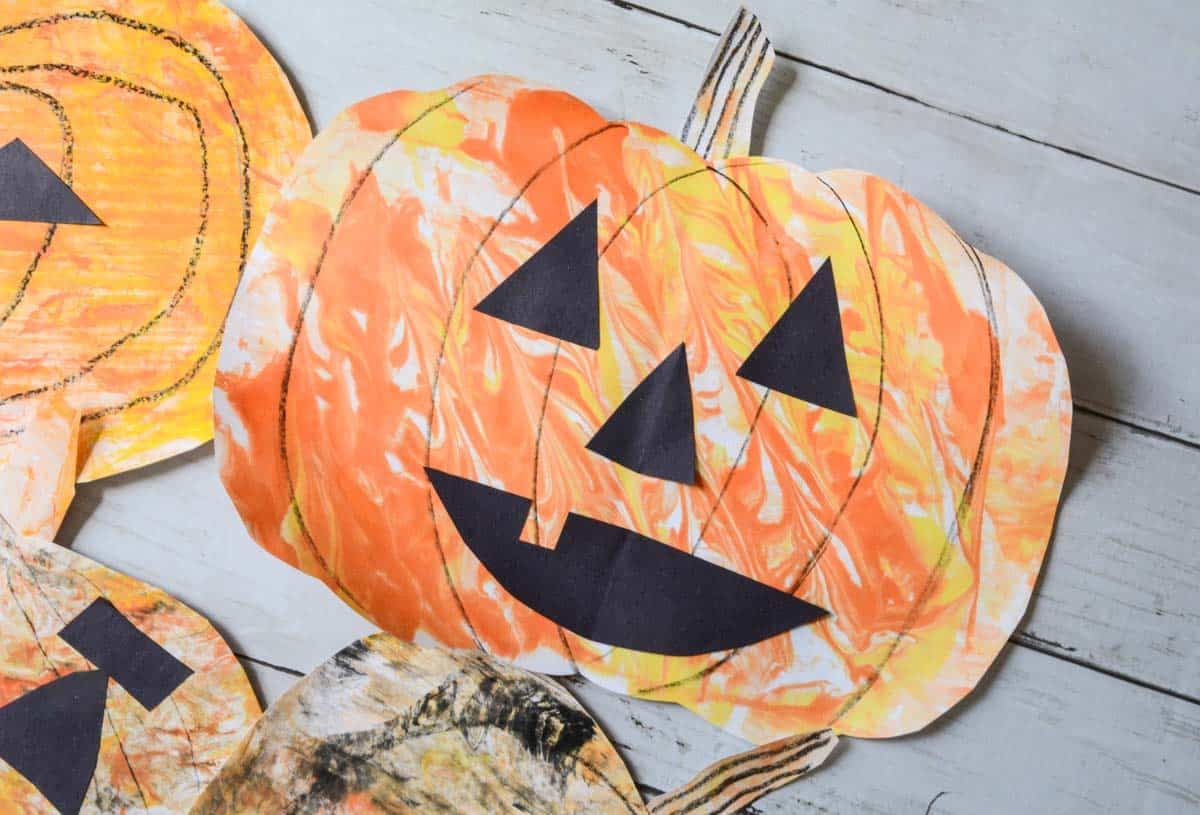
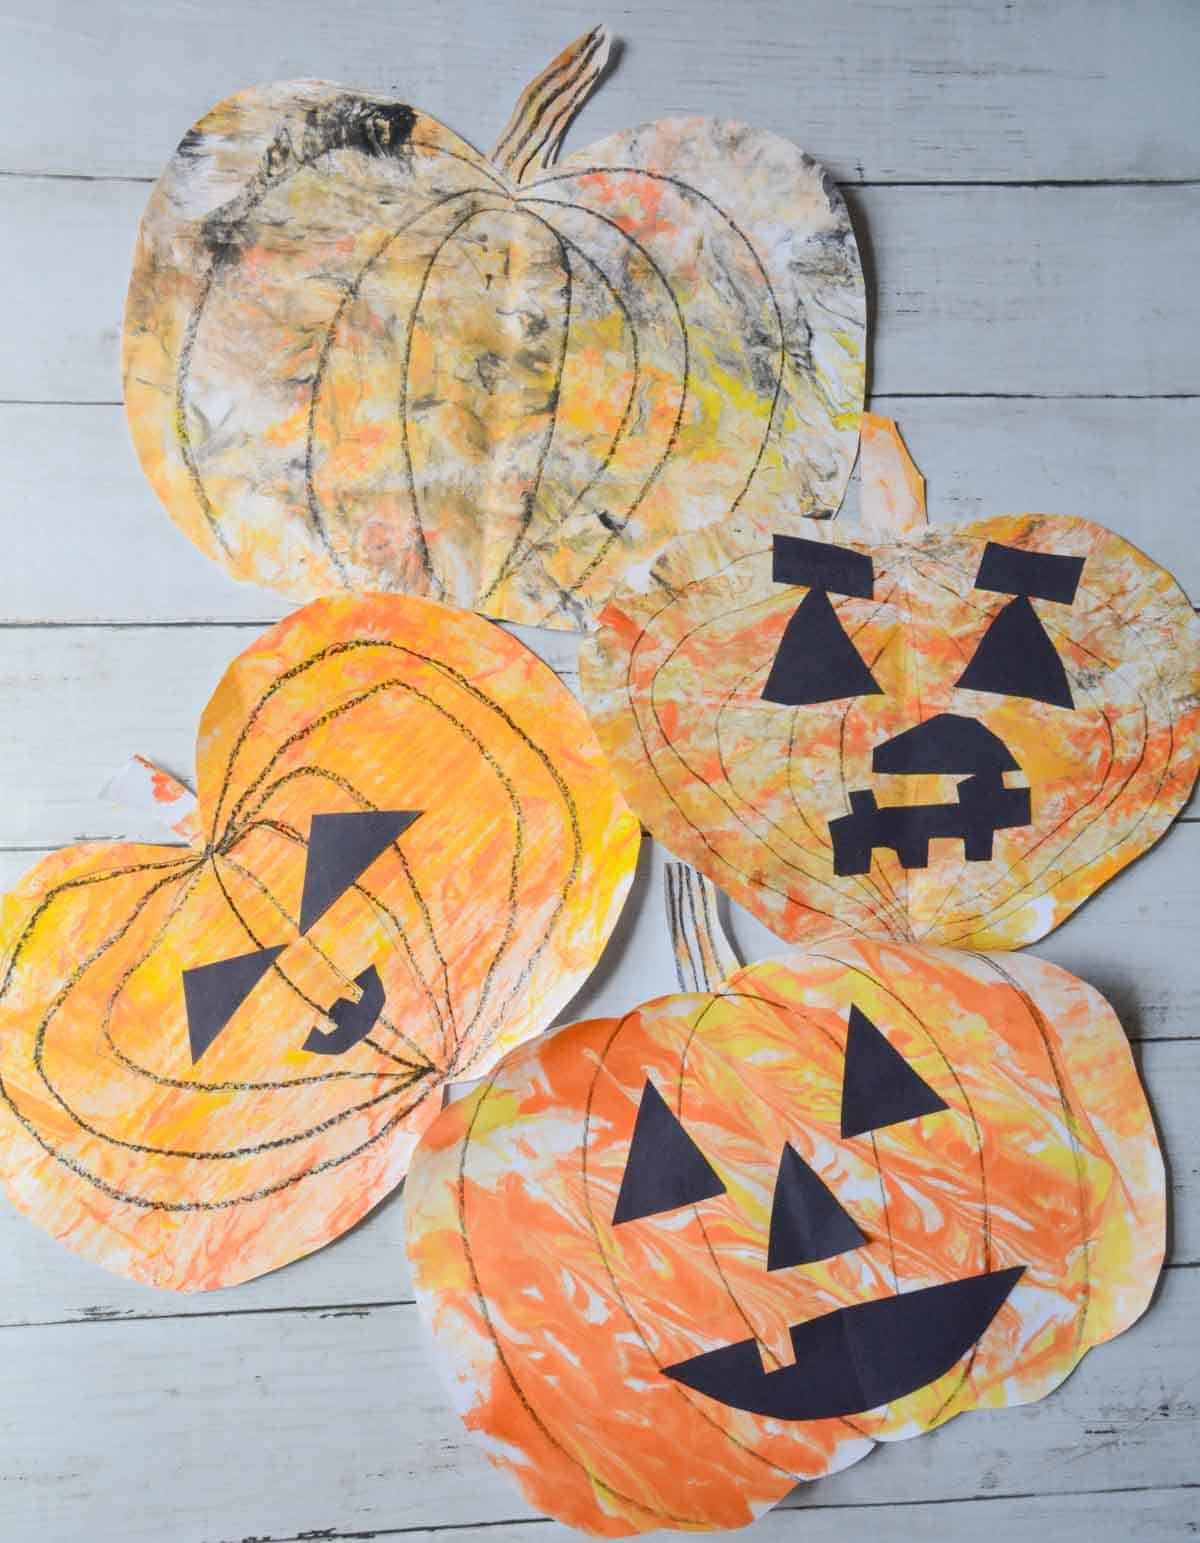
Step 7: Cut Out Pumpkin
Fold the paper in half and sketch a pumpkin. Cut it out and draw extra details. Here are 4 easy pumpkin drawing tutorials.
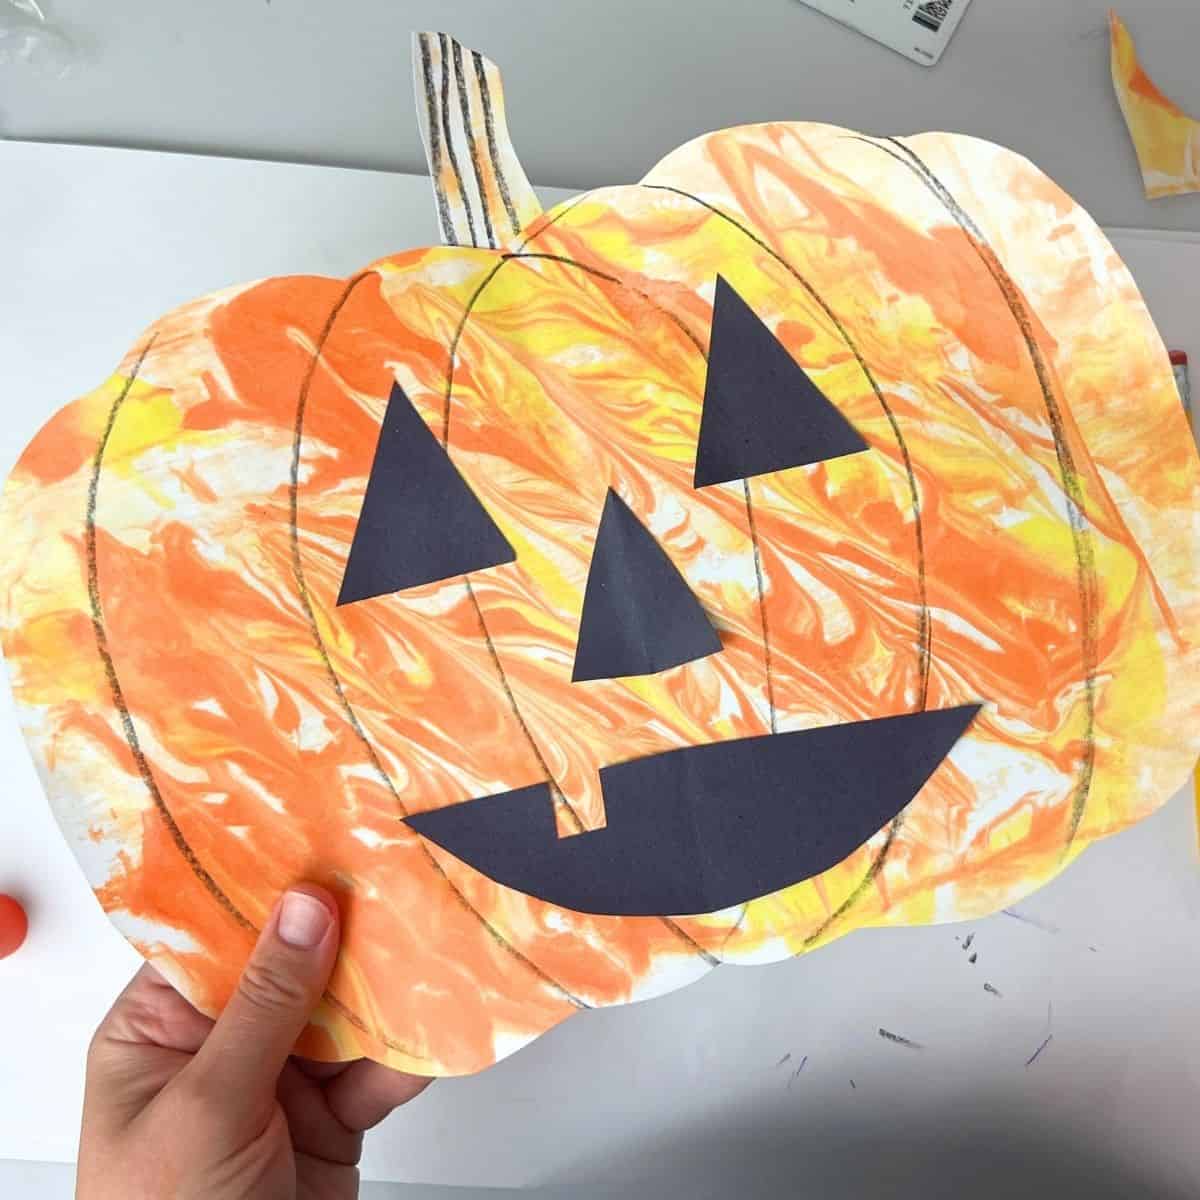
Optional Step: Create A Face
Collage a Jack-O-Latern face onto the pumpkin or leave it as is. Use leftover marbled paper for the stem.
Tips
- CAN MAKE A TEMPLATE – We like to draw unique pumpkins with kids, but you can make a simple pumpkin template if needed.
- DON’T OVERMIX – The more you swirl the shaving cream and paint, the more the paint mixes and becomes one color.
- SHAVING CREAM – don’t buy shaving cream with gel in it. Basic, plain old shaving cream is what you need.
More Fall Art Ideas
We love creating in Fall. Find your next art idea here!


Kids will love learning how to make shaving cream paper, no matter what you decide to create this Fall.