
How To Make Easy Flowers With Model Magic


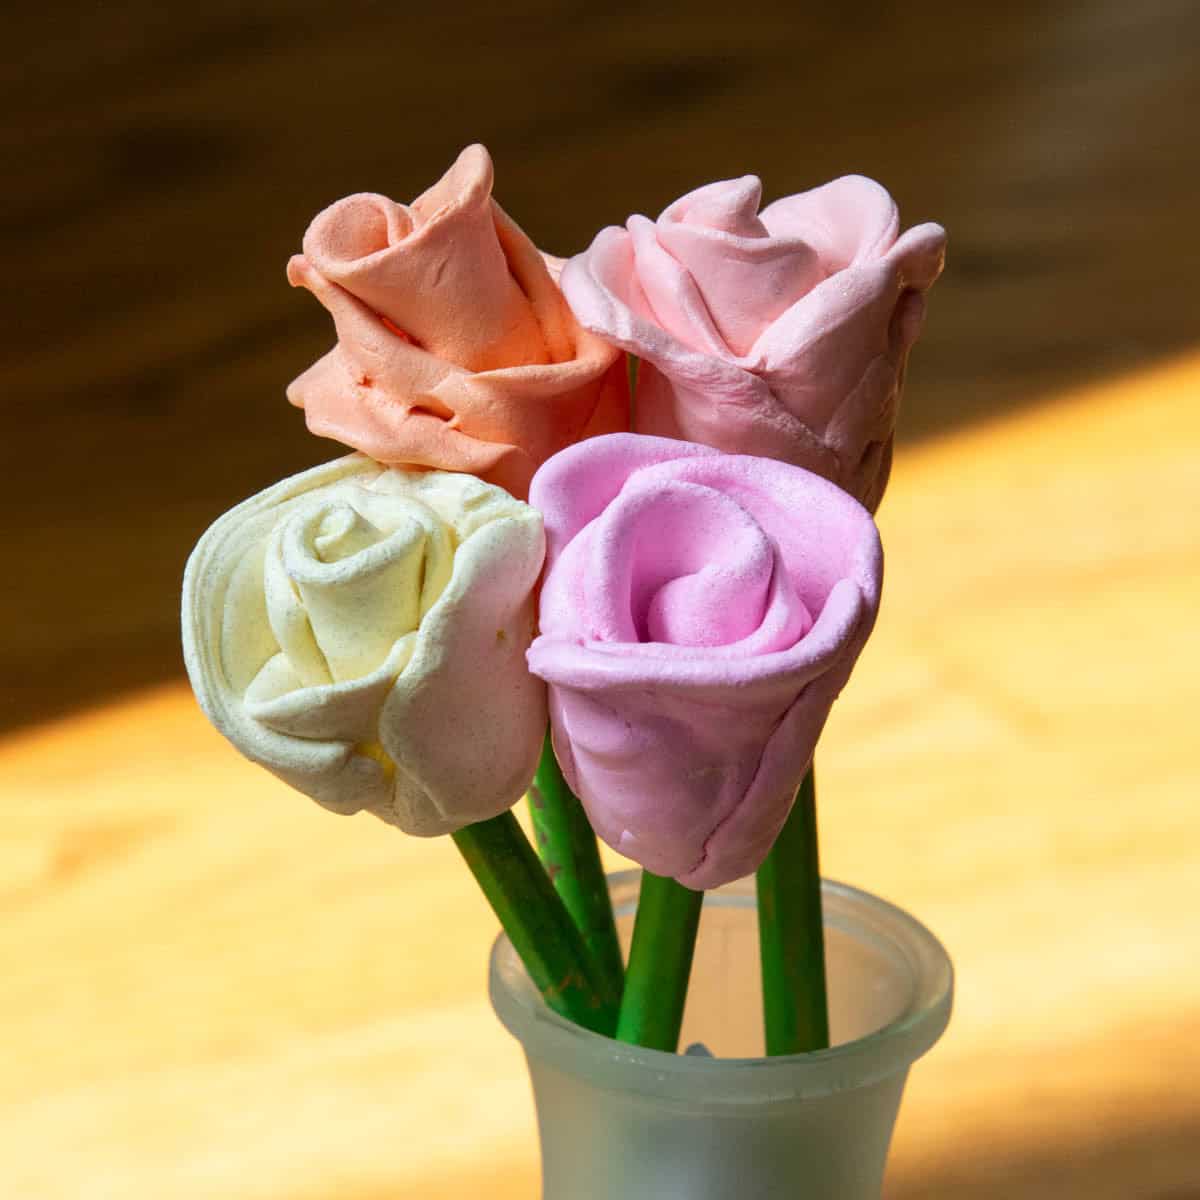
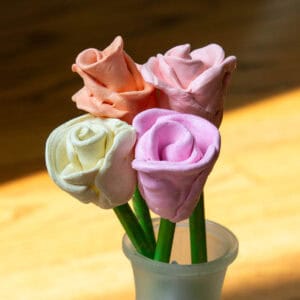
These 3D roses are so simple to make! Beginners will love sculpting and creating colorful, easy flowers. Grab your favorite sculpting material and create this easy flower craft in under 10 minutes.
This Crafty Art Idea was originally published in June 2025. This tutorial was recently updated in September 2026 with extra tips and material suggestions.
Why You Will Love This Sculpture
We love creating fun clay crafts and sculptures at home. Model Magic is such an easy material for kids to work with. These flower sculptures would also make adorable polymer clay magnets or charms.
Supplies You’ll Need
Disclosure: This post may contain affiliate links when clicked, we may earn a small commission at no additional cost to you. Read our full privacy policy.
*One 1-oz pack can make around two roses.
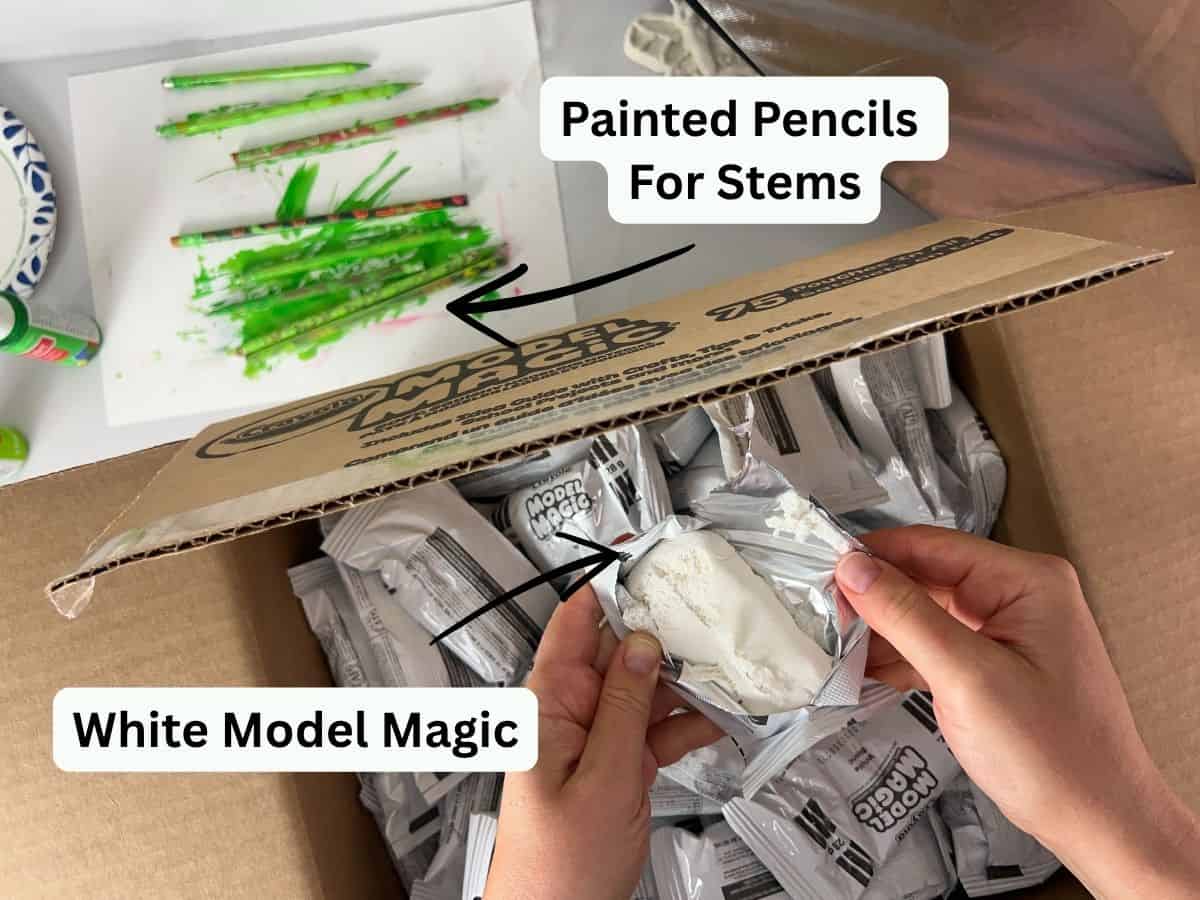
ART TEACHER TIP – You will need to decide if you are going to want to add color beforehand, paint afterward, or use already colored Model Magic. We think one of the easiest ways is to add color to white Model Magic with markers. Find more Model Magic ideas here!
How To Make Model Magic Flowers
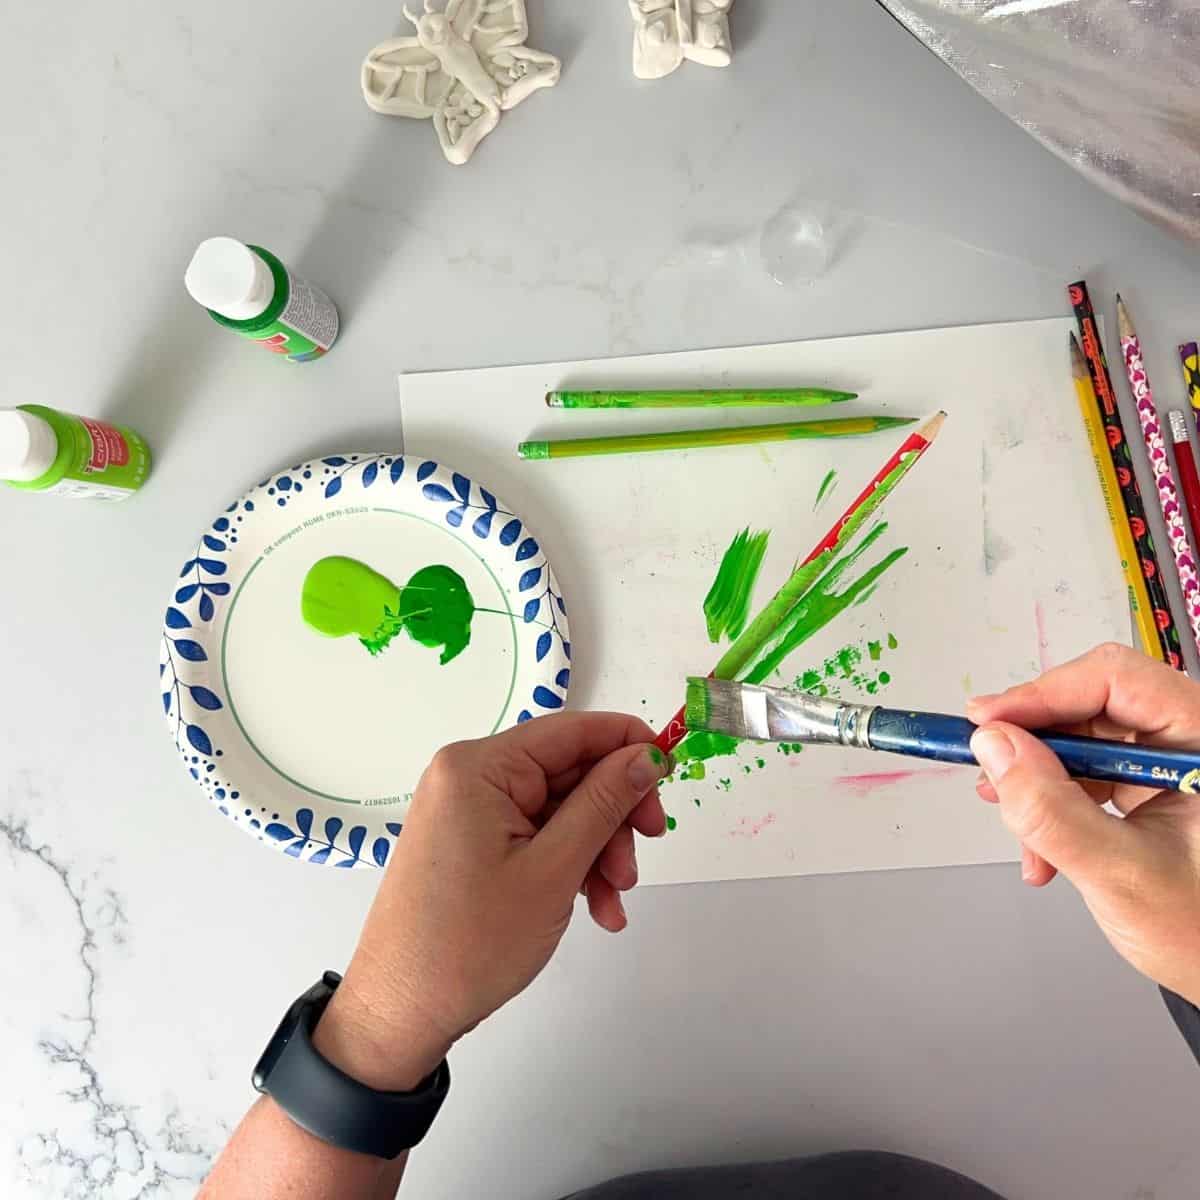
Step 1: Paint Your Stems
There are many ways to make a stem. We painted old pencils with green acrylic paint. For the best coverage, you may want to spray with a primer or use two coats of paint. Put the stems aside and let them dry.
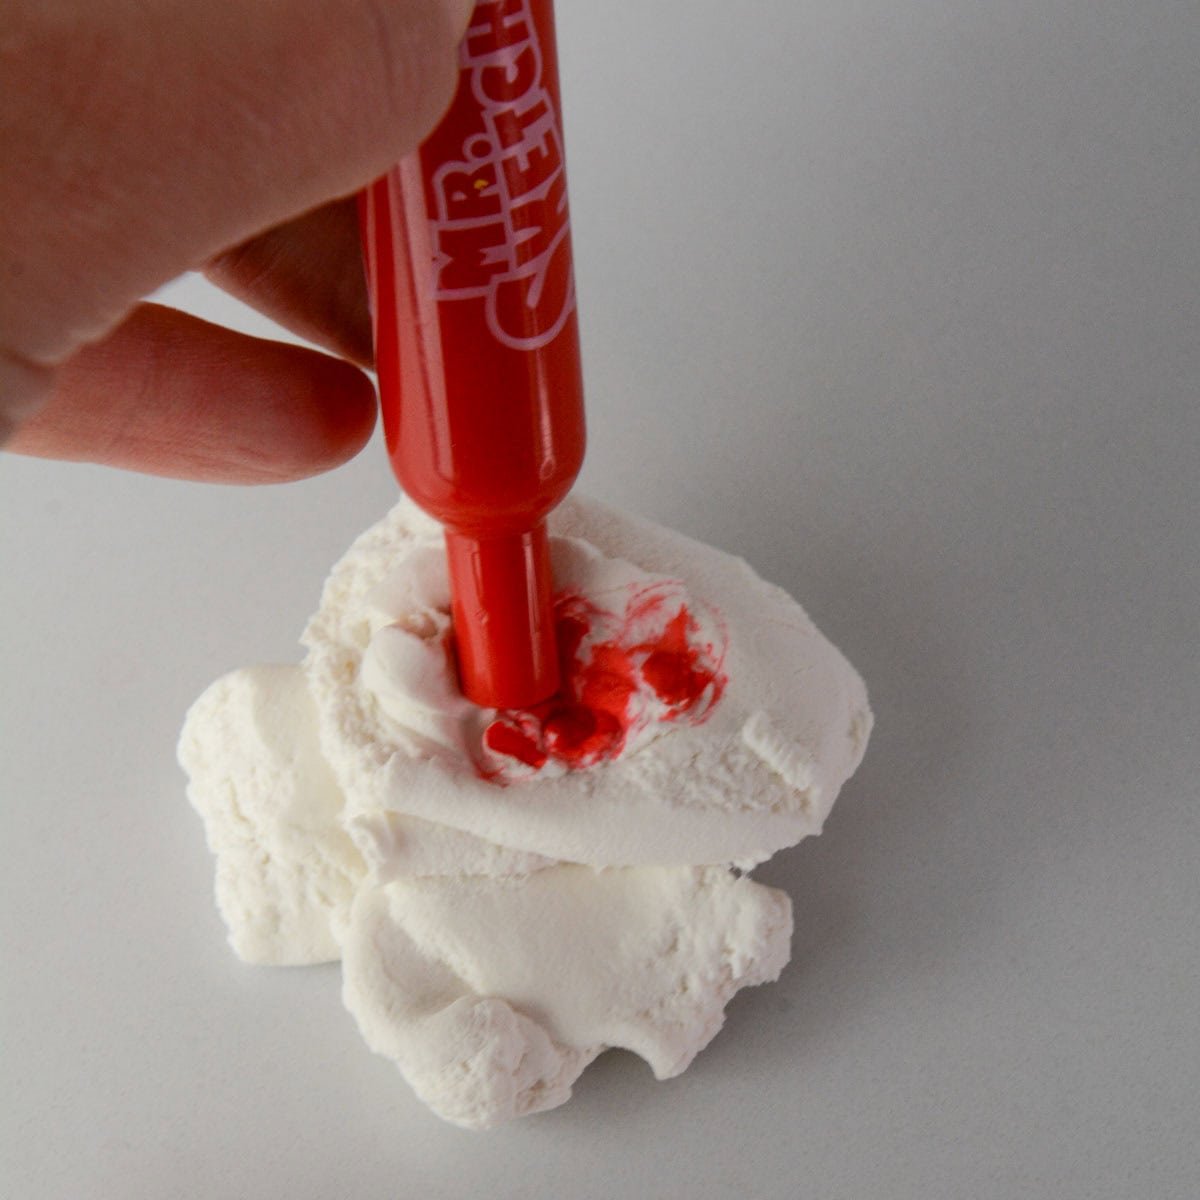
Step 2: Color The Model Magic
Dab washable markers into the Model Magic and mix into it with your hands. Or paint them after they dry.
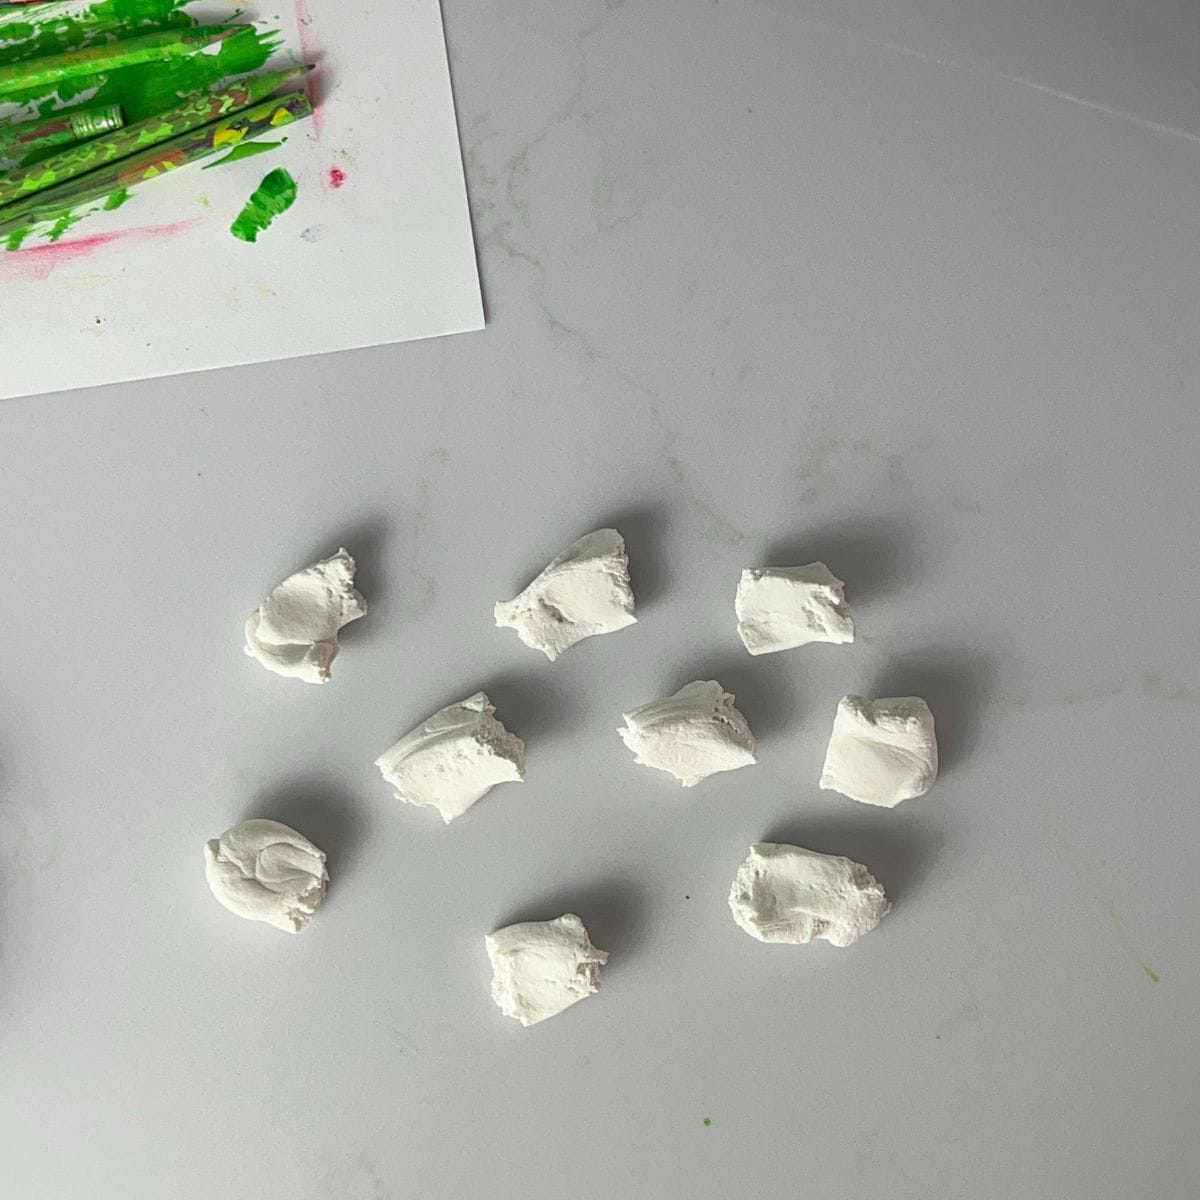
Step 3: Create 7-9 Petals
Split the Model Magic and create 7-9 flat oval shapes.
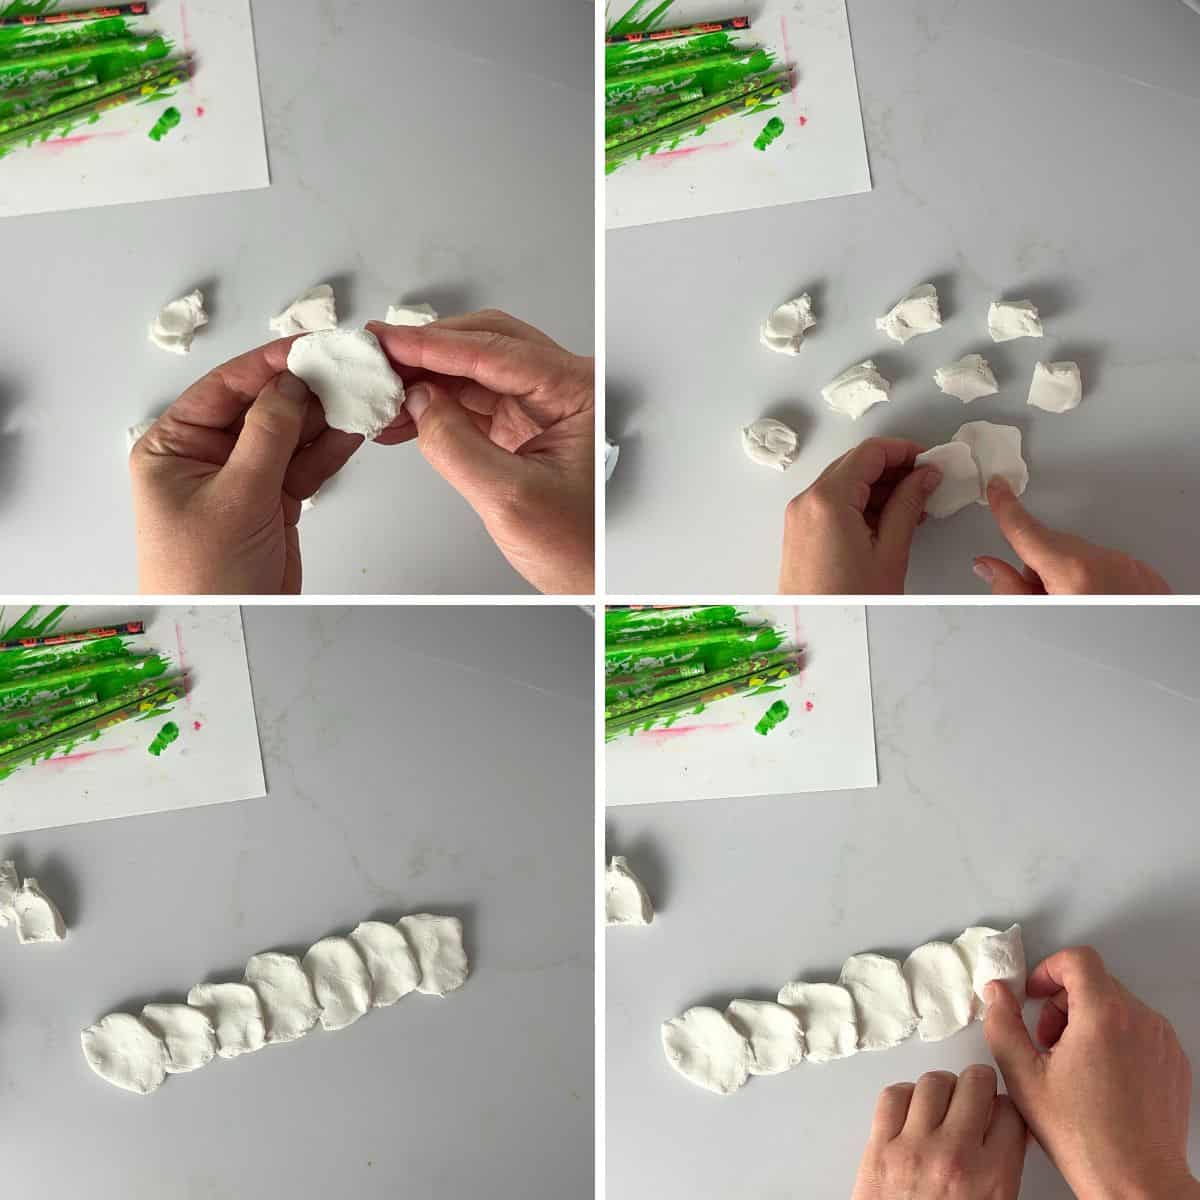
Step 4: Layer The Petals and Roll
Layer the petals slightly on top of each other in a line. Starting with the inside petal, loosely roll to create a rose.
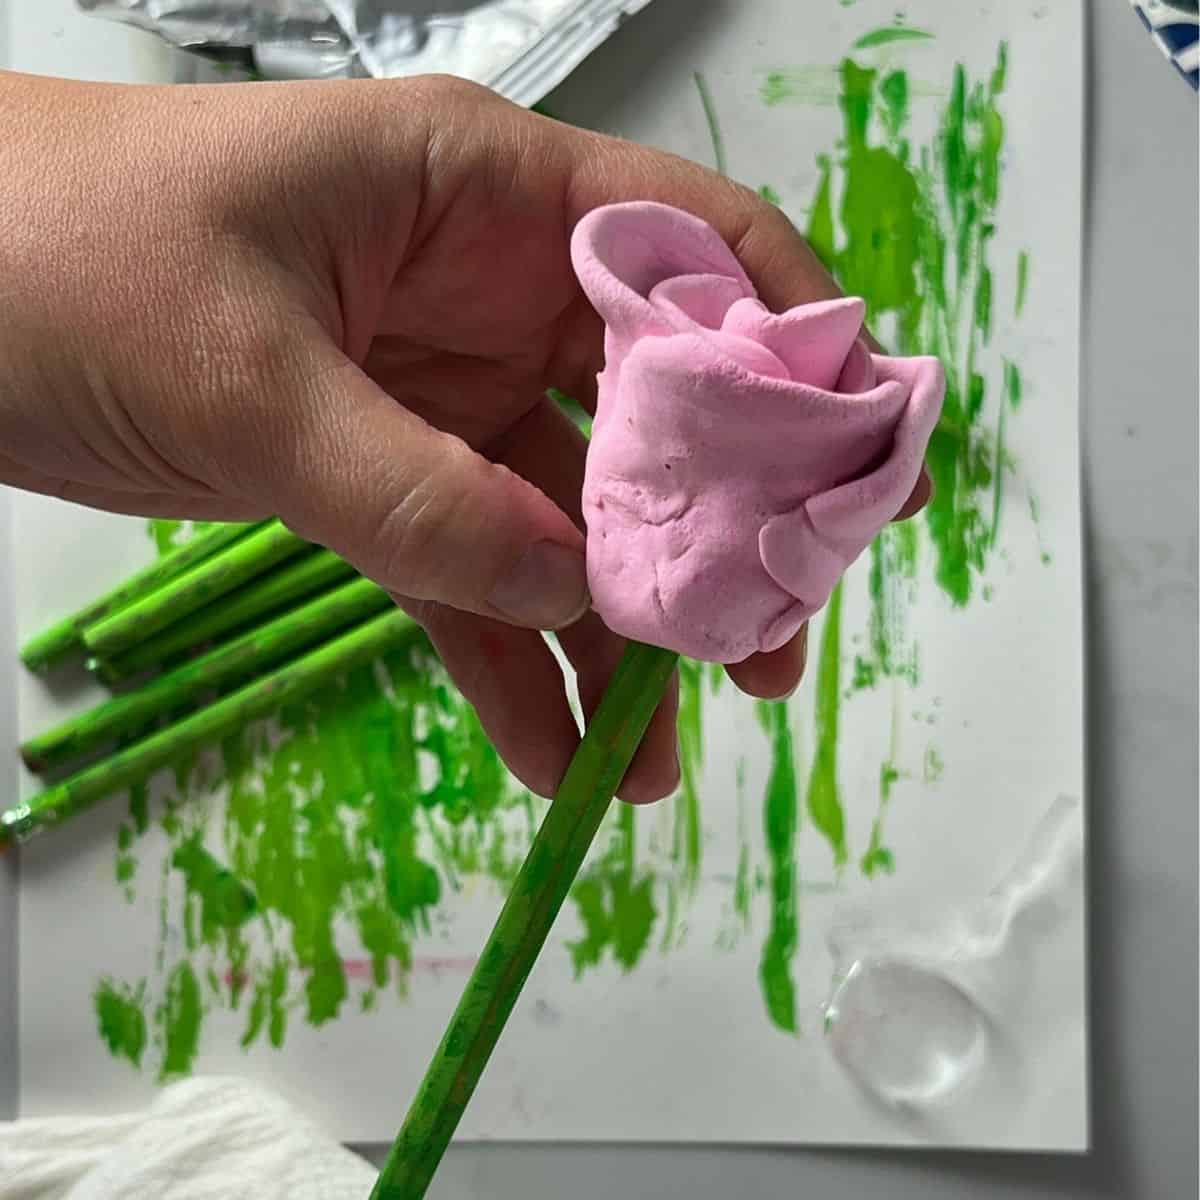
Step 5: Attach The Stem
Poke a hole into the bottom of the rose. Add a drop of glue and then place the pencil back in. Let the flowers dry.
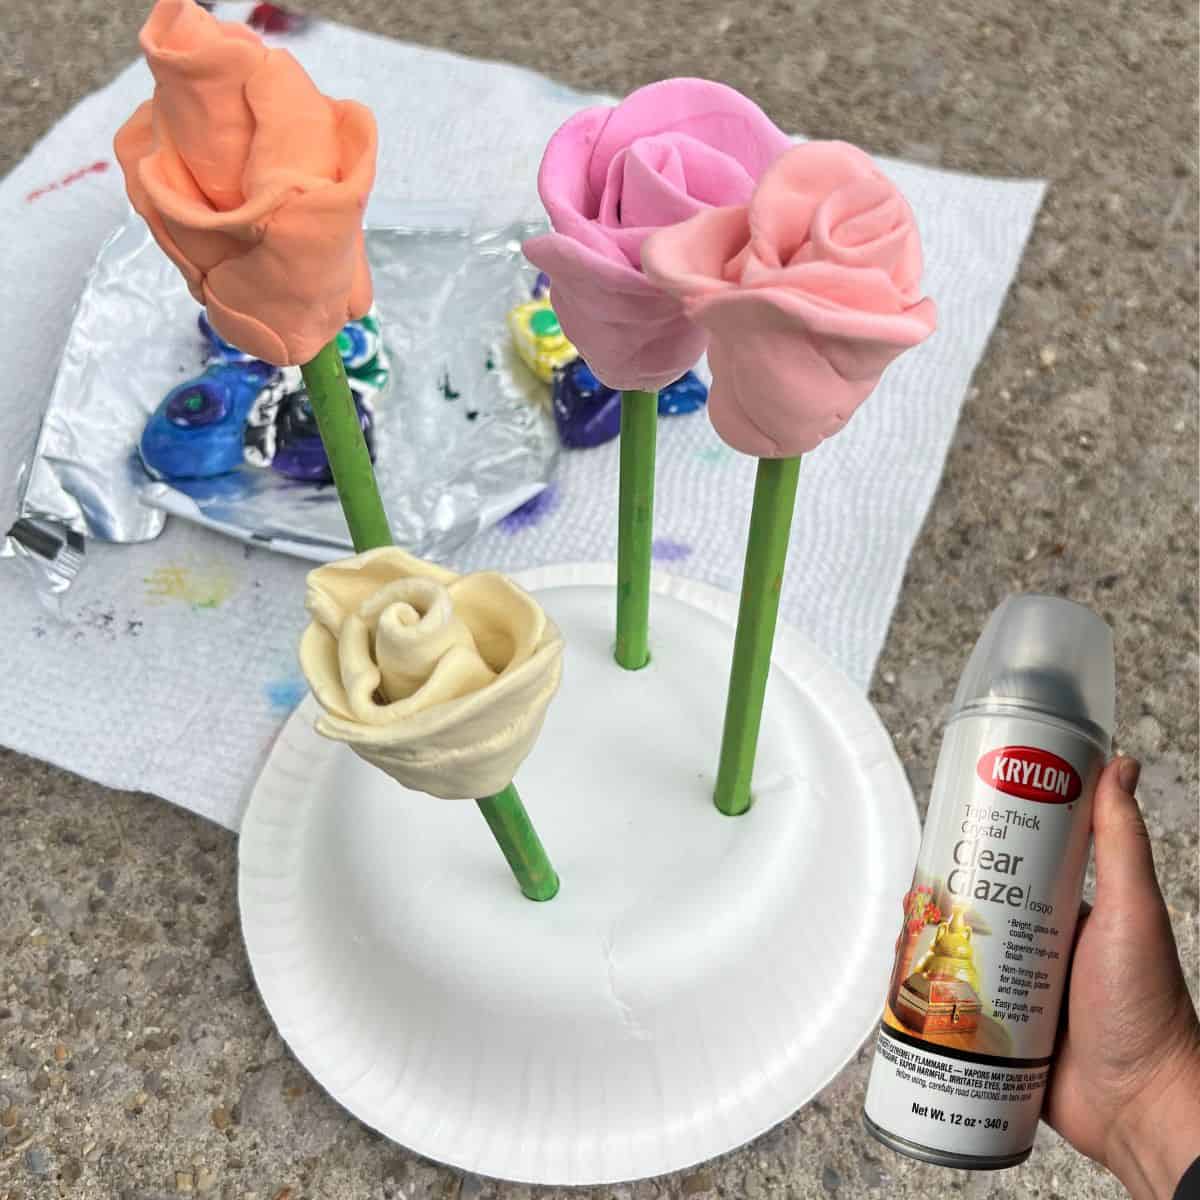
Optional: Attach The Stem
We used 2 coats of Triple Clear Glaze to add extra shine. To make this easier, prop your flowers up by poking holes in a paper bowl and spray.
Tips
- When rolling a rose, roll the beginning (inside) tighter, and apply less pressure as you move toward the outside.
- Use the foil inside as a work surface and to help the Model Magic dry.
- You may need to rotate the sculptures to let them dry evenly.

Model Magic vs. Air-Dry Clay: Pros & Cons
Both Model Magic and air-dry clay work for this project. Here are a few things to consider when choosing between them.
Model Magic
Pros
- Lightweight, soft and easy for kids to shape
- Great for younger artists and simple sculptures
- Easy to attach to lightweight stems like pencils
- No kiln or special equipment needed
Cons
- Can be fragile once dry and may break if handled roughly
- Thin pieces are especially easy to damage
- Sealing finished projects can help protect the surface
Air-Dry Clay
Pros
- Firmer and can hold finer details
- Finished pieces feel more substantial
- No kiln is required
- Works well for older kids who can handle a firmer material
Cons
- Heavier than Model Magic
- Can crack or become brittle if the clay is too thin, dries unevenly or isn’t handled properly
- May be harder for younger kids to manipulate
- Even when completely dry, it is not as strong or durable as kiln-fired clay
Art Teacher’s Take 🎨: For younger artists, I prefer Model Magic because it is soft, lightweight, and easy to shape. If using air-dry clay, make smaller roses so they aren’t too heavy for the pencil stems.
Our Favorite
Related Model Magic Projects

Follow us on Pinterest, YouTube & Facebook for more free art and craft ideas!
These Model Magic flowers are not only an adorable craft, but also great gifts for loved ones.
How To Make Model Magic Flowers
Equipment
- Paper Bowl
- Skewer
Supplies
Instructions
- Before You Begin: Decide how you want to color the Model Magic. You can mix washable marker into white Model Magic, use colored Model Magic or paint the roses after they dry. Paint the pencil stems ahead of time if you want them ready for kids to use.
- Paint The Stems: Paint old pencils with green acrylic paint. Add a second coat if needed and let them dry completely.
- Color The Model Magic: Dab washable marker into white Model Magic and knead it with your hands until the color is mixed in. You can also use colored Model Magic or paint the roses after they dry.
- Create The Petals: Divide the Model Magic into 7 to 9 pieces and flatten each piece into a small oval-shaped petal.
- Layer The Petals: Arrange the petals in a line so they slightly overlap.
- Roll The Rose: Starting with the inside petal, loosely roll the layered petals together to create the rose shape. Keep the center tighter and use less pressure as you reach the outside petals.
- Attach The Stem: Poke a hole into the bottom of the rose. Add a small drop of glue and insert the painted pencil into the hole.
- Let The Rose Dry: Place the finished roses on foil and allow the Model Magic to dry. Rotate the sculptures as needed so they dry evenly.
- Add A Clear Coat (Optional): Once completely dry, add two coats of clear glaze for extra shine. Let the glaze dry completely before handling.
Notes
- One 1-ounce package of Model Magic makes about two roses.
- Keep the center of the rose tighter and gradually loosen the petals toward the outside.
- Use the foil from the Model Magic package as a work surface.
- Rotate the roses while drying to help them dry evenly.
- If using spray glaze, poke holes in a paper bowl to hold the flowers upright while spraying.
- You can also use polymer clay or air-dry clay, but drying or baking instructions will vary.