
How to Make Patterned Clay Pumpkins Inspired by Yayoi Kusama


Kids will love creating their own colorful clay pumpkin sculptures inspired by Yayoi Kusama! This fun clay project combines simple pinch-pot techniques with plenty of opportunities to experiment with pattern, repetition, and color.
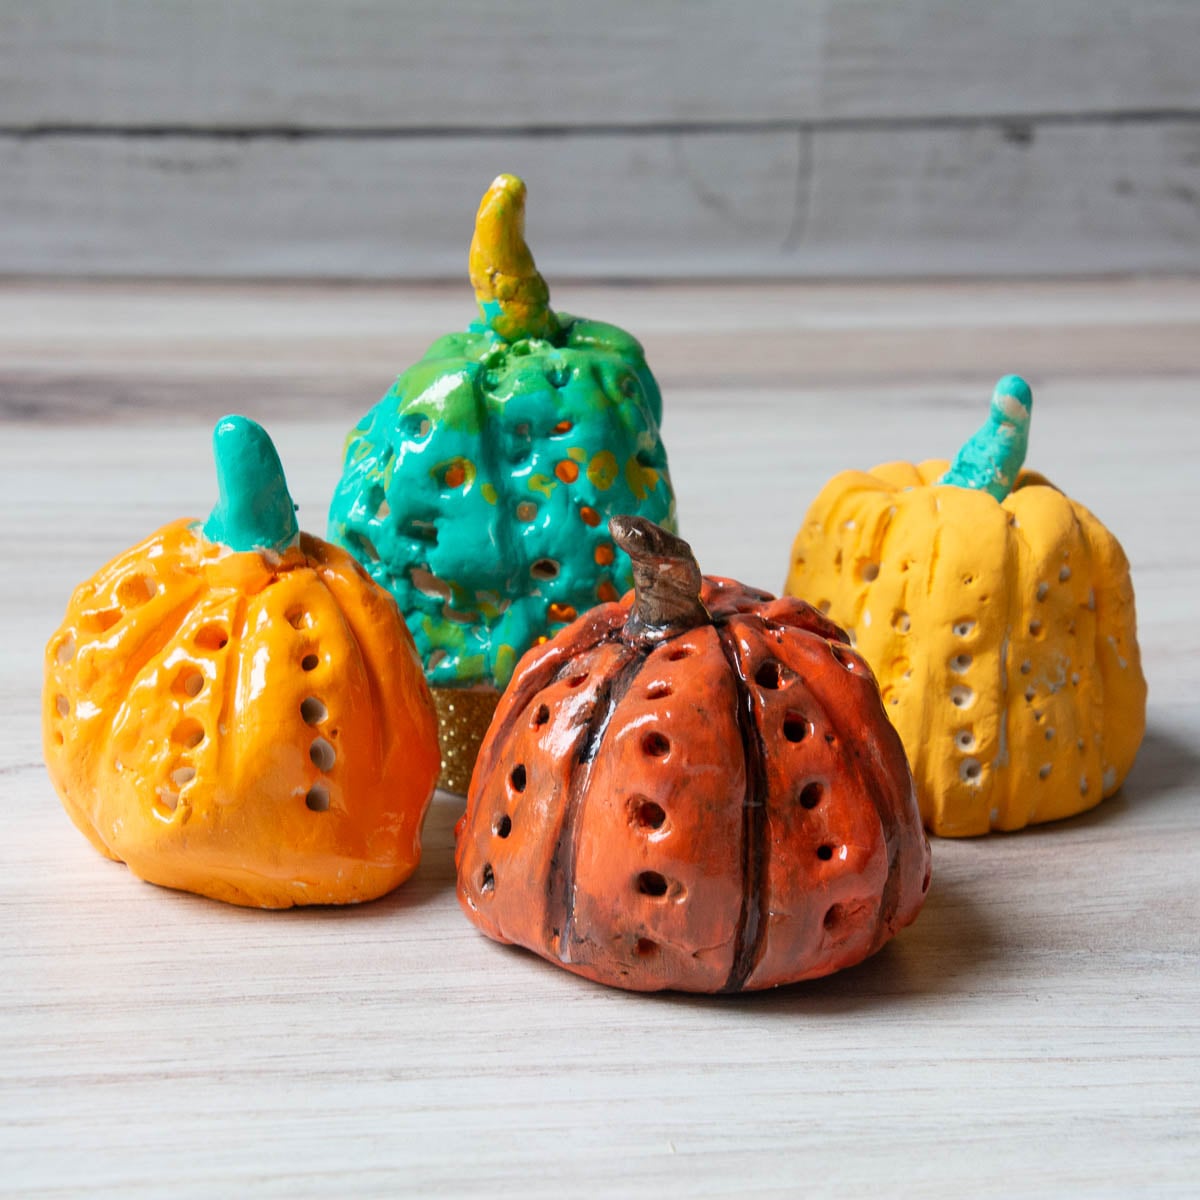
Recently (and sadly), Yayoi Kusama passed away at 97. Kusama is known for using repeating patterns, especially dots, throughout her artwork. I’ve always loved her colorful, imaginative work and have known there are so many ways she can inspire young artists! This clay pumpkin project is one of them.
Why You Will Love This Clay Project
More About Yayoi Kusama
Yayoi Kusama is a contemporary Japanese artist known for her use of dots, repetition, bold colors, and patterns. Pumpkins have also become one of the most recognizable subjects in her artwork.
Before starting this project, take a closer look at Kusama’s Pumpkin sculpture, All the Eternal Love I Have for the Pumpkins, 2016 with your students. I was also lucky enough to see one of her Infinity Mirror Room exhibits in person, and it was such a cool experience! Her use of repetition and pattern is even more impressive when you are completely surrounded by it.
Art Teacher’s Take 🎨
The goal isn’t to copy a specific Kusama pumpkin. Instead, use her artwork as inspiration. Demonstrate the clay-building techniques, but avoid creating a finished example that kids feel they need to copy. Encourage students to make their own choices so each pumpkin sculpture is unique.
Supplies You’ll Need
Disclosure: This post may contain affiliate links when clicked, we may earn a small commission at no additional cost to you. Read our full privacy policy.
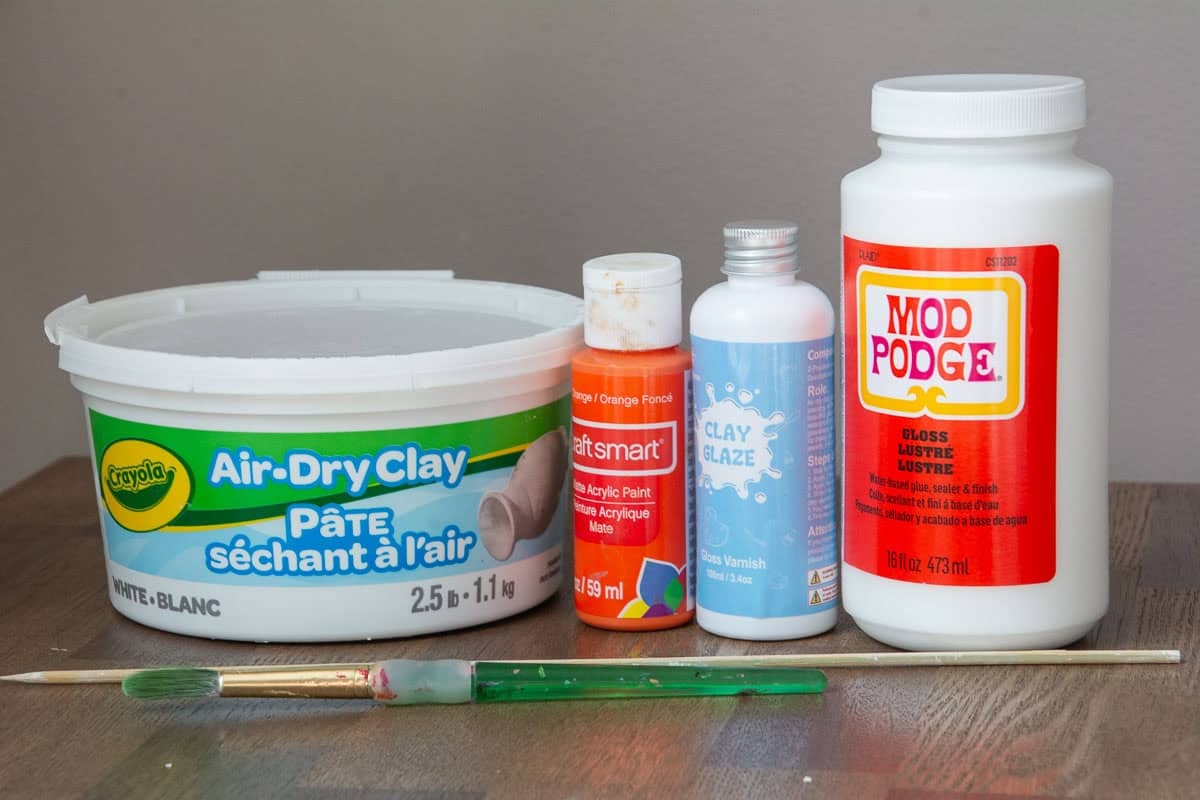
For our pumpkins, we are using Crayola air-dry clay, acrylic paint, and clear sealer.
Air-Dry Clay vs. Ceramic Clay
You can make these patterned pumpkins with either air-dry clay or regular ceramic clay. The building process is similar, but drying and finishing the pumpkins will differ.
Air-Dry Clay
- Does not require a kiln.
- Is a great option for making this project at home or in classrooms without access to a kiln.
- Needs to dry completely before painting.
- Can be painted with acrylic paint and finished with an optional clear sealer or glaze.
Ceramic Clay
- Requires access to a kiln.
- Needs to become completely bone dry before the first firing.
- Is bisque-fired before adding ceramic glaze.
- Requires another kiln firing after glaze is applied.
Whichever clay you choose, follow the drying and firing recommendations for your specific clay.
Clay Vocabulary To Know
PINCH POT: A simple clay form made by pressing your thumb into a ball of clay and pinching the clay between your thumb and fingers to create an opening.
SCORE: To scratch or roughen the two clay surfaces that will be joined together.
SLIP: A mixture of clay and water that acts like glue when attaching pieces of clay. For this air-dry clay project, we use a small amount of water to help join our scored pieces.
How to Build Pinch Pot Clay Pumpkins
SKILL LEVEL MODIFICATION – One larger but skinnier pinch pot can also work for younger kids. Make it, then flip it over. The toughest part will be making sure they do not make the walls too thin.
Step 1: Divide and Roll The Clay
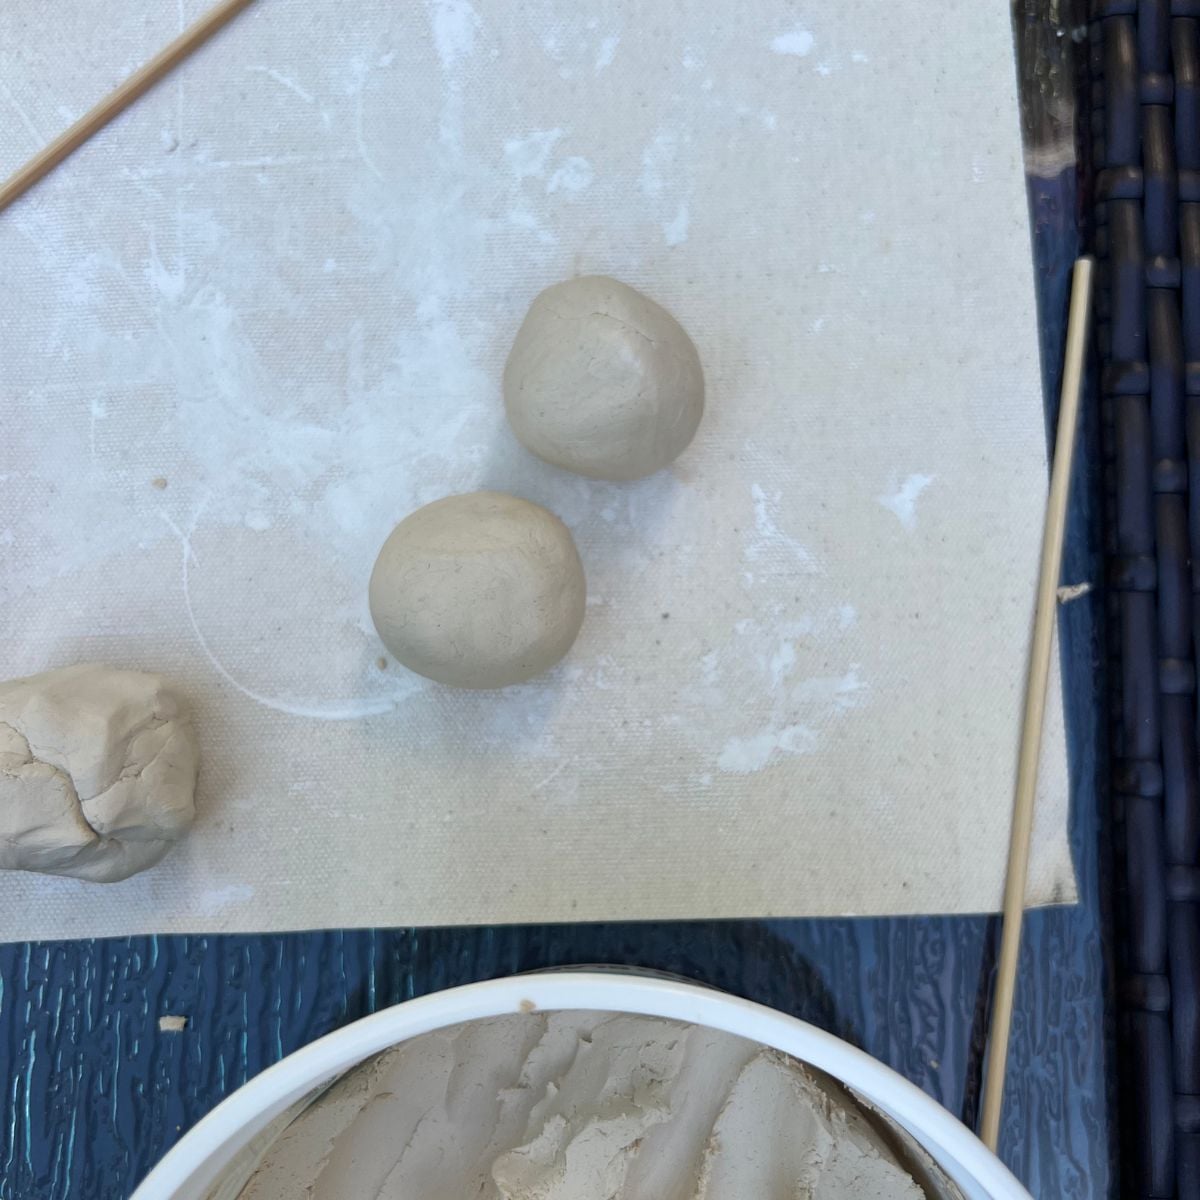
Start with a handful of clay and divide it into two equal sections.
Roll each section between your hands into two smooth clay balls (or say sphere to avoid smirking) of about the same size. These will become the two halves of your pumpkin.
Step 2: Create 2 Pinch Pots
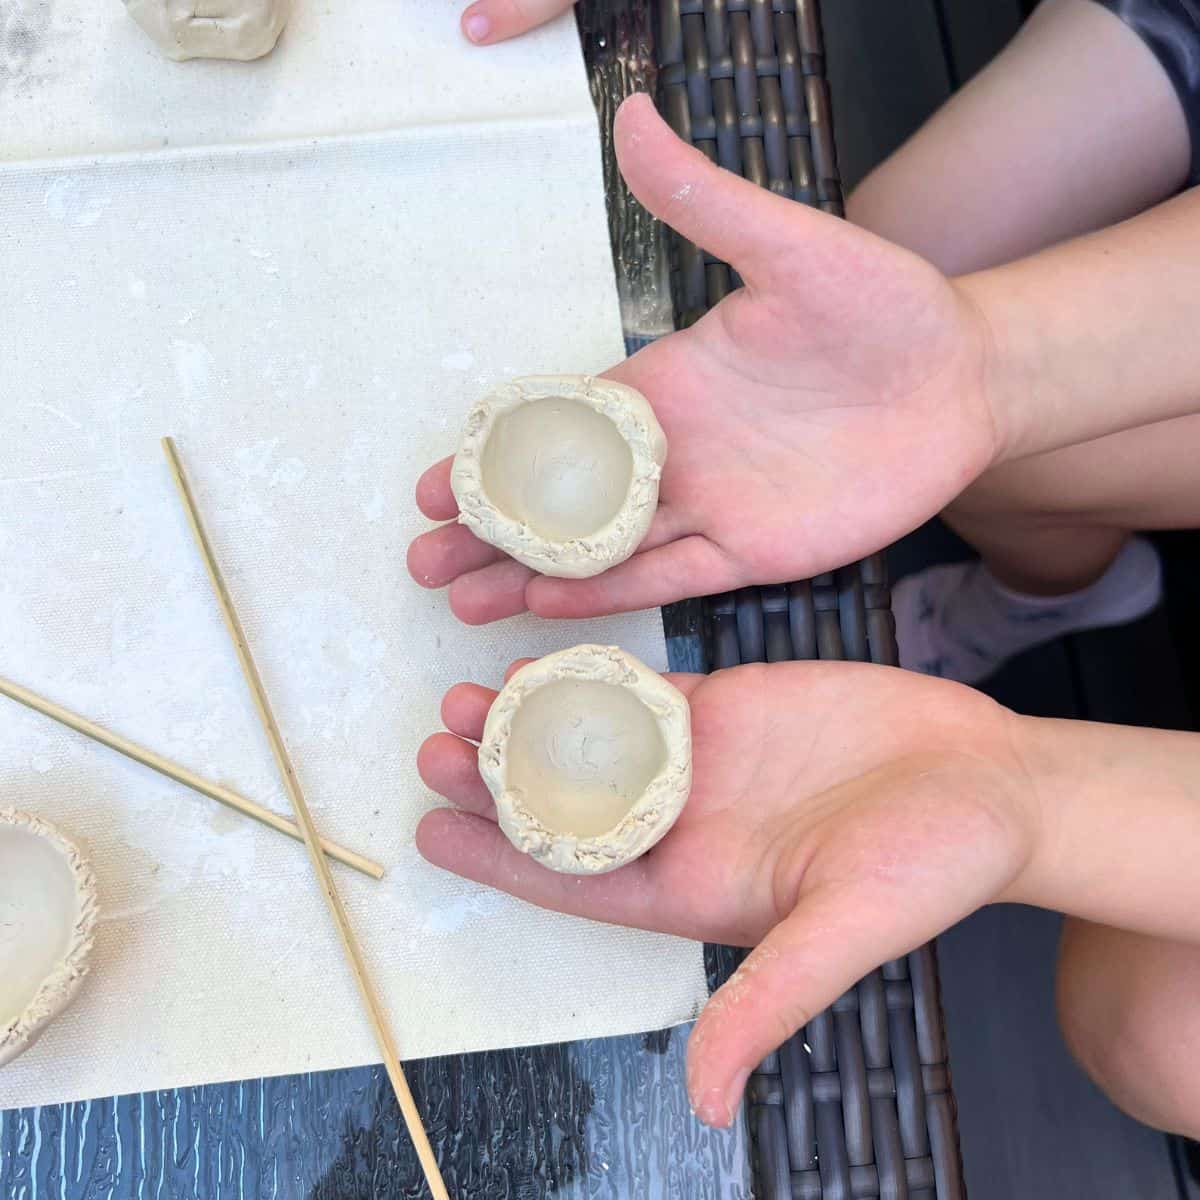
Press your thumb into the center of each clay ball, but don’t push all the way through.
Slowly pinch and rotate the clay to create two pinch pots of approximately the same size. Try to keep the walls even and about 1/8 to 1/4 inch thick.
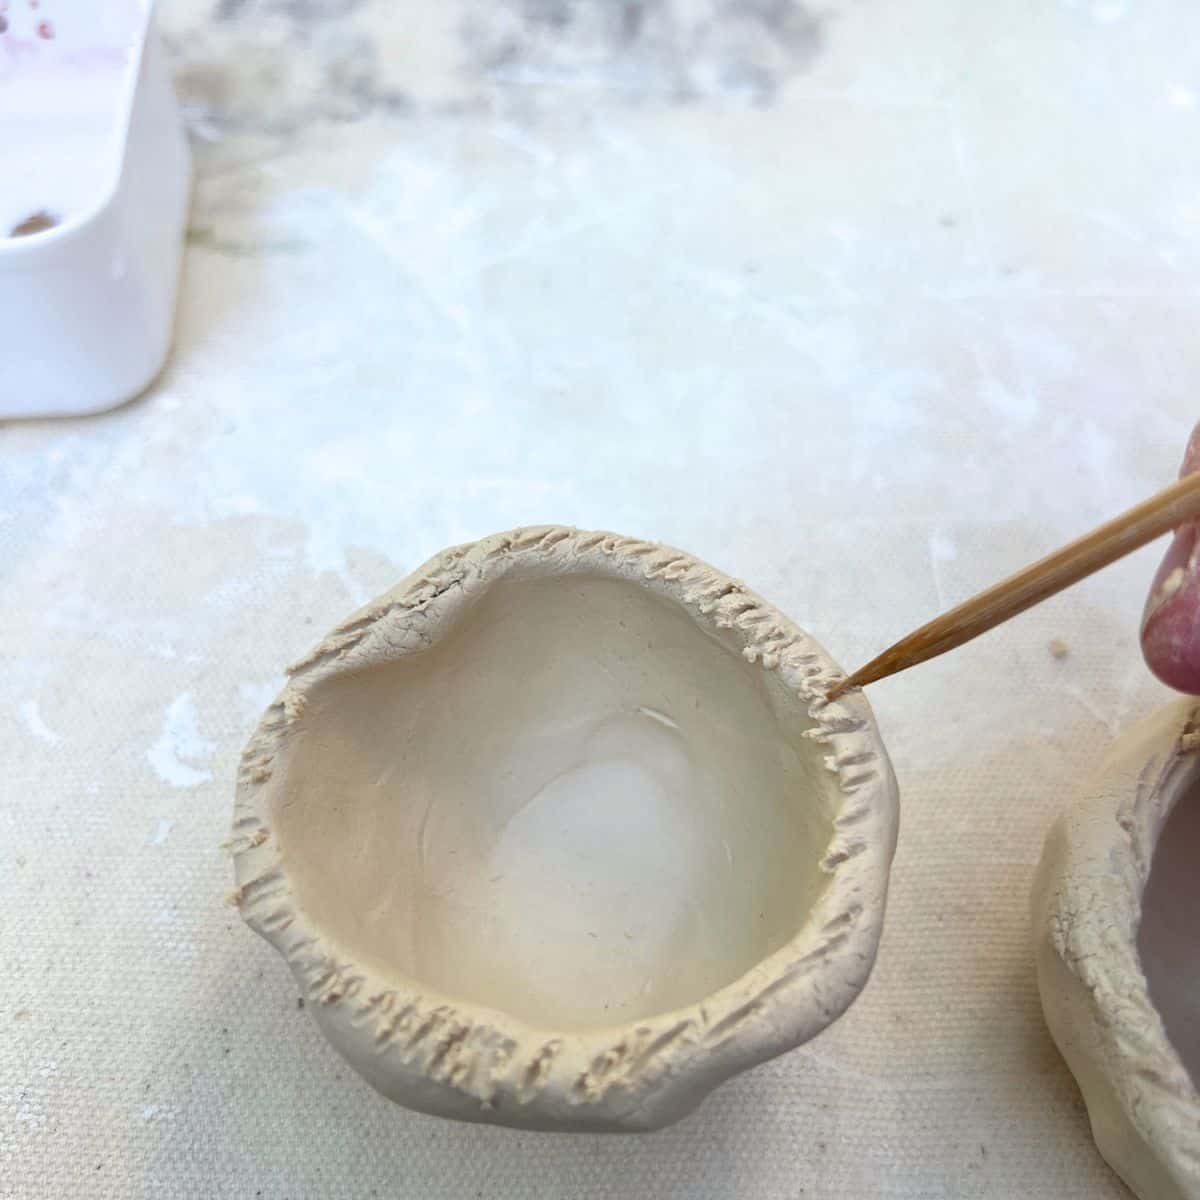
Step 3: Score The Edges
Use a wooden skewer or clay tool to scratch the rim of each pinch pot where the two pieces will connect. Make small scratches around both rims.
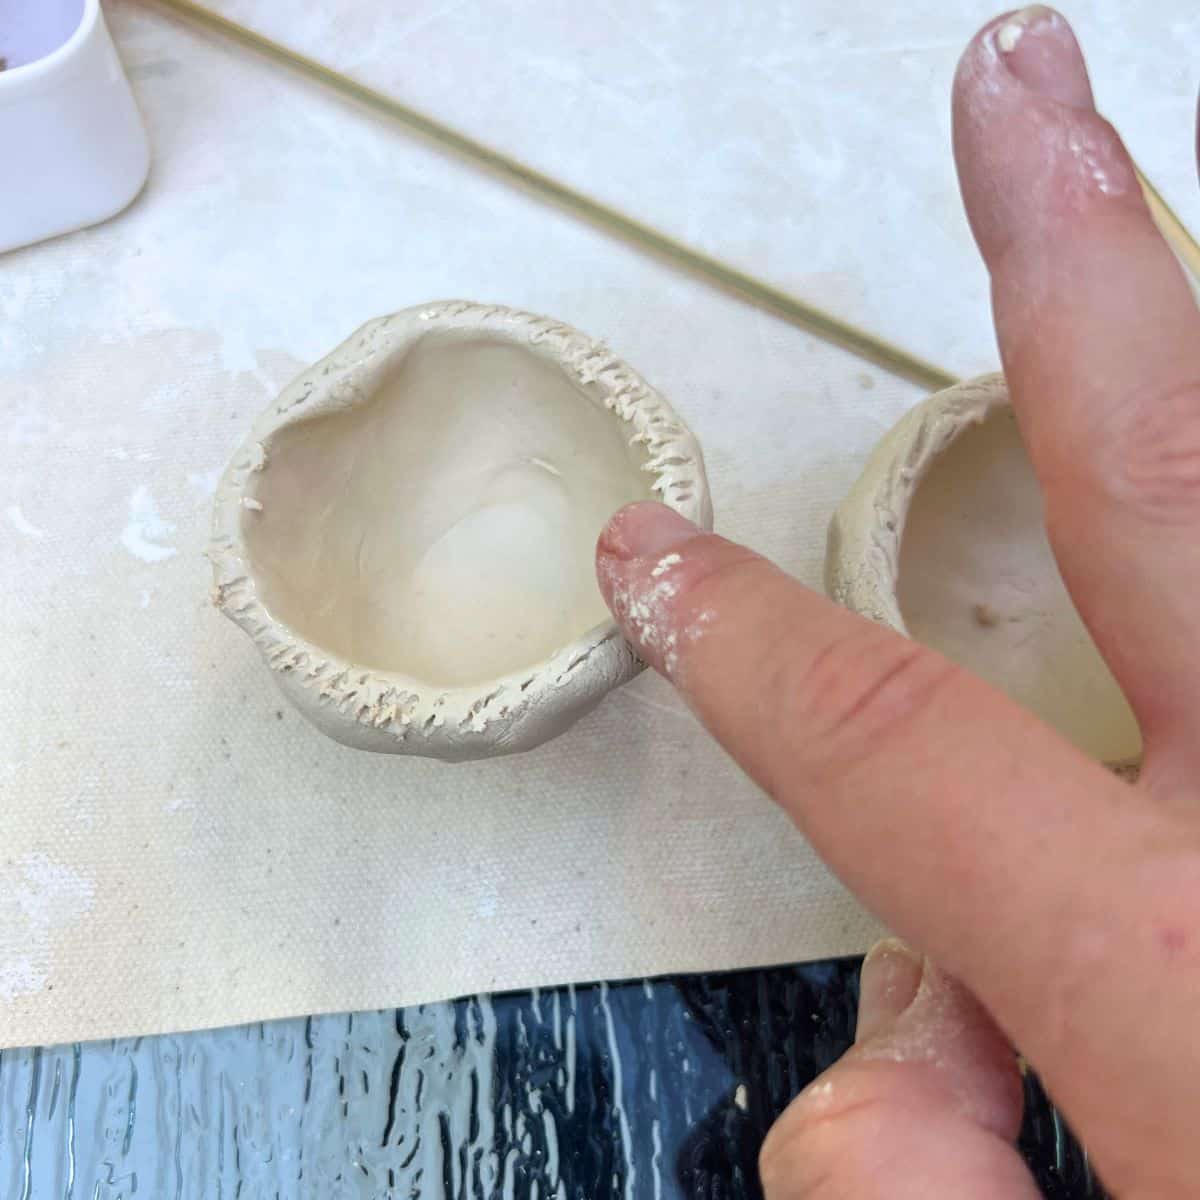
Step 4: Add Water
Dip one finger in water and lightly rub it over the scored edges. You only need a small amount.
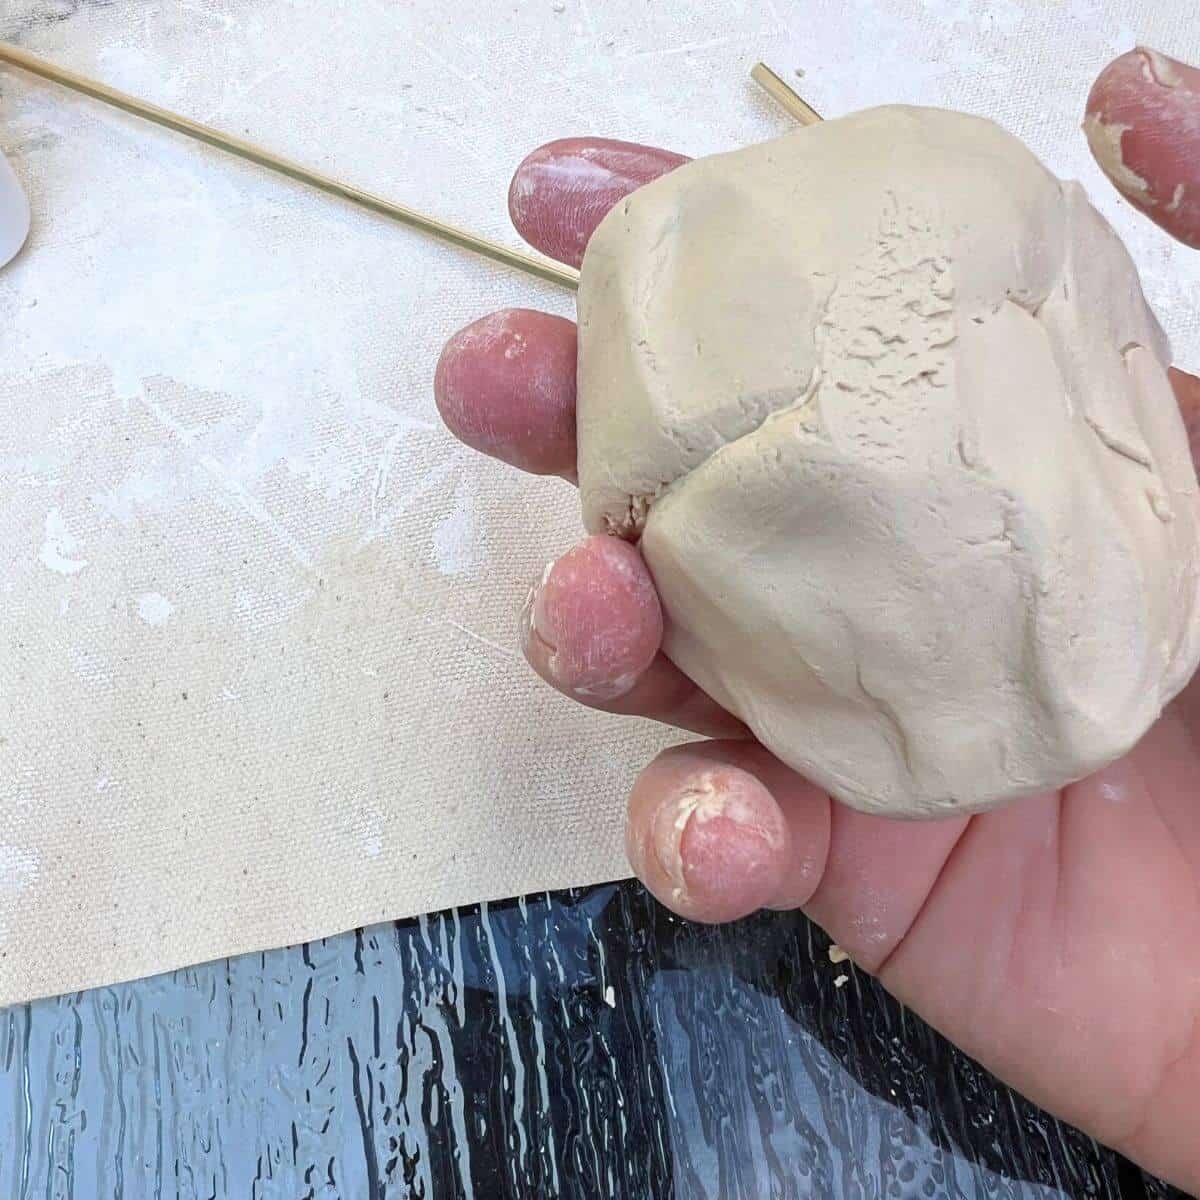
Step 5: Join The Pinch Pots Together
Place the two pinch pots together with the scored edges touching. Gently press around the seam to connect them.
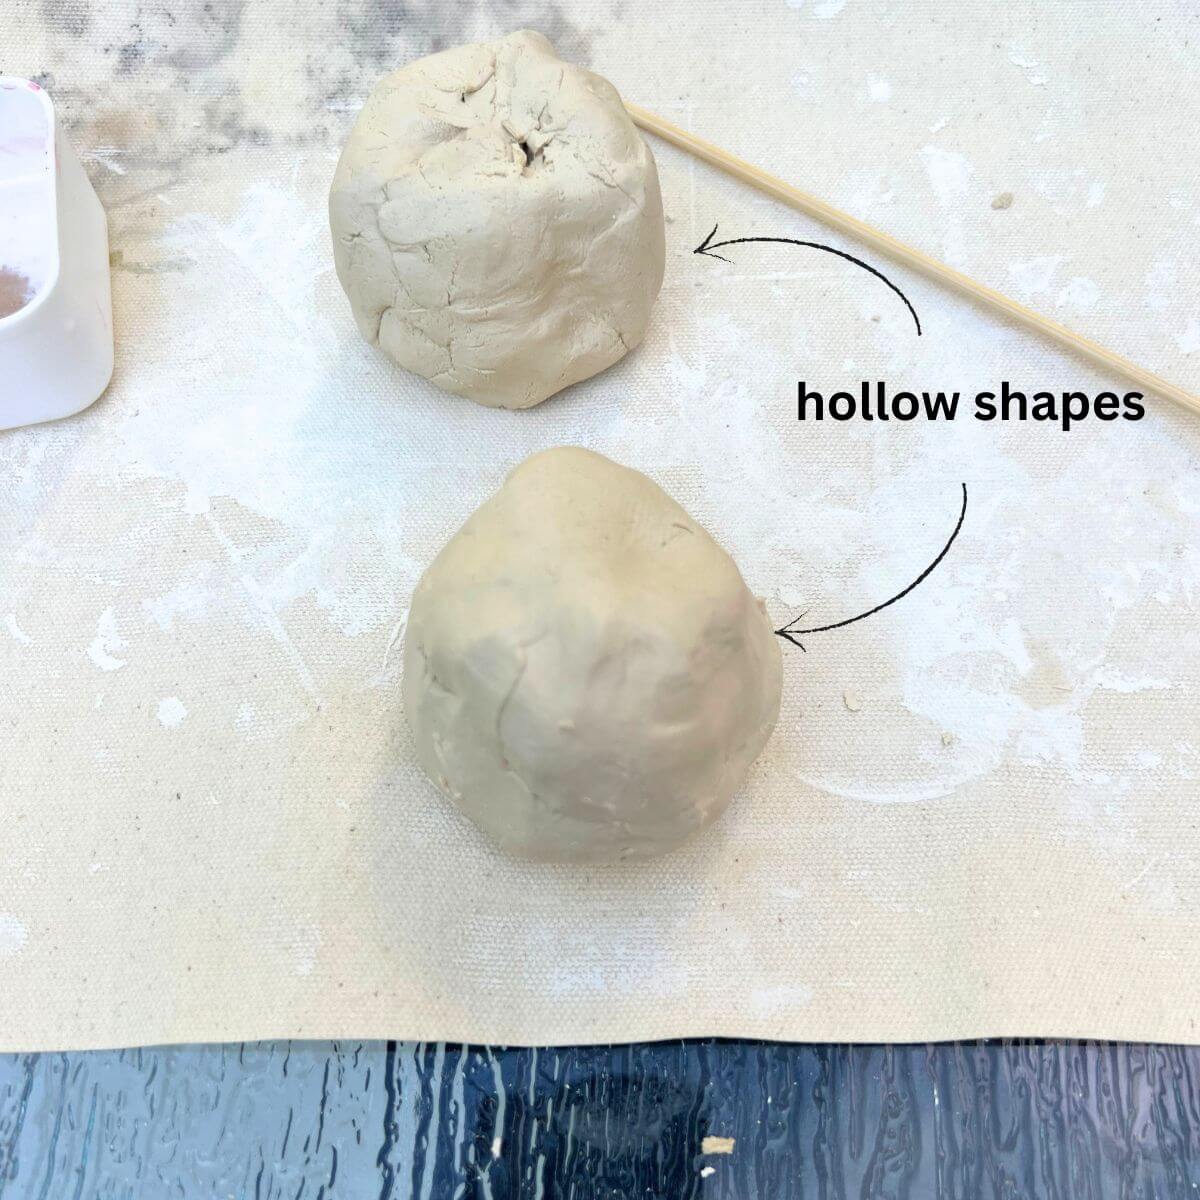
Step 6: Blend The Seam
Use your finger to smooth and blend the seam until the two pinch pots look like one hollow clay sphere.
Step 7: Poke A Vent Hole
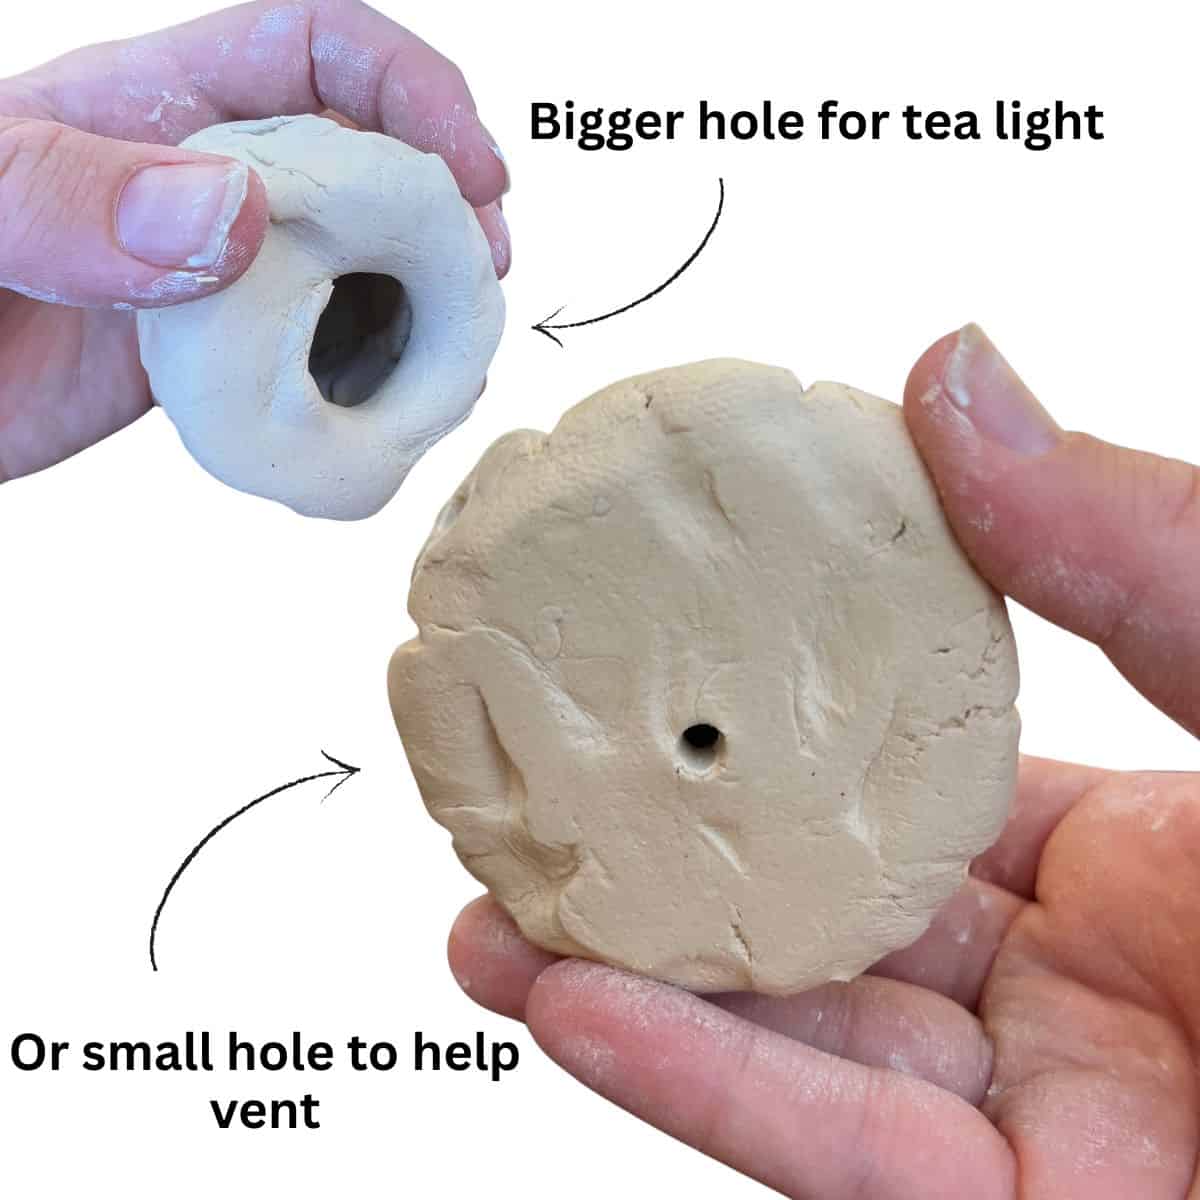
Use the skewer to poke a small hole in the bottom of your pumpkin. This creates a vent in the hollow clay form.
Optional Tea Light: If you want to turn your finished pumpkin into a small luminary, create a larger opening in the bottom instead. Use your thumb to carefully widen the opening so a battery-operated tea light can fit inside.
Step 8: Create The Pumpkin Texture
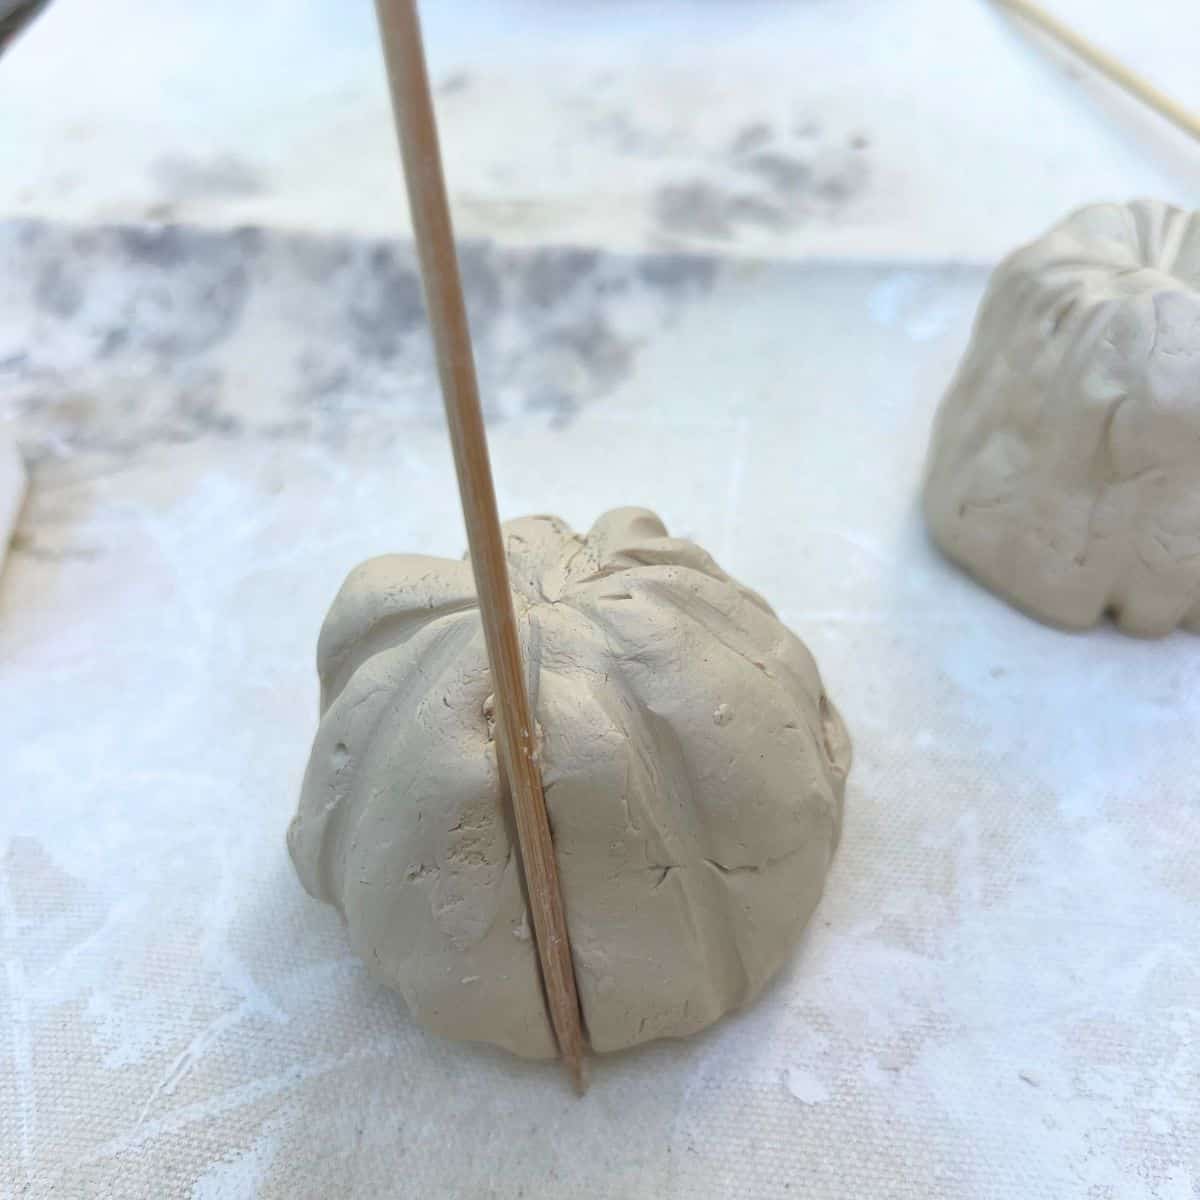
Use the side of a wooden skewer or clay tool to press lines into the clay and create pumpkin sections.
Instead of drawing lines on the surface, gently press into the clay. Don’t worry about making everything perfectly even. Uneven sections can help give your sculpture that fun, wonky pumpkin shape.
Step 9: Add Other Details
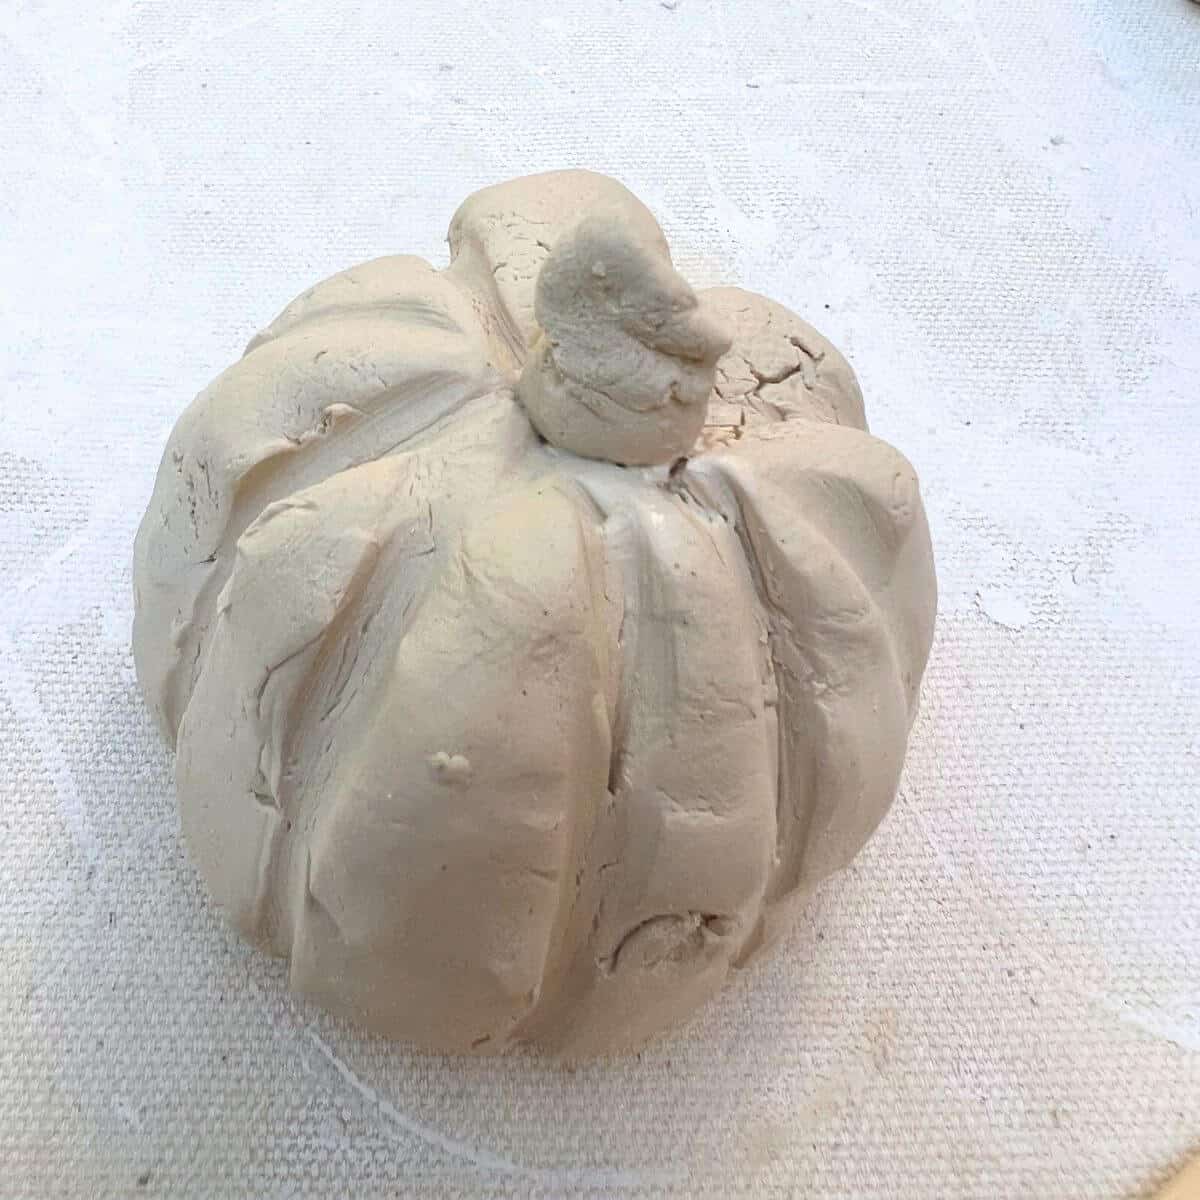
Use a small piece of clay to create a stem and/or leaves for the top of your pumpkin.
Remember to score and add water to both surfaces when attaching any extra clay pieces.
Step 10: Add A Pattern
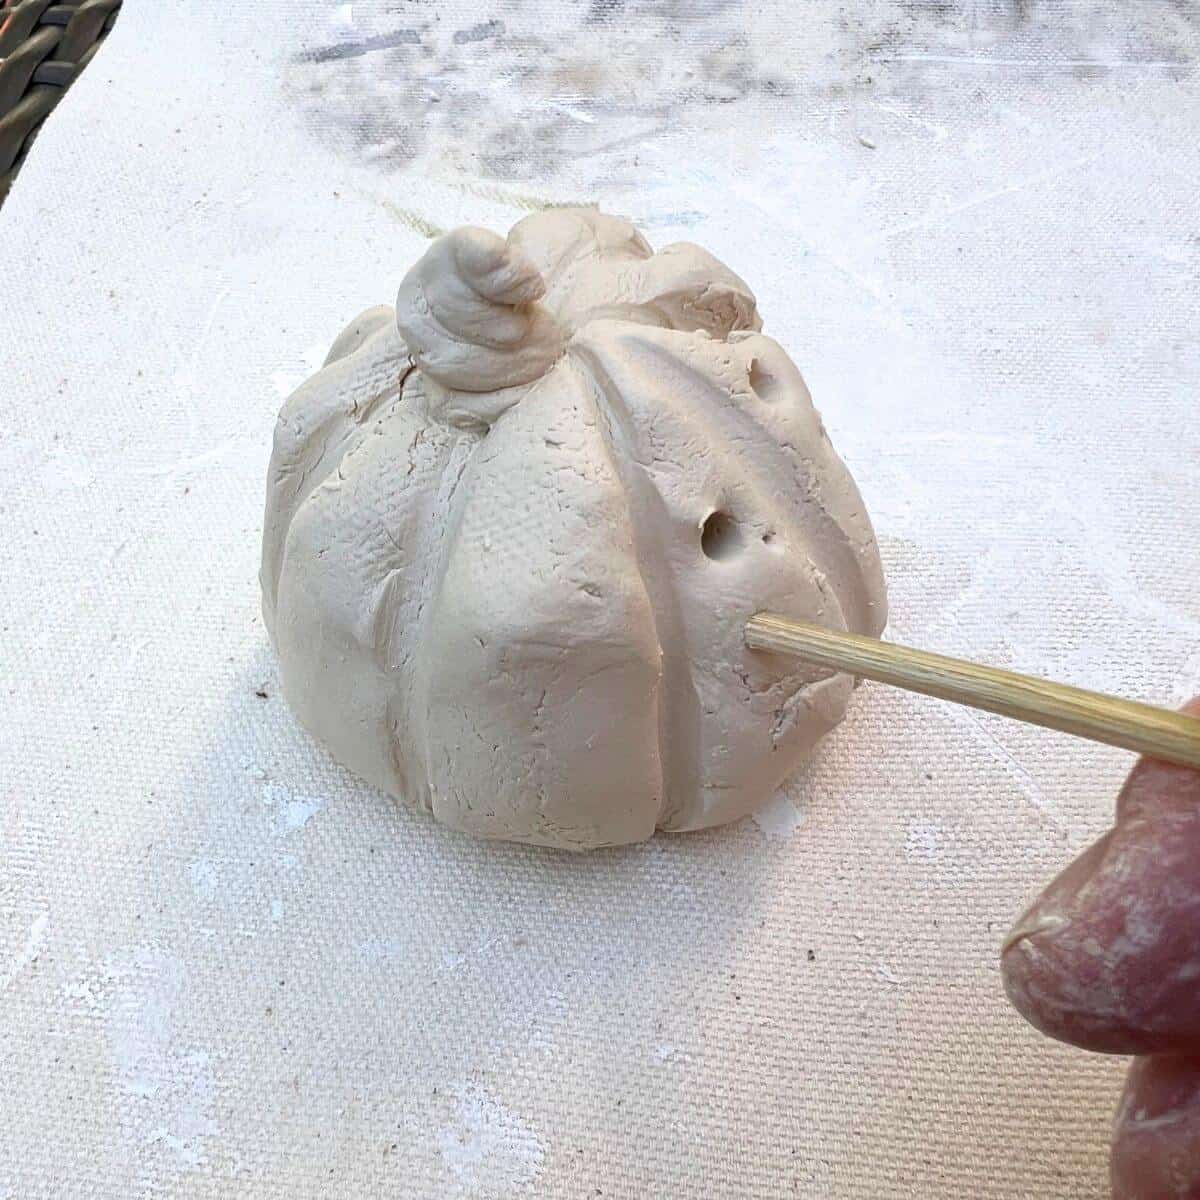
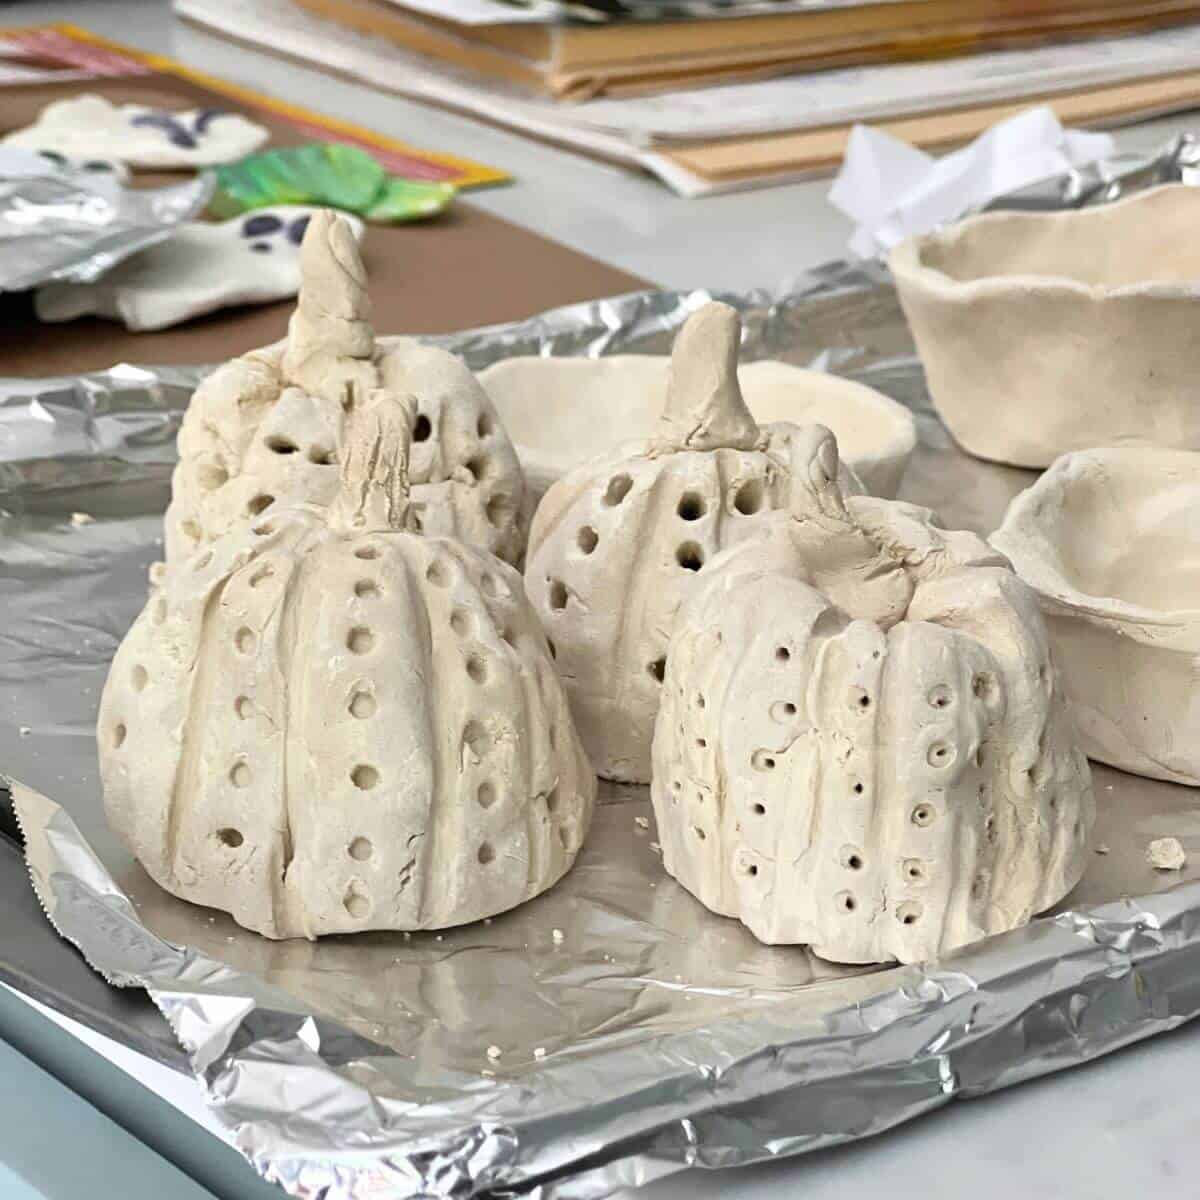
Use the end of your wooden skewer to gently press dots into the clay surface. Repeat dots around different sections of the pumpkin, or experiment with the placement and size of your pattern.
Step 11: Let The Clay Fully Dry
Air-Dry Clay: Let the pumpkin dry completely before painting. Air-dry clay can take approximately 36 to 72 hours to fully dry, depending on the thickness of the sculpture and drying conditions. Thicker pieces may take longer.
Regular Ceramic Clay: Allow the pumpkin to dry slowly and completely until it is bone dry before placing it in the kiln. I generally allow about one week for classroom clay projects to dry, but thicker pieces may need additional time.
Step 12: Add Color
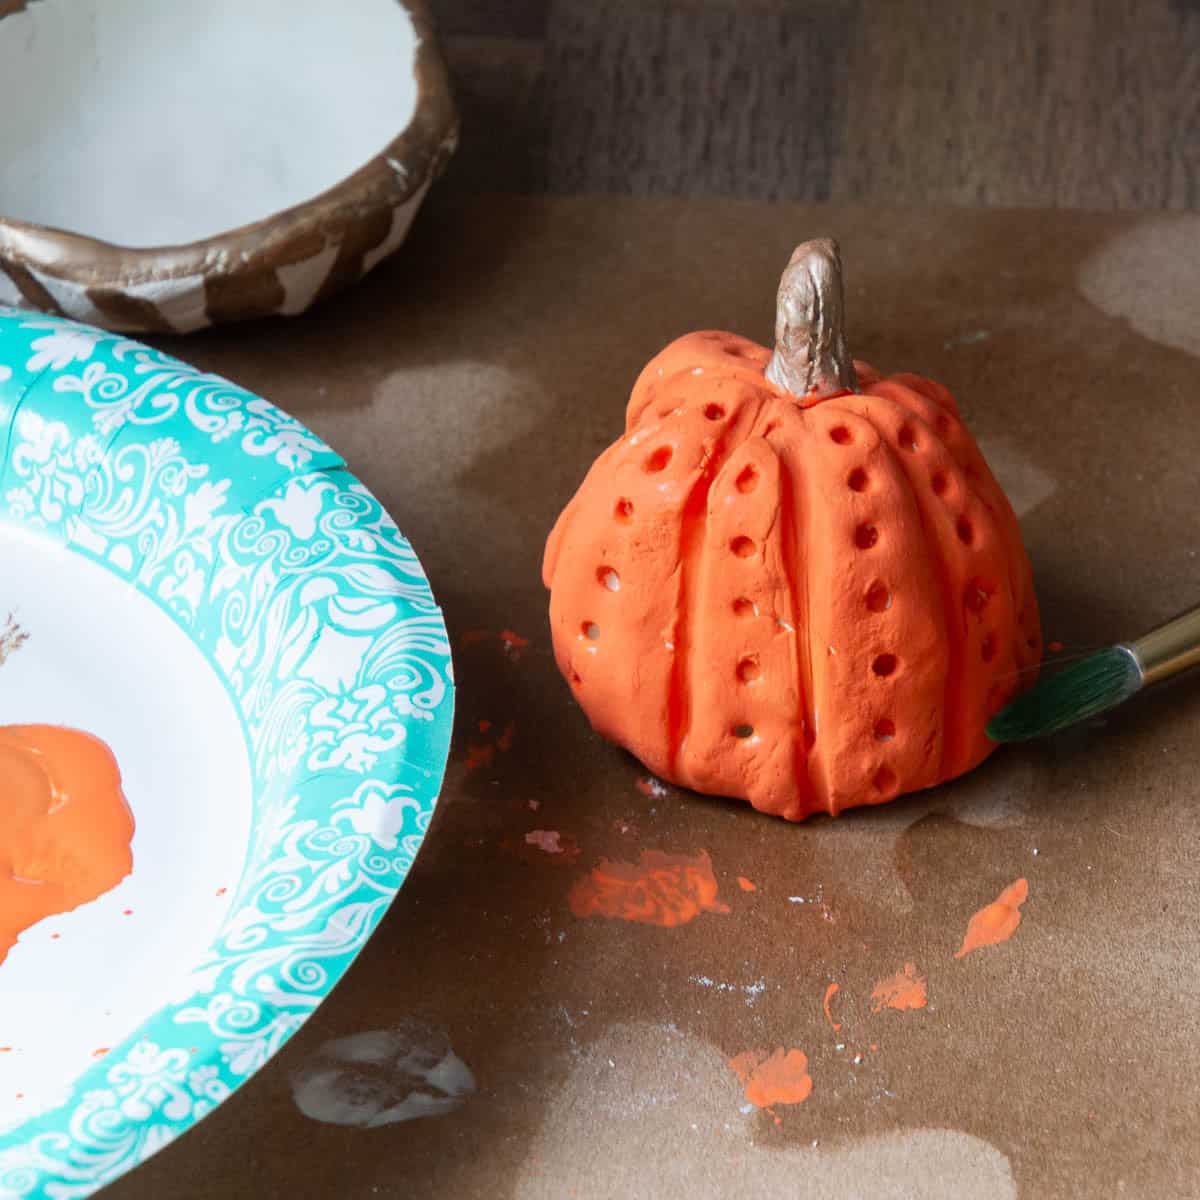
For Air-Dry Clay: Paint the completely dry pumpkin with acrylic paint. Once the paint is dry, you can add an optional clear glaze or sealer for a shiny finished look.
For Ceramic Clay: Apply ceramic glaze to the bisque-fired pumpkin according to the glaze directions. The pumpkin will then need to go through a glaze firing.
Step 13: Add Extra Paint Layers
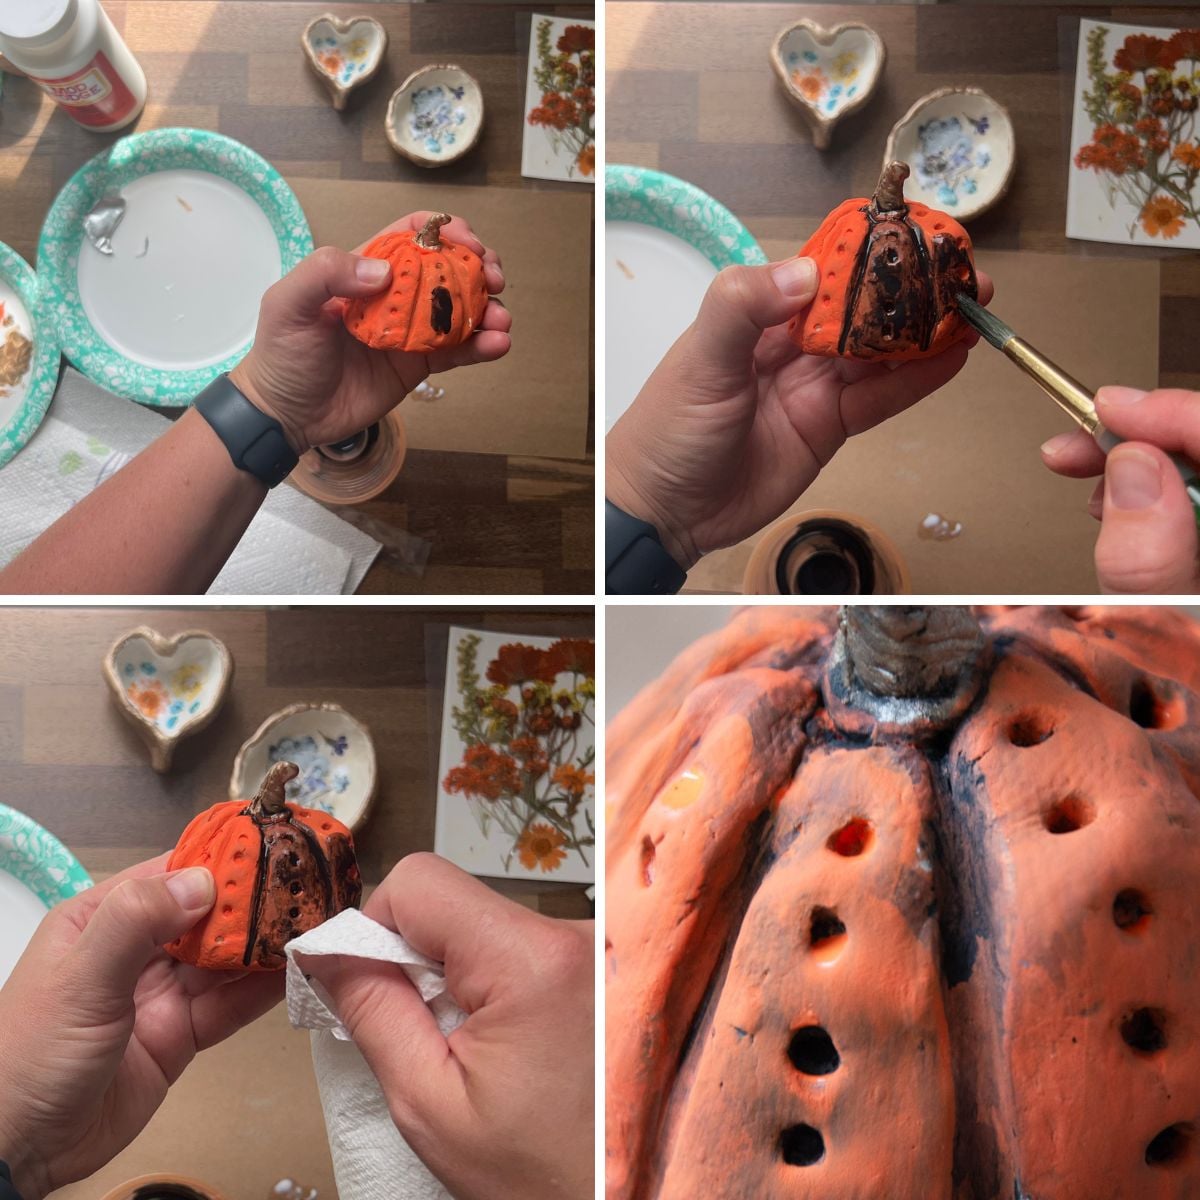
For this air dry clay pumpkin, I added a black wash to make the texture stay out. You can dilute black acrylic paint with water, add paint on top of the design. Wipe or dab away excess paint.
Step 14: Add Clear Glaze
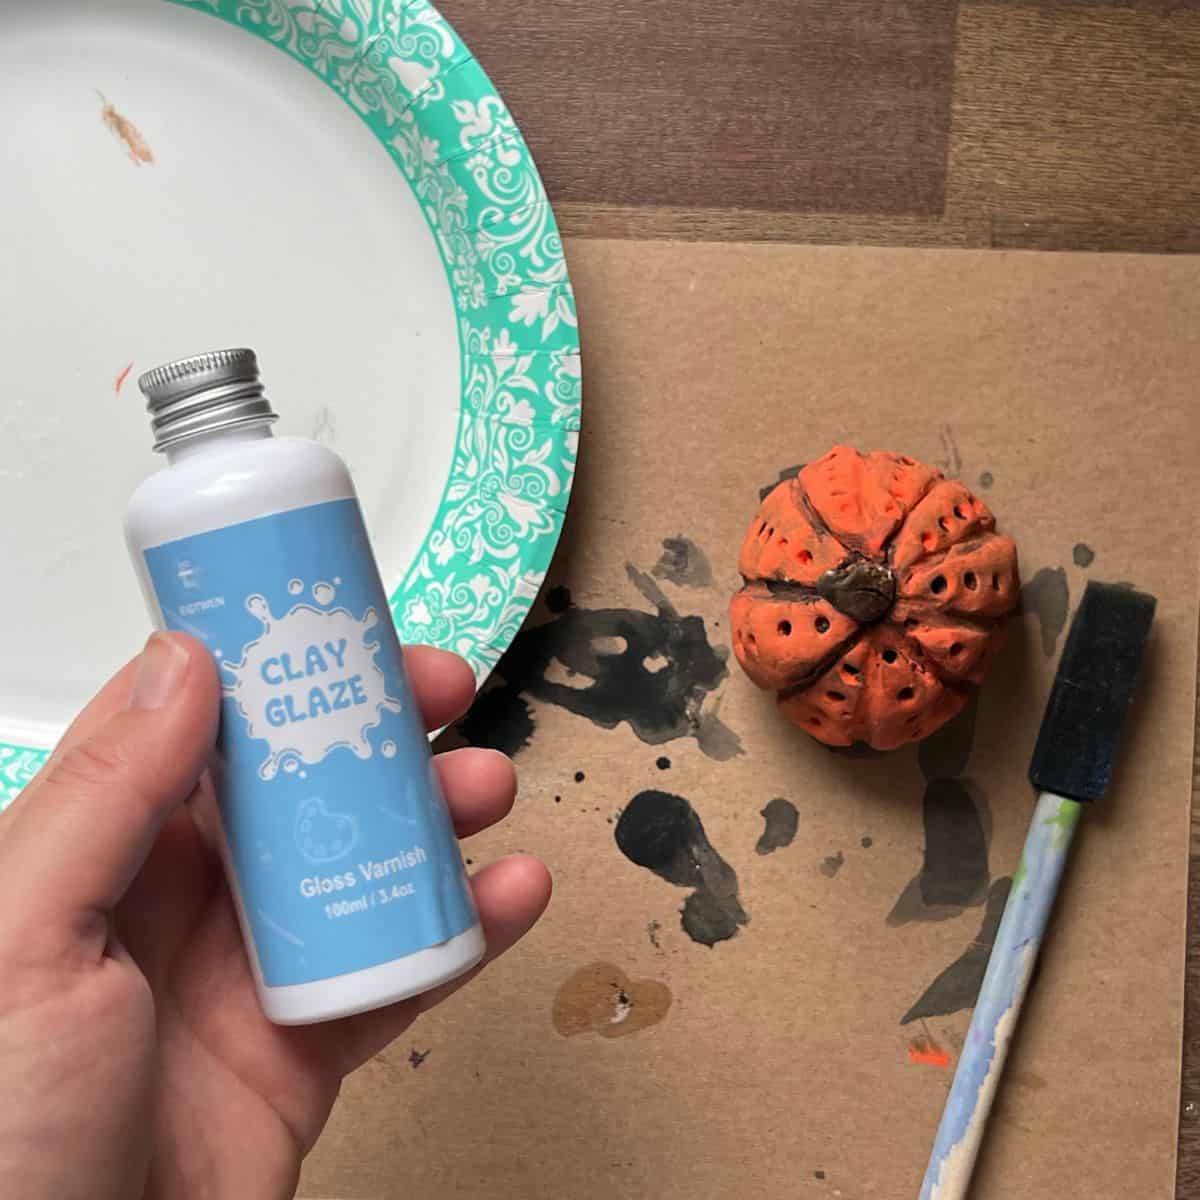
This clear glaze is meant for air dry clay. Apply one coat, let it dry then apply another.
Allow all paint, sealer or glaze to completely dry or finish firing before displaying your pumpkin.
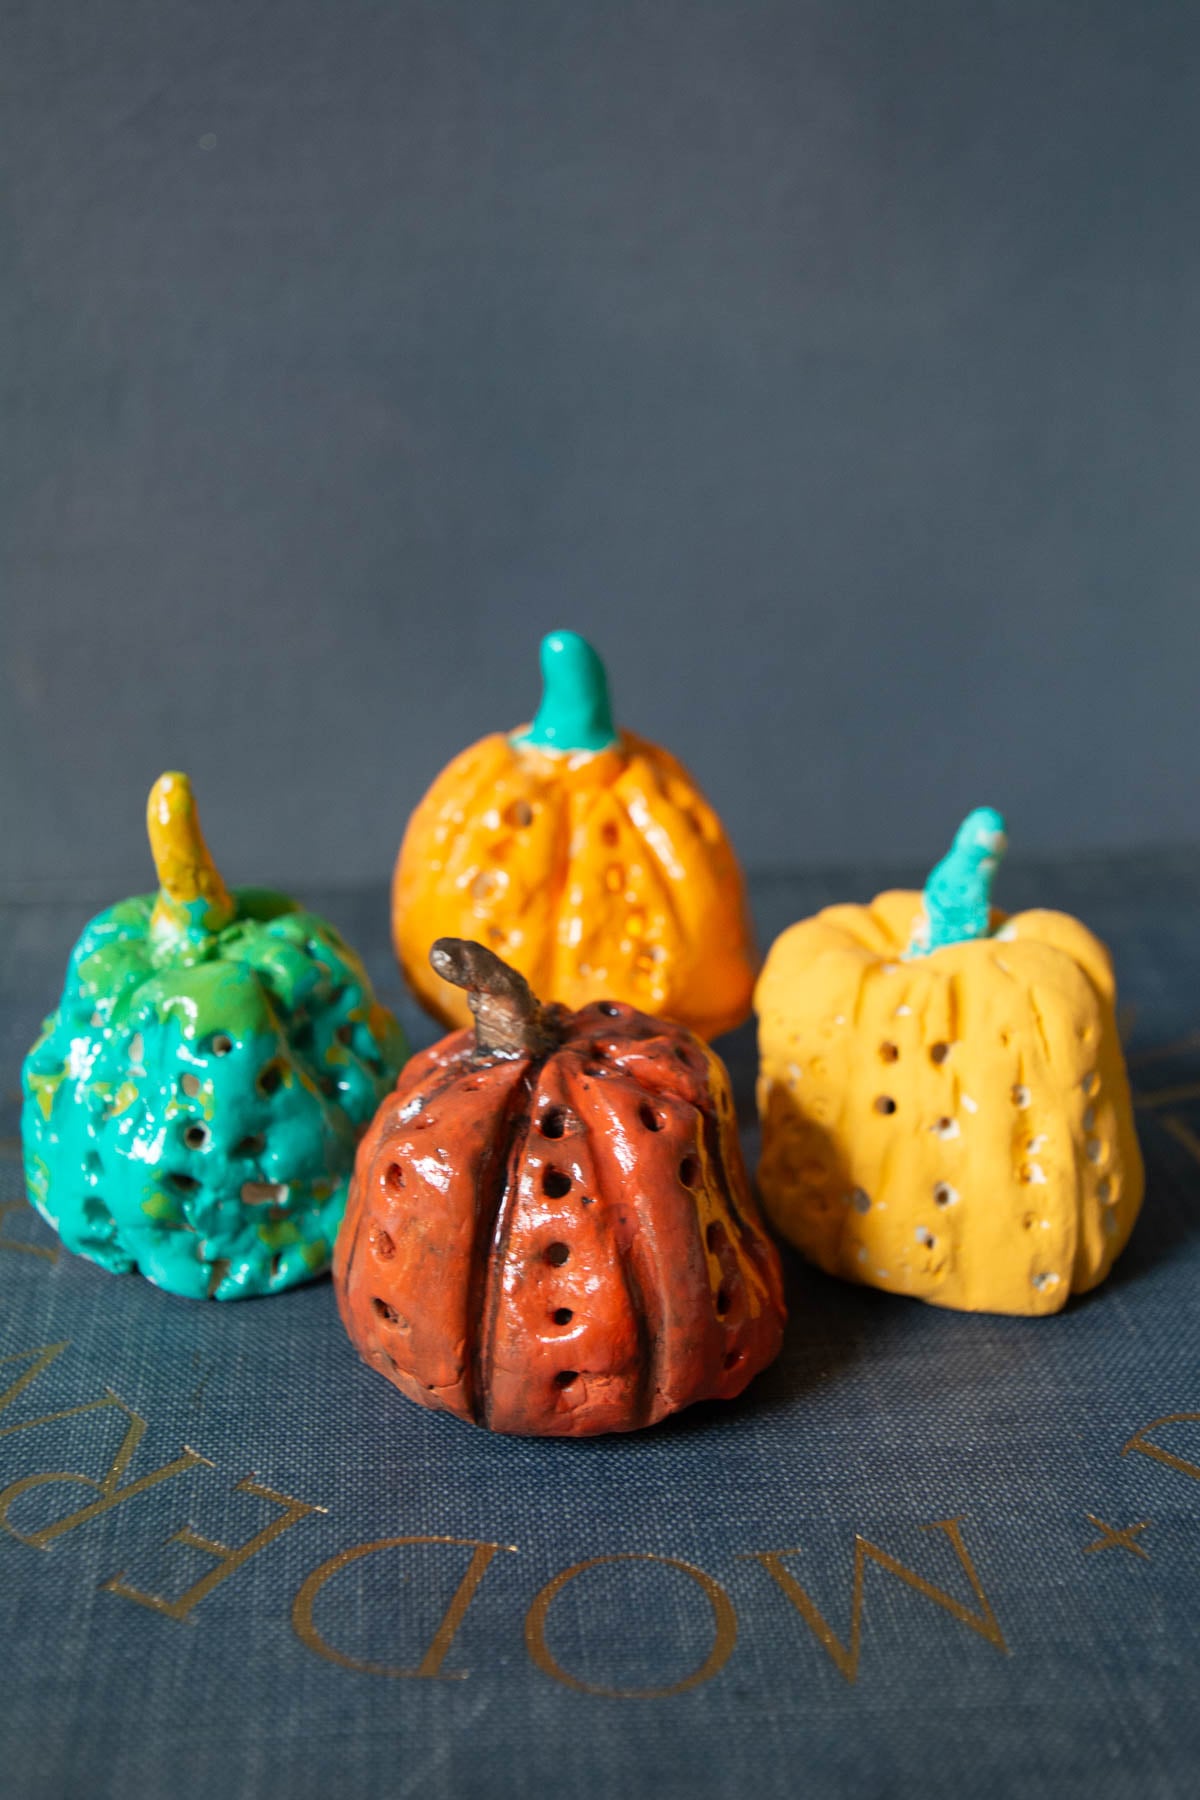
Cool Fall Decor Idea
Display it on its own as a fun little clay pumpkin decoration, or place a battery-operated tea light inside if you created a large opening in the bottom.
If you plan to add tealights to the bottom, make sure the vent hole is large enough and have the artist poke the patterns or dots all the way through.
Clay Pumpkin Tips
- KEEP THE WALLS EVEN – Aim for walls about 1/8 to 1/4 inch thick. Very thin areas are more likely to crack or break. Search more of our creative pinch pot ideas here!
- DON’T USE TOO MUCH WATER – A little water goes a long way with air-dry clay. Too much can make the clay sticky and difficult to work with.
- REMEMBER TO SCORE AND SLIP – Score and add water or slip whenever attaching stems, leaves or other clay pieces.
- DON’T FORGET THE VENT – Hollow ceramic pieces need an opening before kiln firing. Make sure your vent hole goes all the way through to the hollow center.
- LET IT DRY COMPLETELY – Don’t rush to paint or fire the clay. Thick areas may take longer to dry than expected.
- EMBRACE IMPERFECTIONS – Pumpkins don’t need to be perfectly round or symmetrical. Slightly uneven shapes can give them even more personality.
- DOT PATTERNS – if wanting to display with a tea light, make sure clay holes are spread out but poke all the way through.
Frequently Asked Questions
Yes! Air-dry clay works really well for this project and doesn’t require a kiln. We used Crayola Air-Dry Clay for our pumpkins.
Once the sculpture is completely dry, you can add color with acrylic paint and, optionally, a clear sealer for shine.
Plan for about 24 to 72 hours, depending on the clay thickness and drying conditions. Because these pumpkins are three-dimensional sculptures, thicker areas may take longer to dry completely.
A hollow ceramic clay form needs to be vented before firing in a kiln. The hole should go all the way through the clay wall and into the hollow center.
An opening can also help it dry, and you can make it larger if you want to add a battery-operated tea light.
For this children’s art project, I recommend using a battery-operated tea light only.
Some small cracks can happen as air-dry clay dries. Uneven clay thickness, too much water, weak attachments or drying too quickly can contribute to cracking.
Keeping the walls relatively even and allowing the sculpture to dry gradually can help.
Not at all! In fact, choosing unexpected colors is one of the best parts of this project.
Follow us on Pinterest, YouTube & Facebook for more free art and craft ideas!
Our Favorite
Related Famous Artist Lessons
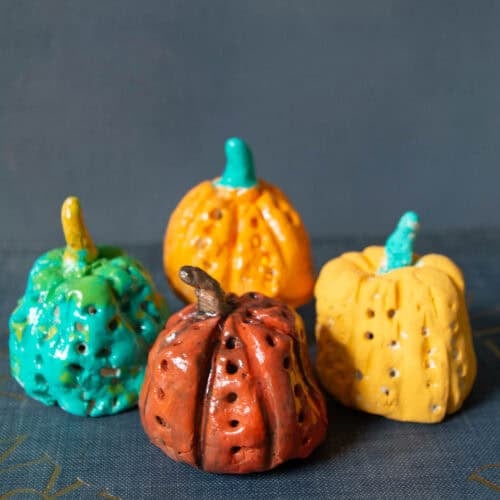
These patterned clay pumpkins are a fun way for kids to practice basic clay-building techniques while creating a sculpture that is completely their own. Whether you use air-dry or ceramic clay, I hope your young artists have as much fun making these little pumpkins as we did!
How to Make Patterned Clay Pumpkin Sculptures
Equipment
- Wooden skewer or clay tool
- Paintbrushes
- Work surface
Supplies
- Crayola Air-Dry Clay or regular ceramic clay
- Water
- Acrylic paint for air-dry clay
- Ceramic glaze for ceramic clay
- Optional Clear Sealer
- Battery-operated tea light optional
Instructions
- BEFORE YOU BEGIN: Decide whether you are using air-dry or ceramic clay. The building process is similar, but drying and finishing will be different. Have kids look at examples of Yayoi Kusama's colorful pumpkin artwork and repeating patterns for inspiration.
- DIVIDE AND ROLL THE CLAY: Divide a handful of clay into two equal sections. Roll each piece into a smooth ball.
- MAKE TWO PINCH POTS: Press your thumb into the center of each ball without pushing through the bottom. Pinch and rotate the clay to create two similar-sized pinch pots with walls about 1/8 to 1/4 inch thick.
- SCORE THE EDGES: Use a wooden skewer or clay tool to scratch the rim of each pinch pot where the two pieces will connect.
- ADD WATER OR SLIP: Lightly rub water over the scored edges when using air-dry clay. Use clay slip when working with ceramic clay.
- JOIN THE PINCH POTS: Press the two scored rims together. Smooth and blend the seam until the two pinch pots form one hollow clay sphere.
- ADD A VENT HOLE: Poke a hole completely through the bottom of the pumpkin and into the hollow center. For an optional luminary, make the opening large enough to fit a battery-operated tea light.
- CREATE THE PUMPKIN TEXTURE: Use the side of a wooden skewer or clay tool to gently press lines into the clay to create the pumpkin sections. Press instead of drawing across the surface.
- ADD A STEM AND DETAILS: Create a stem, leaves or other clay details. Score and add water or slip before attaching each piece.
- ADD A REPEATING PATTERN: Use the end of a wooden skewer to press dots or other repeating patterns into the clay. Encourage kids to experiment with the size and placement of their patterns.
- LET THE CLAY DRY: Allow air-dry clay to dry completely, usually 24 to 72 hours or longer for thicker areas. Ceramic clay should become completely bone dry before bisque firing.
- ADD COLOR: Paint completely dry air-dry clay with acrylic paint.
- ADD A PAINT WASH (optional): Dilute black acrylic paint with water, add paint on top of the design. Wipe or dab away excess paint.
- APPLY CLEAR GLAZE: For extra protect and shine, apply a clear gloss layer. Let the pumpkin fully dry.
- DISPLAY YOUR PUMPKIN: Let all paint, sealer or glaze completely dry or finish firing before displaying. Add a battery-operated tea light if you created a larger opening in the bottom.
Notes
- Keep clay walls approximately 1/8 to 1/4 inch thick.
- Use only a small amount of water when working with air-dry clay.
- Score and add water or slip anytime you attach two pieces of clay.
- Make sure the vent hole reaches the hollow center.
- Allow the clay to dry completely before painting or firing.
- Don’t worry about creating a perfectly round pumpkin. Uneven shapes add personality.
- Use only battery-operated tea lights inside finished pumpkins.