How To Make Model Magic Flowers
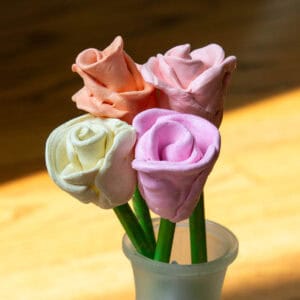
Make easy 3-D roses and other flowers with Model Magic and a few simple supplies. This kid-friendly sculpture project is fun for spring, Valentine’s Day, Mother’s Day or handmade gifts.
Print Tutorial
Equipment
- Paper Bowl
- Skewer
Supplies
Instructions
- Before You Begin: Decide how you want to color the Model Magic. You can mix washable marker into white Model Magic, use colored Model Magic or paint the roses after they dry. Paint the pencil stems ahead of time if you want them ready for kids to use.
- Paint The Stems: Paint old pencils with green acrylic paint. Add a second coat if needed and let them dry completely.
- Color The Model Magic: Dab washable marker into white Model Magic and knead it with your hands until the color is mixed in. You can also use colored Model Magic or paint the roses after they dry.
- Create The Petals: Divide the Model Magic into 7 to 9 pieces and flatten each piece into a small oval-shaped petal.
- Layer The Petals: Arrange the petals in a line so they slightly overlap.
- Roll The Rose: Starting with the inside petal, loosely roll the layered petals together to create the rose shape. Keep the center tighter and use less pressure as you reach the outside petals.
- Attach The Stem: Poke a hole into the bottom of the rose. Add a small drop of glue and insert the painted pencil into the hole.
- Let The Rose Dry: Place the finished roses on foil and allow the Model Magic to dry. Rotate the sculptures as needed so they dry evenly.
- Add A Clear Coat (Optional): Once completely dry, add two coats of clear glaze for extra shine. Let the glaze dry completely before handling.
Notes
- One 1-ounce package of Model Magic makes about two roses.
- Keep the center of the rose tighter and gradually loosen the petals toward the outside.
- Use the foil from the Model Magic package as a work surface.
- Rotate the roses while drying to help them dry evenly.
- If using spray glaze, poke holes in a paper bowl to hold the flowers upright while spraying.
- You can also use polymer clay or air-dry clay, but drying or baking instructions will vary.
Tried this Crafty Art Idea?Please consider Leaving a Review!
Cost: under $5