Snowman At Night Drawing – Simple Chalk Pastels For Beginners

This is one of my favorite Winter drawing projects for kids! Use our step-by-step tutorial to make a fun chalk snowman drawing at home or at school. This simple drawing teaches many art skills and vocabulary while having a lot of imaginative fun!
Have you ever been reading a book and then fallen in love with the illustrations? Illustrators are among the first artists children encounter, and I love reading and sharing ideas together before using them as inspiration for our own art ideas.
This snowman drawing is exactly one of those fun lessons that get those creative wheels spinning.
Why You Will Love This Drawing
Supplies You’ll Need
Disclosure: This post may contain affiliate links when clicked, we may earn a small commission at no additional cost to you. Read our full privacy policy.
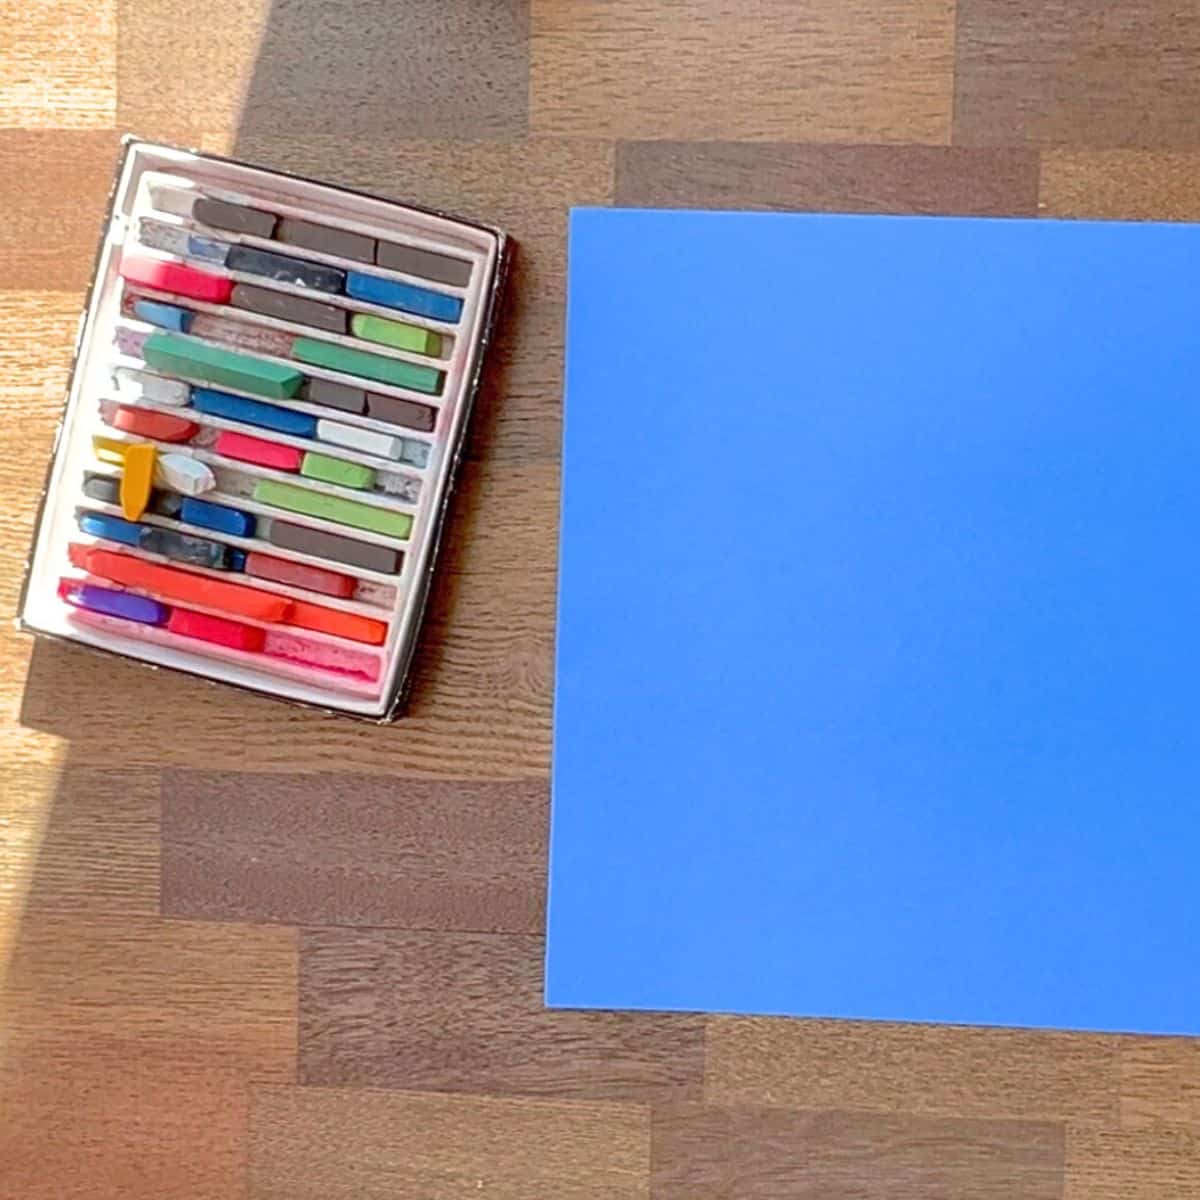
Notes On Supplies:
- This brand is the best construction paper for kids. It doesn’t fade and is thicker than other brands. Anytime I try to use another type, I am disappointed.
- We are using Nu-Pastels that seem to have less dust than other brands.
What book is this drawing based on?
This art lesson is based on the illustrations from the book Snowmen at Night, written by Caralyn Buehner and illustrated by Mark Buehner. Kids absolutely love this book and the fun snowman drawings.
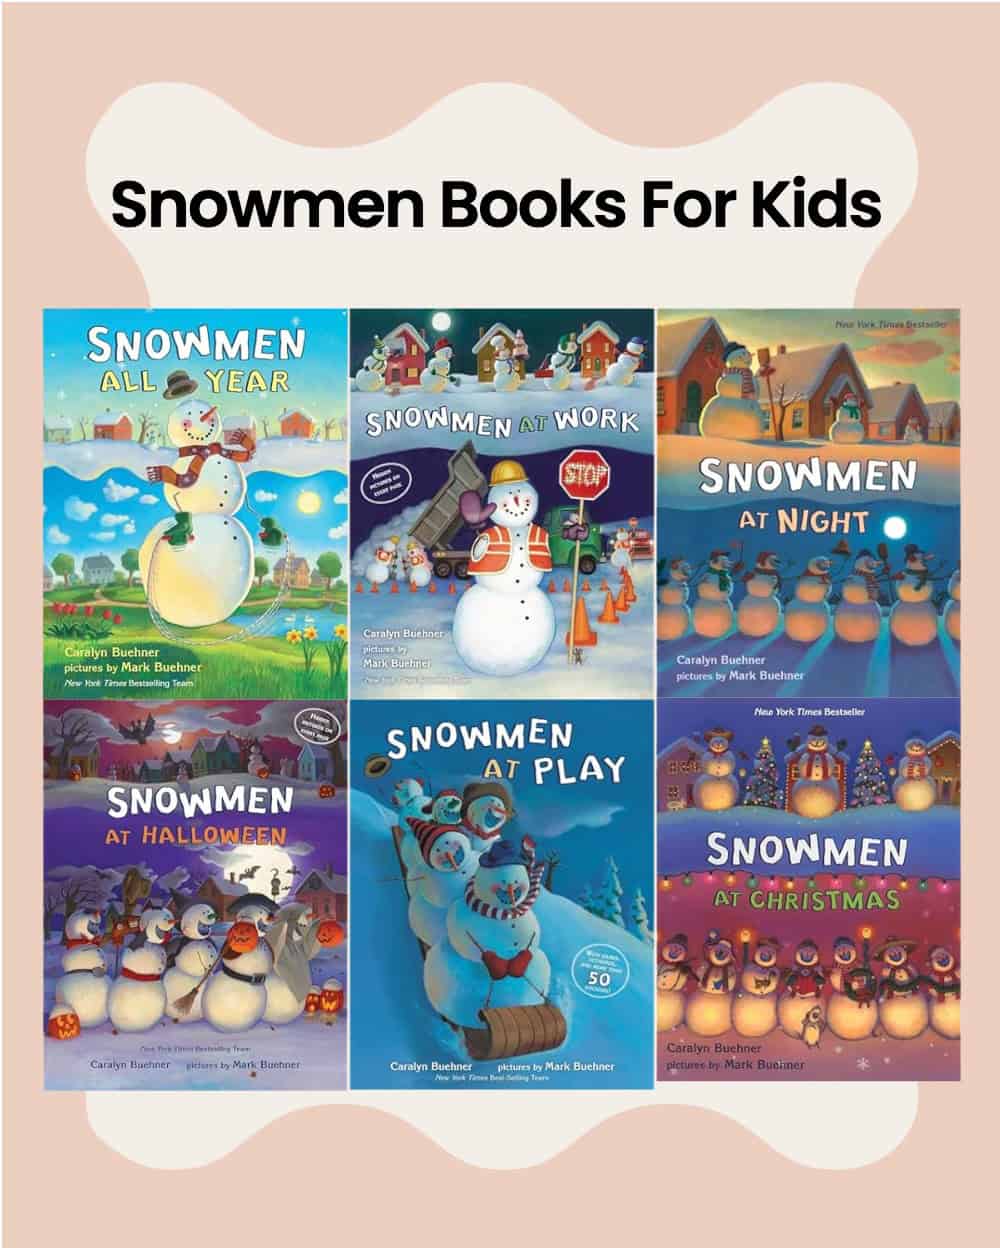
You may also want to check out their other books in the series: Snowmen at Christmas, Snowmen at Play, Snowmen All Year, Snowmen at Work, or Snowmen at Halloween.
Step-By-Step Instructions
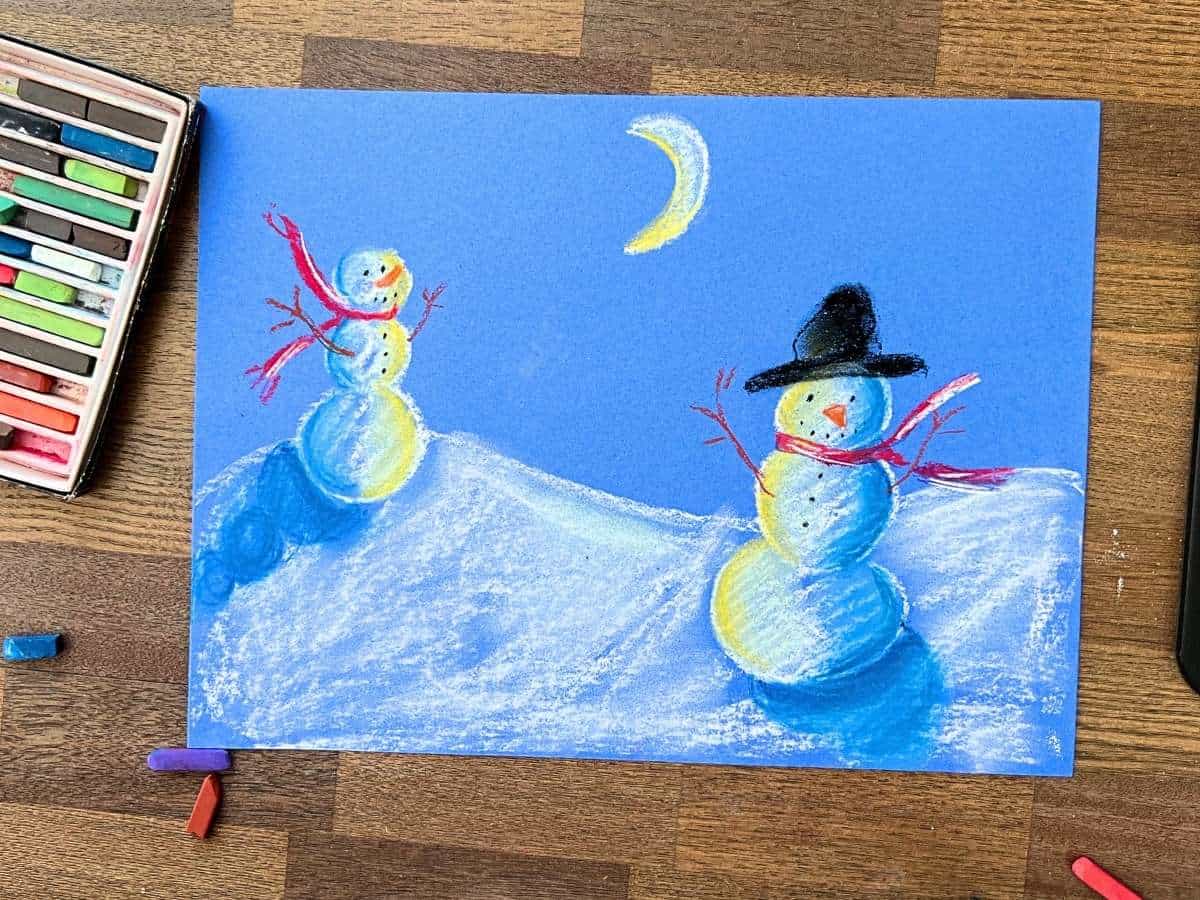
ART TEACHER TIP – Before drawing, decide where the light source will be. It can be the moon (the easiest) on the actual page or just a general place that isn’t even drawn.
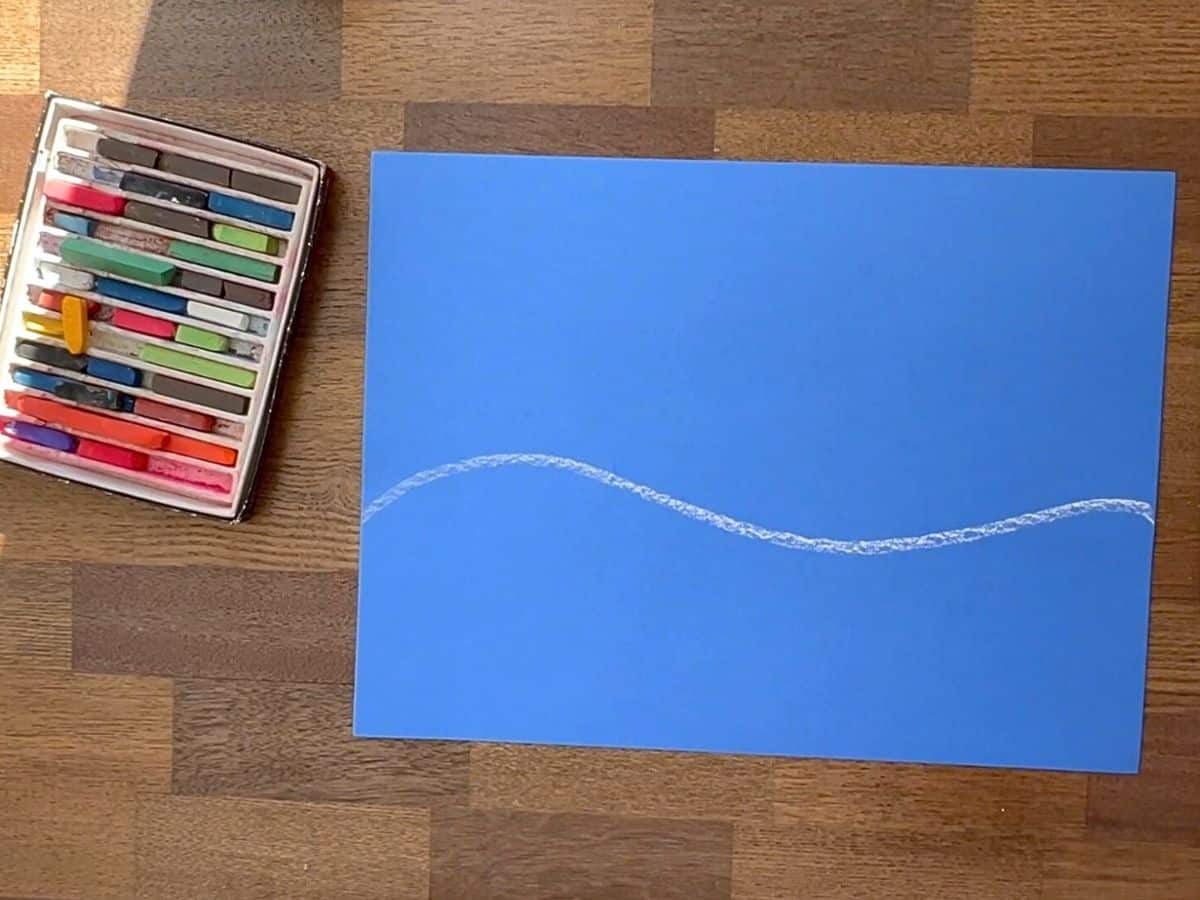
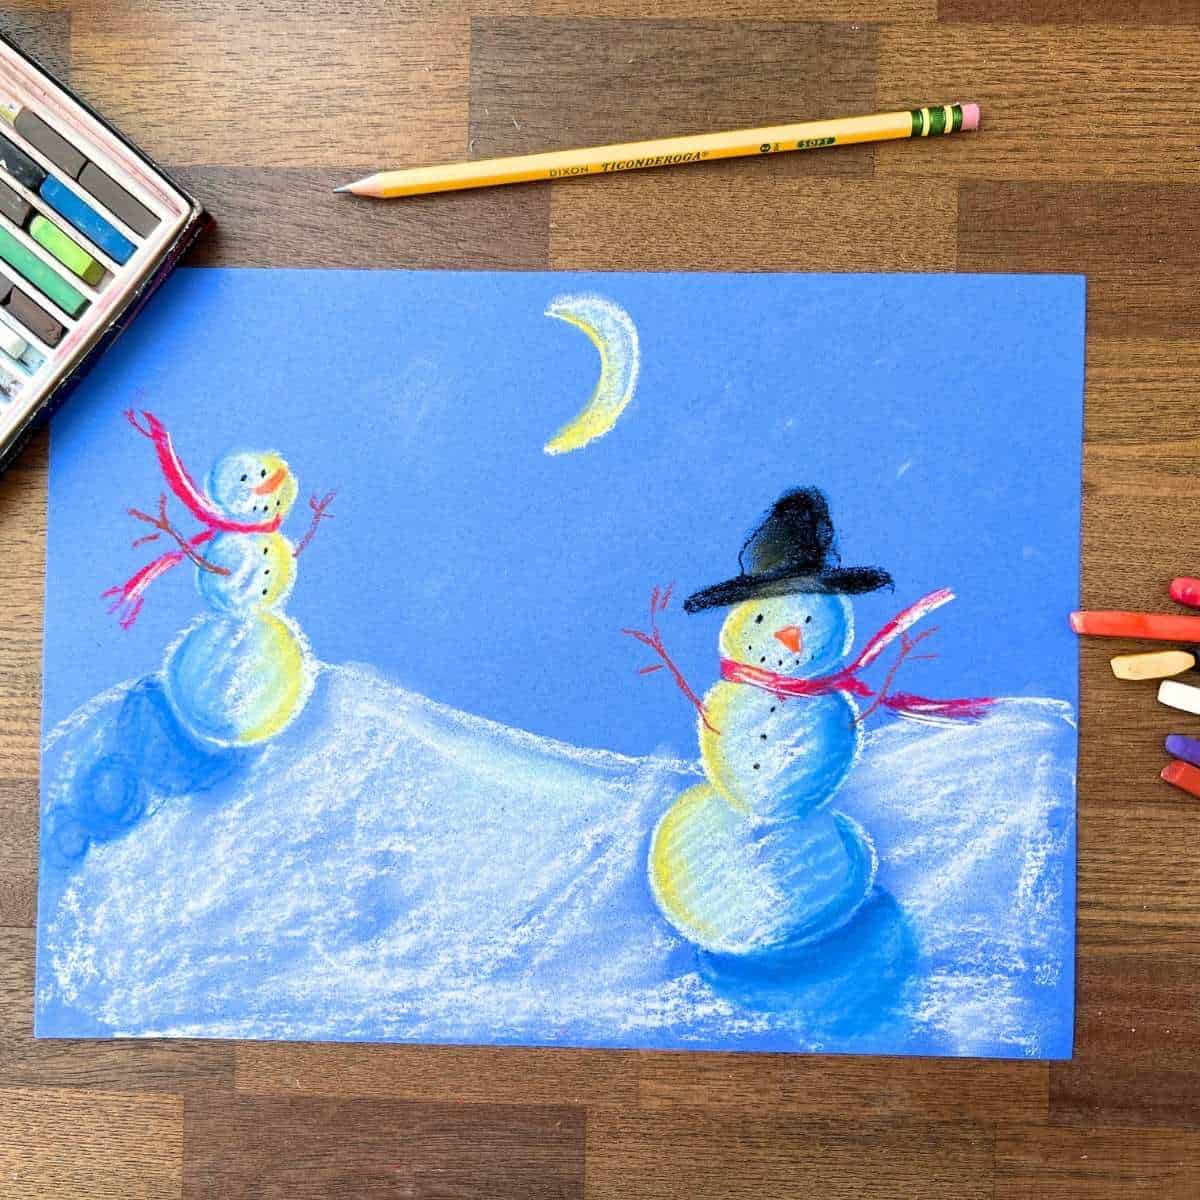
Step 1: Draw Horizon Line
Use a white chalk pastel to draw a simple horizon line across the page.
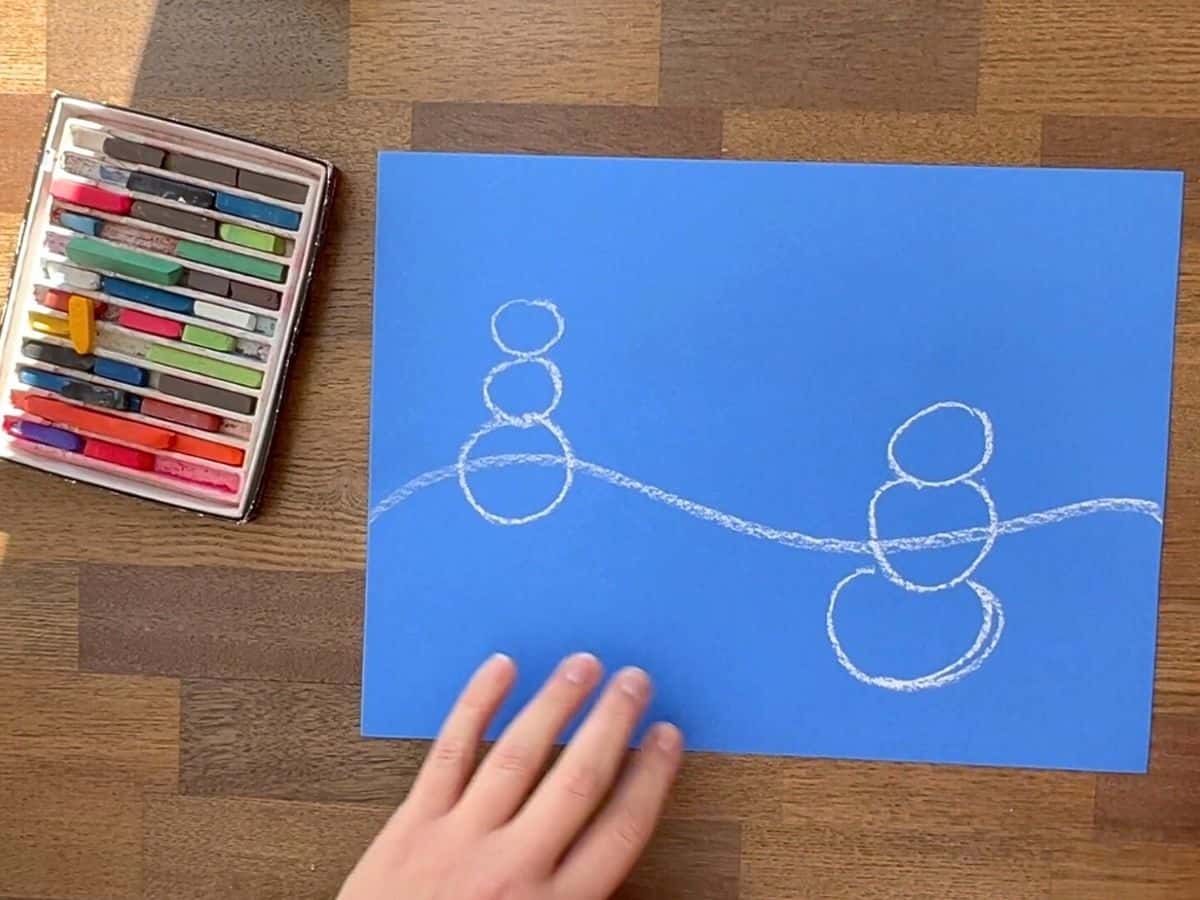
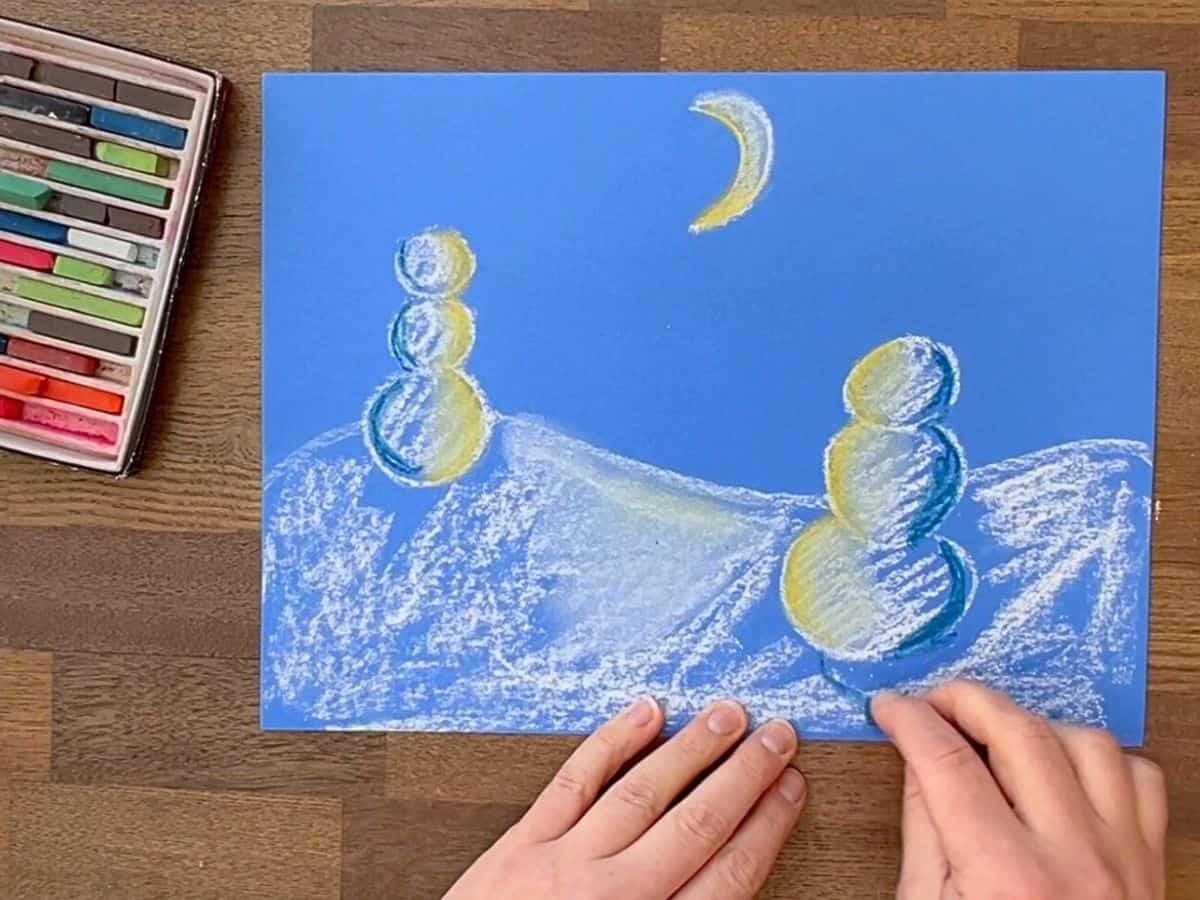
Step 2: Draw 2-3 Snowmen
Draw one snowman closer to the bottom of the page and one closer to the horizon. The one closest to bottom of the page should be larger.
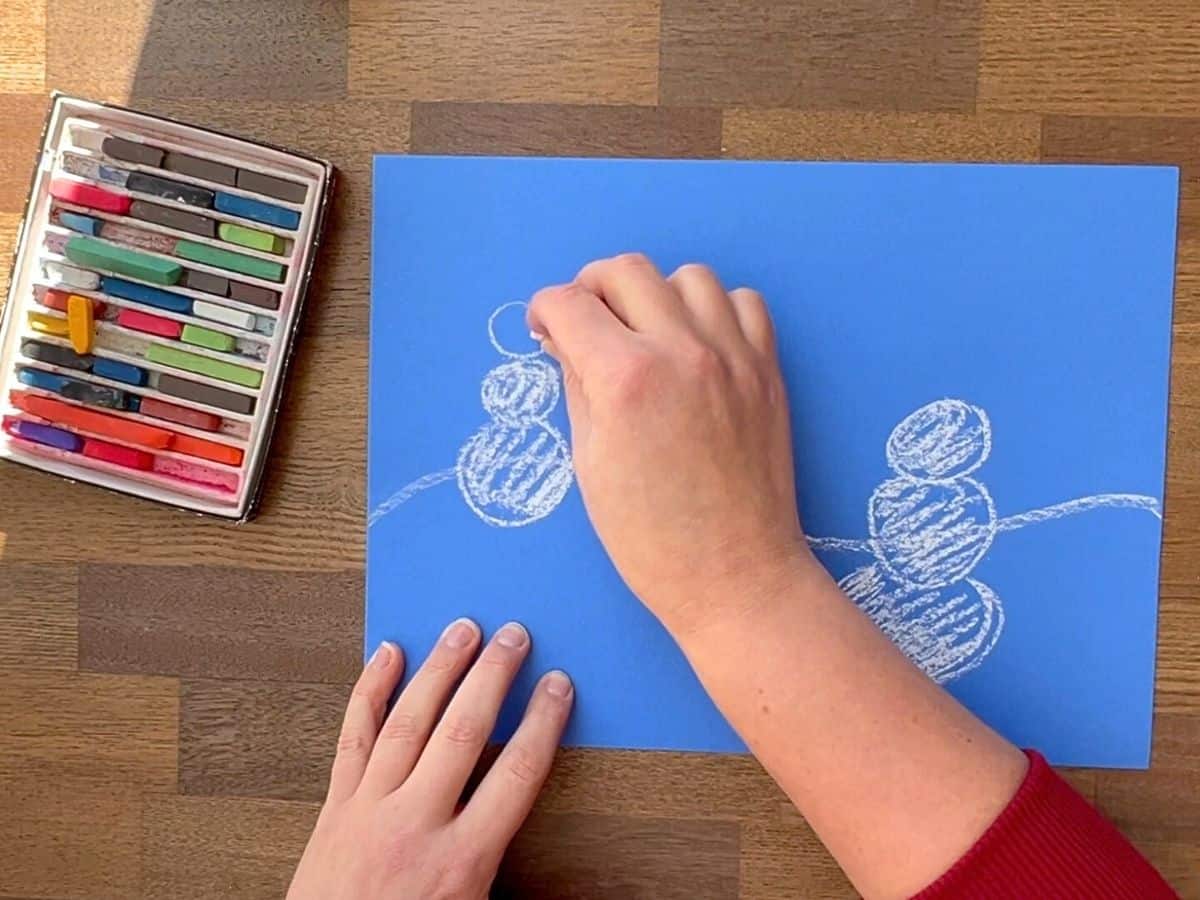
Step 3: Fill In Snow
Lightly add white chalk pastel inside snowmen.
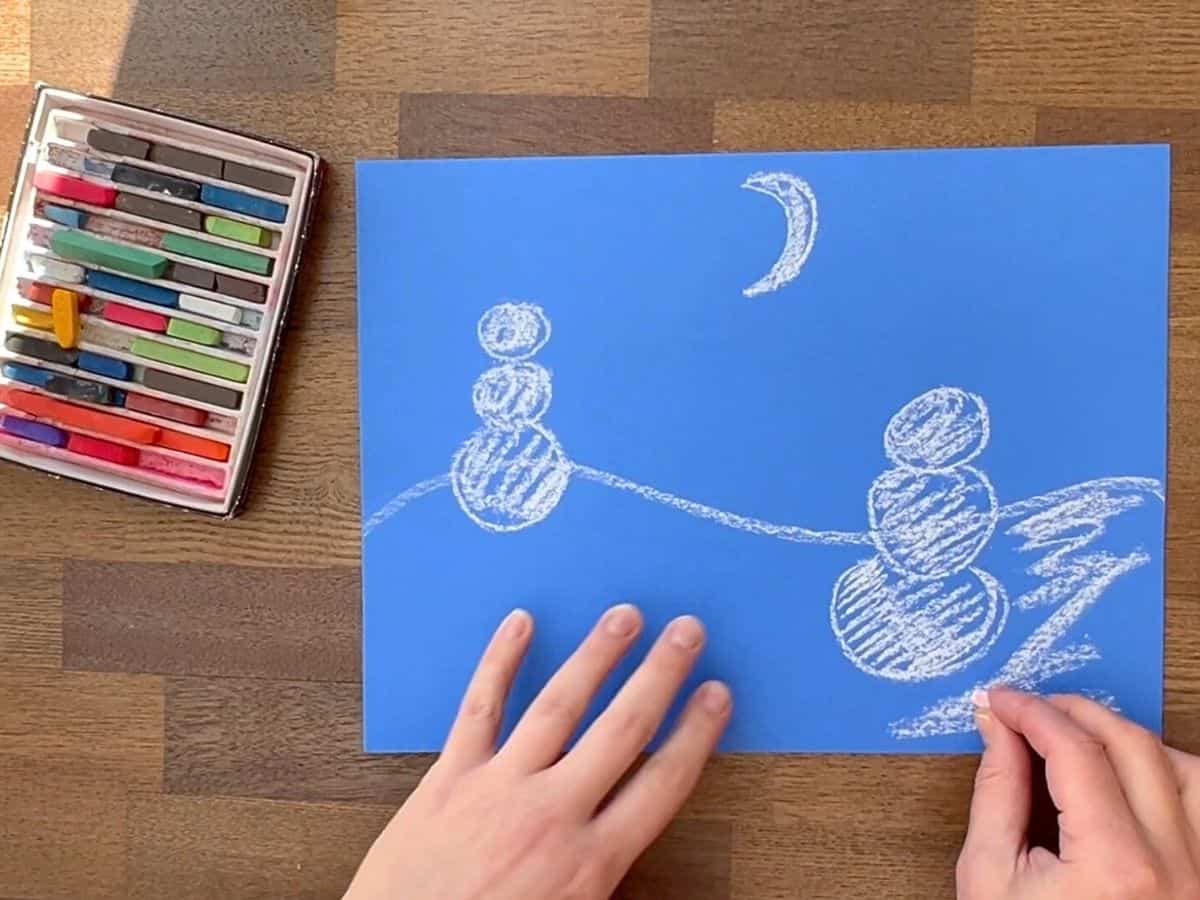
Step 4: Draw A Moon and More Snow
Fill the ground with white chalk pastel and add a moon.
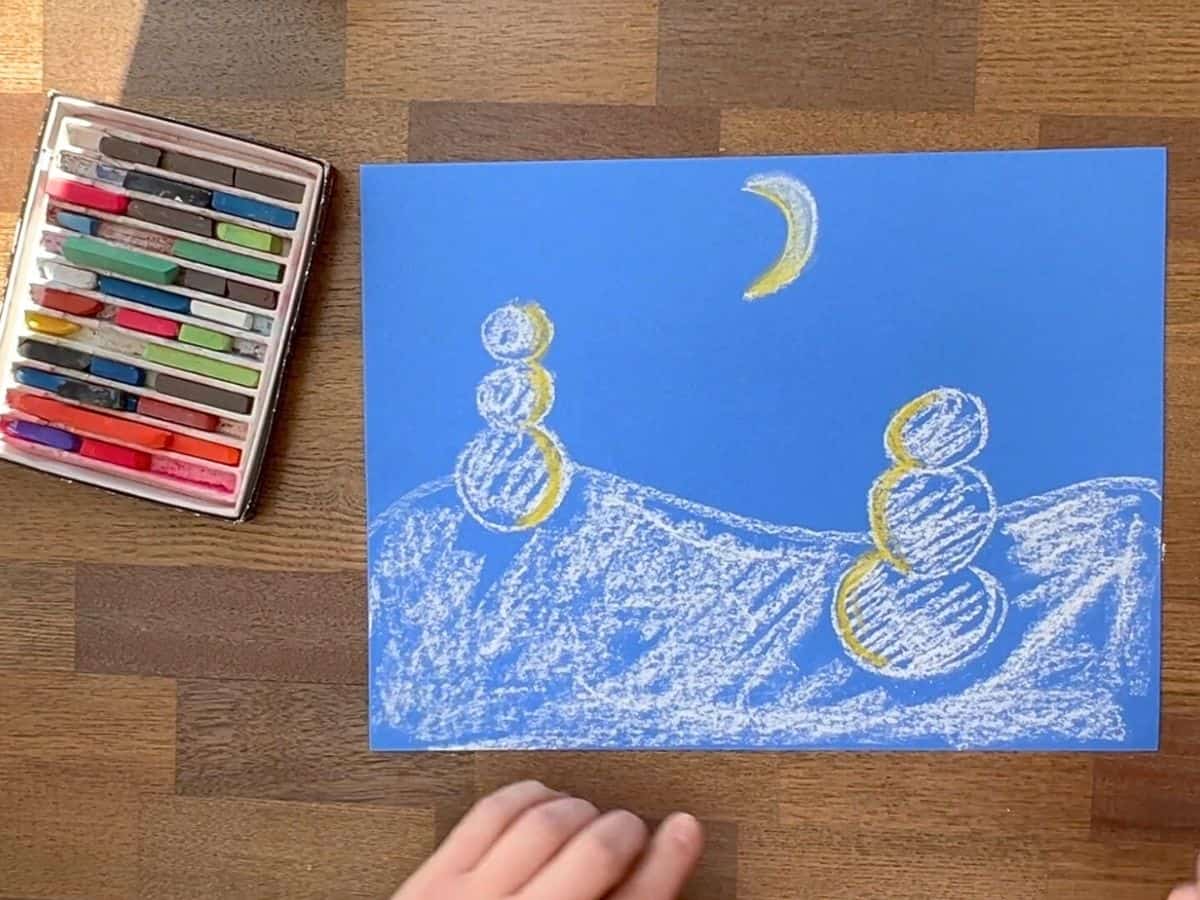
Step 5: Add Highlights
On the sides closest to the moonlight, add yellow highlights to the snowman.

Step 6: Blend
Use one finger to carefully blend yellow areas with the white pastel.
Step 7: Add Shadows
With a darker blue or purple chalk add shadows on the oppposite side of the snowmen.
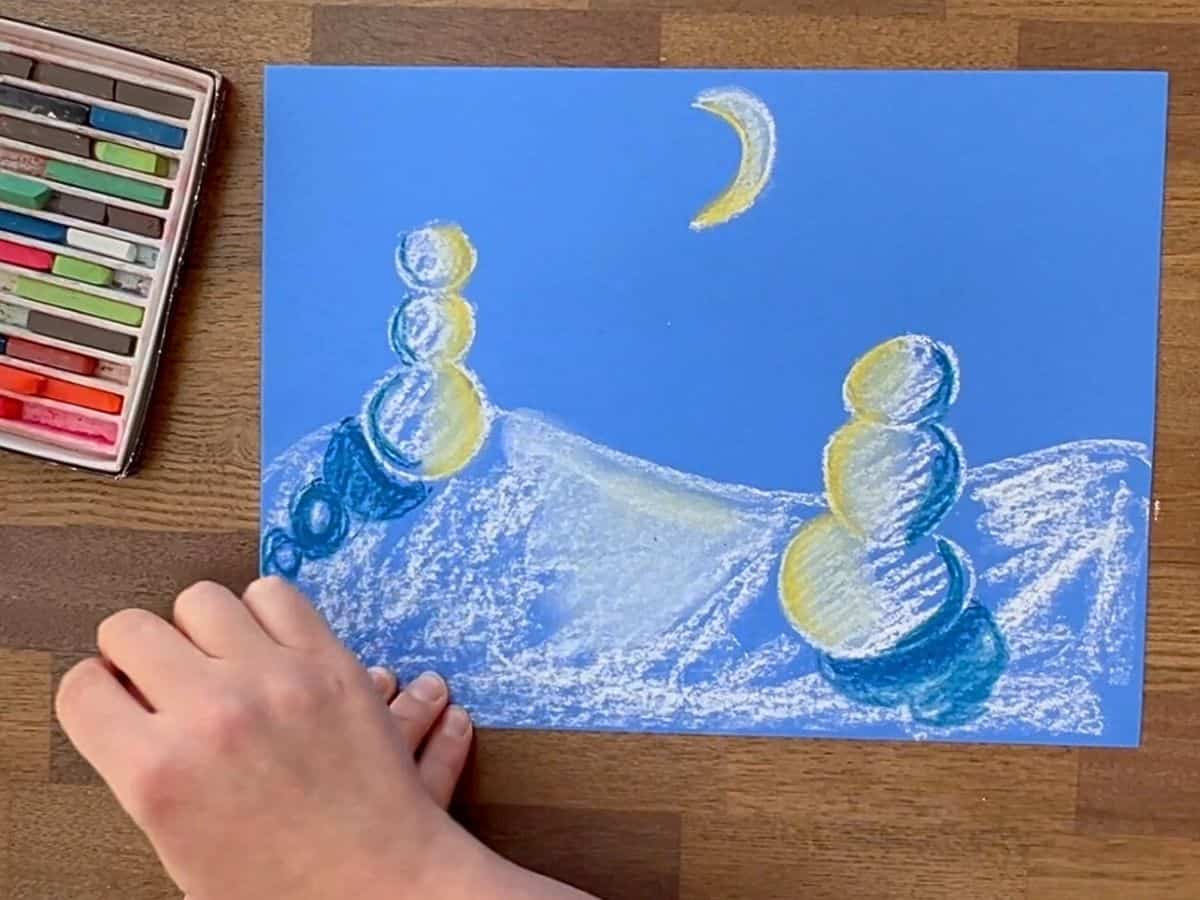
Step 8: Add Cast Shadows
Create snowman cast shadows with the blue pastels.
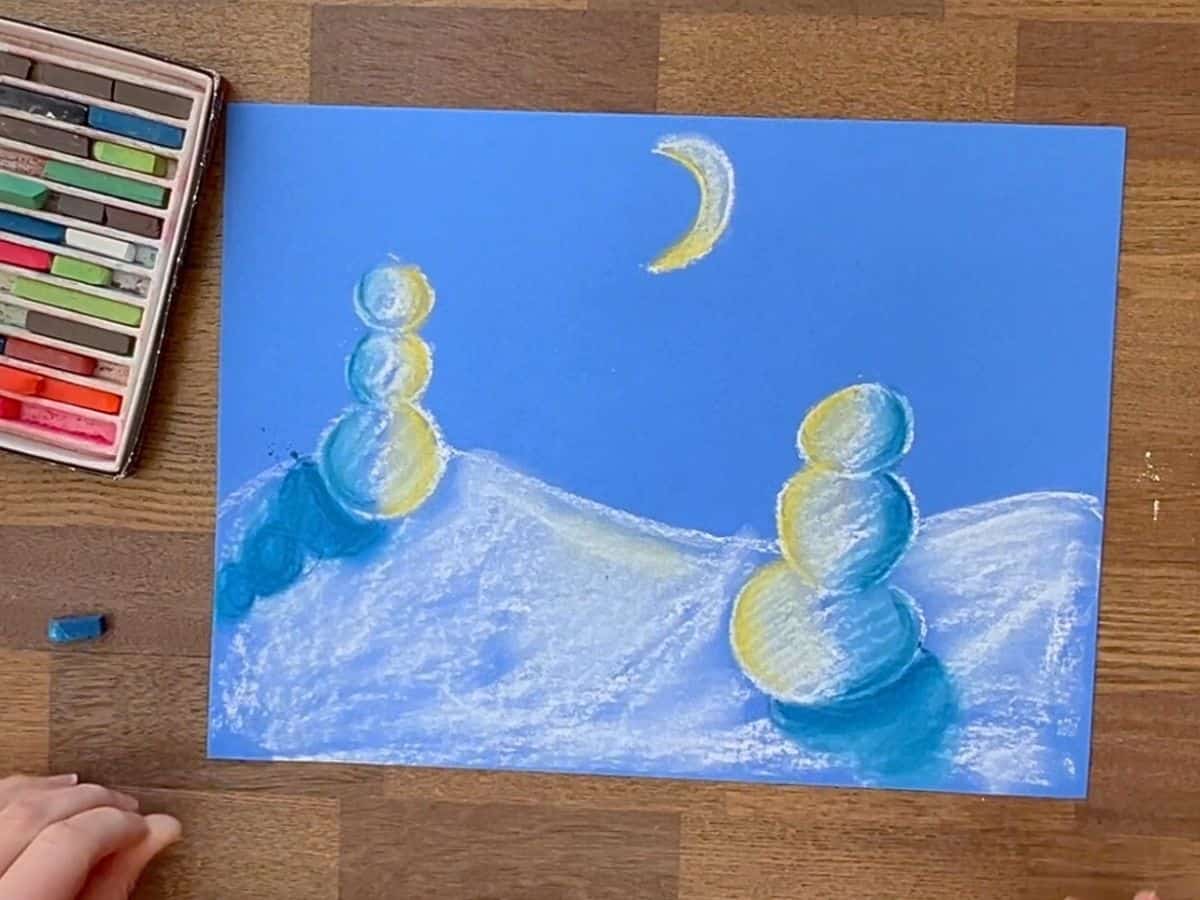
Step 9: Blend
Use your finger to blend blue and white chalk pastels.
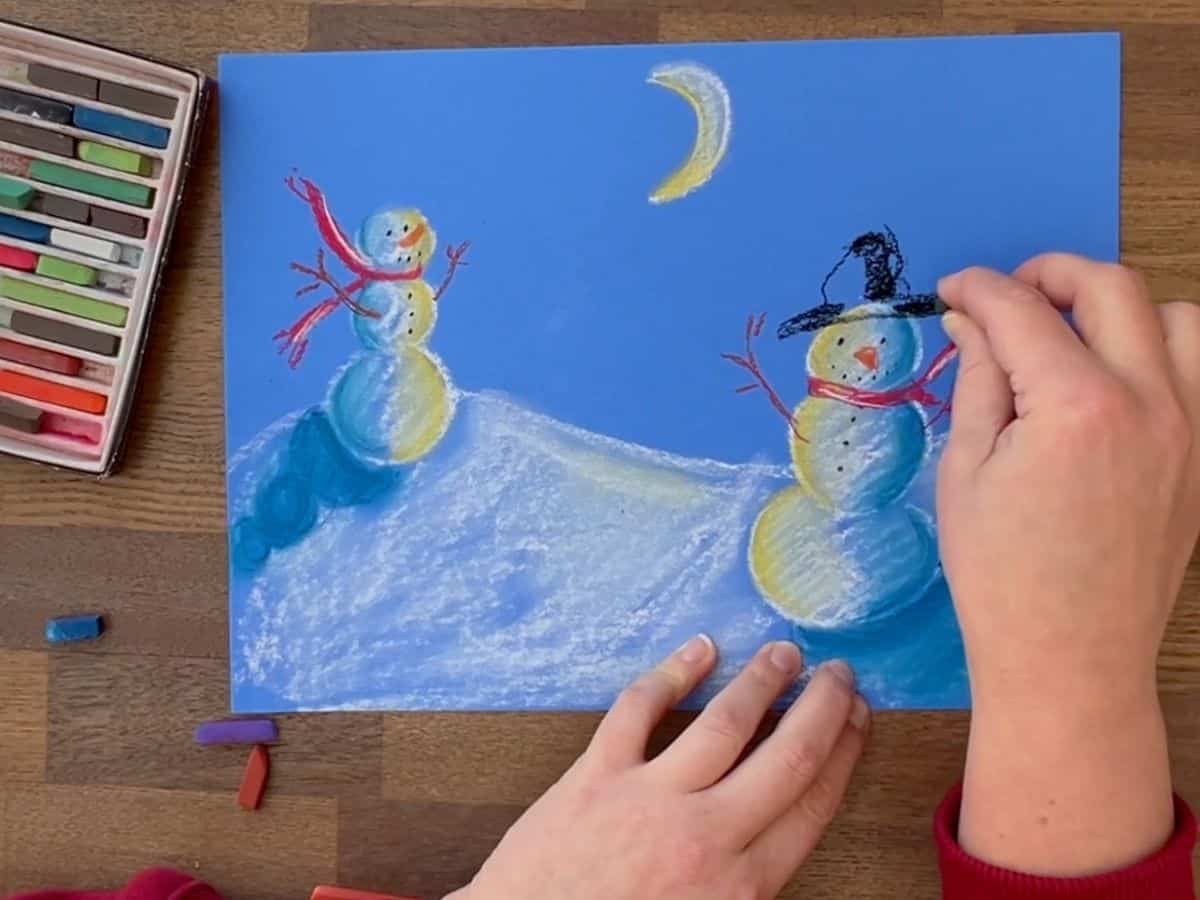
Step 10: Draw Extra Details
Use drawing materials to add an orange carrot nose, scarf, top hat and other additional details.
Tips
- USE ONE FINGER – Don’t let kids use their whole hand to smudge the drawing.
- DON’T GRIND CHALK PASTELS – Encourage kids to limit the amount of dust they see on the paper.
- WIPE FINGER – In between blending colors, wipe your finger.
- CAN MAKE MORE ADVANCED – For older artists, consider using different shades of blues to create a sense of a 3-D form.
- CLEAN SMUDGES – Use a good eraser to carefully remove excess chalk pastel smudges.
Drawing FAQs
For non-professional drawings (aka beginner or kid drawings), using workable fixative or even hair spray can help set the drawing.
After spraying and drying, I recommend making a folder out of a larger piece of manila paper to take the drawing home.
related
Winter Art Lessons
This chalk pastel snowman project is more than just a fun winter activity; it’s a wonderful way to explore art skills, vocabulary, and imagination. Whether you’re drawing at home or in the classroom, encourage kids to make their snowmen unique and to play with light, shadow, and color. Remember, every smudge and blend is part of the creative journey!
Do you like this art project? Please give us a 5-STAR review below ⭐️⭐️⭐️⭐️⭐️ and have fun being creative with your family.
Snowmen At Night Drawing Project

Supplies
- Chalk Pastels
- 1 piece 9 x 12" Blue Paper
- Workable Fixative
- Snowmen At Night optional
Instructions
- Draw the horizon line using white chalk pastel across your paper to create the snowy landscape’s base.
- Sketch 2 to 3 snowmen: one large snowman near the bottom (foreground) and 1 or 2 smaller ones closer to the horizon line to add depth.
- Lightly fill in the snowmen’s bodies with white chalk pastel.
- Add the moon in the sky and fill the ground area with white chalk pastel.
- On the sides of the snowmen closest to the moon, add soft yellow highlights to show moonlight.
- Blend the yellow highlights into the white snow gently using your fingertip.
- Add shadows on the sides opposite the moonlight using darker blue or purple chalk to give the snowmen shape.
- Create cast shadows on the ground with blue pastels to anchor the snowmen in the scene.
- Blend the blue and white pastels on the ground softly with your finger to unify the snowy scene.
- Add extra details like carrot noses, scarves, top hats, or buttons using markers or chalk pastels to personalize your snowmen.
- Spray drawings with workable fixative or hair spray.
Video
Notes
- Use only one finger for blending to avoid over-smudging.
- Wipe your finger with a paper towel between blending colors.
- Avoid grinding chalk pastels to reduce dust and keep colors vibrant.
- Older artists can try multiple shades of blue to create a 3D effect.
- Carefully erase any excess smudges with a good eraser.