How To Make Leaf Prints With Paint
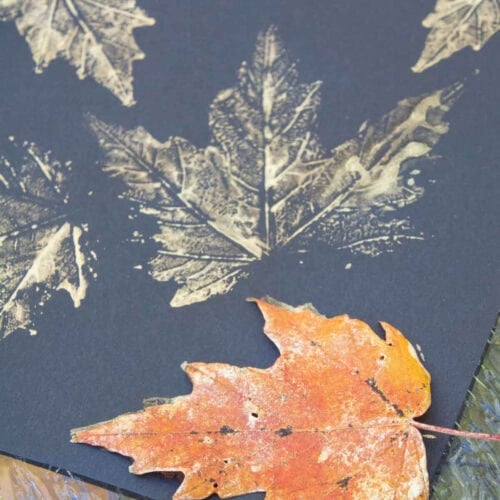
Learn how to make easy leaf prints with paint using real leaves. This simple nature art and printmaking activity can be completed in about 10 minutes.
Print Tutorial
Equipment
- Scrap paper or a protected work surface
Supplies
- Fresh or newly fallen leaves
- Metallic gold acrylic paint can also use tempera paint
- Black paper
Instructions
- BEFORE YOU BEGIN: Look for whole, flat leaves with noticeable veins. Fresh or newly fallen leaves work best because leaves that are too dry may crack or break when pressed.
- FIND THE RIGHT LEAVES: Choose whole, flat leaves with noticeable veins. Avoid leaves that are too dry or brittle.
- PAINT THE TEXTURED SIDE: Flip the leaf over so the underside with the raised veins is facing up. Use a paintbrush to completely cover this side with a thin layer of paint.
- PRINT THE LEAF: Carefully place the painted side of the leaf down on the paper. Gently press over the entire leaf with your fingers to transfer the paint.
- REMOVE THE LEAF: Slowly lift the leaf straight off the paper to reveal your print. Let the paint dry completely before touching it or adding more details.
Notes
- Don't use too much paint. A thin, even layer will help the leaf's veins and details show.
- You may be able to use the same painted leaf for a few prints.
- Try different leaf shapes and sizes to create a variety of prints.
- While we used metallic gold acrylic paint on black paper, you can experiment with other paint and paper color combinations.
Tried this Crafty Art Idea?Please consider Leaving a Review!
Cost: under $5