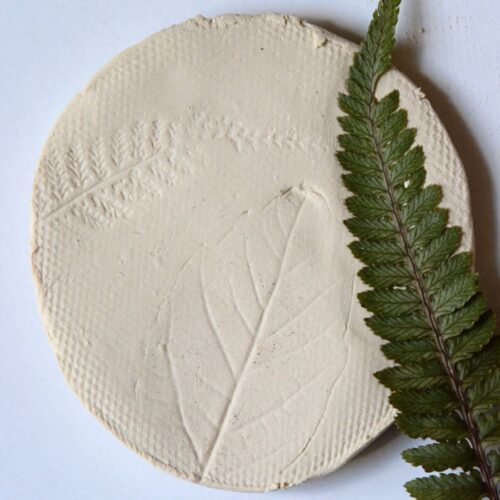
How To Make Clay Leaf Impressions
Use this tutorial to make easy clay leaf prints in clay that are a perfect ornament idea.
Print Tutorial
Equipment
- Rolling Pin or Wine Bottle optional
- Cookie Cutter or Lid
- Wooden Skewer or Straw
- Work surface canvas, coated cardboard, parchment paper or wax paper
- Small container of water
- Slab Rolling Guide could be tape together paint sticks or rulers to your desired thickness.
Supplies
- Regular Clay, Air Dry Clay or Polymer Clay We are using Crayola air dry clay for this project at home.
- Variety Of Leaves With Fun Textures
Instructions
- Prepare Your Clay: Roll your clay into a 1/4-inch thick slab using rulers and a rolling pin.
- Shape Your Clay: Use a cookie cutter or lid to create your desired shape, then remove excess clay.
- Smooth the Edges: Dampen your finger and smooth out any sharp edges for a clean finish.
- Find the Textured Leaf Side: Explore leaf textures with children for added artistic fun.
- Create Impressions: Press the textured side of a leaf into the clay to make unique patterns.
- Lift Off the Leaf: Carefully remove the leaf from the clay; use one leaf for small items or overlap textures for a unique design.
- Allow to Dry: For air dry clay, wait 24-48 hours; for polymer clay, follow baking instructions on the packaging.
- Add Color (Optional): Paint with watercolor, acrylic paint, or leave as is. Consider adding a clear coat for ornaments or necklaces.
Notes
- You can modify this craft by cutting around the outline of the leaf, making slump dishes and painting in a variety of ways.
Cost: under $5