How To Make Chalk Name Art
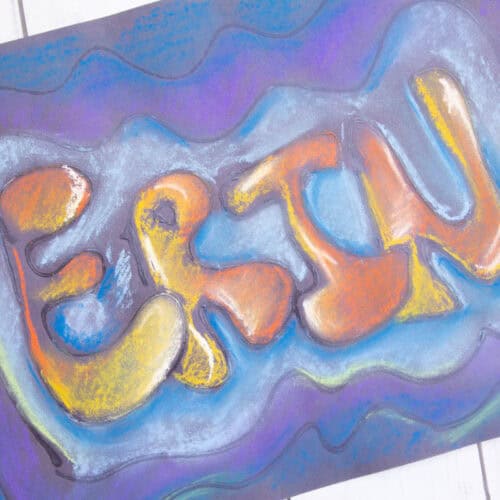
Create colorful chalk name art using glue, chalk pastels and black paper. This easy art lesson lets kids experiment with color while creating a personalized piece of artwork.
Print Tutorial
Equipment
Supplies
- Black construction paper
- White school glue
- Chalk pastels
- Pencil
Instructions
- BEFORE YOU BEGIN: Have kids lightly sketch their names in large letters before adding glue. Simple block or bubble letters work well and leave plenty of space for adding color.
- DRAW YOUR NAME: Lightly draw your name in large letters on black construction paper.
- TRACE WITH GLUE: Carefully trace over the pencil lines with white school glue. Let the glue dry completely before adding chalk.
- ADD CHALK PASTELS: Choose between warm and cool pastel colors and add color around the dried glue lines. Use the opposite color scheme in the negative space.
- BLEND THE COLORS: Use your fingers to gently blend and smudge the chalk pastels. Experiment with different color combinations as you work.
- ADD MORE DETAILS: Continue adding and blending chalk until you are happy with your design. Add extra lines, shapes or patterns if desired.
- PROTECT THE ARTWORK: Carefully shake off excess chalk dust. Display the finished artwork as is or have an adult use an appropriate fixative to help reduce smudging.
Notes
- Draw the name large enough to fill most of the paper. Let the glue dry completely before using chalk pastels.
- Encourage kids to experiment with blending colors instead of trying to make every section look the same.
- Use one finger or paper towel to gently blend chalk pastels.
- Chalk pastels can be messy, so protect tables and work surfaces before beginning.
- Avoid blowing chalk dust off the artwork.
Tried this Crafty Art Idea?Please consider Leaving a Review!