Coffee Filter Fall Leaf Craft
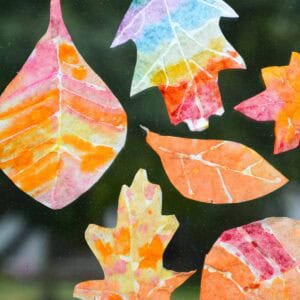
Make colorful coffee filter leaves with watercolor paint and glue. This easy fall art project lets kids explore color mixing while creating beautiful leaf art.
Print Tutorial
Equipment
- Scissors
- Baking sheet or scrap paper
Instructions
- BEFORE YOU BEGIN - Cover your work surface with extra paper or work on a baking sheet to prevent the coffee filters and glue from sticking to the table.
- CUT THE LEAVES - Trace real leaves or draw simple leaf shapes on the coffee filters. Cut out each leaf. For younger children, adults can pre-cut the leaves.
- ADD THE LEAF VEINS - Use a glue bottle to draw thin lines for the leaf veins. Avoid large globs of glue. Let the glue dry completely before painting.
- ADD COLOR - Paint each coffee filter with watercolor paints. Choose colors that blend well together and watch as the colors spread and mix. The dried glue lines will resist the watercolor.
- LET COMPLETELY DRY - Place the painted leaves on a clean sheet of paper or baking sheet. Let them dry completely before carefully peeling them up.
Work a piece of paper and don't move to prevent tearing until dry.
Notes
- Use thin glue lines to prevent the coffee filters from sticking.
- Let the glue dry completely before adding watercolor.
- Pre-cut the leaves when doing this project with preschoolers or younger children.
- Regular watercolor palettes and liquid watercolors both work well.
- Skip the glue and draw leaf veins with Sharpies, metallic paint markers, or oil pastels instead.
- Hang finished leaves in a window with tape or glue dots for easy fall decorations.
Tried this Crafty Art Idea?Please consider Leaving a Review!
Cost: under $5