Easy Model Magic Ghosts
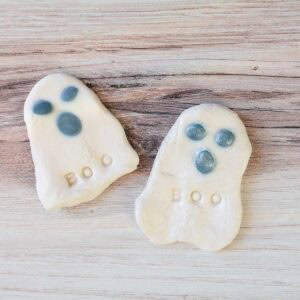
Make cute Model Magic ghosts with this easy Halloween sculpture project for kids. Young artists can shape, stamp and personalize their ghosts before adding a protective finish or turning them into magnets.
Print Tutorial
Equipment
- Toothpick, optional
Supplies
- White Model Magic
- Small letter stamps optional
- Iridescent medium Glitter Mod Podge or Clear Coat
- Magnet optional
- Black washable marker
Instructions
- Shape The Ghost - Use your hands to pinch, press and sculpt the white Model Magic into a simple ghost shape. Keep it flatter if you plan to turn it into a magnet.
- Add Designs - Use small letter stamps or a toothpick to gently press designs into the Model Magic. Try adding letters to spell "BOO" or create your own textures and patterns.
- Make Black Model Magic - Color a small piece of white Model Magic with a black washable marker. Knead and mix until the color is evenly distributed.
- Create The Face - Use small pieces of black Model Magic to make simple eyes, a mouth and other facial details. Gently press the pieces onto the ghost.
- Let The Ghost Dry - Place the finished ghost on a plastic bag or the opened Model Magic package and allow it to air dry completely.
- Add A Protective Coat - Once dry, brush on iridescent medium, glitter Mod Podge or your favorite clear protective coat. Let dry completely.
Notes
- PREVENT STICKING - Have kids build and dry their ghosts on the opened Model Magic package or a plastic bag.
- AVOID SMEARING - Homemade black Model Magic may smear onto the white clay. Make the black facial features separately, let them dry, and glue them onto the dried ghost.
- CHANGE THE DESIGN - Encourage kids to experiment with different ghost shapes, expressions, stamped words and textures.
- MAKE A MAGNET - Once completely dry, glue a magnet to the back of a flatter ghost.
Tried this Crafty Art Idea?Please consider Leaving a Review!