Easy Halloween Clay Magnet Craft
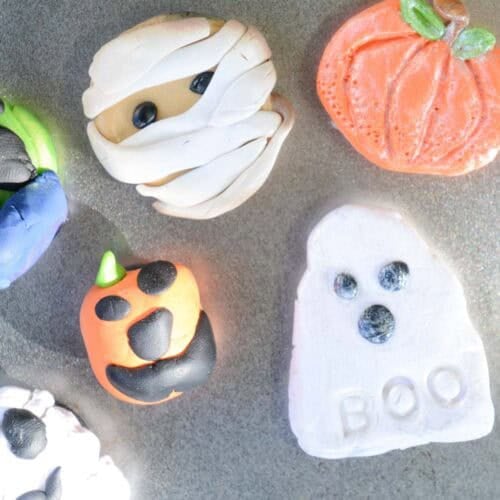
Make cute Halloween clay magnets with kids using polymer clay. Young artists can practice basic sculpting techniques while creating ghosts, pumpkins, mummies, monsters and other Halloween designs.
Print Tutorial
Equipment
- Smooth work surface such as this polymer clay kit
- Rolling pin or small glass
- Baking tray
- Magnetic oven thermometer
Supplies
- Polymer Clay
- Small Magnets
- Super Glue
- Clear Gloss or Iridescent Medium Optional
Instructions
Before You Begin
- Preheat the toaster oven according to the directions for your brand of polymer clay. Have kids sketch a simple Halloween design first if they need help planning their sculpture. An adult should always handle the baking and super glue.
Instructions
- Prepare The Clay - Give each child a small amount of polymer clay. Warm and condition the clay with clean hands until it is easy to shape.
- Sculpt Your Halloween Design - Shape the clay into a simple ghost, pumpkin, mummy, monster, or other Halloween design. Keep the sculpture relatively flat so it works well as a magnet.
- Add Details and Texture - Use coils, small clay pieces, toothpicks, stamps or clay tools to add facial features, patterns and texture. Make sure all clay pieces are firmly attached.
- Bake The Clay - Have an adult bake the polymer clay according to the manufacturer's directions. For the Premo clay used in this project, bake the pieces at 275°F for approximately 15 minutes.
- Cool Completely - Remove the sculptures from the oven and allow them to cool completely before handling or adding the magnets.
- Add A Clear Coat (Optional) - Brush on a compatible clear gloss or iridescent medium if you want to add shine to the finished clay.
- Add A Magnet - Have an adult glue one or two magnets to the back of each sculpture, depending on its size. Let the glue dry completely before using.
Notes
- Keep the first designs simple, especially with younger artists.
- Give kids a magnet while sculpting so they can check that their design is large enough.
- Avoid making the clay too thin.
- Work on a clean surface because polymer clay colors can transfer.
- Before baking, check that all added clay pieces are firmly pressed together.
- Use an oven thermometer to help maintain an even baking temperature. Always follow the baking directions for the specific polymer clay you are using.
Tried this Crafty Art Idea?Please consider Leaving a Review!