Colorful Fall Chalk Pastel Drawing
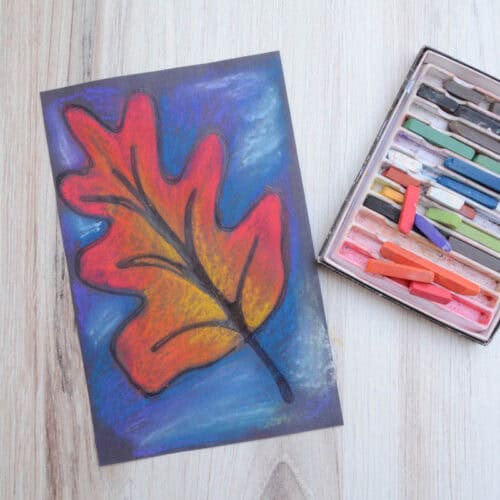
Create colorful fall leaf chalk art on black paper using glue outlines and warm-colored chalk pastels. This easy fall art project is perfect for elementary-aged artists.
Print Tutorial
Equipment
- Pencil
Supplies
- Black construction paper
- Chalk pastels
- Bottled glue
Instructions
- Before You Begin: Choose a simple leaf shape or collect real leaves for kids to draw from observation. Oil pastels or construction paper crayons can also be used instead of chalk pastels.
- Sketch the Leaf: Lightly draw a simple leaf shape with a pencil. You can draw one large leaf, multiple leaves or use real leaves for inspiration.
- Outline With Glue: Carefully trace the leaf and its main lines with bottled glue. Keep the glue bottle tip touching the paper as you draw for better control.
- Let the Glue Dry: Lay the artwork completely flat and let the glue dry for several hours, or until it's completely clear and hardened.
- Add Chalk Pastels: Add warm fall colors inside the dried glue outlines. Try layering yellow, orange and red chalk pastels to create colorful fall leaves.
- Blend: Gently blend the chalk pastel colors together with a clean finger. The dried glue will resist the chalk and create raised outlines.
- Spray the Drawing: Have an adult lightly spray the finished chalk pastel artwork with workable fixative, if desired.
Notes
- We recommend this project for 2nd grade and up, although it can be modified for younger artists. Drawing with glue instead of sketching first can encourage kids to simplify their leaf shapes.
- Keep glue drawings completely flat while drying to prevent the glue from dripping or smearing.
- Thicker glue can create a more noticeable raised outline.
- Let students practice blending warm colors before starting their final artwork.
- Oil pastels or construction paper crayons are good alternatives if you don't want to use chalk pastels.
Tried this Crafty Art Idea?Please consider Leaving a Review!