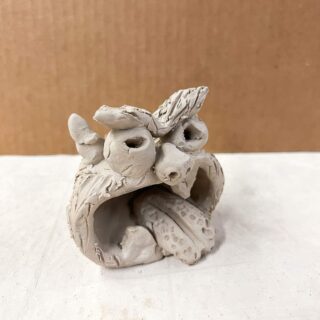
Pinch Pot Monsters
This fun ceramic monster project is great for kids ages 7 and up. Children will love sharing their creativity by making their own pinch pot monsters.
Print Tutorial
Equipment
- Wooden Skewer
- Optional: Variety of other clay tools
- Needle Tool (best for adult to write names)
- Small container of water
- Clay placemat or work surface
Supplies
- White Art Clay
- Variety of Clay Glazes
- Acrylic Paint optional if not glazing
Instructions
- Start with a ball of clay that can fit inside a child’s hand.
- Split a little bit off the hunk of clay. The bigger chunk of clay can be rolled into a ball.
- Have kids push one hole with their thumbs as far as they can go without going through.
- Use hands to pinch around the edge and make sure not to make walls too thin. The walls should probably be around 1/8” thick to support the shell when flipped on its side.
- Put clay pinch pot on its side.
- Begin sculpting eyes for your monster. Make sure the eyes are not too thick. Use a skewer to poke in the pupils. This will also help to ensure eyes are not too thick.
- Attach eyes to pinch the pot monster's face by scoring the eyes and where you are attaching to the face of the monster. Use one finger dipped in water to add “slip” and connect. Use a finger to help blend the seam where the eyes go.
- Create monster details such as horns, eyebrows, tongue and teeth. Roll a coil for eyebrows. Add texture by drawing lines with a skewer. Make sure to score and add water when attaching to clay.
- Finally, add any extra texture to the monster.
- Kids can use water to smooth out any rough areas. We always instruct them that a little goes a long way and not to make “mud pie”.
- Glaze or paint monsters after a bisque fire.
Notes
- An adult should write the kid’s name on the bottom of the monster with a sharp skewer or needle tool.
- Let projects fully dry before putting them in the kiln. The clay should not be cool to the touch at all.
- Don't build anything too large or skinny off the monster's body. This will help ensure that it does not break.
Cost: Less than $5