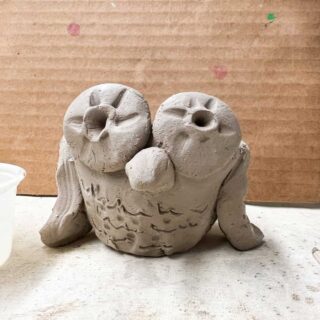
How To Build A Clay Owl
Kids will love this clay building project. Create simple pinch pot owls in around an hour. You can modify this art project for kids to fit whatever clay building and paint materials you have.
Print Tutorial
Equipment
- Wooden Skewer
- Small Water Container
- Needle Tool (for adult)
- Paint Brushes
- Kiln
Supplies
Instructions
- Cut clay so that it fits into your hand or the hands of the children completing the project.
- Split the clay into a large hunk and a smaller one.
- Roll the larger chunk into a ball of clay and squeeze the clay a little to make it more egg-shaped.
- Push your thumb as far as it will go without pushing through. With young children, you may have to check or help them push farther down.
- Create a pinch pot cup as the base of your owl. Make sure that the walls of the pinch pot are not too thin.
- Create owl eyes by rolling small balls of clay and smooshing and using the end of the pointer to add eye details and possibly designs.
- Use a skewer to create details like eye holes and extra textures.
- Score the back of the eyeball and where you are attaching the clay eye. Use a little water on your finger to put water on both spots you have scored.
- Create a beak for your ceramic owl, score and attach it to the pinch pot body.
- Make a small slab and use a skewer to cut out wings. Add feather details by stamping or drawing. Use the pointed end of the skewer to score (draw little lines) on both the pieces needed to be attached and where they are going on the pinch pot.
- Add extra textures or draw feather details onto the finished adorable clay owl.
- Let owls fully dry. We like to let them dry for a whole week.
- Run a bisque fire in the kiln according to the directions of the clay you ordered.
- Use paint or glaze to complete clay projects and run a glaze fire.
Notes
When painting or glazing, kids can pick one color for the body, one for the beak and wings, and one for the eyes.
Cost: Less than $5