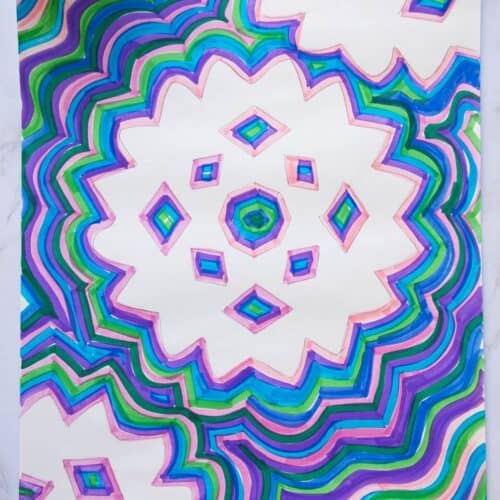
Easy Line Snowflake Art Project
Learn how to make a fun snowflake line art project for kids.
Print Tutorial
Equipment
- Mr. Sketch Chiseled Markers (any marker will work, but we find that the chisel tip gives a variety of line and color)
- Pencil
Supplies
- 1 piece 12" x 18" White Heavy Drawing Paper
- Snowflake template made from square white copy paper
Instructions
Before You Begin
- You will need to make a classic paper snowflake to use as a template. You can make these as complicated or as simple as you want.
Creating Snowflake Line Art Project
- Tape snowflake template to white drawing paper.
- Use a pencil to lightly trace around the snowflake.
- Remove template.
- Trace snowflake at least two more times. Only parts of the snowflake will snow on the paper.
- Use one colored chisel tip marker and trace along the pencil line and in the negative space. Trace right next to every single pencil line on the page.
- Switch colors and continue to trace around the previous line to create a fun line pattern.
- Repeat tracing until the whole background is done.
- Optional: Use an eraser to clean-up any residual pencil lines.
Notes
- If students are smudging markers with their hands, you can give them a paper towel to rest their hands on.
- Encourage students to use the wide part of the marker whenever possible (but it is okay if they don't always)
- If a child is struggling with repeating the lines, they can also split up the negative space and color their own designs or color blocks.
Cost: under $5