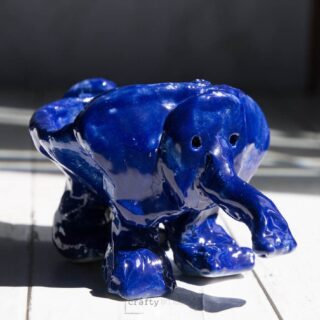
Clay Pinch Pot Animal
This clay pinch pot project is perfect for upper elementary and middle school students. They can make a clay elephant or their own clay pinch pot animal following the tutorial below.
Print Tutorial
Equipment
- Wooden Skewer
- Work Surface or placemat
- Small container of water
Supplies
- White Low-Fire Art Clay
- Clay Glaze
Instructions
- Start with a larger ball of clay that can fit inside a child’s hand.
- Split a little bit off the hunk of clay. The bigger chunk of clay can be rolled into a ball.
- Have kids push one hole with their thumbs as far as they can go without going through.
- Use hands to pinch around the edge and make sure not to make walls too thin. The walls should probably be around 1/8” thick to support the shell when flipped on its side.
- Kids can squeeze the shape of their pinch pot to make it a little longer like an actual body of an animal.
- Begin creating the head of your elephant by creating a small slab with some of the extra clay. Use a wooden skewer to cut out the basic ear shape.
- Construct a head and trunk out of more clay. Use a skewer and fingers to pinch the end of the trunk for a more realistic feel.
- Add score lines to the back of the head and elephant ears. Use a little water to create “fake slip” and attach the head and trunk.
- Follow the same scoring method with water to attach the head to the pinch pot.
- Carefully flip the clay pinich pot over. We supported our elephant with paper towels so that we could work on making clay feet without smashing the head.
- Build similar sized clay feet that will be able to support the weight of your clay pinch pot and head.
- Attach clay feet to the bottom of your pinch pot. Make sure that you put the front feet as far up the pinch pot as possible.
- Flip the clay elephant over and adjust the feet as needed to balance the weight. The ends or feet of your elephant may become a little larger, but that works if it is supporting the weight.
- Kids can use water to smooth out any rough areas. We always instruct them that a little goes a long way and to not make “mud pie”.
Notes
- If building a different pinch pot animal, create at least 3 different sketches before beginning.
- The hardest part for kids during this project is getting their clay project to stand. Therefore, if a child is having difficulty consider creating an animal that is laying down with its feet out in front.
- An adult should write the kid’s name or initials on the bottom of the pinch pot with a sharp skewer or needle tool.
Cost: Less than $5